[Photo: One of the areas where we had to replace the 1x4s with plywood. All of the boards in this patch were totally rotten.]
Last week in our first kitchen progress report I gave a brief recent back-story on our kitchen floors, followed by an update from the previous weekend’s adventure. Another week has passed and there is progress, but as usual, there are also hiccups.
I began last week with a bit of background on our kitchen floor from the point in which we became the caretakers of our space. But to really understand why things are the way they are, let us go back to the days of yore (that would be 1910) and delve into just what makes our floors different than virtually anywhere else in America (followed by progress report, I promise) .
[For those who haven’t read before, our apartment was once part of a much larger apartment in a 12 story building built in 1910 for middle and upper middle class families. In the middle of the last century, landlords couldn’t rent such large apartments (families were fleeing the city in droves) and they split most of the apartments in our building into two units. So what is now our kitchen was originally a bedroom, hence the fancy oak-parquet flooring.]
Before we began pulling up the old parquet flooring we had decided to only go down as far as the original 1×4 pine subfloor and stop. We then did some repair work to areas of dry rot, or ravaged by time, and are building our new floor up from that point.
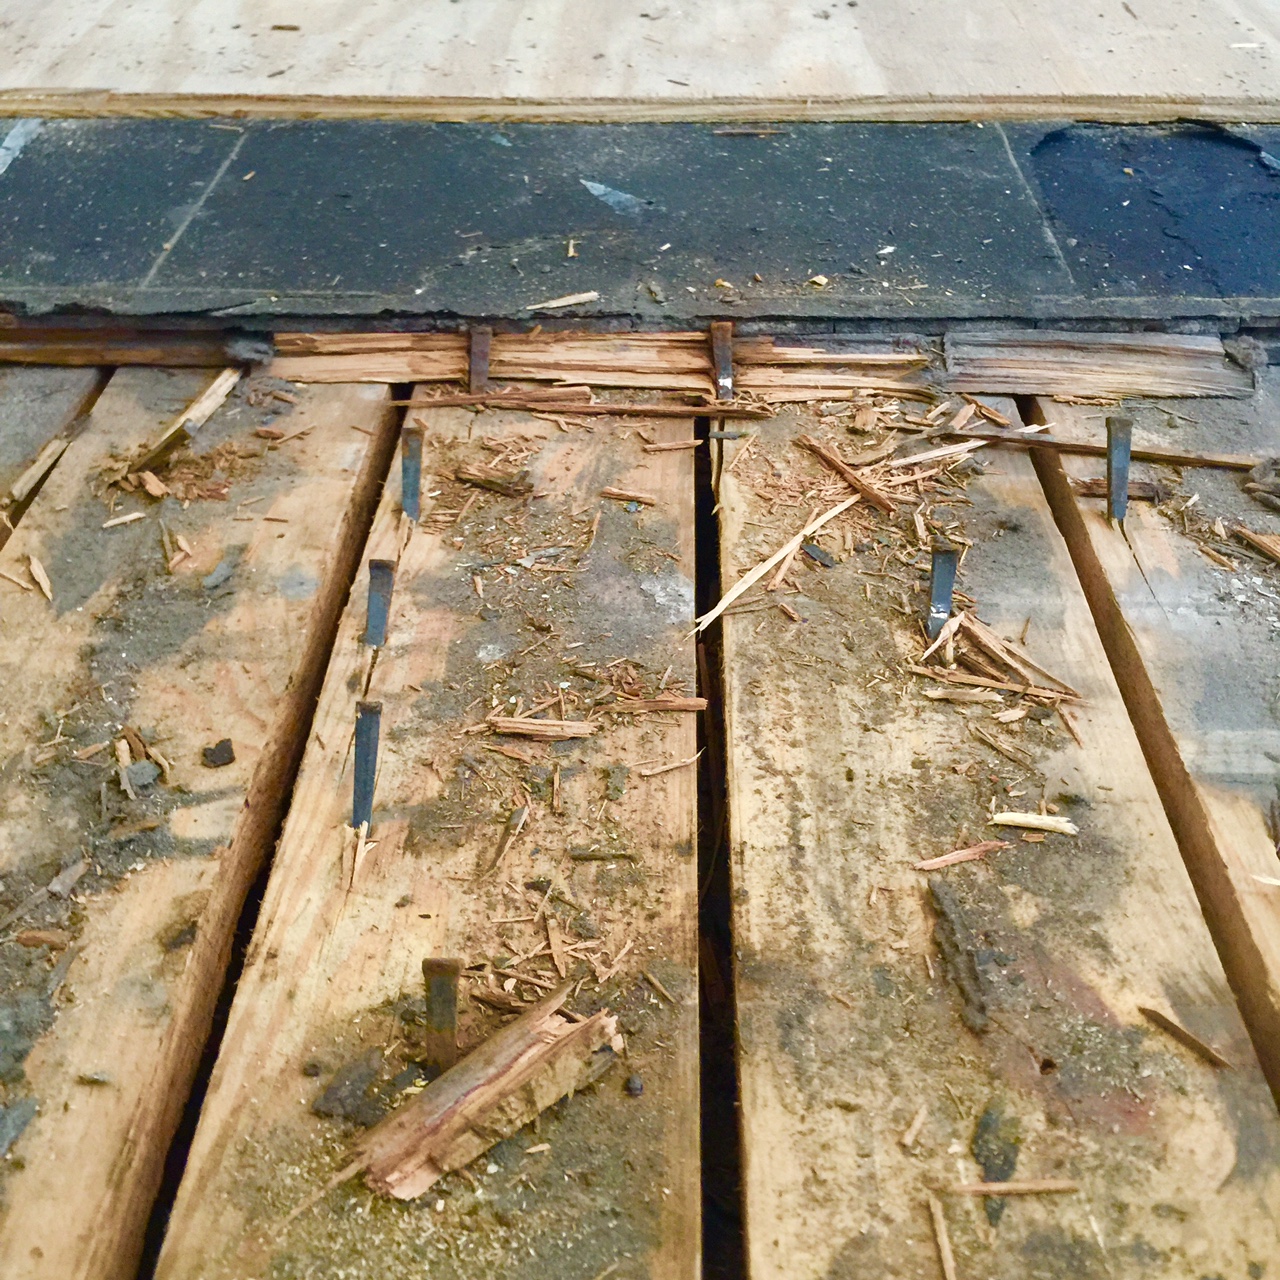
Tearing up the floor only revealed the hundreds of nails used to install it to begin with. I now have a few pounds of vintage square cut nails.
Why did we keep the 1×4 pine subfloor you ask? OK, I know you didn’t really ask, you may not even care, but here is the reason anyways. Back in 1910, high rise construction techniques were still in their formative years and often out of a general lack of knowledge, builders would fall back on what they knew from their past. That lack of knowledge about materials led to a tendency to overbuild rather than cut corners and of course, masonry construction was still the dominant material at the time, but there was another big reason for the excessive use of masonry.
The early part of the last century saw an interesting transition from single family townhouses to grand apartment buildings. Single family townhouses were suddenly becoming very expensive and they required 3-4 servants to keep everything going. Thus began the transition from townhouses to apartments, the benefits being lower housing cost as well as the ability to employ only one or two domestics. This was precisely the case with our building, appeal to these families and provide the feel of a home, with the convenience of not having to carry the burden of townhouse living. One of the ways to attract tenants was to make the building appear very grand on the outside, and give the apartments a familiar feeling of living in a house. The original apartments ranged from small classic sixes of about 1,200 sq ft. to one large classic-eight of 2,300 sq ft. This is why our rooms tend to have a generous feel to them.
![Triangle Shirtwaist Factory Fire, 1911 [Source: Public Domain]](https://halfclassicsix.com/wp-content/uploads/2016/03/Triangle_Shirtwaist_Factory_fire_19110325.jpg)
Triangle Shirtwaist Factory Fire, 1911 [Source: Public Domain]
Of course just because the building was designed to not burn, does not mean it is truly fireproof (especially by today’s standards). Fires could and did happen. In pure irony, our building was designed with only a single open staircase (albeit a very beautiful one with marble steps and stained glass windows) and should there be a fire, the only way out would have been down that staircase. Fire escapes were mandated following the deaths of 146 people in the Triangle Shirtwaist Factory Fire of 1911, so it is safer today.
![NATCO Flat Arch Perspective [<i>Source: <a href=“https://archive.org/details/NatcoHollowTileFireproofingEasternEditionCatalogue” target=“blank”>Natco hollow tile fireproofing : Eastern edition catalogue (1915)</a></i>]](https://halfclassicsix.com/wp-content/uploads/2016/02/NATCO-Flat-Arch-Perspective.jpg)
NATCO Flat Arch Perspective [Source: Natco hollow tile fireproofing : Eastern edition catalogue (1915)]
![While not exactly like our building, it is none the less very close to how our floors are constructed - NATCO Flat Arch Section View [<i>Source: <a href=“https://archive.org/details/NatcoHollowTileFireproofingEasternEditionCatalogue” target=“blank”>Natco hollow tile fireproofing : Eastern edition catalogue (1915)</a></i>]](https://halfclassicsix.com/wp-content/uploads/2016/02/NATCO-Flat-Arch-Section-View.jpg)
While not exactly like our building, it is none the less very close to how our floors are constructed – NATCO Flat Arch Section View [Source: Natco hollow tile fireproofing : Eastern edition catalogue (1915)]
“Wood sleepers filled between with loose cinders rest on this cinder concrete surfacing the whole covered with single seven eighths inch wood flooring.”
So, what the hell are cinders? I first found out about them from our super when I began to discuss my renovation plans last year (it’s always good to keep the super informed of everything you are doing). Basically, cinders are a mixture of various non-combustible materials made up of by-products of the coal industry back in those days as well as concrete slag, excess mortar, and other random things. By filling all the spaces between the joists with cinders, the idea was that this increased the level of fireproof-ness by making it virtually impossible for fire to spread between floors.
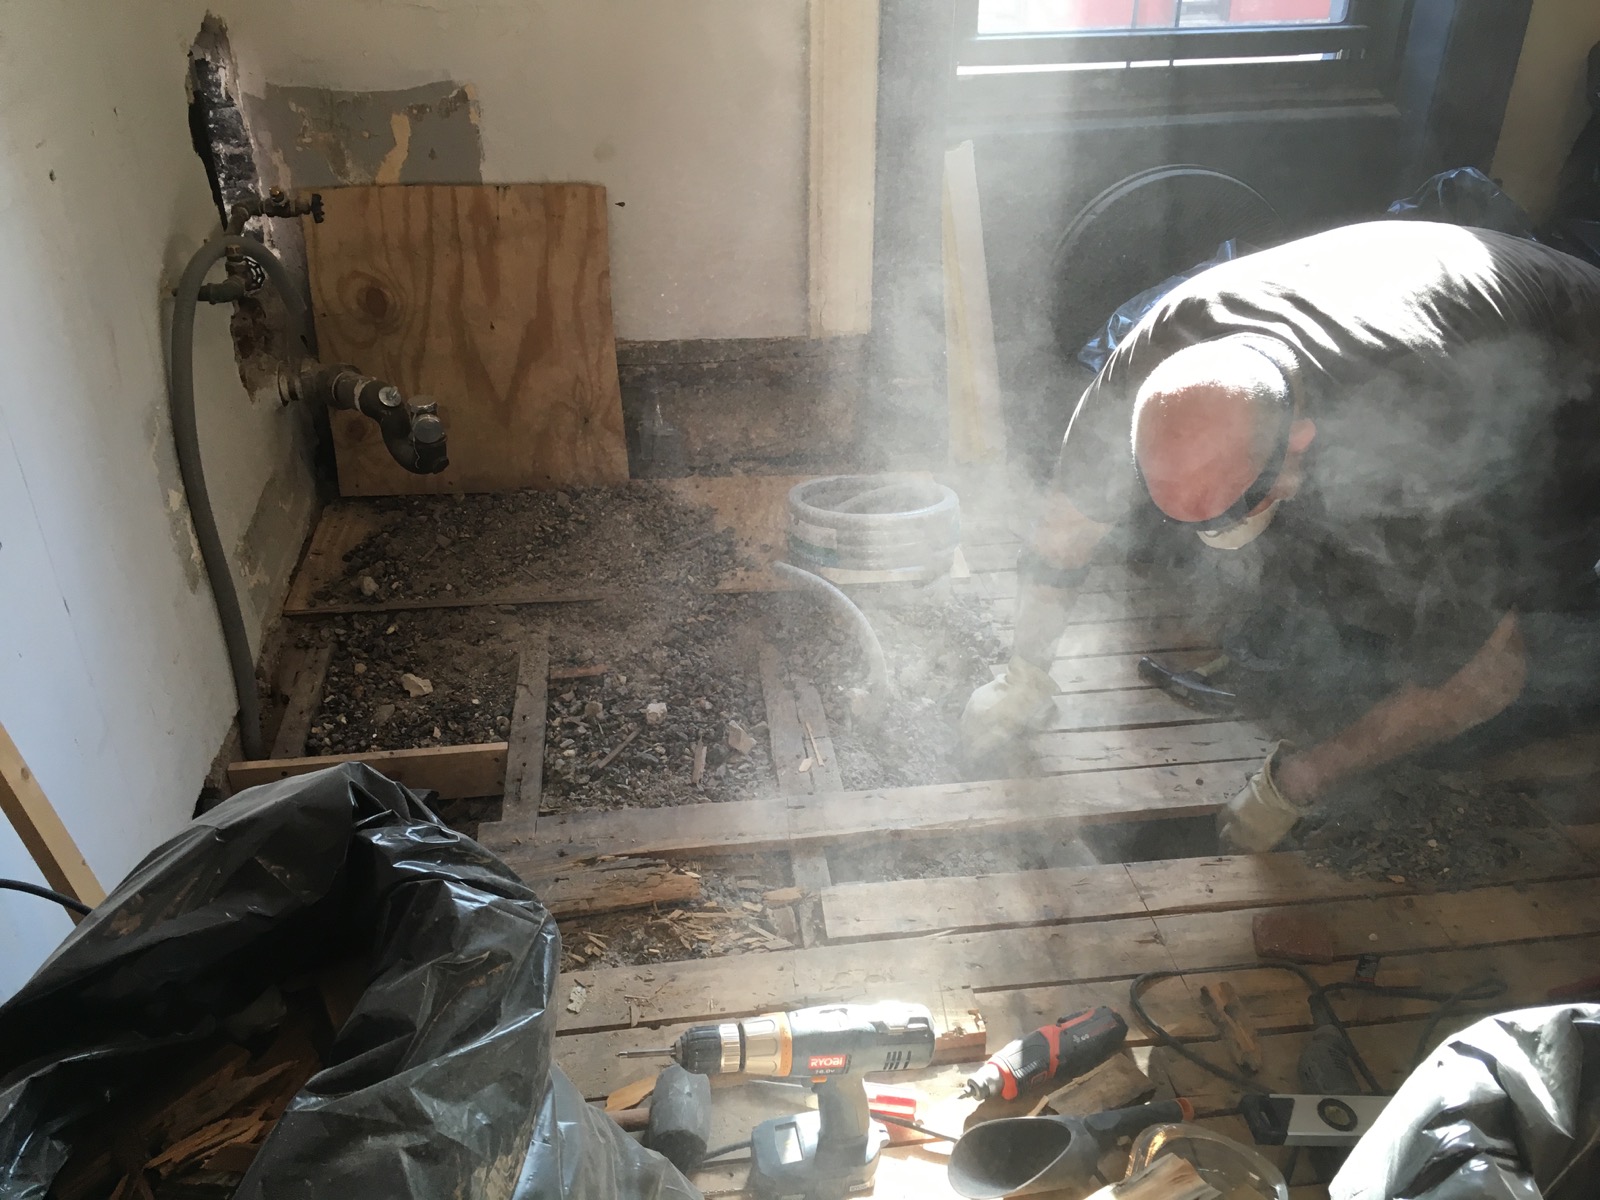
The hubby captured me digging through the cinders during demolition.
So, now that you have had your New York historical architecture lesson of the day its time to get to the progress report.
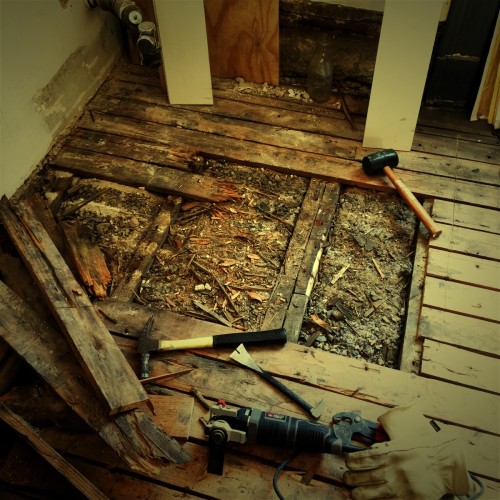
This past weekend we finished pulling up the original flooring (and filling 14 construction bags with debris). While there was satisfaction in the accomplishment of large sections being completed, there were also moments of sadness at tearing up what was once a very beautiful floor. Even though we have the same flooring throughout the rest of the apartment, it was still gut wrenching none the less because this is not something that could be easily replicated today.

This was the final corner of tearing up the floor. We reached this point after four days of back breaking work.
Once the flooring was pulled, we tackled areas where the 1×4’s had dry rot (near the sink area) and a few sections where the floor was on the soft side when you stepped on it. I want a very solid foundation to construct our new floor, and given the amount we are investing in our dream floor, I want it to outlast both of us.
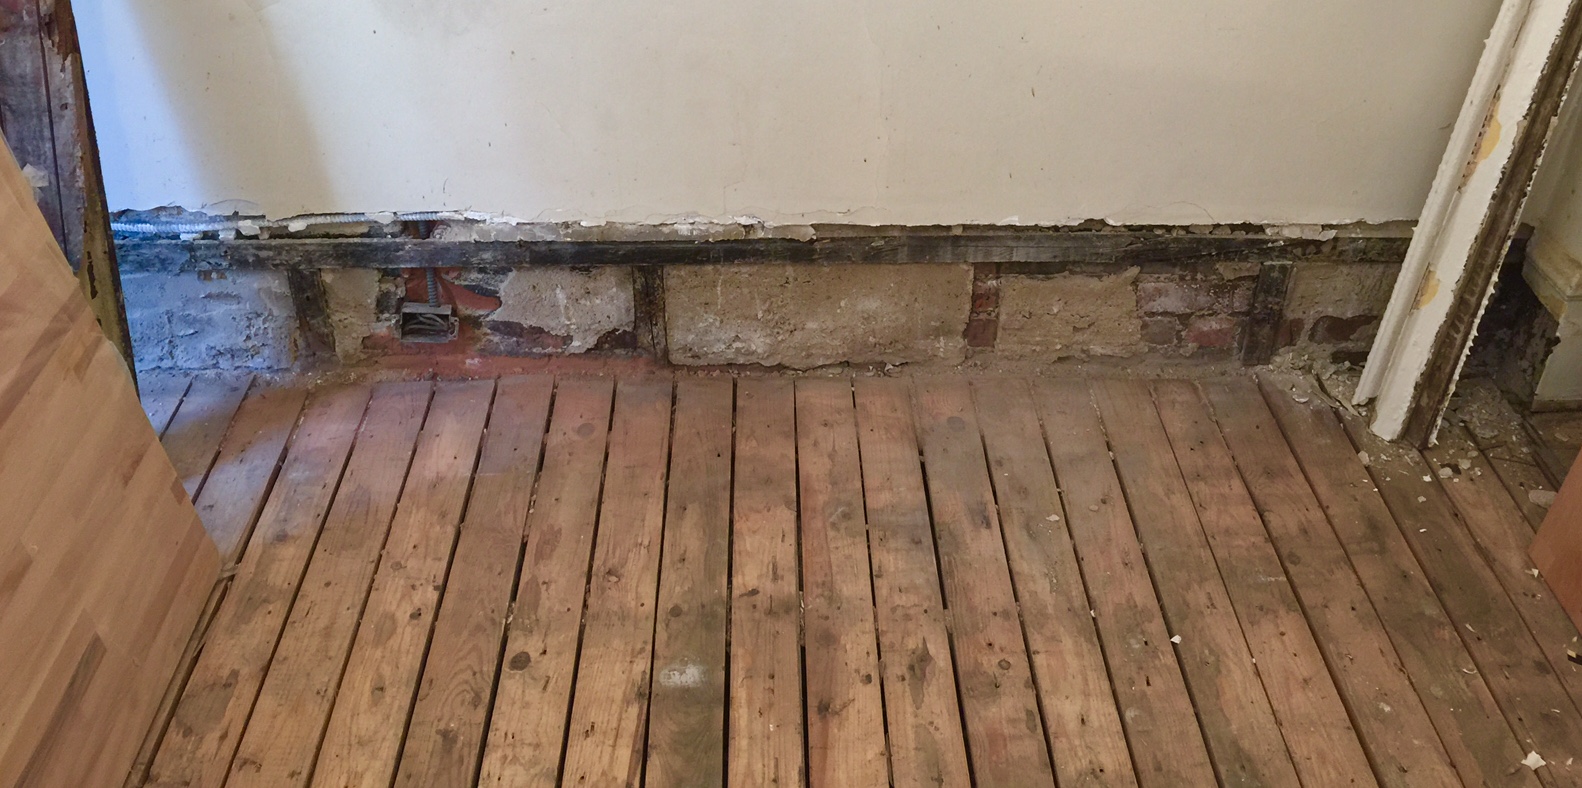
Ripping out the original ten inch tall baseboards was painful to say the least. Although I will not be able to replicate them, I will do my best to capture the profile in the replacements.
Another task which was cause for consternation was the pulling of the original ten inch tall baseboards. Again, sadness prevailed as we pulled out this original element. It was a necessary task because we are installing ¾” thick beadboard wainscoting around the whole room, and in order to keep the proportions correct, it was necessary to remove the baseboards. There was brief hope of salvaging them, but it was quickly determined that they were just not in good enough condition to save, aside from the dozens of coats of paint which would need to be stripped, the wood was rotten on the backside of a couple of sections causing them to literally fall apart in our hands.
One of the challenges we faced in the overall design was how do we get water from the sink on one side of the room, to the ice maker in the refrigerator on the other? Simultaneously, I want the cabinet lighting on both sides of the room to be on a single control. To get the water line and low voltage power line across the room, we had to go under the floor. This was a conundrum from early on in the process of planning. But once we made the decision to take up the floor down to the subfloor, the solution presented itself.
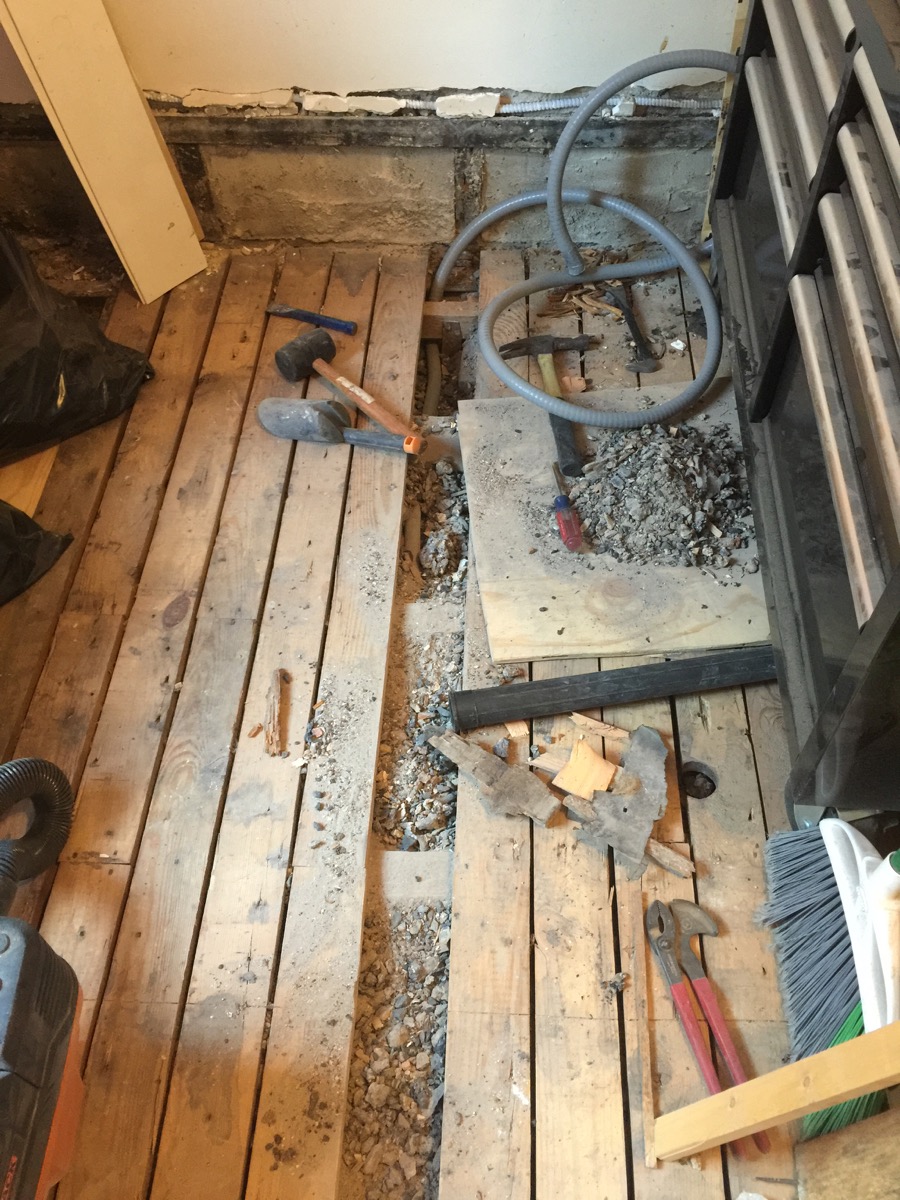
The is towards the end of digging through the cinders between the joists to bury the conduit for the water-line and low voltage wiring. You can get a good glimpse into the construction of the flooring here.
I knew that I didn’t just want to bury the waterline and wiring under the floor. What if I needed to replace them in the future? The solution turned out to be one of my more brilliant moments. I could bury a rigid tubing of some sort under the floor which was large enough to pull the water line and wire through. If I ever needed to replace either of them, I could just pull new ones through. I found some ¾ inch heavy duty outdoor plastic conduit and we literally buried it under the floor. And when I say buried… we opened the floor, dug out the cinders between each joist, and I carefully threaded the conduit underneath each joist (between the blocks) and then filled the space back in with the cinders. It was a very dirty job, and my facemask was filthy by the time we were done.

Yours truly sporting my dirty filthy dust mask after digging through cinders for three hours. Glad that brown stuff isn’t in my lungs.
That pretty much brings us to where we are now. I had hoped to get the new subfloor installed on top of the 1x4s by the end of my long weekend, but alas after too many hours on my knees hunched over the floor, and after pulling hundreds of nails, and after digging through the cinders, my middle aged body said enough.
The tile installers arrive this coming Monday, and God willing, I will be able to complete the installation of six sheets of ¾ plywood over the original 1×4 subfloor as well as install a 1×2 border to establish the edges of where the tile should go (while providing a place for the beadboard to be installed) before the end of day on Sunday. It will be my third weekend of hard labor, but the excitement of knowing that in less than ten days, we will no longer be looking at photos of the cement tile floor we have been dreaming about, but will be able to walk on it right in our home will make all of this worth it.
Oh, and the beadboard arrived on Tuesday…. But that is for another post. Next week, final updates on the preparation of our subfloor for tile and perhaps a sneak peak at the new floor.


0 Comments