OMG! It’s finally done! Really! It’s more than a year later than we wanted, but I am grateful to say that I have finally finished our kitchen and it is spectacular! It has been sitting at the 98% completion mark since this past spring, but we finally managed to get the last of it done and, for the moment, we can relax.
Before I get to the reveal, let’s go back and take a look at what we started with, and what we did to get to where we are now. [Warning: This is a bit of a long post…. If you just want to see the pretty pictures, then you can click here to skip to the reveal.]
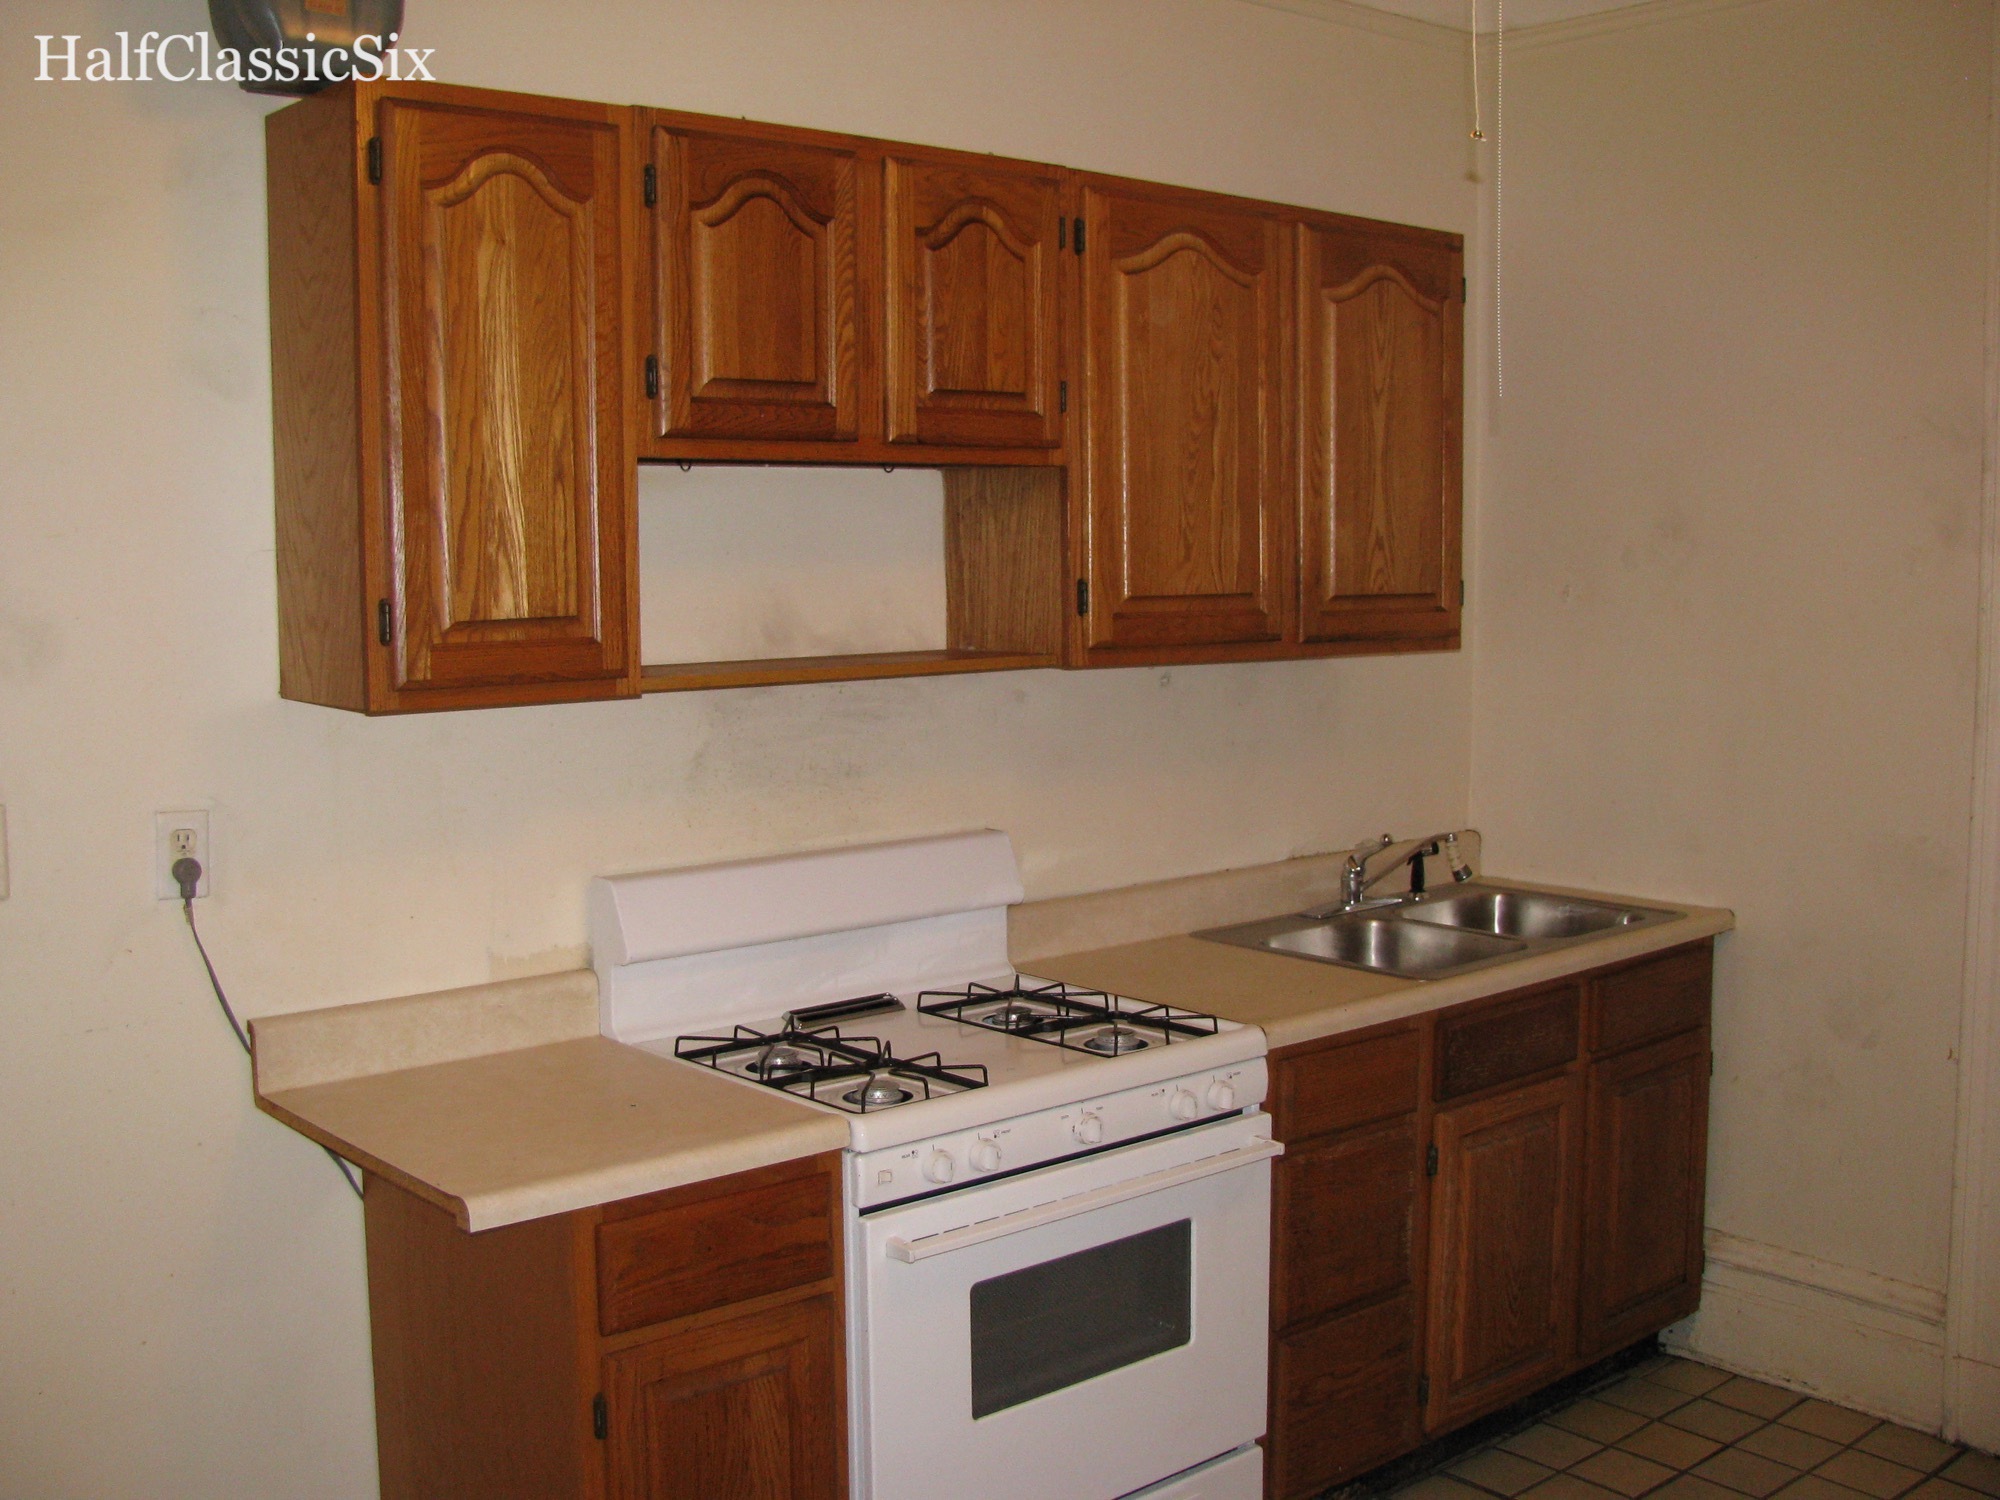
Our “Landlord Chic” kitchen as it was on closing day.
In the year prior to finding our gem of an apartment, we had gone to more than 50 open houses where we quickly learned and refined what we liked and what we didn’t. Most important to us was that the space must have good bones to begin with. A banal space will always be a banal space, no matter how much lipstick you put on it. When we saw our apartment, it was clearly a fixer-upper, but the underlying bones were amazing. Fortunately for us the tattered condition was such that it scared most people away.
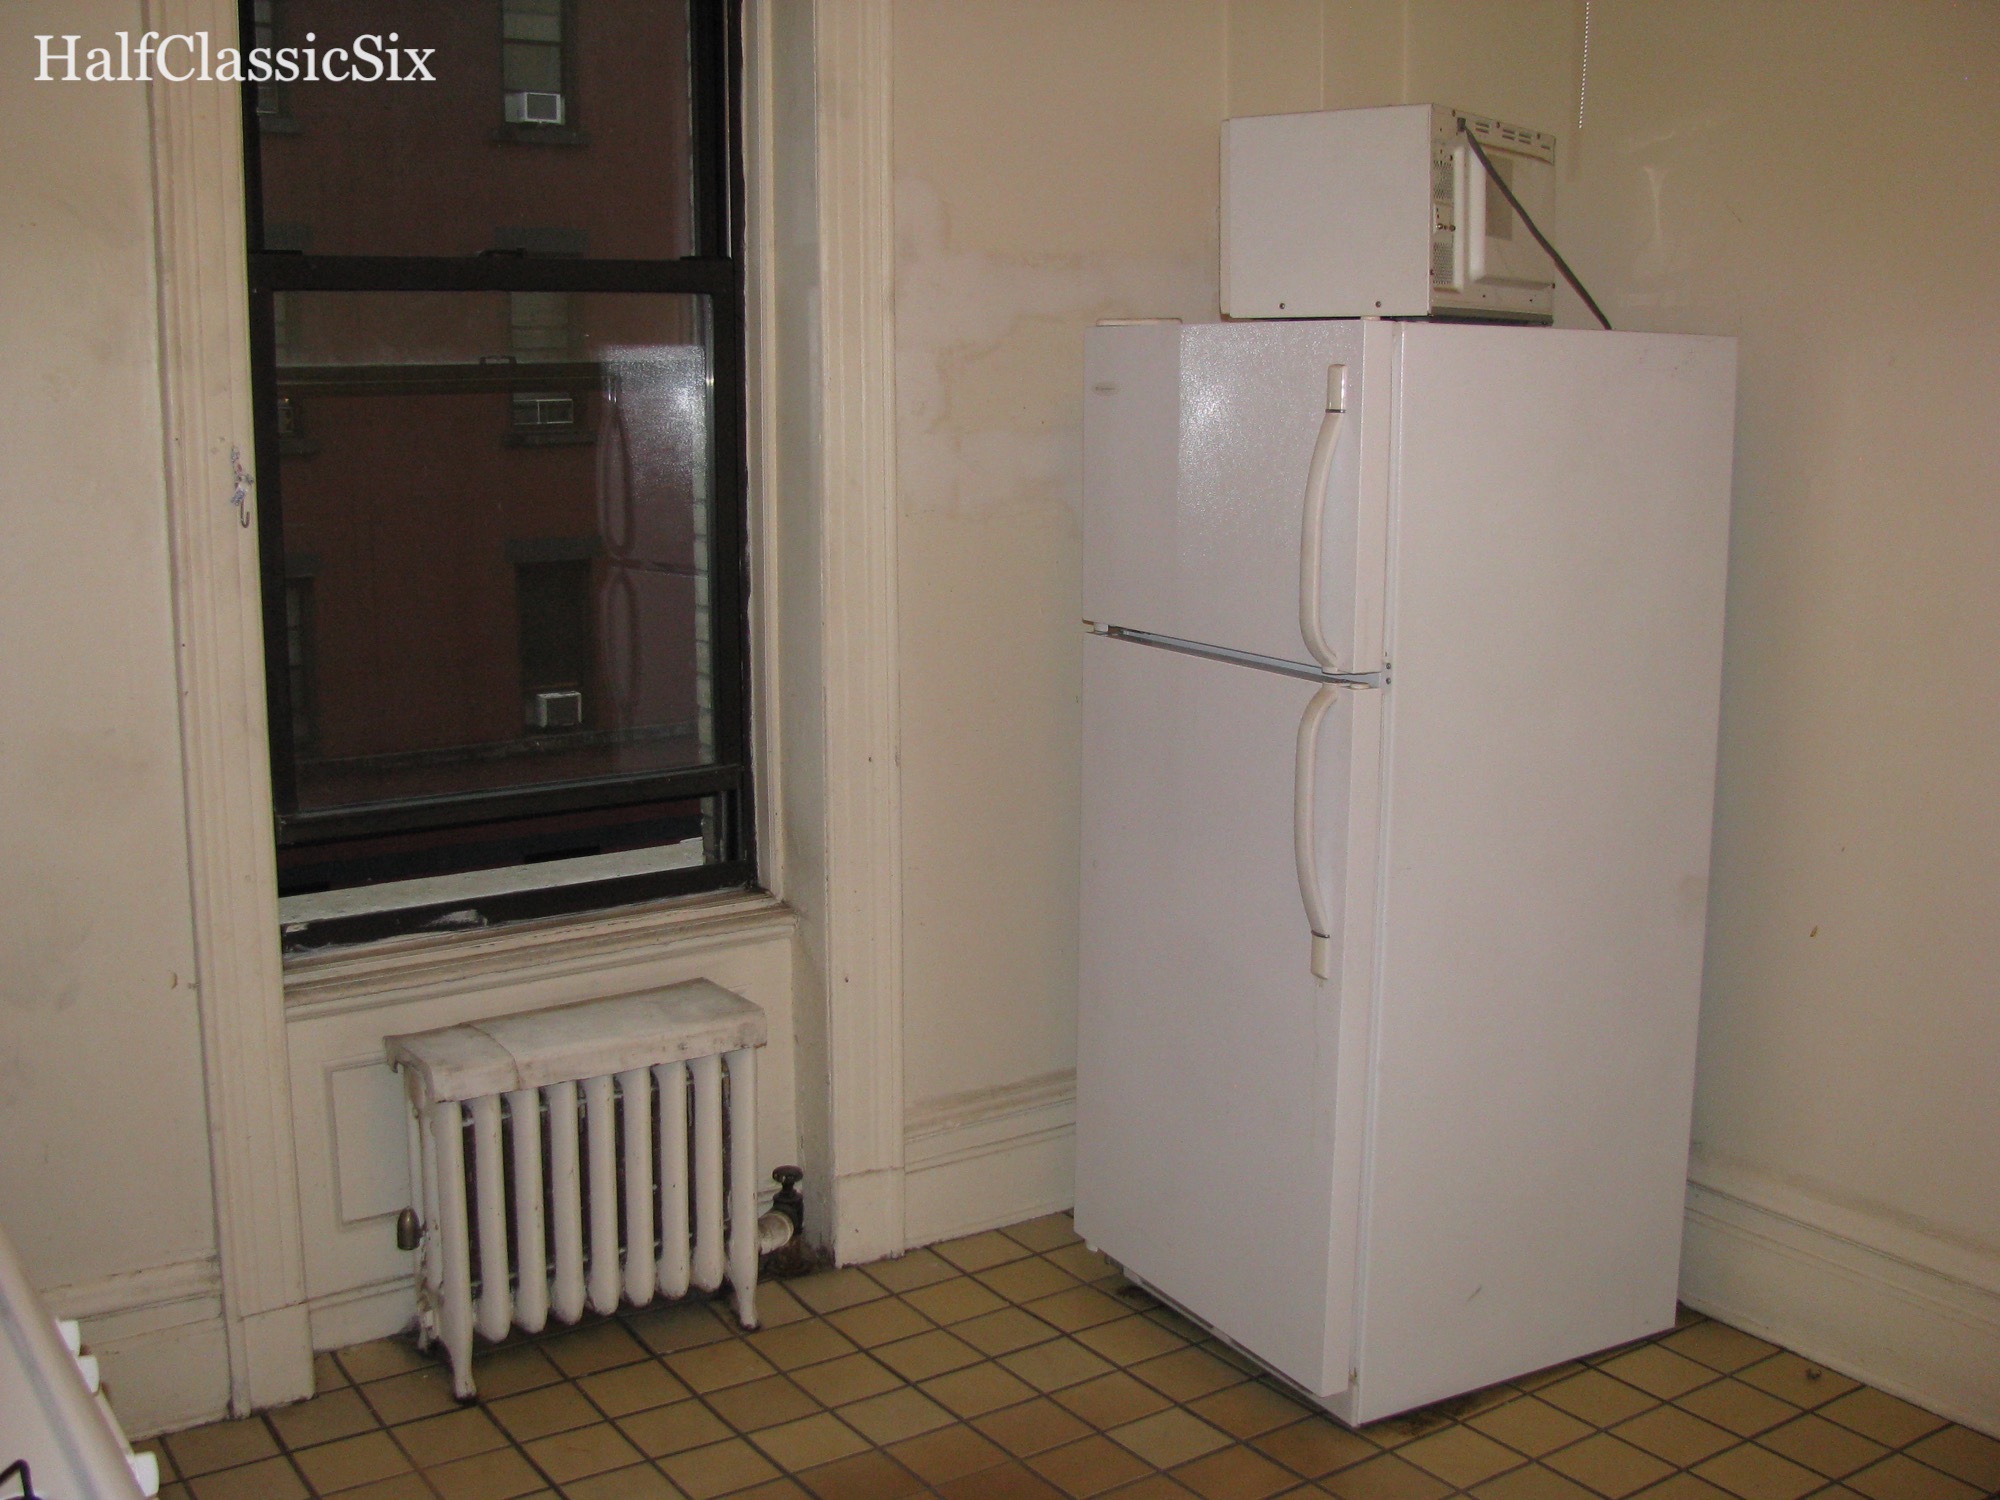
The other side of the kitchen as it was on closing day. We very quickly got rid of the filthy microwave, fridge, and stove.
The kitchen was in the style of what I like to call Landlord Chic. It featured random ugly mismatched cabinets from a big-box store, beige laminate countertops, beige peel-n-stick floor tile and a white stove and refrigerator from a different era. But it also had something we had not found before…. Space! At 11’x13’ (plus two closets), it was huge for a Manhattan apartment. The reason it is so large is because, in 1910, it was a bedroom. When they split the large apartment in two during the middle of the last century, they converted a bedroom into a kitchen. How lucky for us?!
The planning began in our heads before we had even taken possession of our apartment. We soon learned that if we kept the sink and stove in the existing location, we could avoid going through an in-depth review process with our co-op board because we were simply replacing what existed without moving any plumbing or gas supplies.
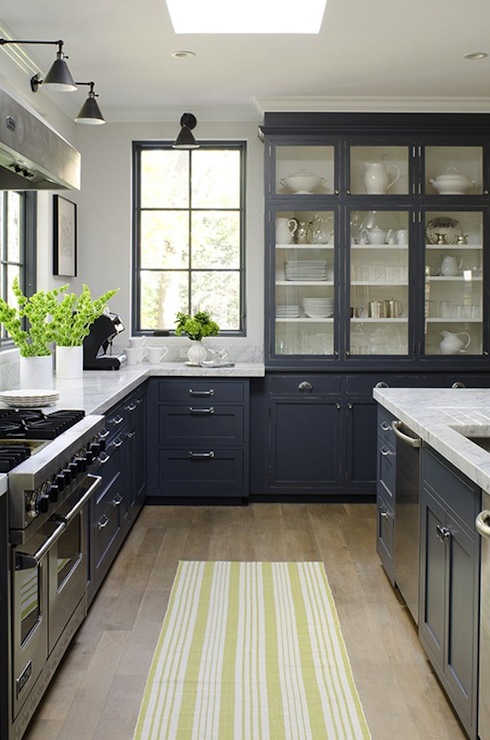
This is one of the earliest inspiration images we came across for our kitchen. Only we wanted a simpler version of it…. That was not to be.
So initially, I thought we should just do a stylish but economical kitchen using IKEA cabinet frames and custom doors from Semihandmade topped with quartz counters, subway tiles on the walls, and a hexagon tile floor. But, then as I got serious about the design and planning, our ideas shifted and transformed into a very different kitchen altogether. I had developed a love affair with classic British kitchens from the likes of DeVol, Plain English, and Naked Kitchens. I loved how simple they were while being elegant at the same time.
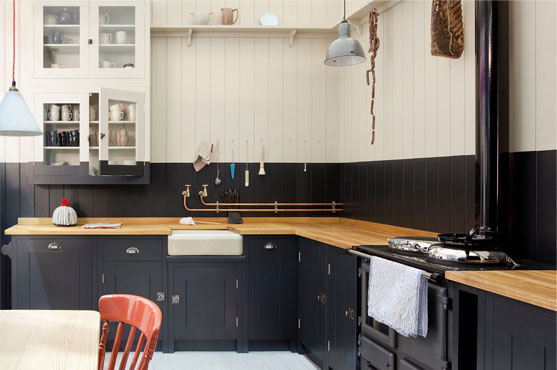
British Standard Kitchens [UK], Black and White Fabulocity! Source: British Standard Kitchens
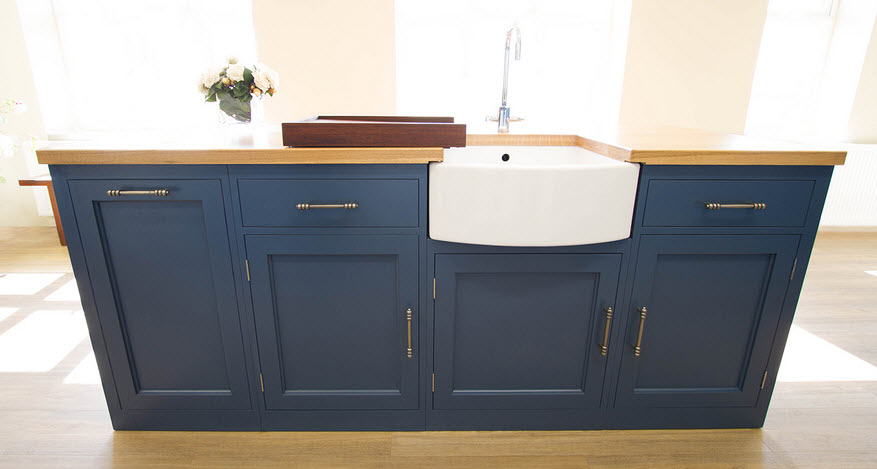
It was the color of this island sink and counter by Naked Kitchens [UK] in Stiffkey Blue (Farrow and Ball) that we fell in love with and changed the direction of our entire kitchen. Source: Naked Kitchens
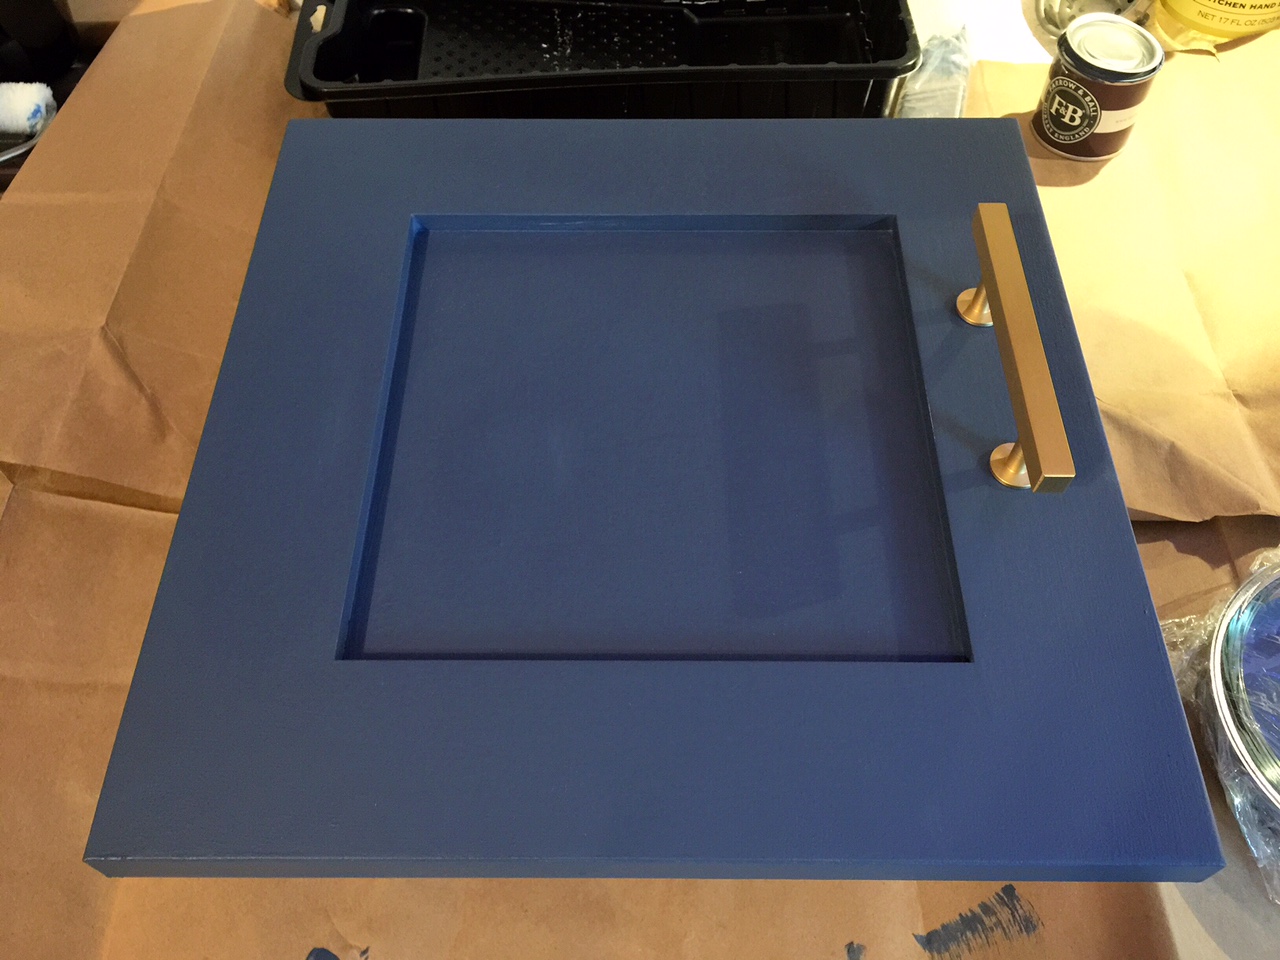
Our sample door from Semihandmade arrived on Friday. I made quick work at priming and painting in Farrow & Ball, Stiffkey Blue, our chosen cabinet color.
We ordered a sample door from Semihandmade and painted it Stiffkey Blue. Next up was finalizing the IKEA cabinet layout. But after months of trying to force the limited sizes of the IKEA cabinet shells into a cohesive layout that worked with our existing plumbing and gas lines, I became increasing frustrated that I could only come up with plans which resulted in awkward and/or impractical design. I then turned to the internet where I accidentally discovered Barker Cabinets and everything changed again. Barker Cabinets sells solid furniture grade plywood shells and solid wood doors, but what made them truly special was that I could customize the cabinets in height, width, and depth resulting in a truly custom kitchen that fit perfectly without moving any supply lines.

My amazing husband guarding the only slab of honed Carrara marble to be found in eastern New Jersey.
After debating countertop materials, the practical and beautiful quartz countertops which we initially wanted felt too modern for the space. I had been leaning towards Carrara marble, but there are so many dire warnings out there about why you should not use marble for kitchen countertops. Warnings be damned, we decided to take the risk and went with the timelessness of honed Carrara marble.

OMG! Is this Beadboard not Sexy? Utilitarian yet elegant and chic all at once. [Source: DeVOL Kitchens – UK]

Our sample tile arrived in the fall of 2015. Black and White “Gypsy” from Villa Lagoon Tile
The last material to be challenged was the idea of using a simple 2 inch hexagon floor tile in white with black accents. The hex tile looked lovely, but it became overshadowed by these absurdly gorgeous (and absurdly expensive) black and white handmade cement floor tiles from Villa Lagoon Tile. (Note: our kitchen floor is featured on their website!) At more than four times the cost of the hexagon tile, we found ourselves revisiting them online frequently. Every time we pulled up the website, our heart rates increased and our desire for them grew stronger and stronger. Then budget be damned… Bye-bye hexagon floor tiles… Hello glorious black and white cement tiles from Villa Lagoon!

Clichéd shot of me and my red leather Chuck Taylors, I know…. But I couldn’t resist. The grout looks great too!
With all of our materials finally selected, we began to place orders for materials and, in early 2016, we dove headfirst into renovation mode. We first spent six grueling days pulling up the old damaged oak parquet flooring, and preparing the subfloor for new tile. Then we waited for eight days while the tile pros first cut and dry fit the entire room, then set the tile, applied grout release, and finally grouted and sealed the floor. The results?
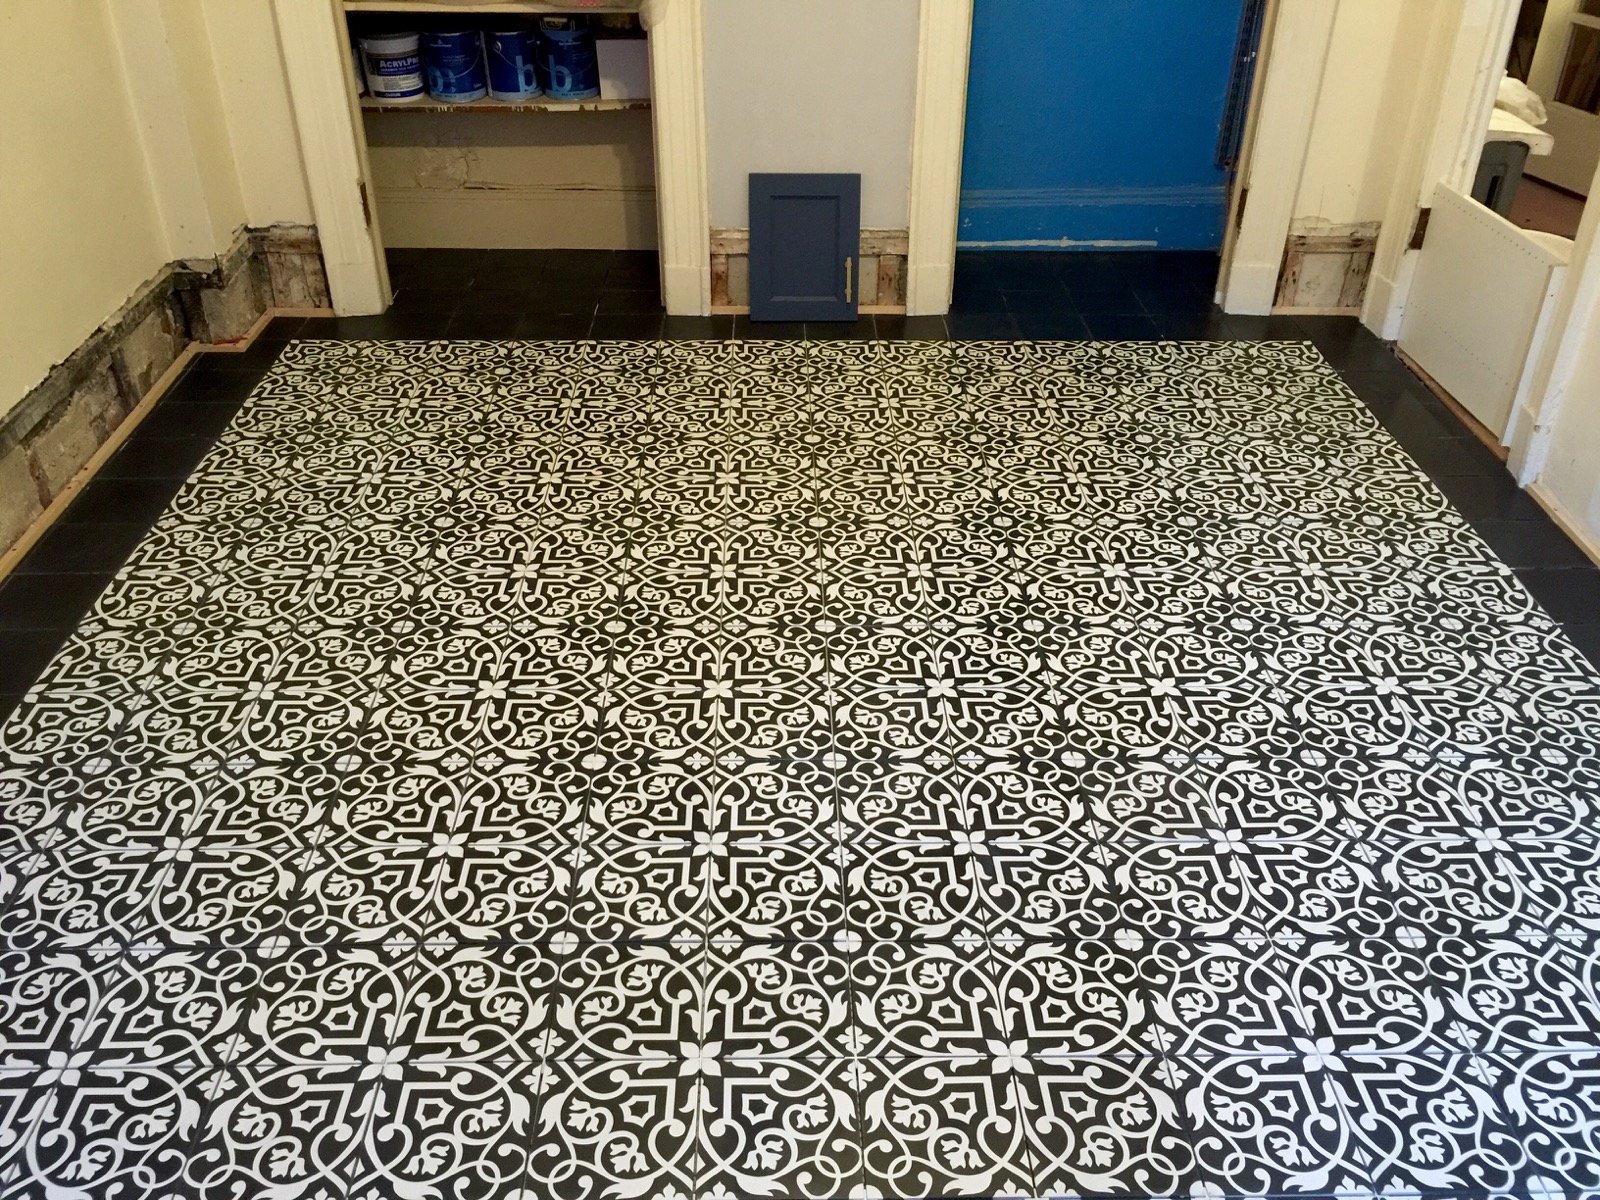
OMG…. It is so beautiful! It is crazy to think about the fact that with all of our cabinetry installed, it could be decades before anybody ever sees the entirety of the floor again.
I then took as much time off of work as I possibly could and started installing the bead-board walls, priming and painting the more than 200 cabinet components, and finally assembling and installing the cabinets.
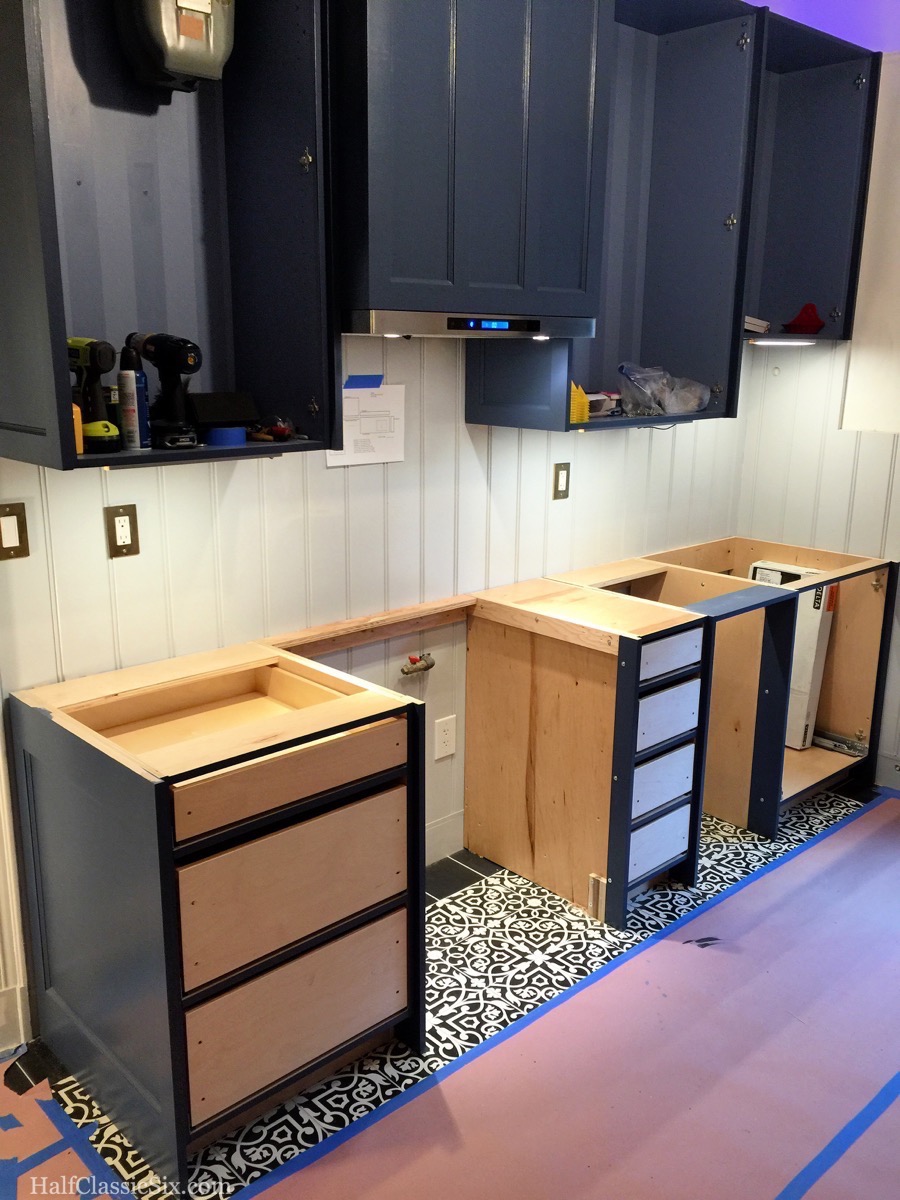
The kitchen when it was ready for countertop measurements.
By early June, we were took delivery of our honed marble countertops, I installed the sink and stove and then installed the textured glass in the upper cabinet door frames and we had one side of the kitchen essentially finished. But the other side was still a construction mess as shown in my panorama view below taken in July of 2016.
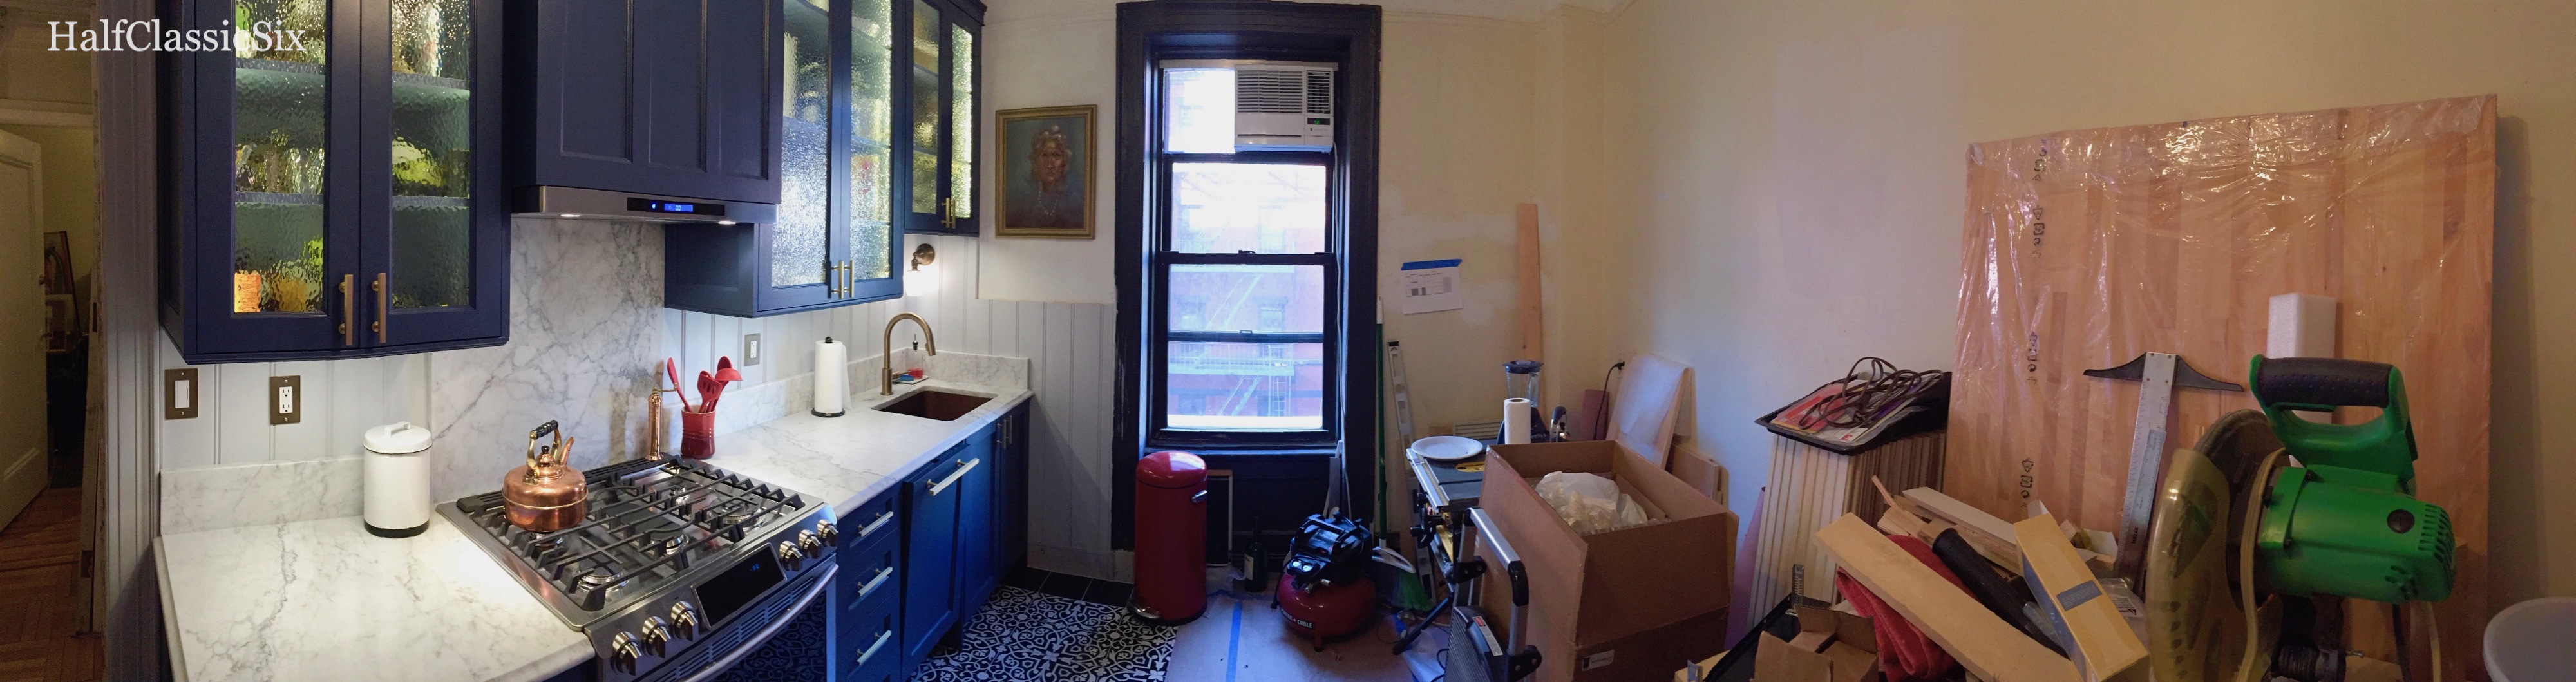
This was the status of the kitchen in the summer of 2016. One side was 95% complete, the other?… Not even started.
Finally the kitchen was back to being functional (if incomplete) and the fruits of our labors began to show. Then life got in the way and the time I had for working on the kitchen became much more limited, but I kept at it, bit by bit. By late fall, I managed to get the cabinets up on the other side of the room, and in the spring of this year I completed the bead-board wainscoting around the entire kitchen.
This last bit of beadboard was completed last spring. I ended up using a router to create the profile for the top trim piece around the room because it was not available locally.
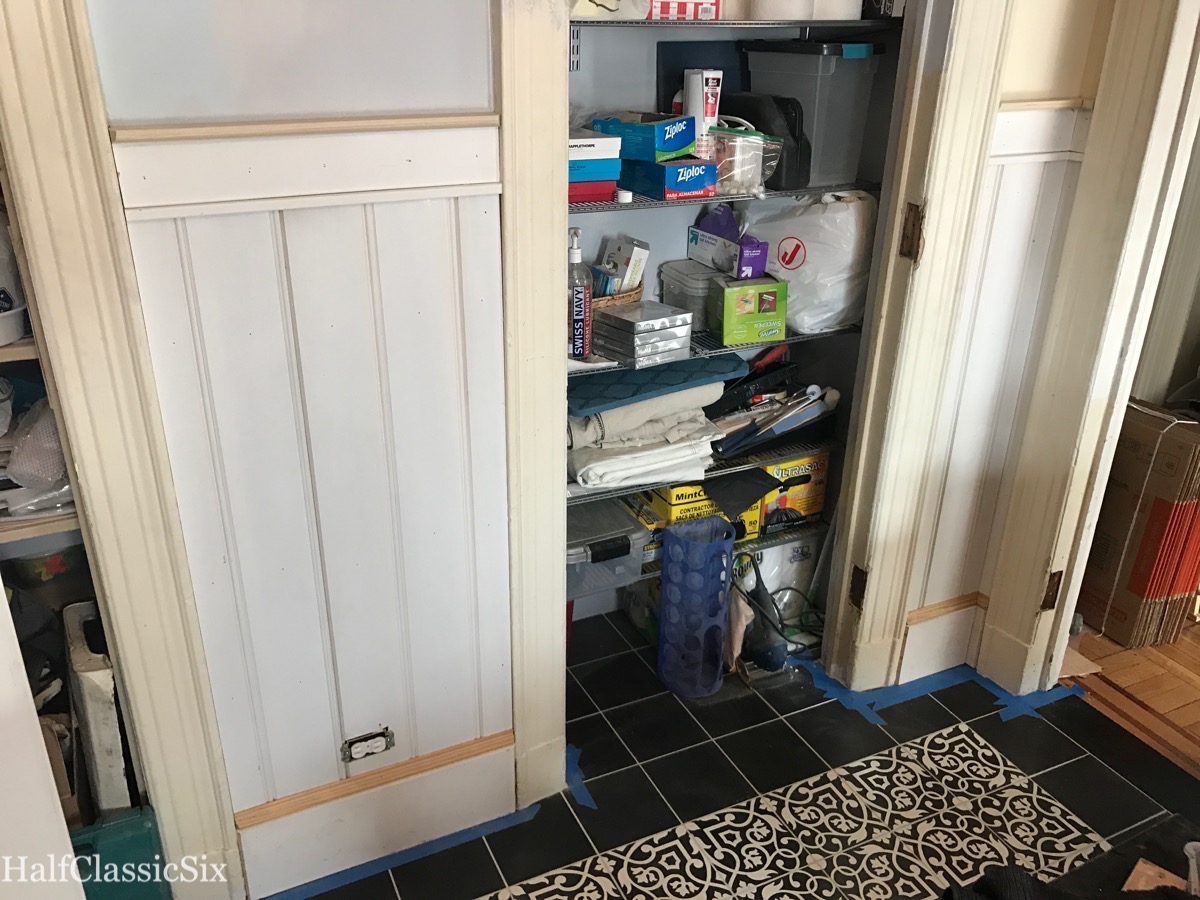
At this point, the kitchen was about 95% complete but again life got in the way and it sat all summer waiting for me to finish painting the closet wall and install the doors. Now that you have the back story, I am excited to say that the closet doors were installed at the end of September and everything on my checklist has been done.
So, now that it is finally finished, let’s take a look at some pretty pictures!
Scroll down…… (Hint: click on an image and it will open in a slide show.)
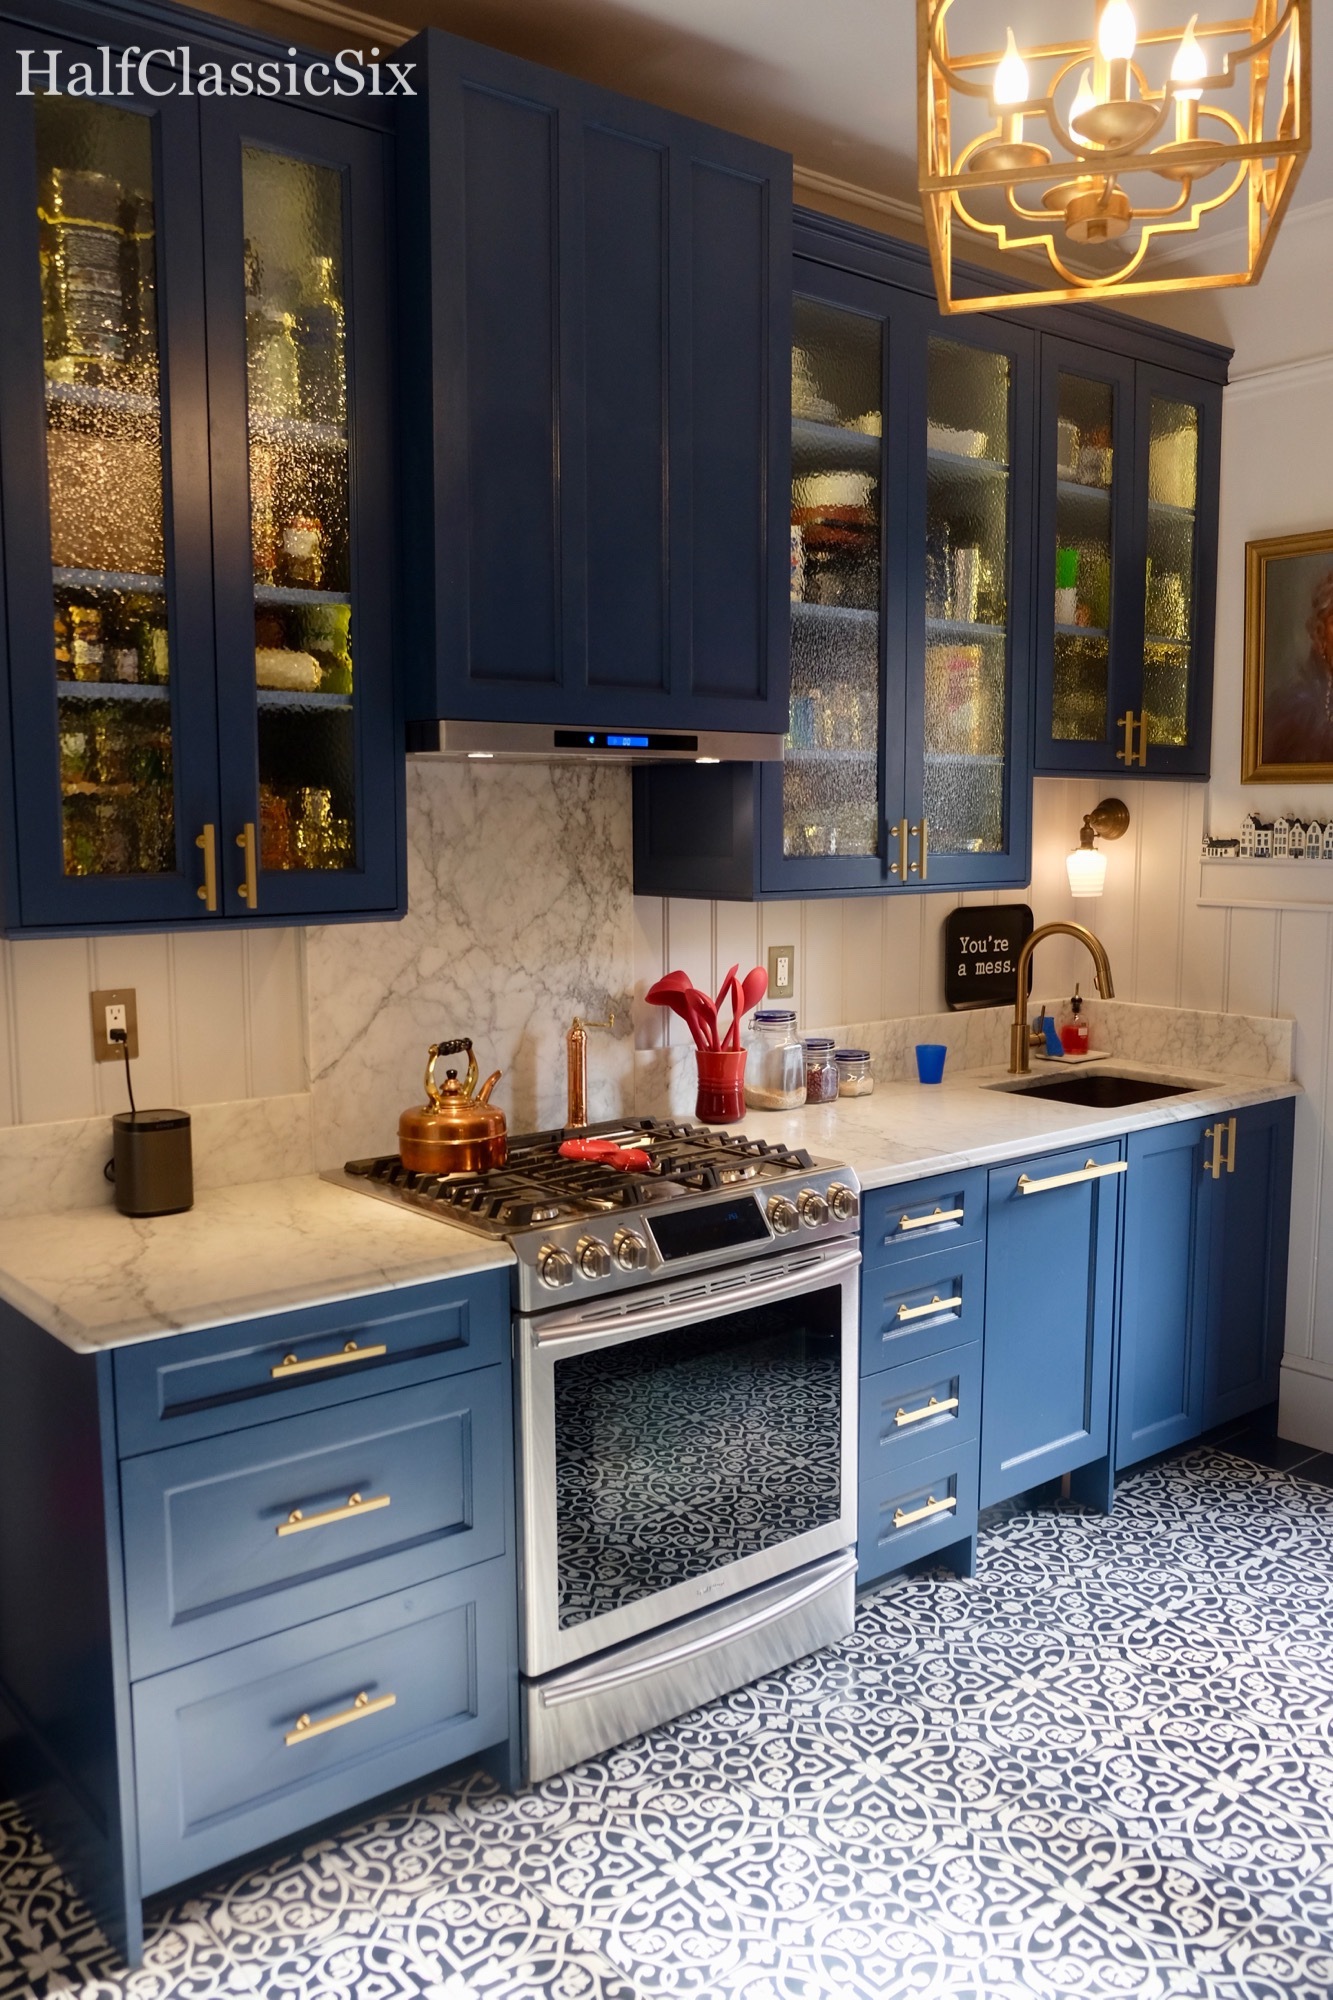
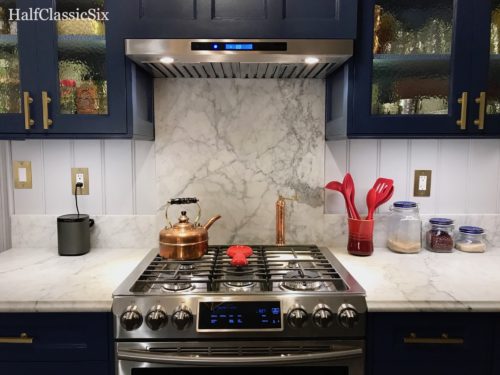
Gorgeous!!!! Yes?
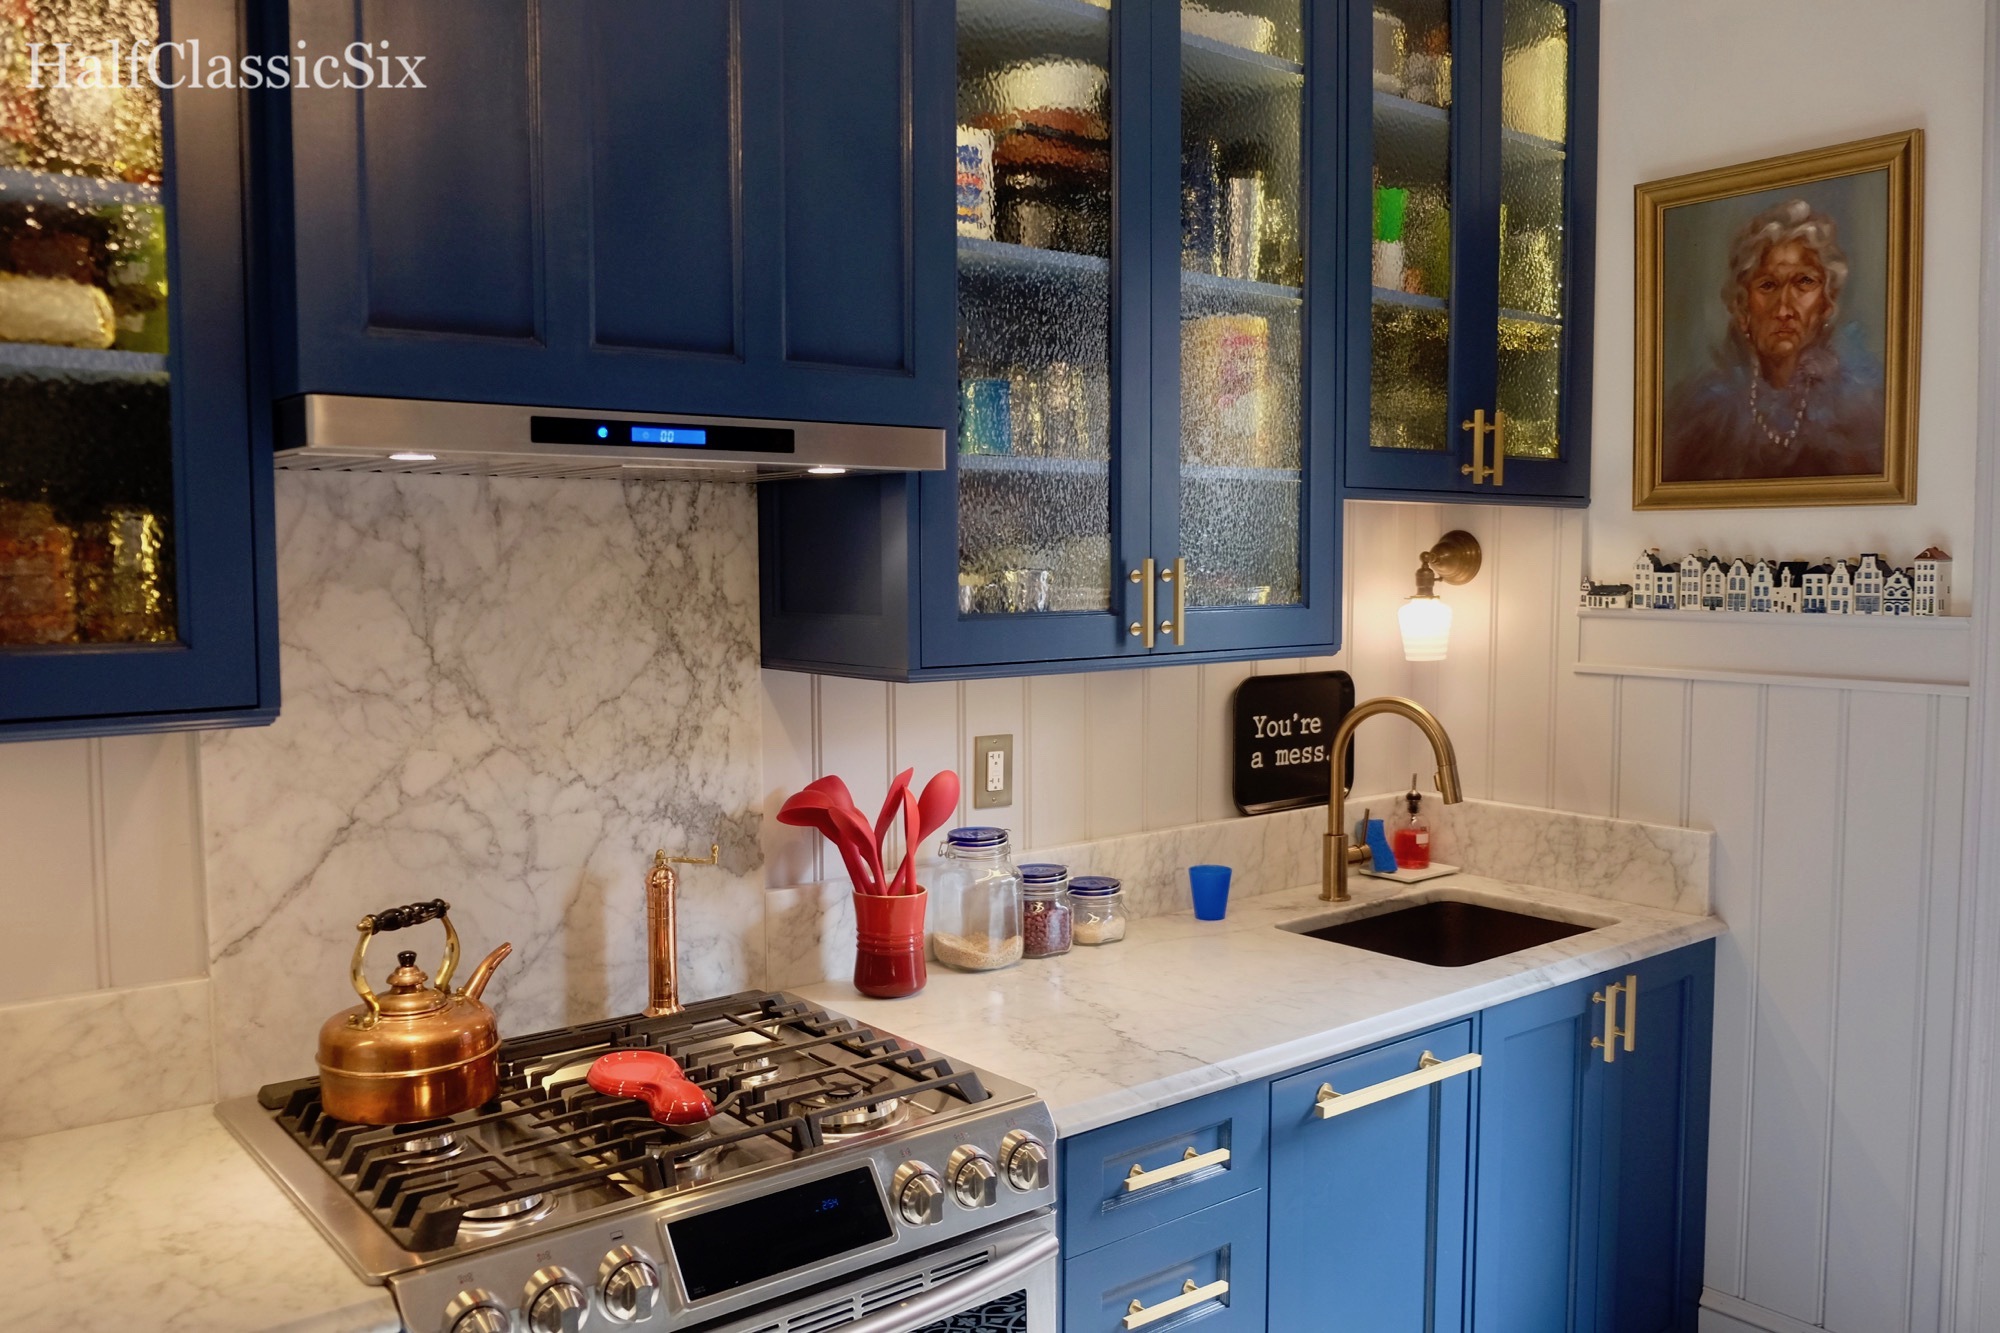
Ooops, I seem to have left a blue cup on the counter :p
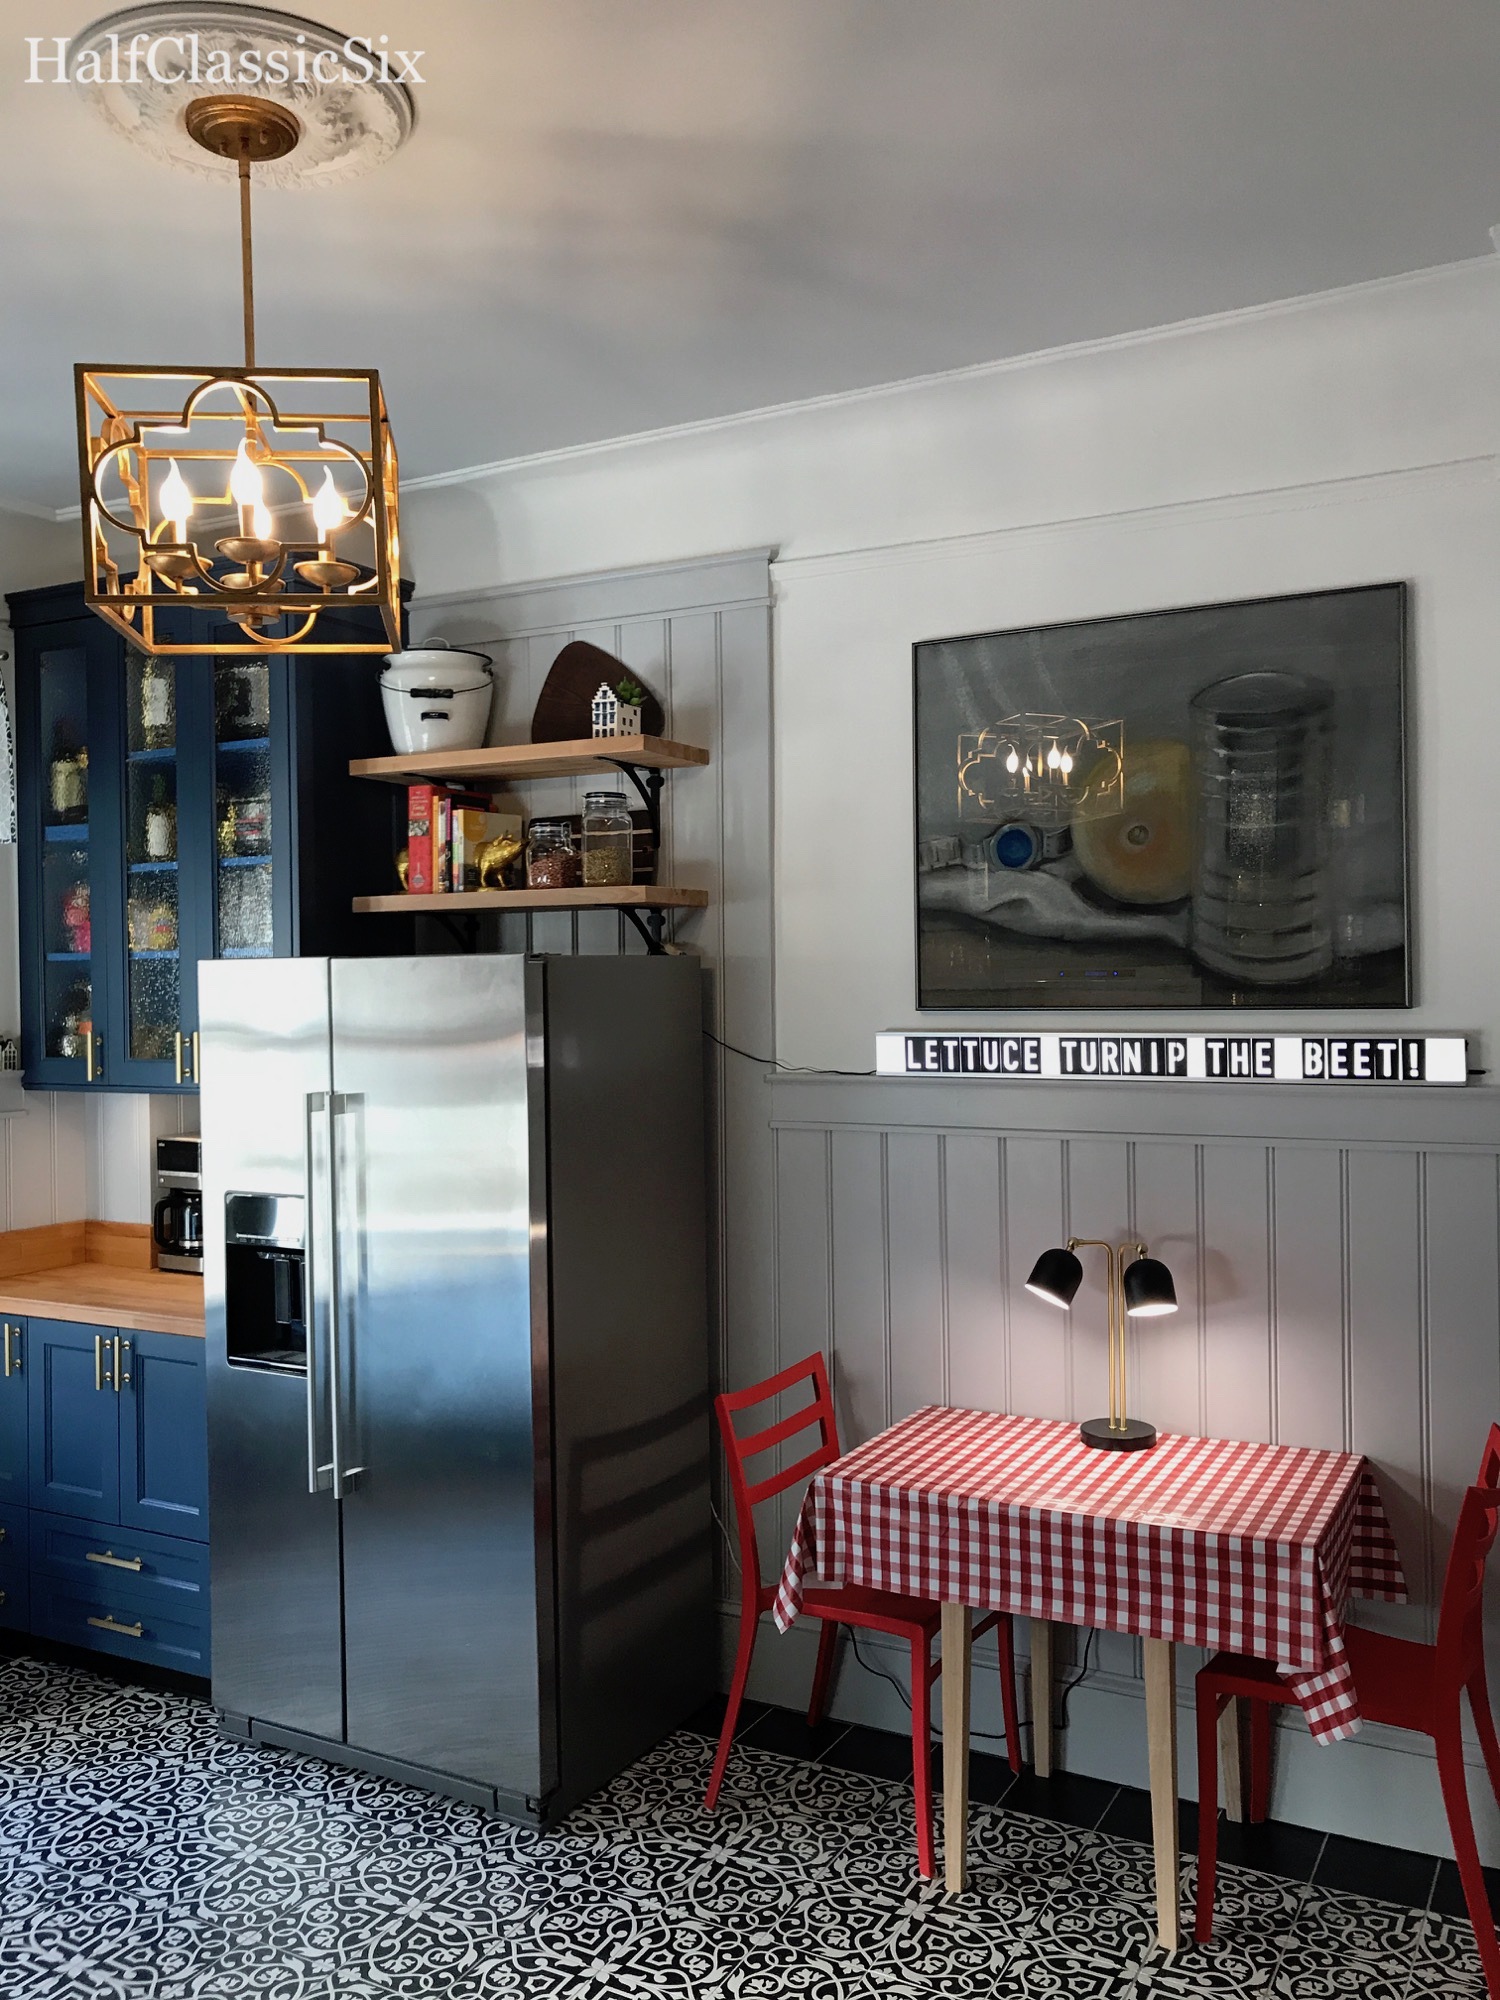
“Lettuce Turnip the Beet!” – Our cozy little sitting area has really been a nice reprieve from dining at the sofa as we’ve been doing for the past few years.
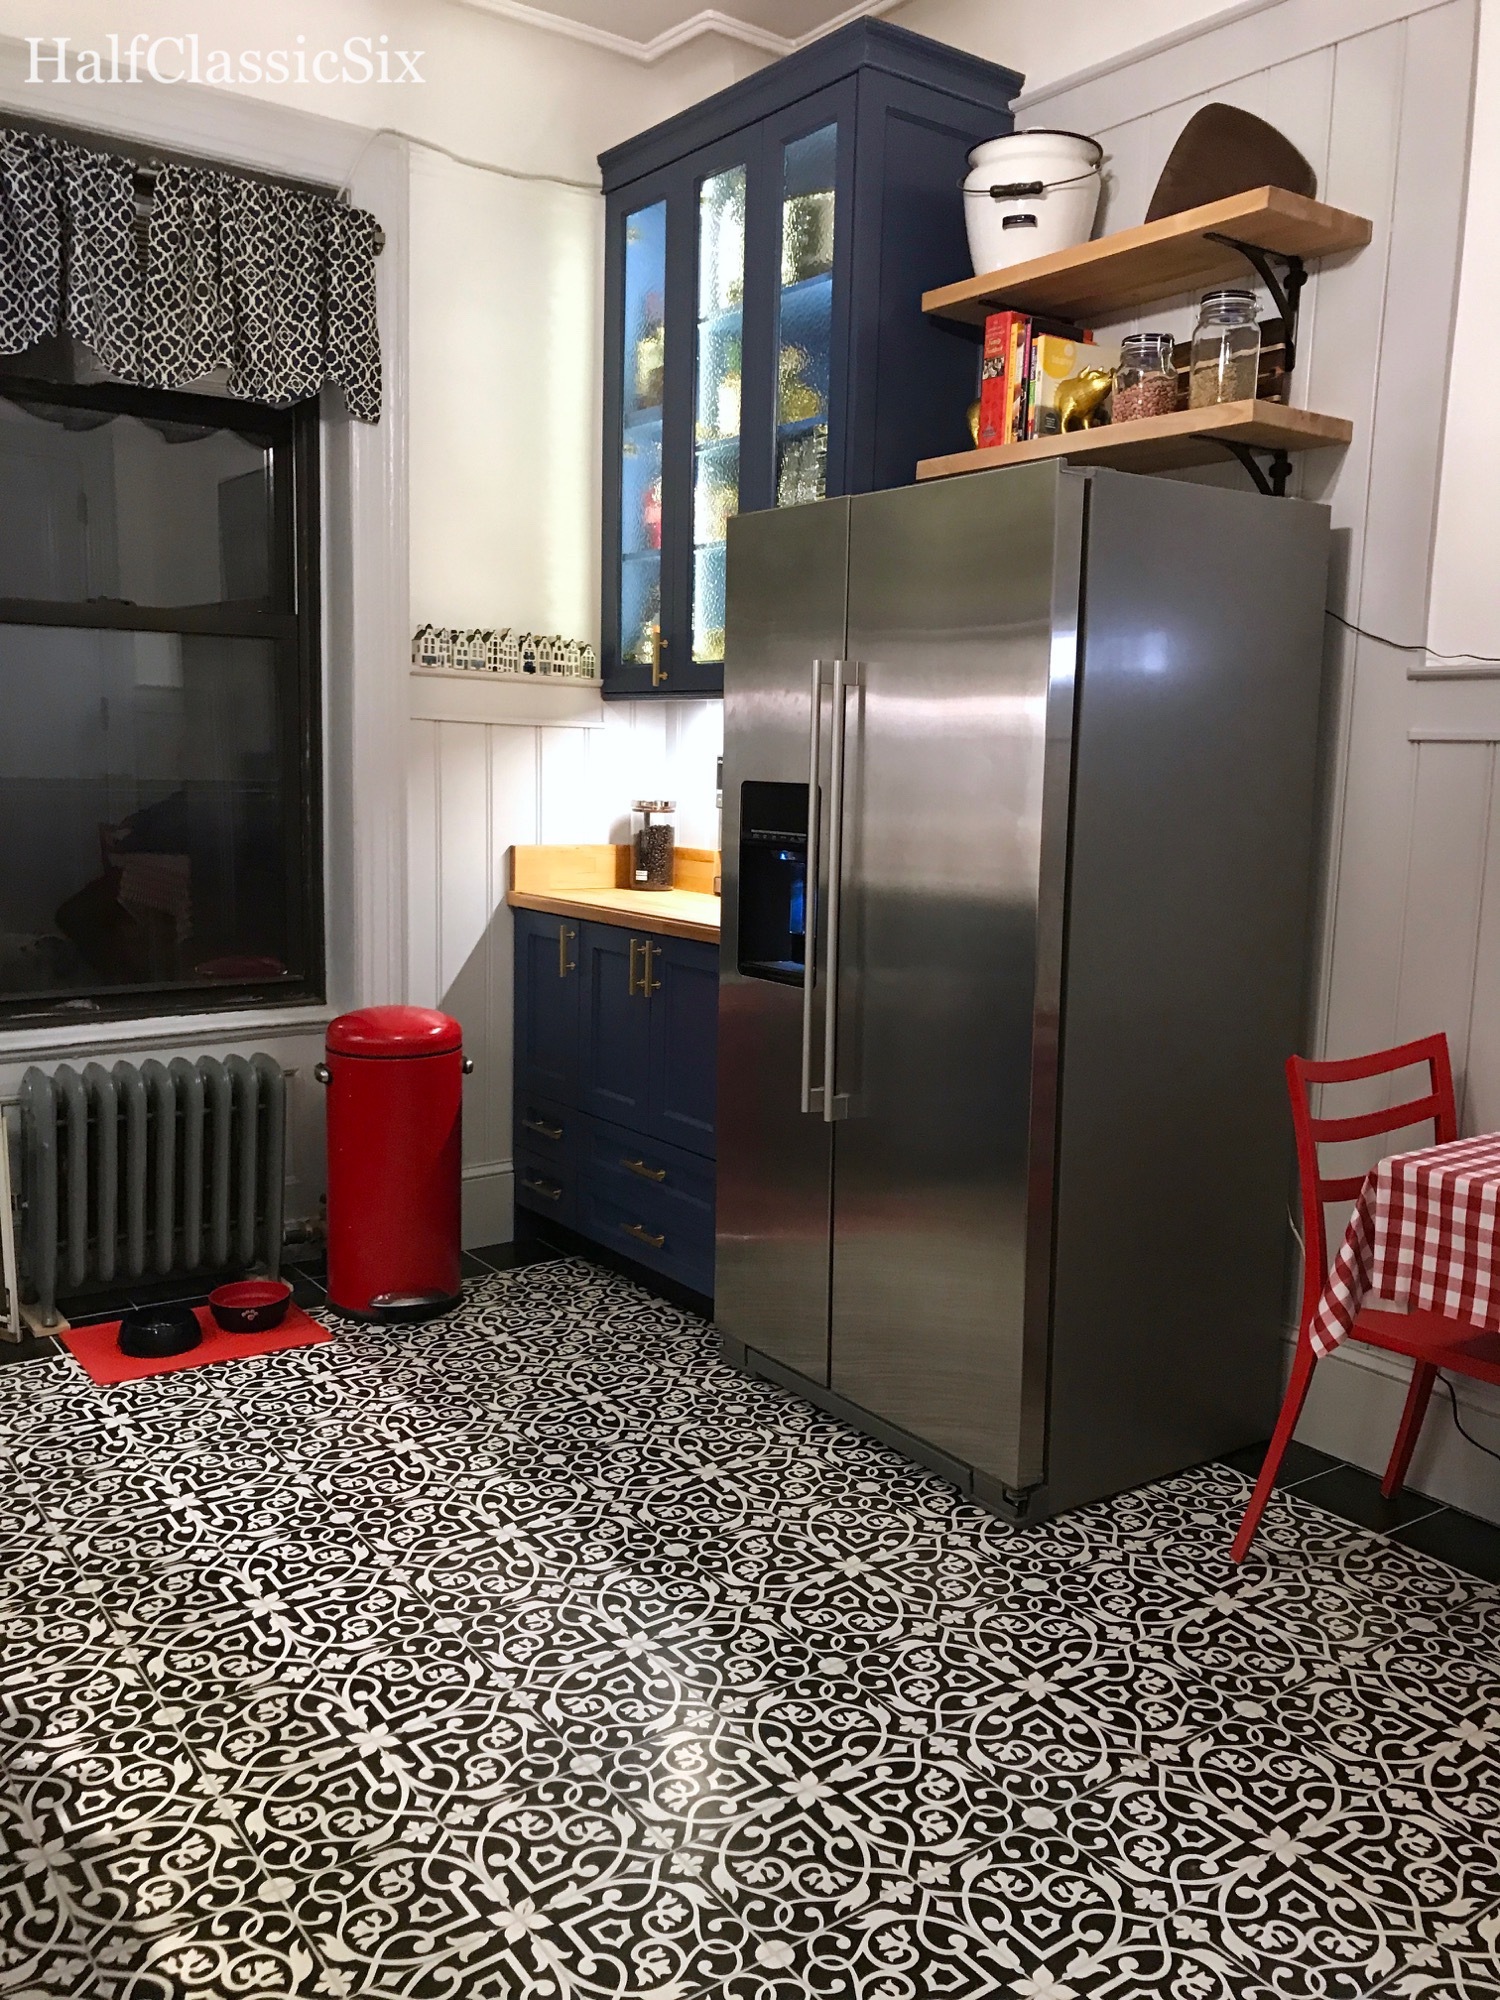
We went with a counter-depth refrigerator which helps keep it from feeling as though it was going to overtake the room.
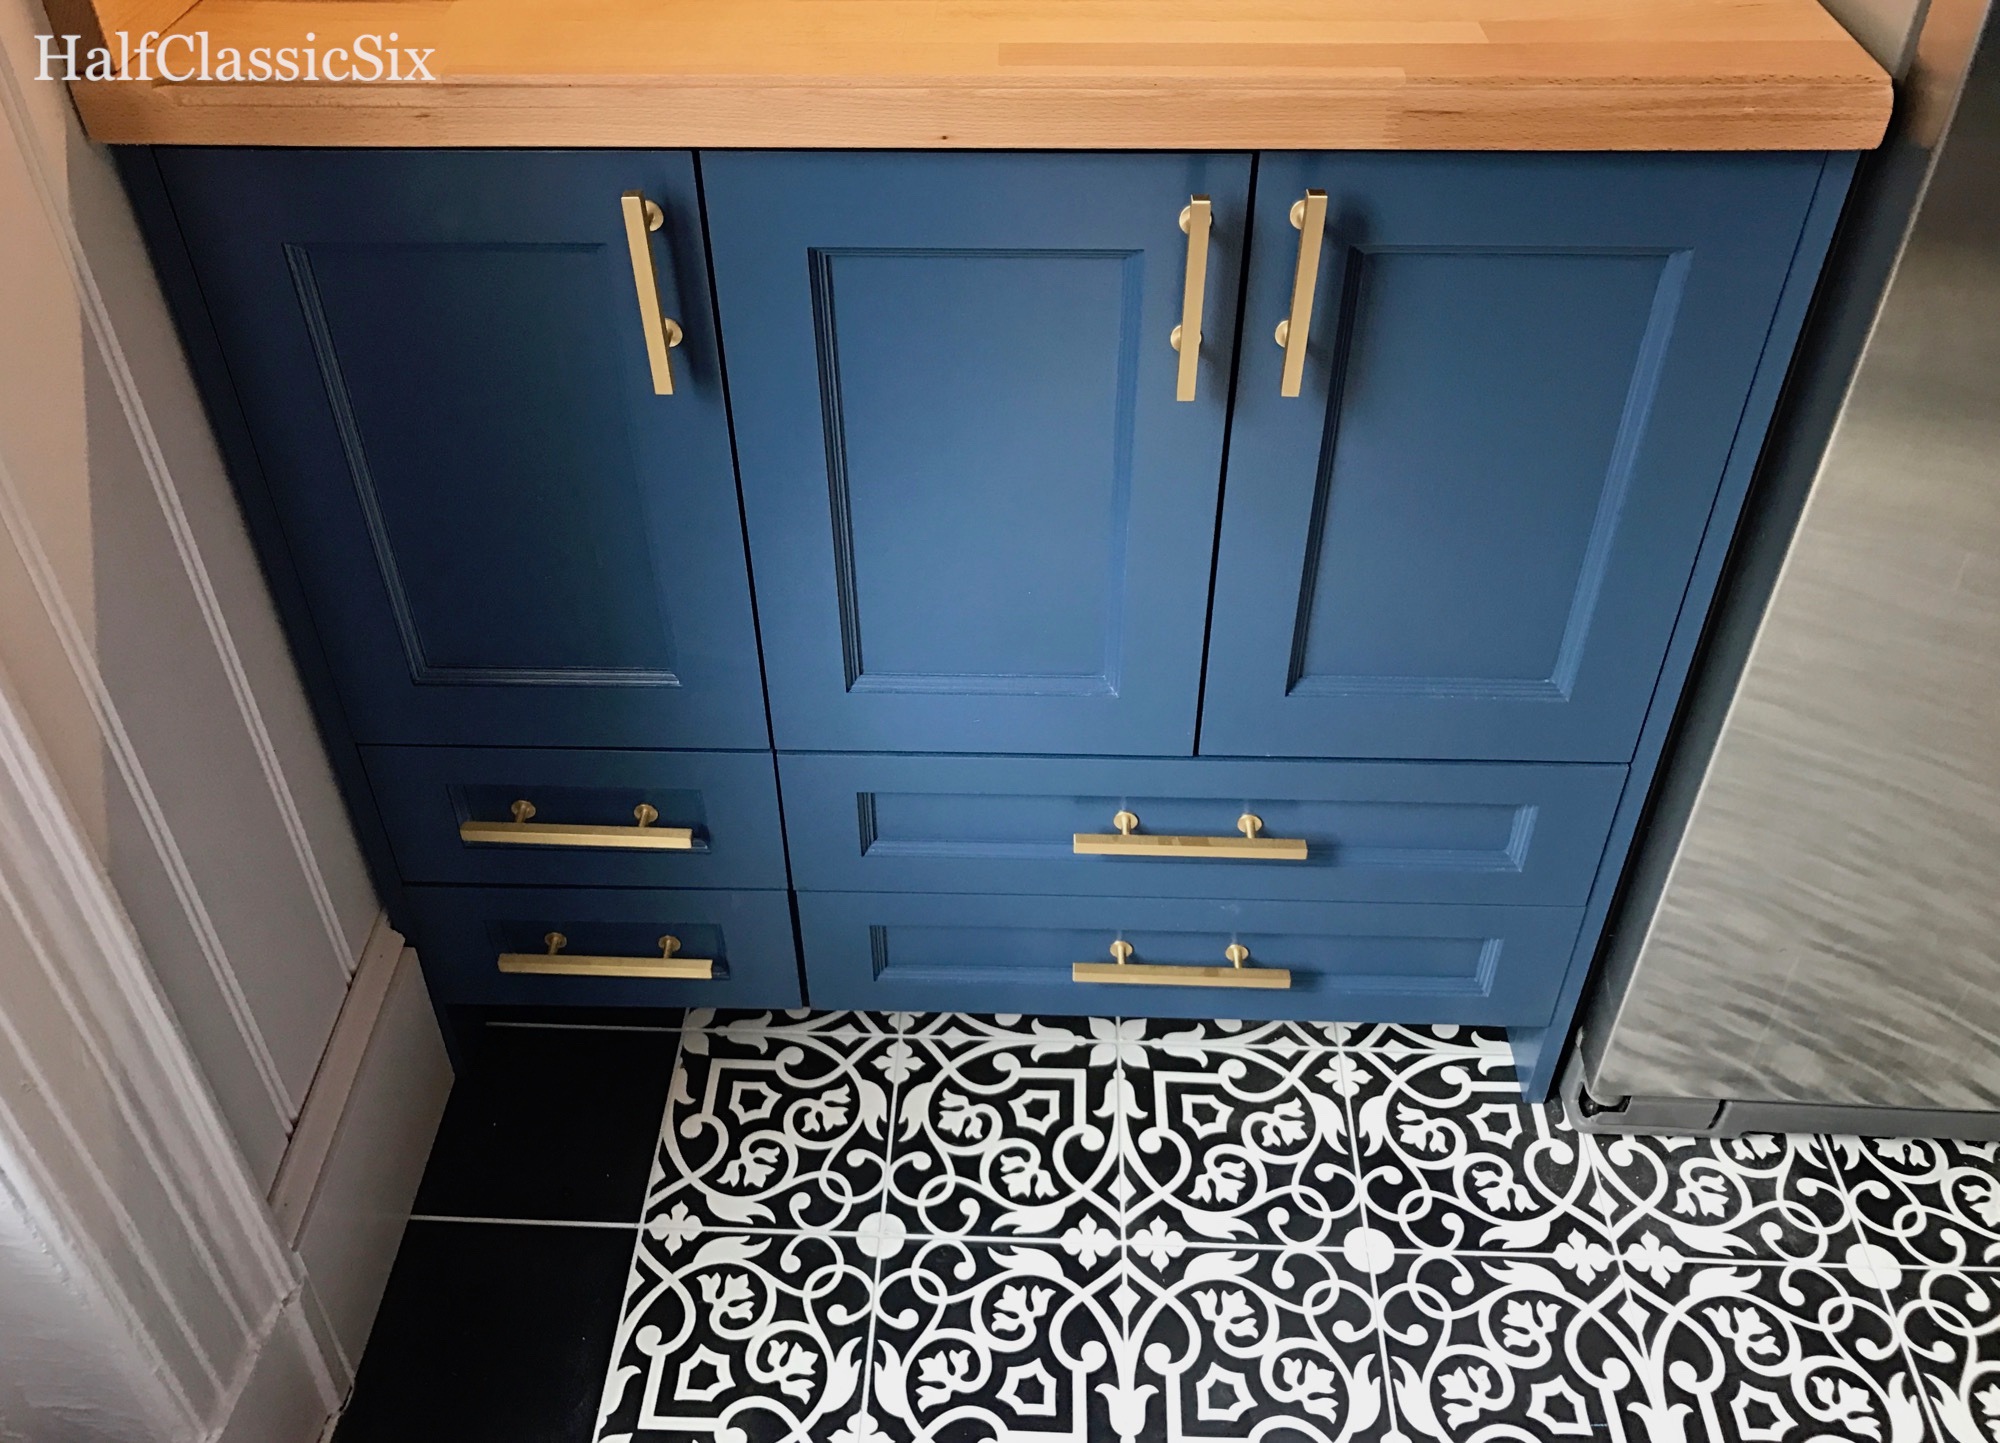
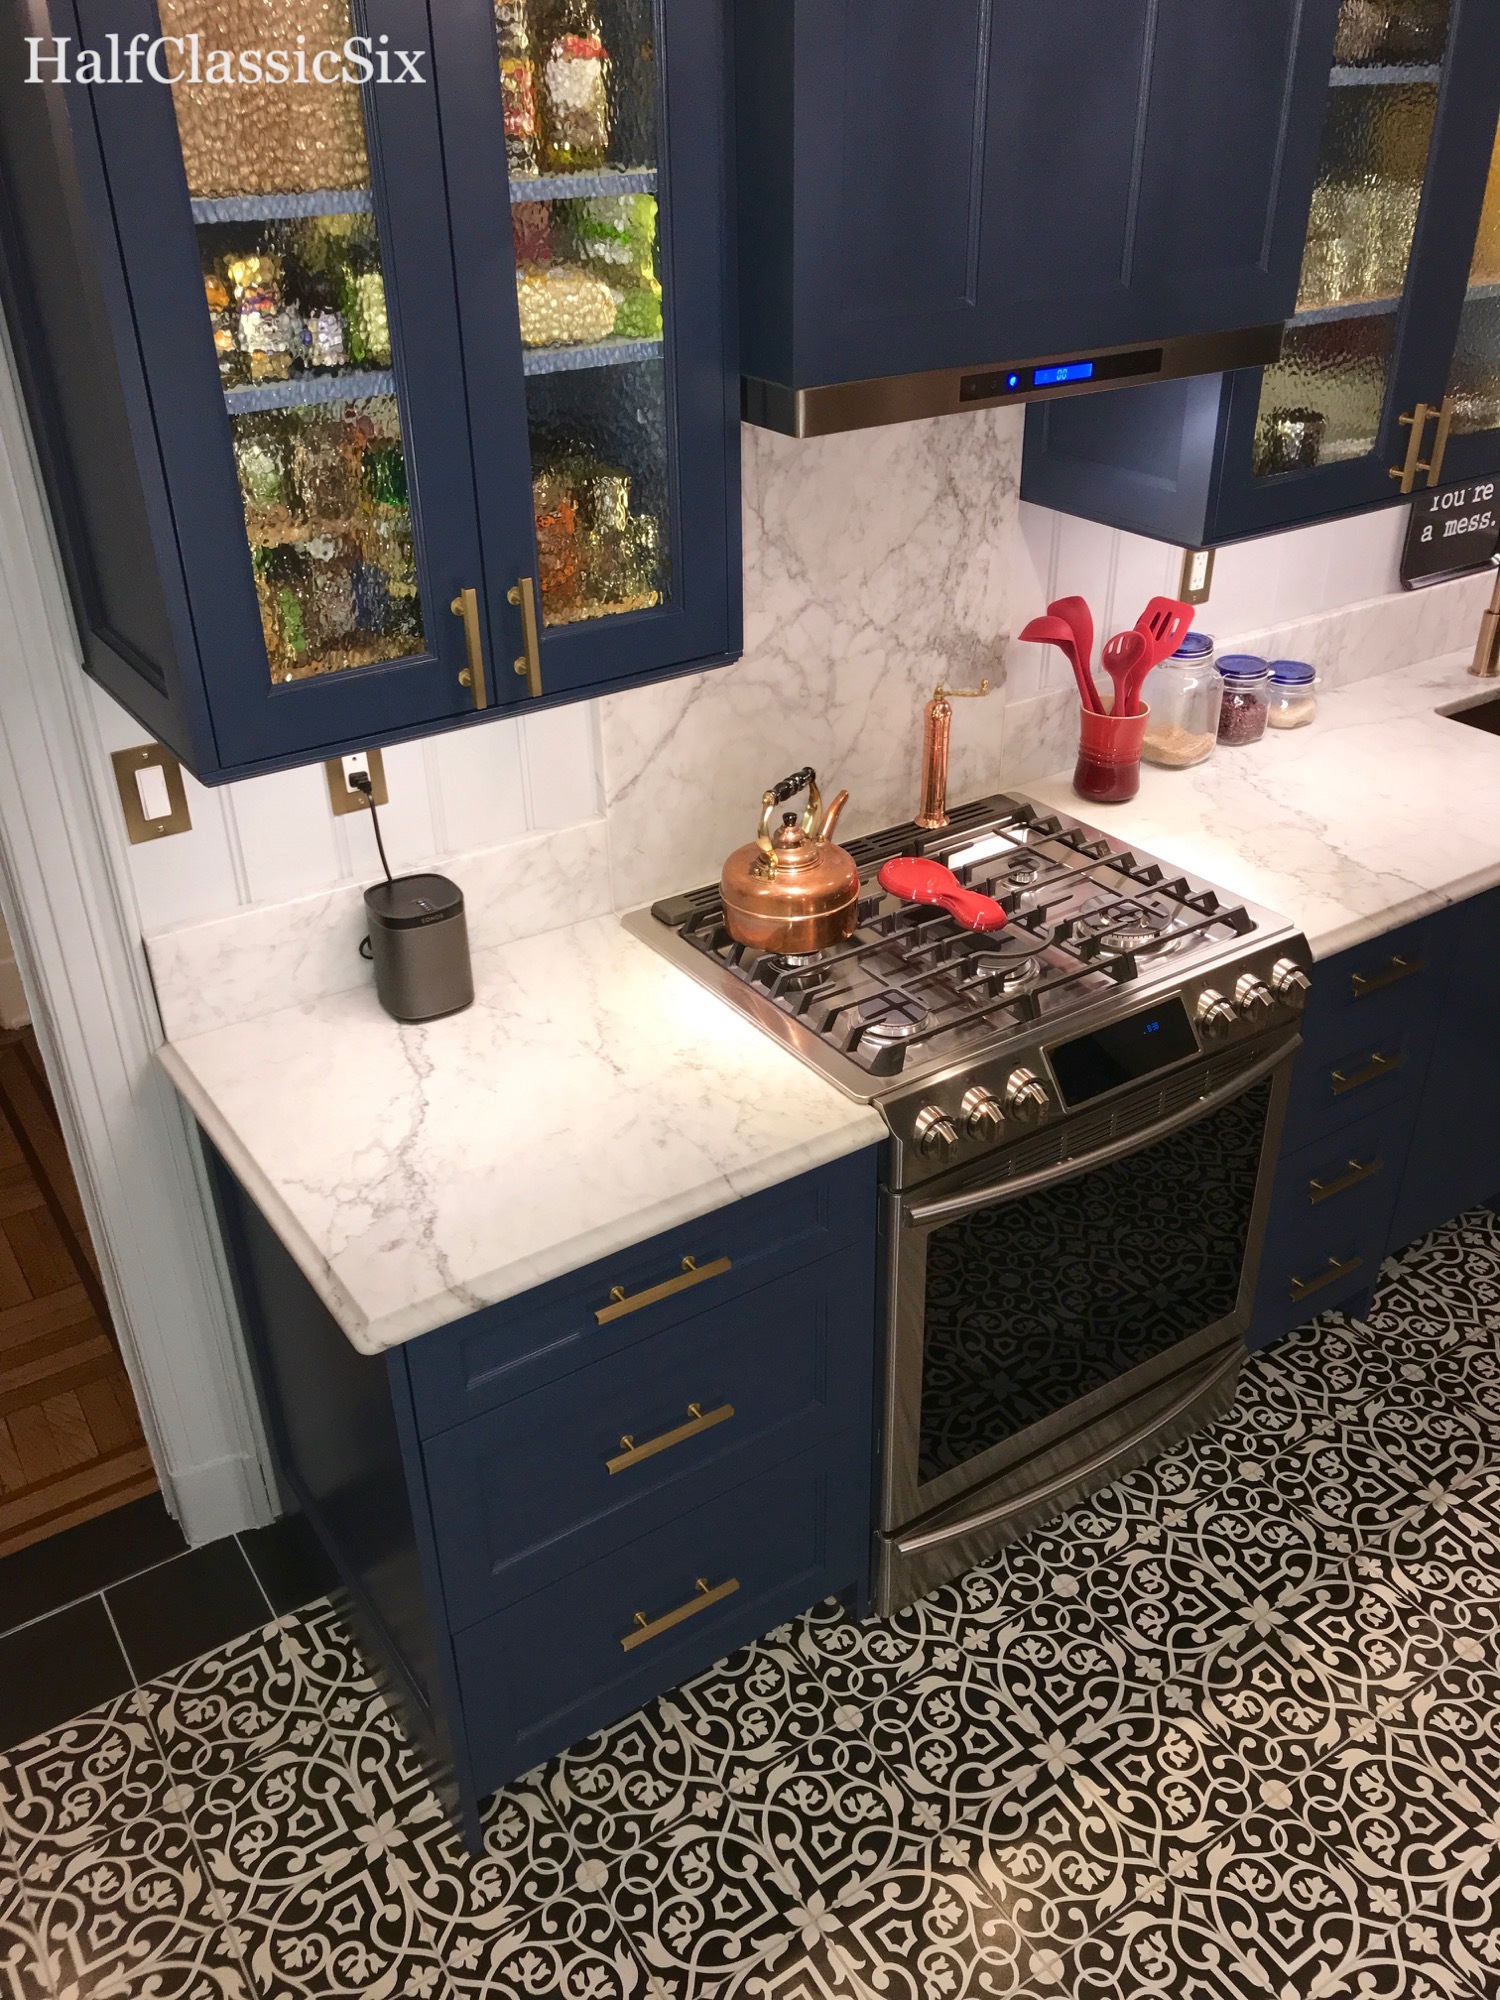
The other side of the kitchen as it is today. I was originally going to have marble countertop, but chose to transfer the square footage to the slab behind the stove to shave a few dollars off of the cost. The butcher-block came from IKEA, I used my router to make the edge fancy.

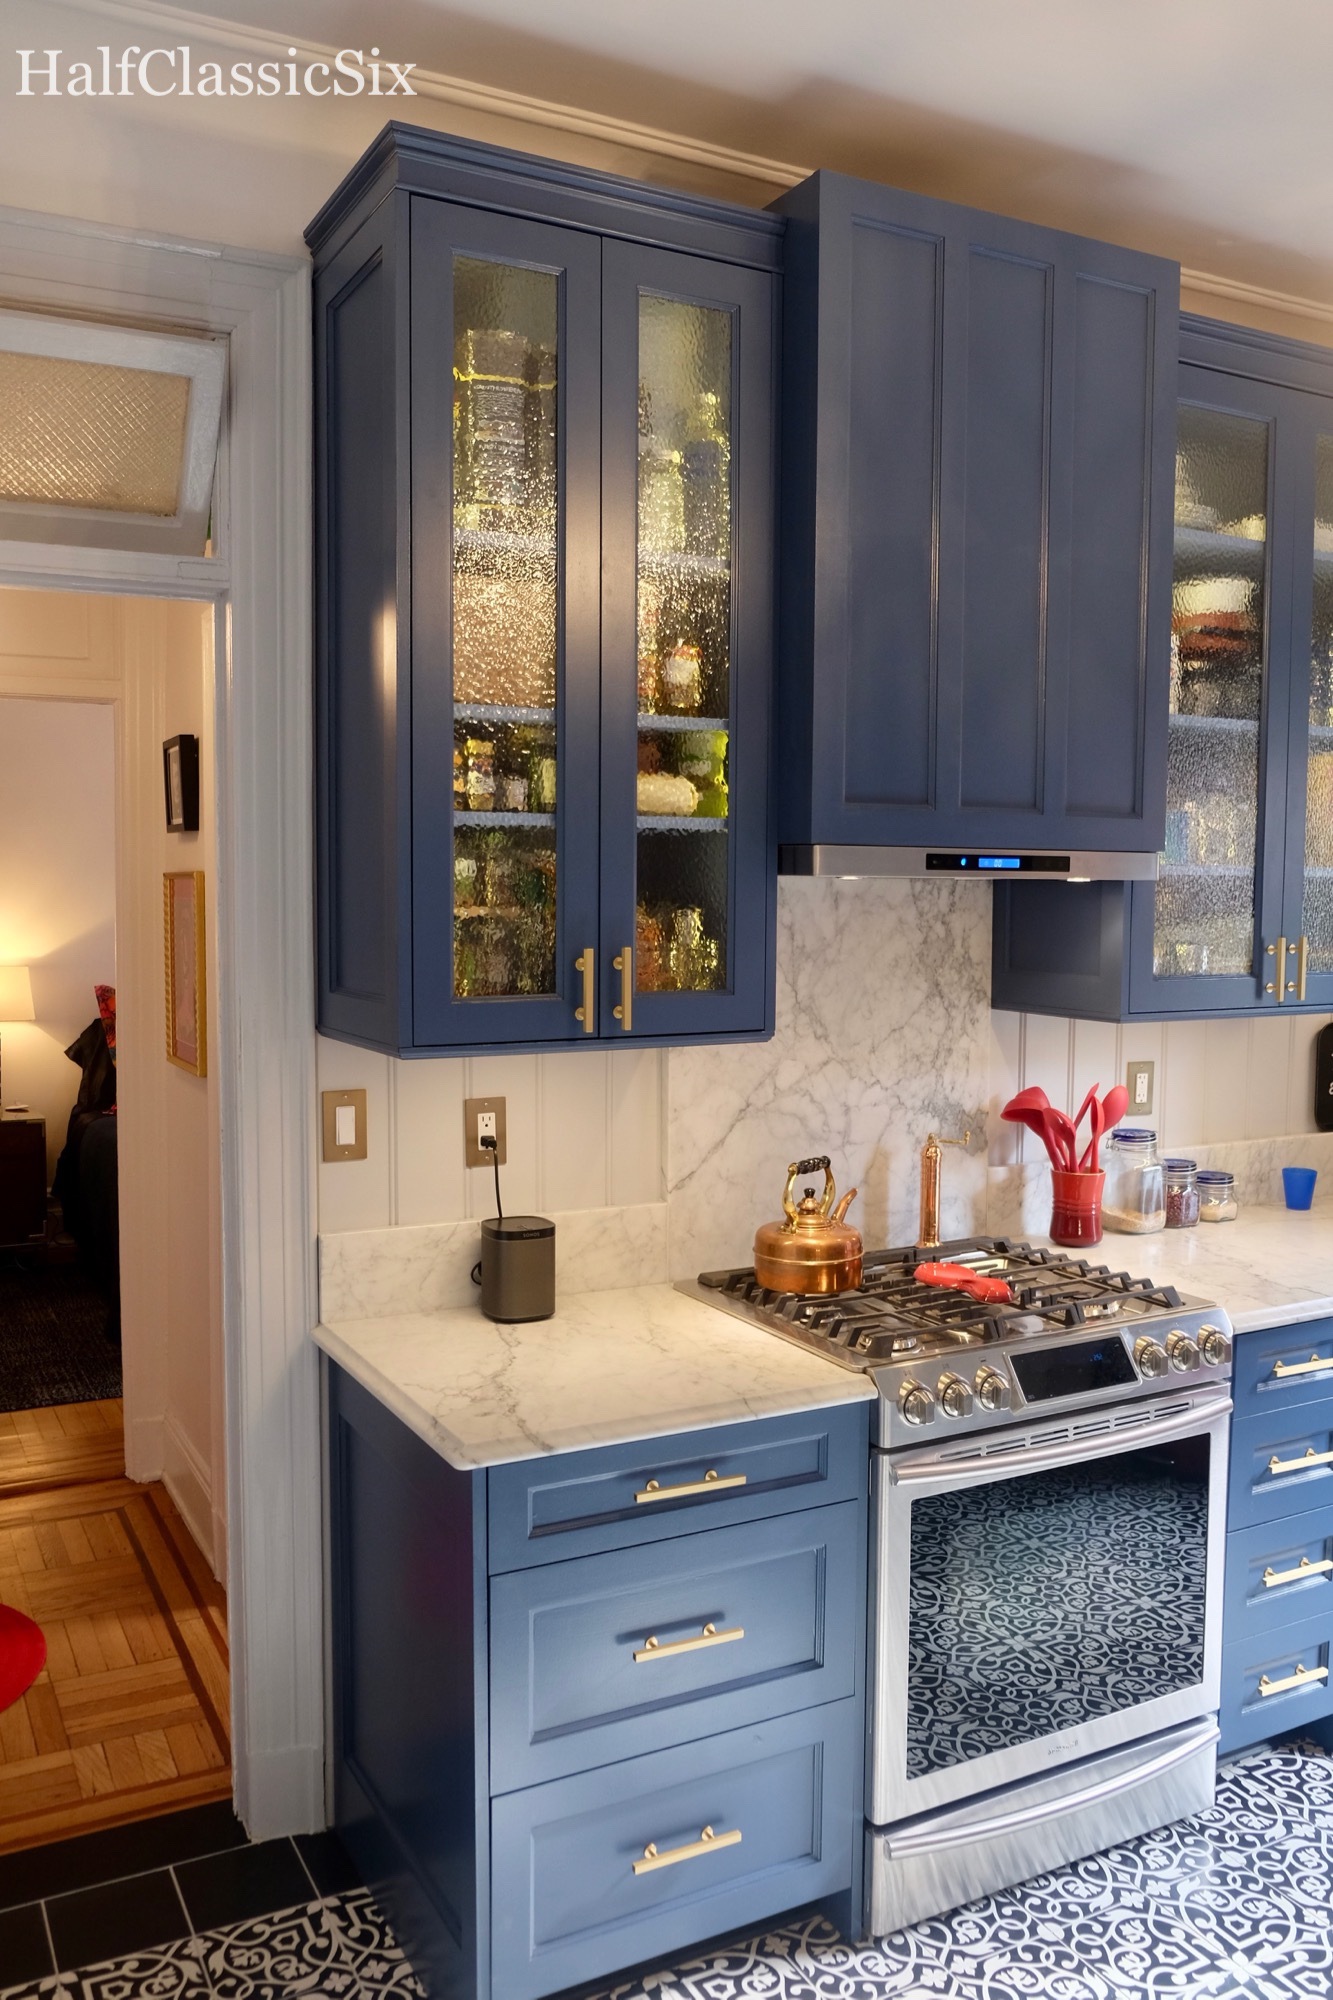
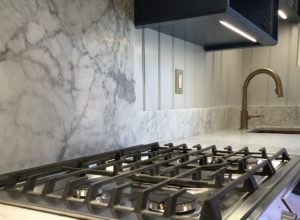
I wanted a slide in range because I’ve always though the typical free-standing range (with controls on the back) looked like an afterthought. It is totally worth the little extra cost for the built in look.
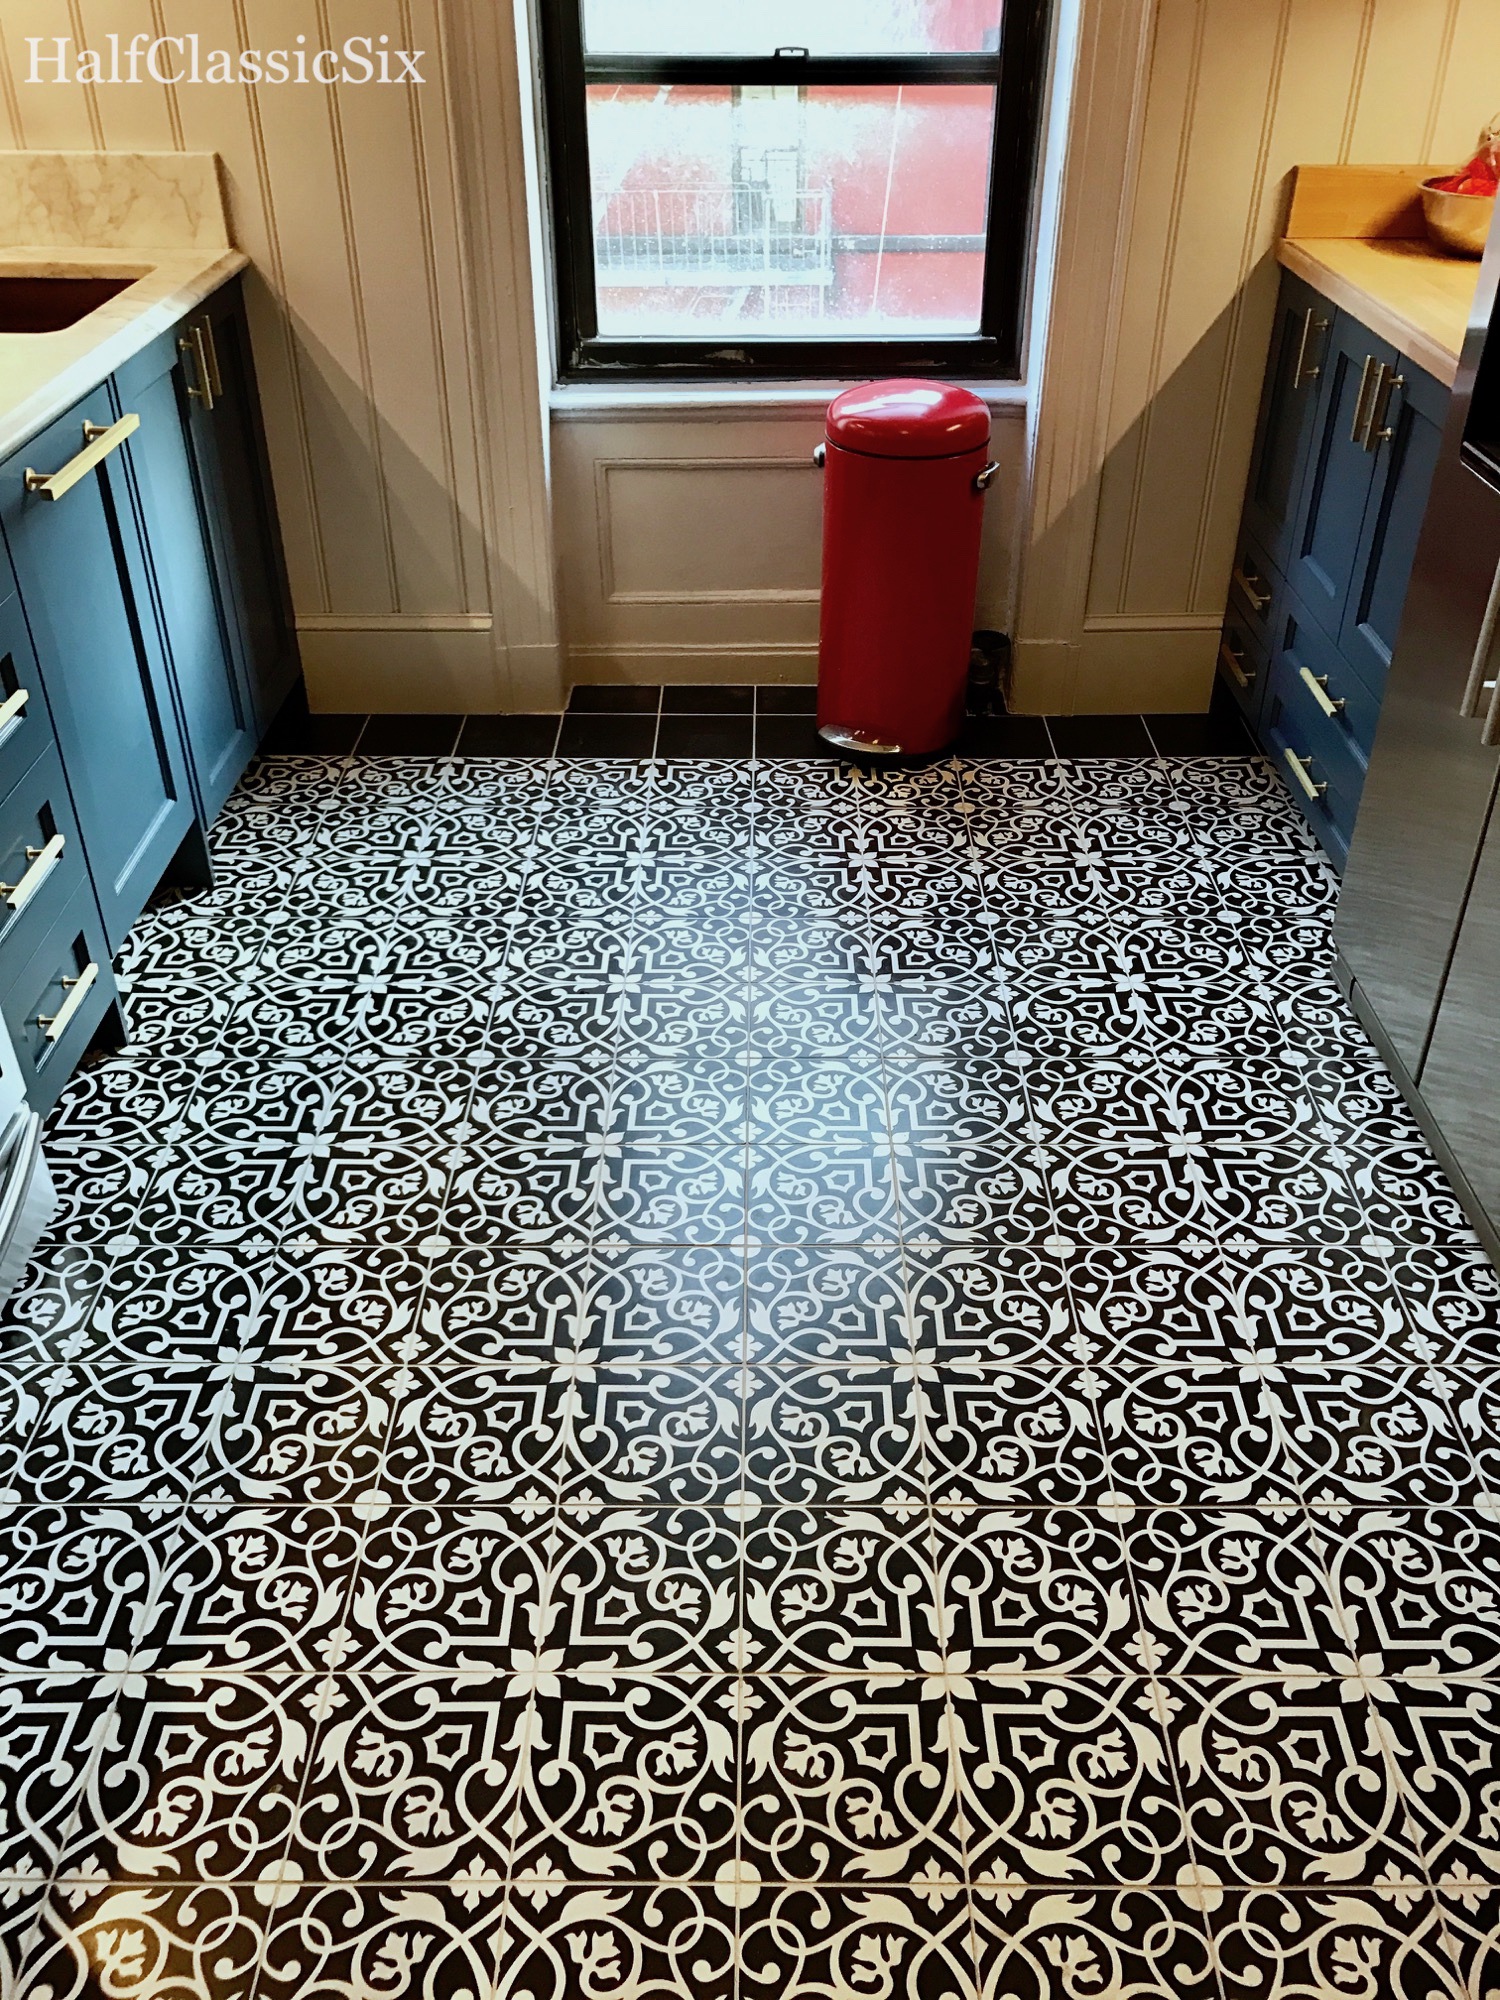
The floor…. Did I mention the floor?

I was very proud of my solution to hide the ugly air conditioner.
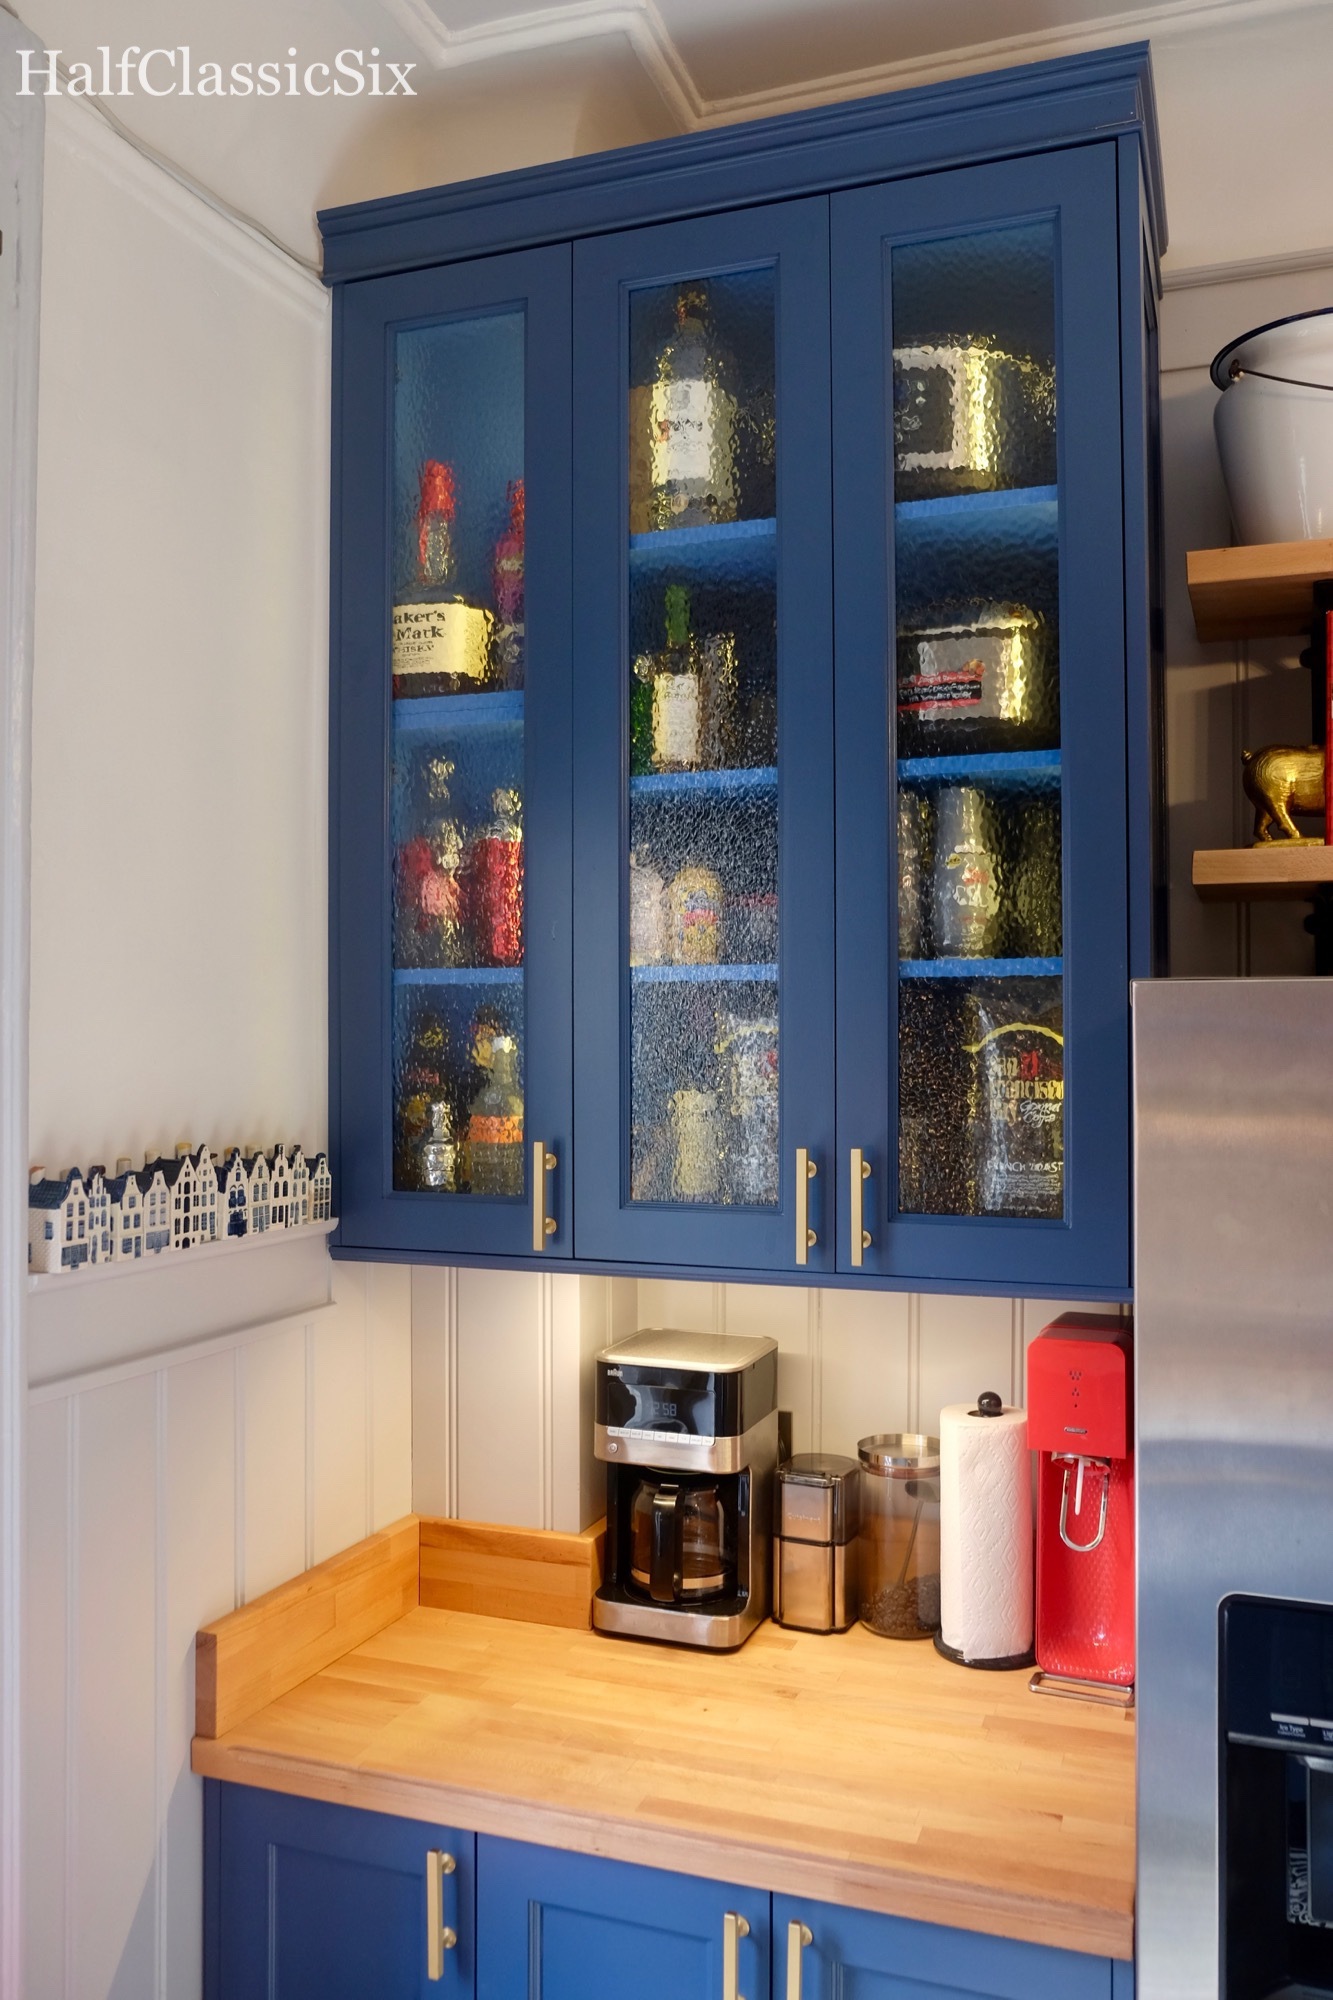
This shot gives a good indication of just how tall the upper cabinets are. Definitely need a stepladder to get to the top shelves.

The copper sink is now more than a year old and I have zero regrets. It’s still as wonderful as the day it was installed.
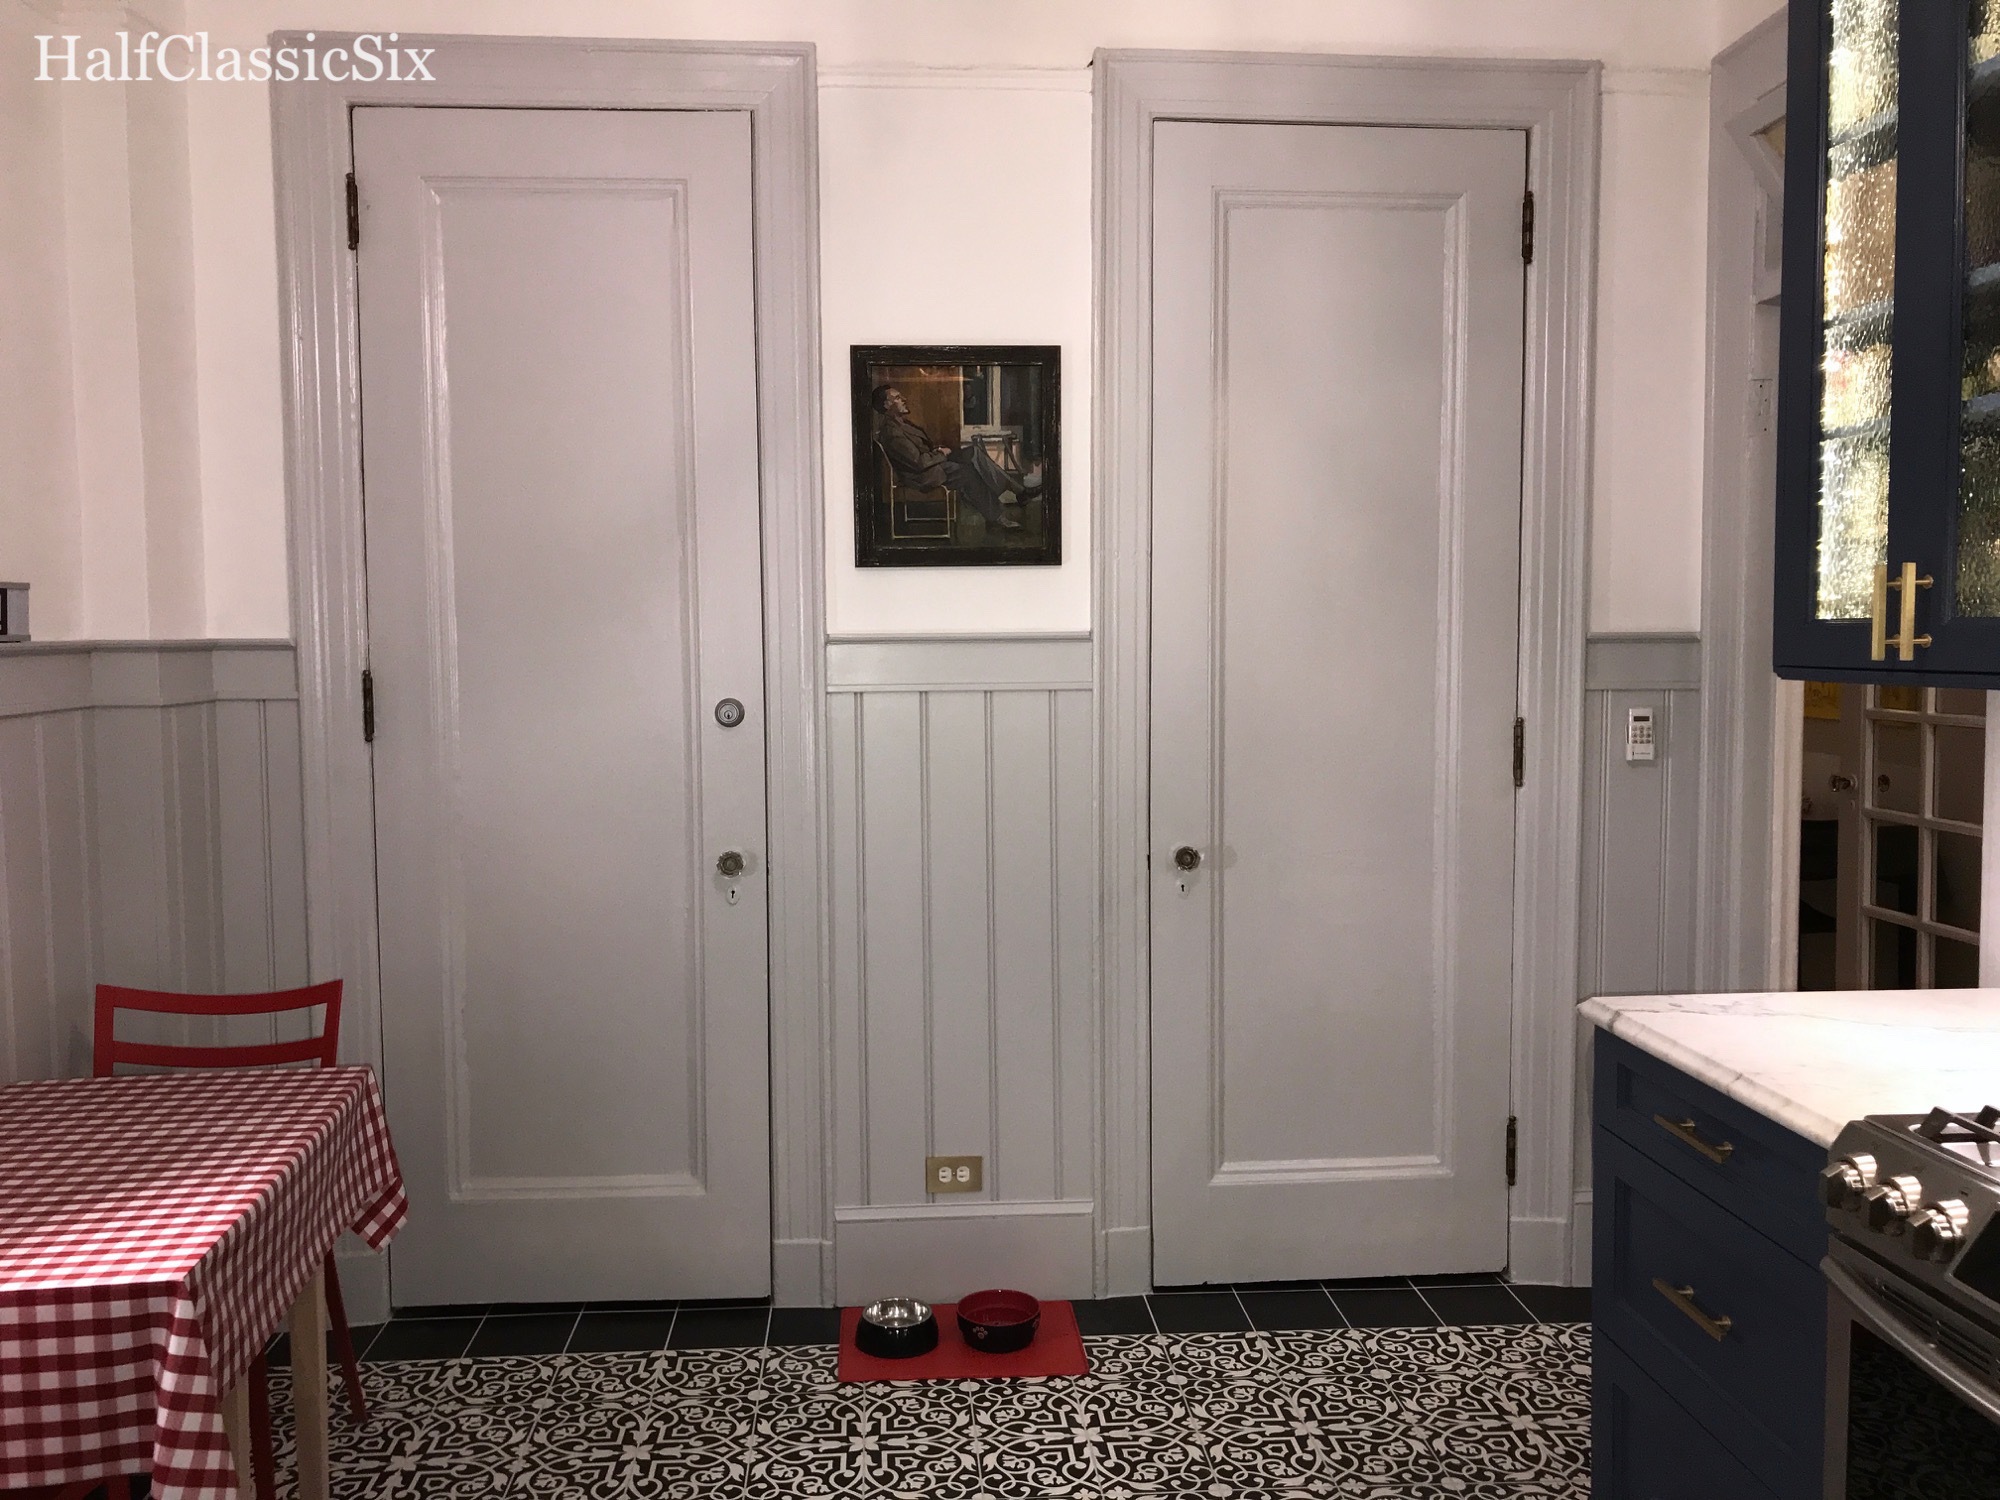
The 99″ tall closet doors on the other side of the room were removed early on, and sat in our hallway forever. It was a huge chore to get them back up and working correctly, but they look great!
There is a microwave oven hidden here.
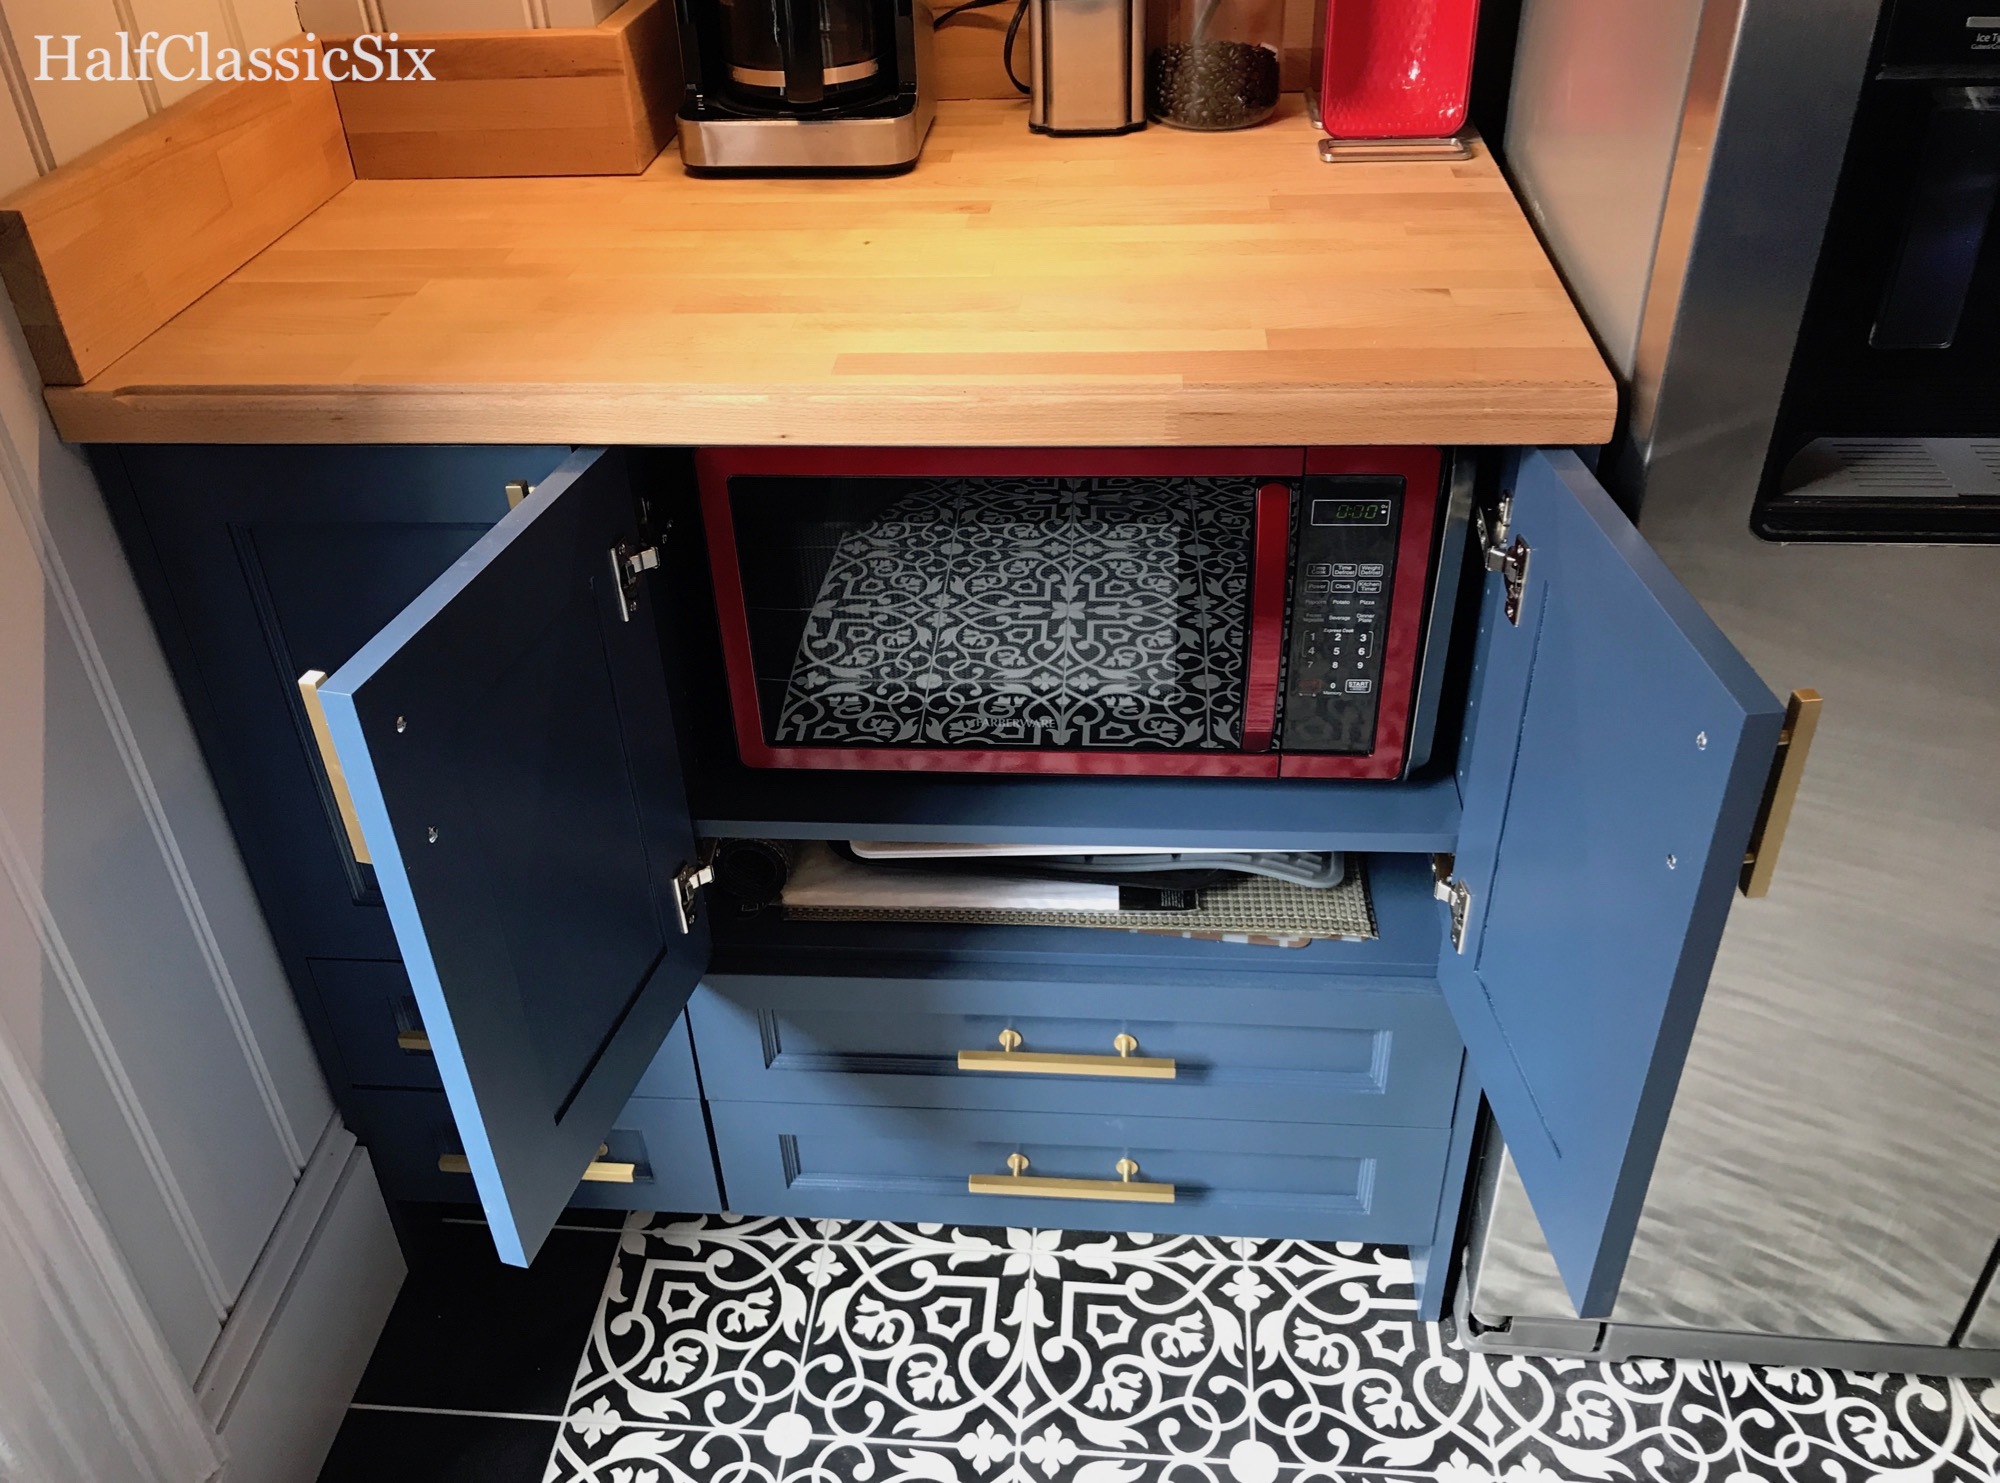
The microwave is conveniently tucked under the counter.
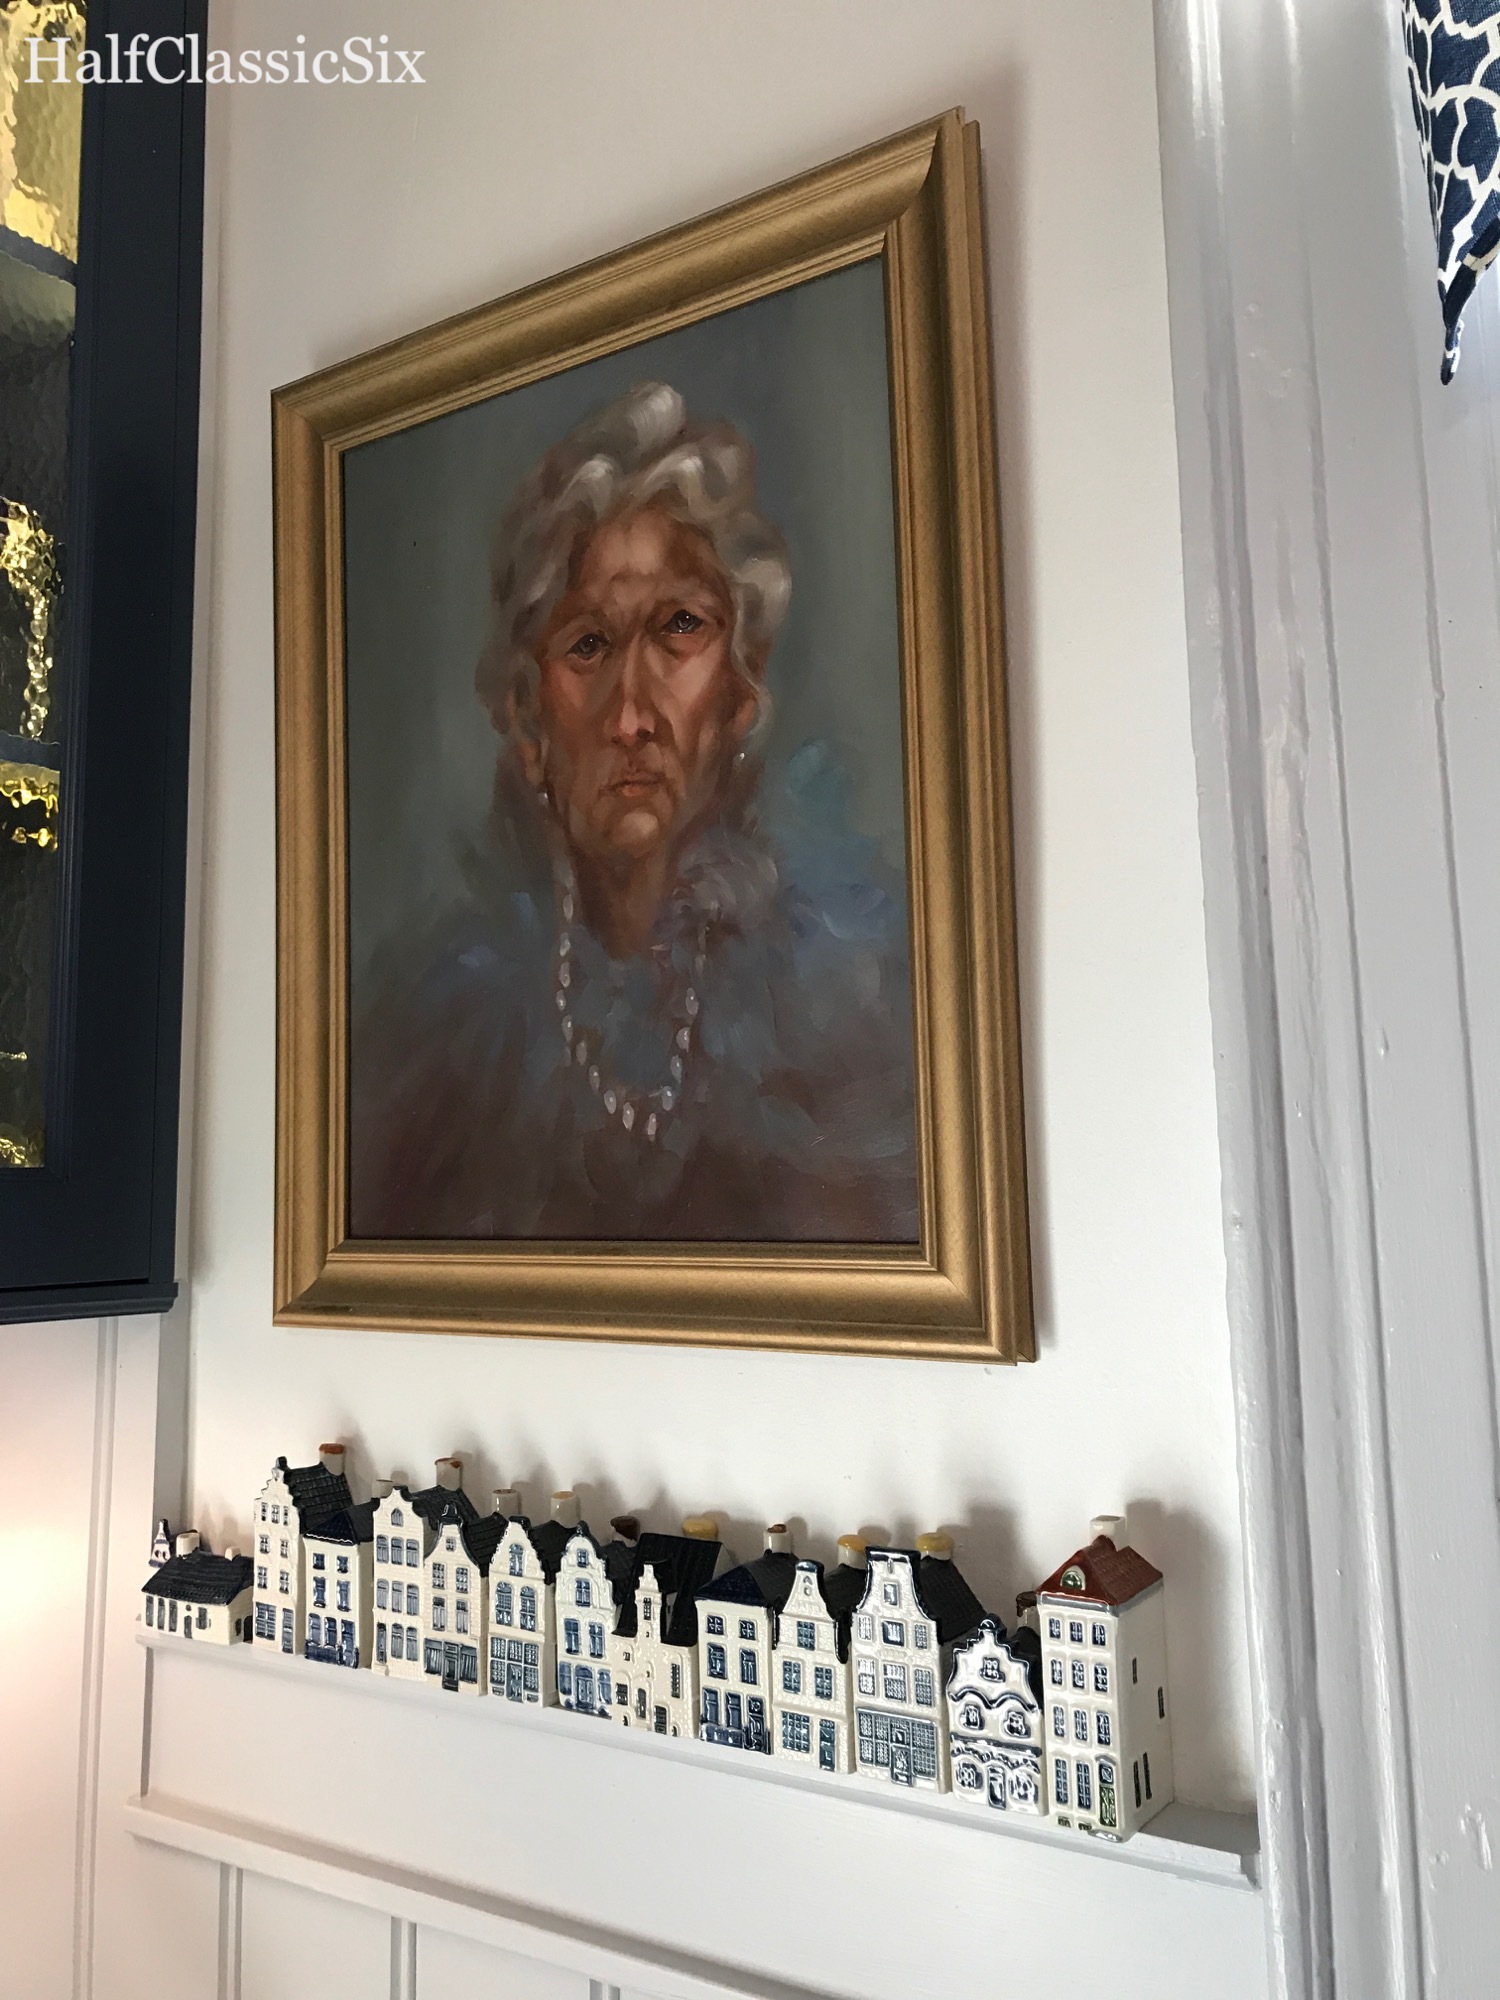
Nanna Zelda keeps watch over the kitchen. She is the disapproving grandmother we never had… Acquired for only $41 on eBay.
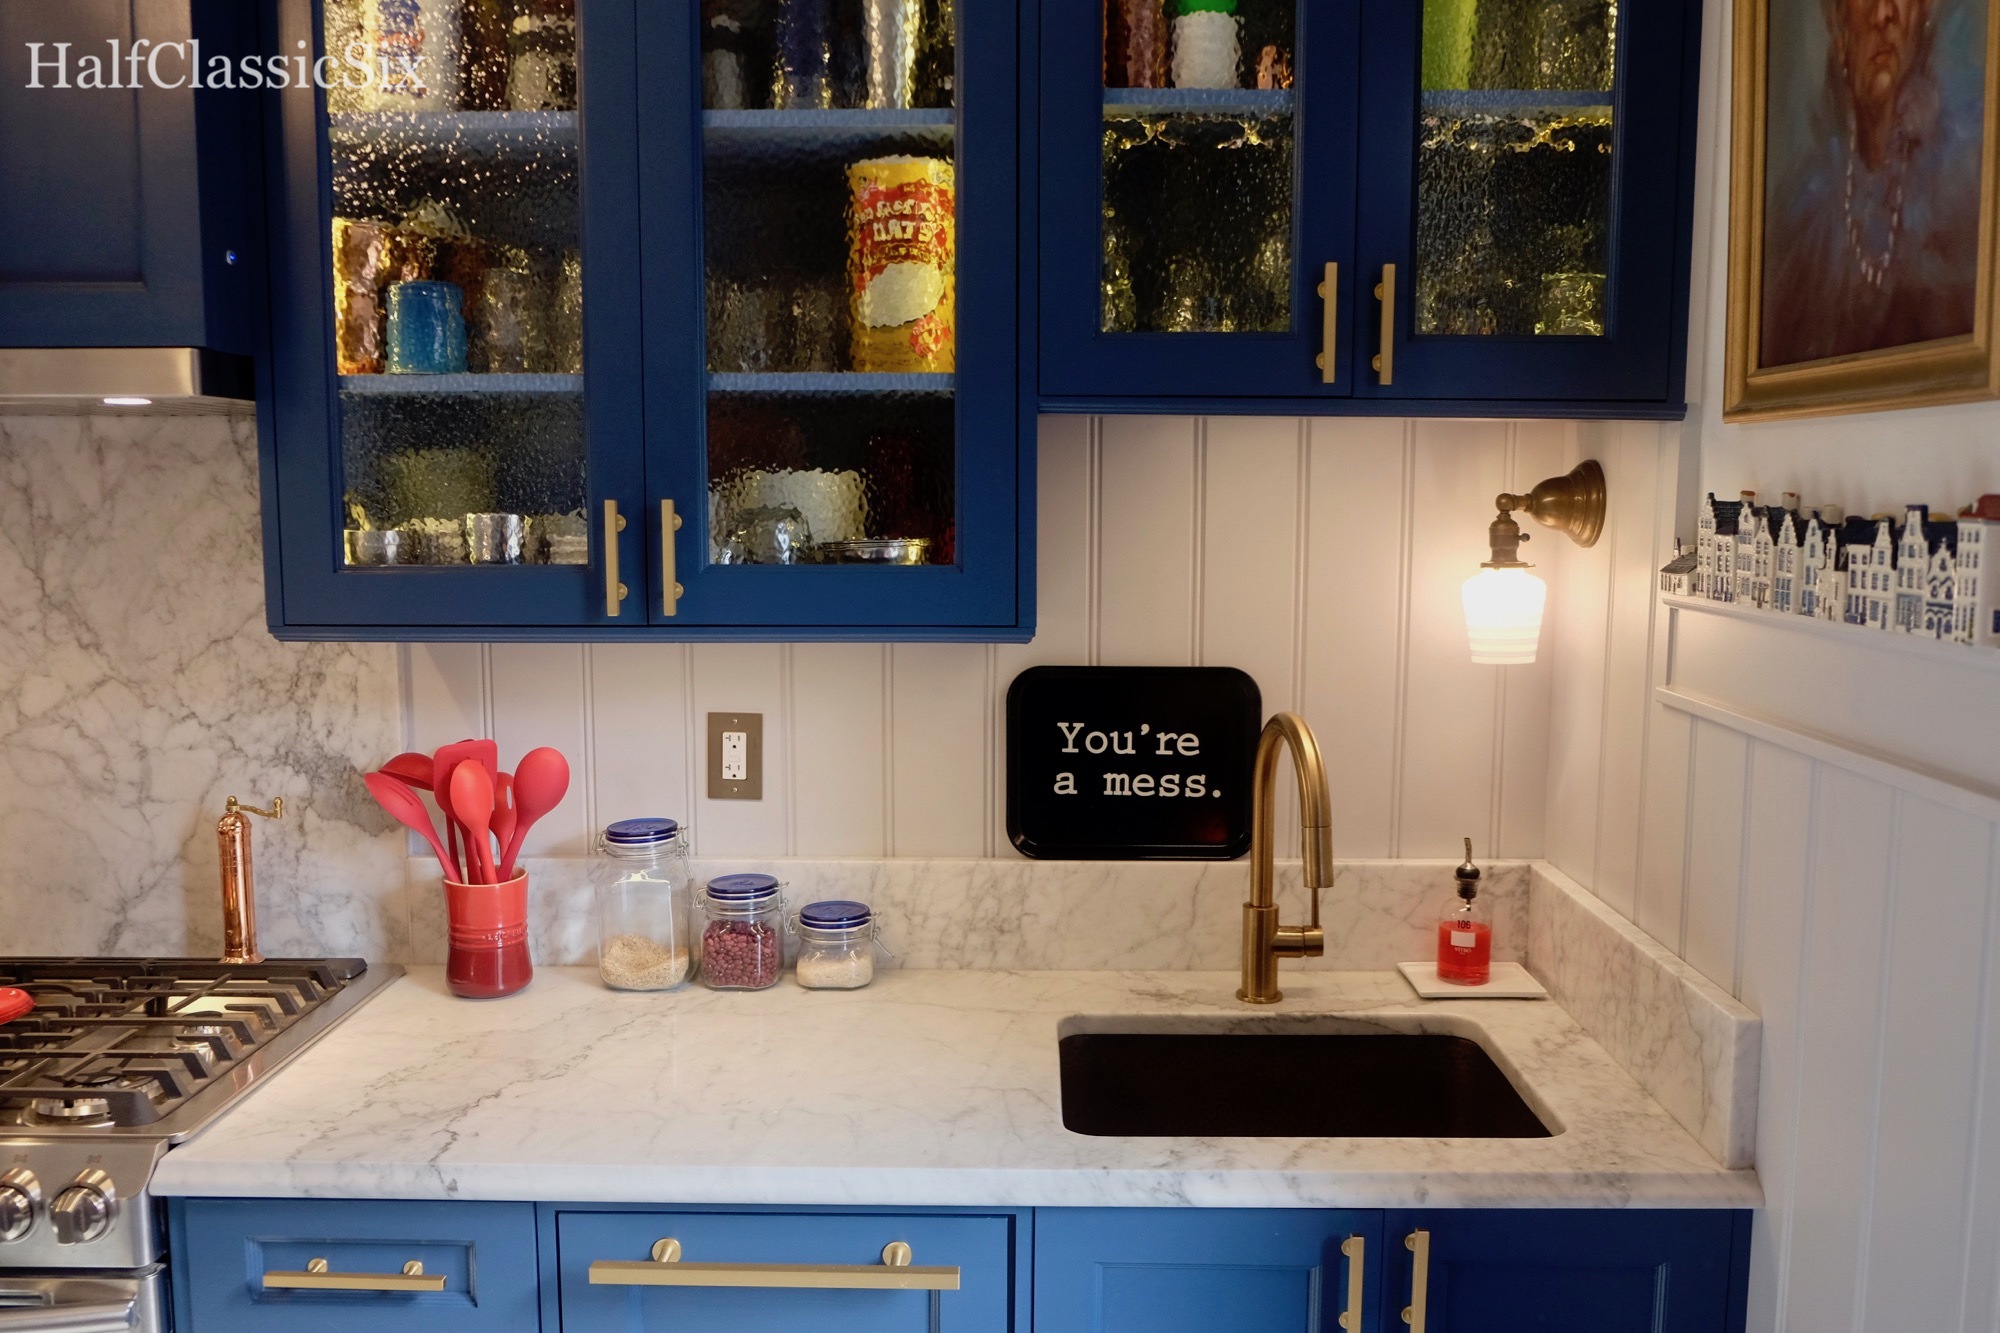
The upper glass doors are so beautiful! I had the glass cut and shipped from California (cause it was cheaper than local sources).
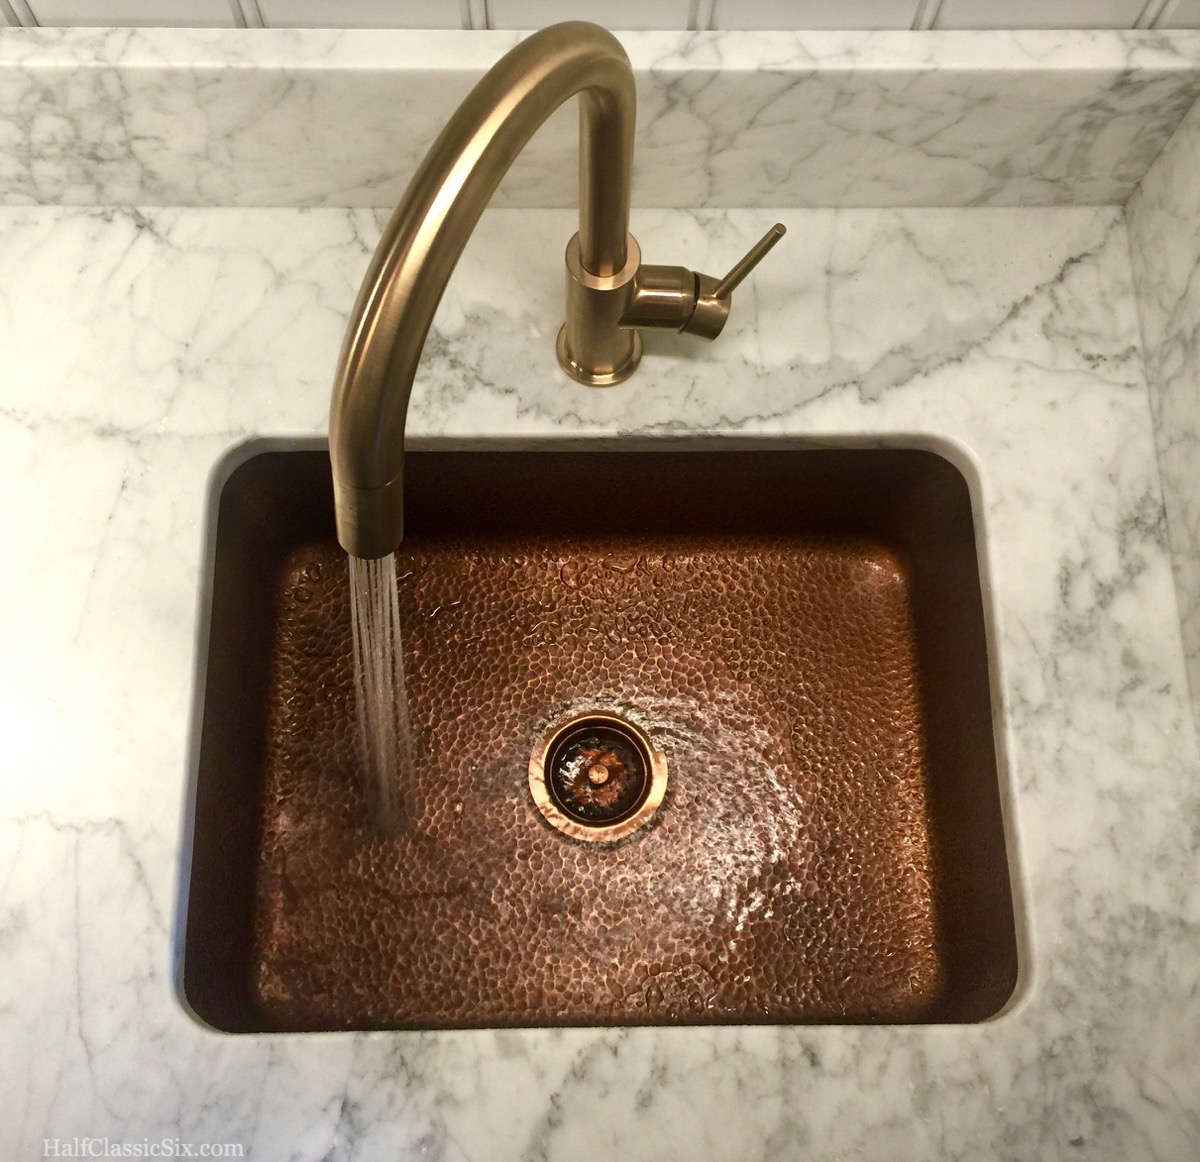
Another gratuitous shot of our copper sink and faucet.
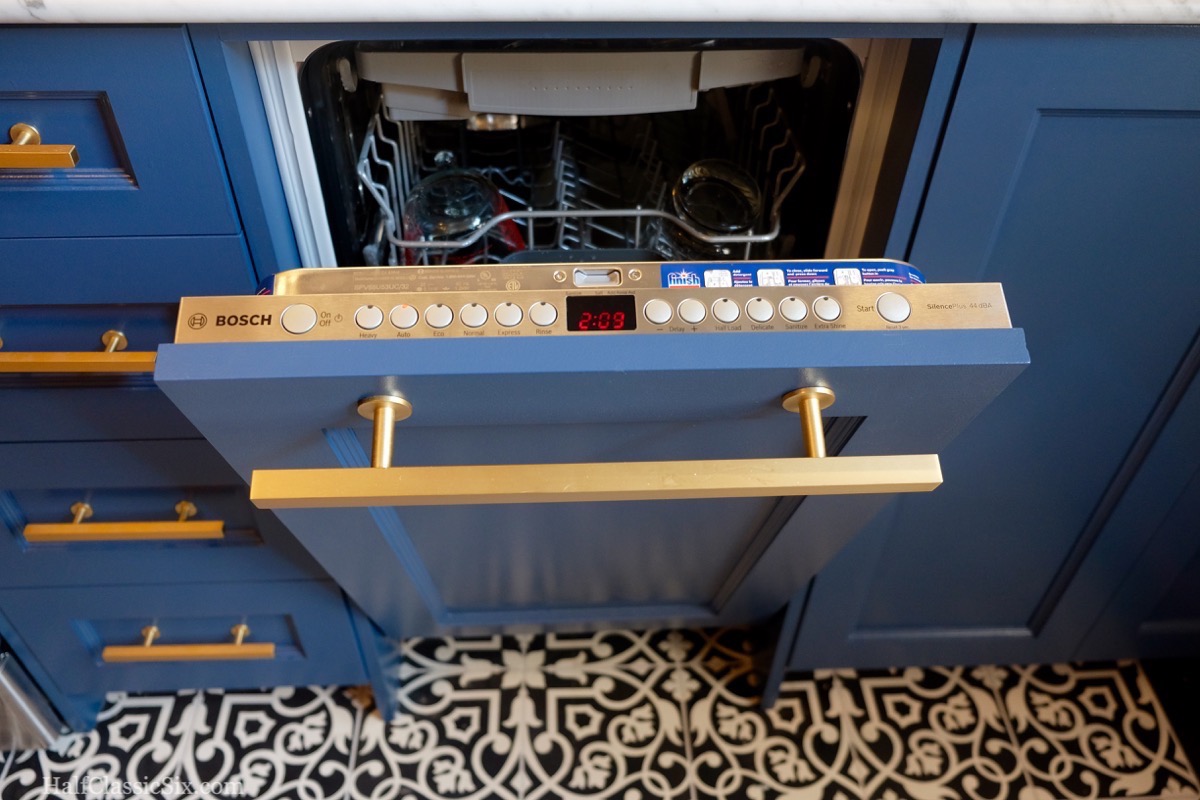
The integrated Bosch dishwasher is so quiet at 44 decibels, it is almost not noticeable.

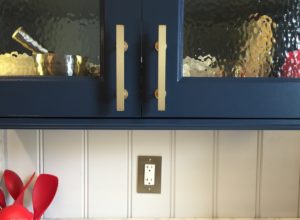
The brushed bronze switch and outlet plates are so lovely on the beadboard wall. [Source: Wallplatesonline]
OK, so I stood on a stepladder for this shot.
So there you have it! Our dream kitchen is finally finished!
In the end, it took about 20 months to complete our kitchen (about eight months of real work on my part). We hired out the floor installation and the countertop fabrication, but I did nearly all of the remaining work using vacation time and on weekends while maintaining a full-time professional job in IT. My workload as well as other life events got in the way as well as periods of absolute exhaustion which slowed me down. But the biggest delay in getting it done is that I am more meticulous (read “anal retentive”) than most others and I strive to achieve a higher level of finish quality than most people would ever care about. I wanted to do everything right, and to the best of my ability. I also wanted something you would never be able to buy from a store.
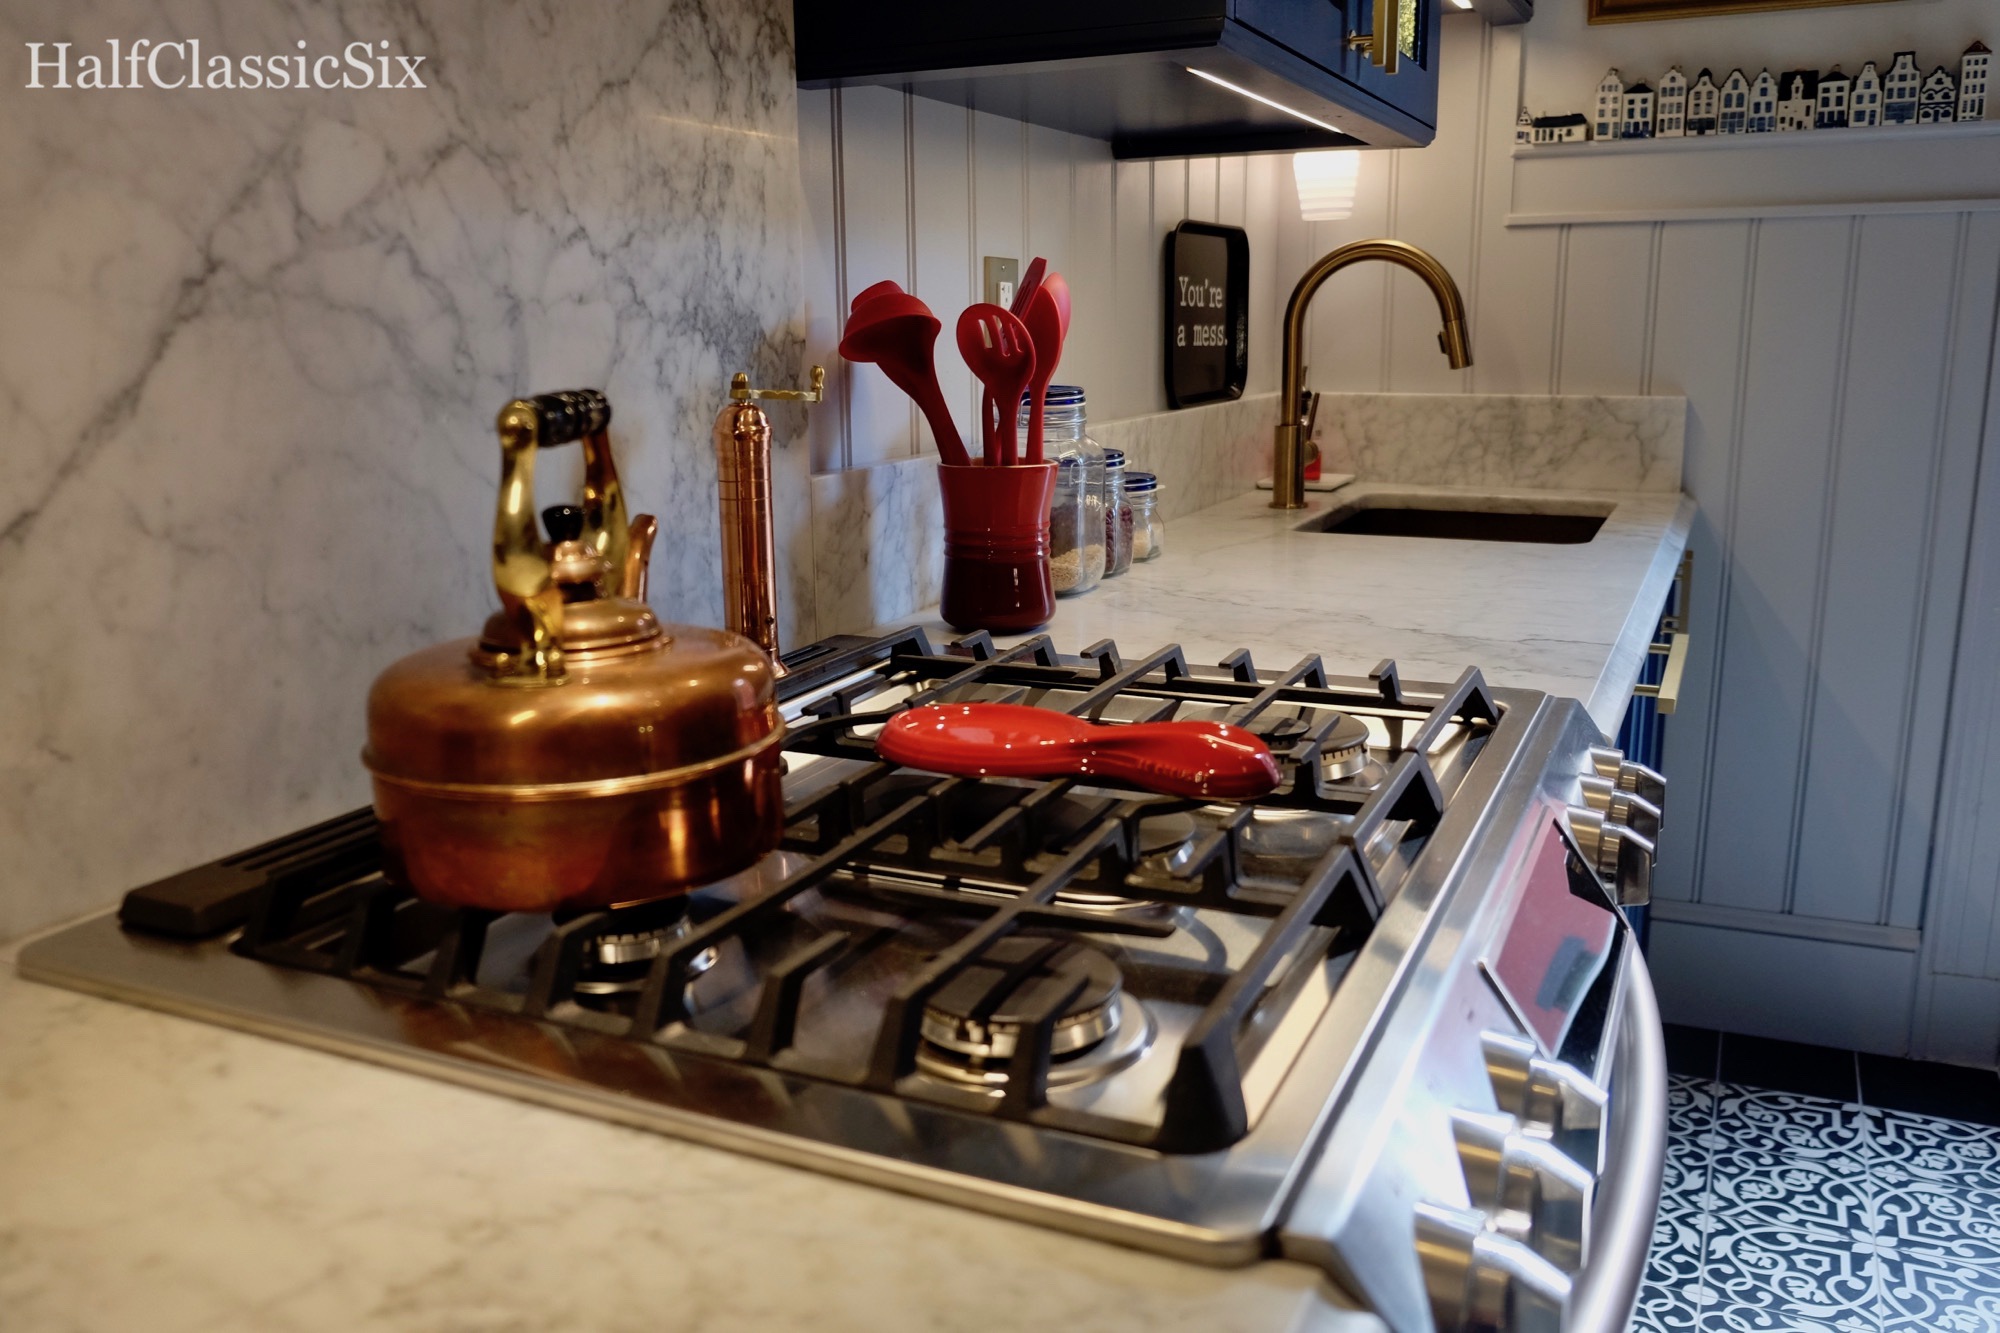
The stove makes our Simplex Teapot look even more fabulous.
For those who are curious about cost… Our final estimate before we got started was that it would cost around $35k. In the end, we wound up spending closer to $40k, which is really very reasonable for a Manhattan kitchen renovation. Had we hired this out, it would have easily been double that given the level of detail I expect, and I am certain it would not be as nicely finished. One huge benefit to doing the work yourself is that in the process of doing it, you discover ways you can refine what you are doing and take things to a higher level. Do I have any regrets? Absolutely not! It may have cost a bit more than we wanted it to, but the beauty of it more than makes up for what extra we paid.
Sources:
- Floor tile, Gypsy Black and White from Villa Lagoon
- Cabinets, Barker Cabinets
- Countertops, Honed Carrara Marble from a Big Box Store
- Cabinet door glass: Wholesale Glass Online
- Cabinet hardware, Lewis Dolin Bar Series
- Bead-board, Custom milled by Starke Millwork
- Sink, Sinkology
- Faucet, Delta Trinsic
- Custom drawer inserts, Orderly Drawer
- Under-cabinet lighting, Loox Series via Rockler (Discontinued)
- Interior cabinet lighting, Amazon
Appliances:
Paint colors:
- Cabinets, Stiffkey Blue, Farrow and Ball (281)
- Bead-board/Trim, Sidewalk Gray, Benjamin Moore (2133-60)
- Walls, Chantilly Lace, Benjamin Moore (OC-65)
- Ceiling, Tundra, Benjamin Moore (2133-70)
Side note: I wrote the entire post last week and was very happy with it, and then somehow I didn’t save it. This is the rewrite from my memory.


October 19, 2017
STUNN-ING. This is one of my top 3 favorite kitchens ever, it is so gorgeous. And God bless you for painting all those cabinets yourselves. I did a test door and gave up before the primer dried!
October 19, 2017
Thanks Alice! So glad you like what we did.
I sometimes wondered if I was a glutton for punishment when I opted to paint the cabinets myself. It was a huge undertaking to do in a small apartment. Hindsight tells me I should have sent them out for professional finishing.
— Lessons learned. 🙂
October 20, 2017
Devyn, the kitchen looks so good! It is stunning! Wow! Wow! It must feel so good to see your design dream come to fruition. Your ideas are so on point.
October 21, 2017
Thank you Stacy! It is pretty amazing to be able to have a vision in your head and then have the capability and means actually make it happen without compromise. Even more amazing is that there is very little I would do different.
This being the fourth kitchen I have renovated (and by far the most complex), I learned a lot about my abilities and limitations…. And apparently amassed enough power tools to be the envy of my building super. ☺️
November 19, 2017
OMG such a cliche but really GORGEOUS!!!!
you are an inspiration. i have been house hunting for over six months and am inspired by your kitchen not that i have the skills but so many wonderful tips and an inspiration.. love the colors and that stove
and isnt sonos fabulous!
November 22, 2017
😛 I so meant to respond on Monday…. Thanks! It is truly amazing to see it all finished, and I am certainly glad to offer inspiration. I can’t go into details just yet, but I may be doing another kitchen in a couple of years…. This one will certainly influence the next one. And, yes, we are totally sucked into the Sonos world…. Love that we can listen to the same thing everywhere.