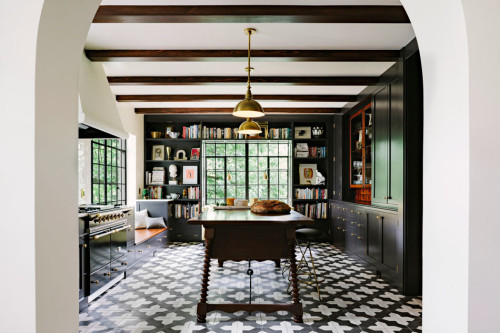
As we get closer and closer to finally starting our kitchen renovation after many, many, many delays, we are finding that there has been an unexpected benefit to having postponed our renovation for so long. That unexpected benefit is that with each delay comes continued insight to plan as it relates to materials resulting in a much more refined final look which we would never have done had we just gone with our initial plans.
This is even truer when it comes to the kitchen floor. I have now spent the better part of the past 15 months obsessing over what we want to do with our kitchen floor resulting in this flat plain of space undoubtedly having seen more changes in plans than any other surface in our home. This quest has led me to search high and low for various options, all with the hopes of a solution which would make my heart sing (thump?) with joy every time I walked into the room.
| Side Note: Sorry to interrupt this amazing blog post, but we are excited to share that this past weekend, we placed our order on-line for our Barker Cabinets. It took almost two hours to enter and then review each of the 21 cabinet components, but if all goes well, we will have our delivery by early February! |
The evolution of our kitchen floor began in July of last year (2014) before we had closed on our apartment. Because the room had formerly been a bedroom, we initially hoped to just pull the peel-n-stick tile, sand the floors, and paint them with porch paint. We then pondered installing a ceramic tile floor, but then I came across beautiful kitchens with stenciled floors, which put us back to the original plan only adding a stenciled pattern on top.
![Beautiful Stencil pattern on the floor (covering vinyl flooring) [<i>Source: <a href="http://www.brownacres.com" target="blank">Brown Acres</a></i>]](https://halfclassicsix.com/wp-content/uploads/2015/12/brown-acres-stencil-floor-500x333.jpg)
Beautiful Stencil pattern on the floor (covering vinyl flooring) [Source: Brown Acres]
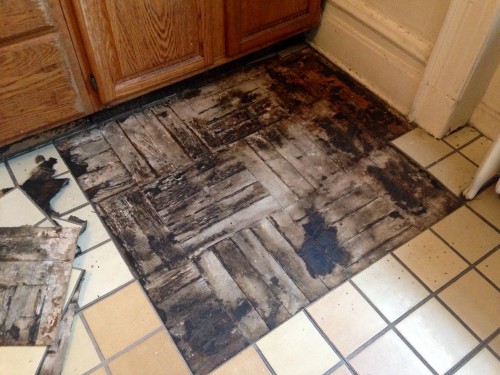
Only hours after closing on our apartment, we had the misfortune of discovering dry-rot under the kitchen sink. So much for salvaging our quarter-sawn oak floor.
Before moving into the apartment in late September (2014), we had the beautiful original floors throughout the apartment sanded and refinished. In the kitchen, we had them cut out the bad area, fill it in with new plywood, and then at the advice or our flooring guy, we had the entire kitchen floor covered in 3/8 plywood, glued and screwed down. It was difficult to see what was once a beautiful quarter sawn oak floor covered with cheap plywood. September rolled into October, and we pondered many options for the floor including: Trafficmaster Ceramica Peel-n-stick tiles with grout to mimic ceramic tile (too ugly); Marmoleum (nice, but not very elegant); a wood laminate floating floor (would look too “fakey” and have that weird hollow sound when walked upon); and then back to a painted plywood with a stencil. (I wrote a post about the different thoughts in October.) All of which struck few if any notes in my heart.
![Linoleum is a truly vintage option having been in production for more than 150 years. It is entirely possible that there was linoleum in many of the kitchens in my building 100+ years ago. [<i>Source: <a href="http://www.oldhouseonline.com/best-flooring-choices-old-house-kitchens/" target="blank">Old House Online</a></i>]](https://halfclassicsix.com/wp-content/uploads/2015/12/LinoleumFloor-OldHouseOnline-500x388.jpg)
Linoleum is a truly vintage option having been in production for more than 150 years. It is entirely possible that there was linoleum in many of the kitchens in my building 100+ years ago. [Source: Old House Online]
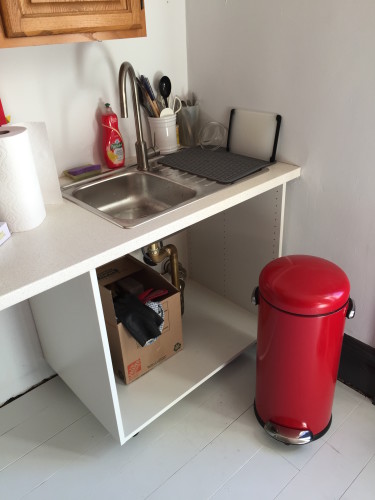
With that decision made, we moved forward in November with the floor decision we have today. Quarter inch plywood strips painted white. I had Mikes Lumber cut the plywood sheets into six inch strips, and put Yoav to work sanding the edges of the strips to create the illusion of boards once they were nailed down to the floor. Once we had the plywood strips down and painted white, we installed the temporary sink base, ordered our range and refrigerator and by the first week of December, we had a very temporary semi-functional kitchen again. It didn’t exactly make my heart sing, but I was generally satisfied knowing it was only for a few years.
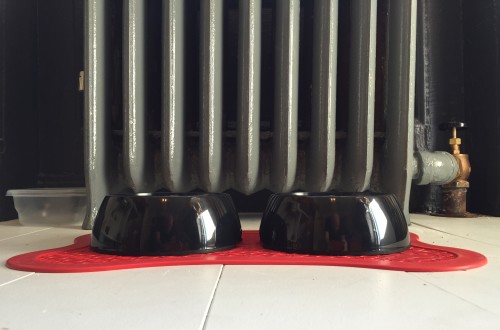
Our white painted floor in November of last year (with new dog bowls awaiting the arrival of Fritz). The floor was less than two weeks old and already I was seeing future maintenance nightmares.
Everything should be hunky-dory now yes? Hmm….. Not so fast….. In January, while searching Apartment Therapy, I saw a post about the new cabinets called SEKTION, which are the North American version of the METOD cabinets they sell to the rest of the planet. They had to create SEKTION to comply with our failure as a country to envision a future in Metric, as we continue to embrace our feet and inches. As I excitedly looked through the pictures I made a hugely disappointing discovery that they had chosen to pander to the bland North American palate (Sorry Canada) and instead of offering the frames in black/brown or white like the rest of the world, they instead offered hideous medium brown wood-grain or white. I didn’t want white…. And I really didn’t want hideous medium brown wood-grain.
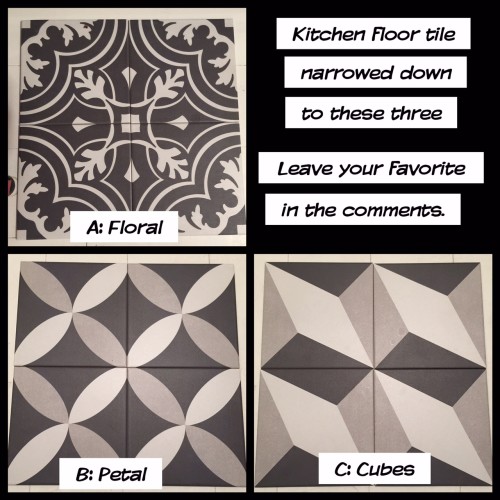
In February, I put this up on my Facebook page with the request for folks to vote for their favorite. In the end, it was close, but B won out.
Very shortly after my moment of devastation, Yoav and I began to realize that we were no longer planning a semi-temporary kitchen for just a few short years, but in reality, we were now designing a kitchen which we plan to live with for the next 25+ years. I knew then that the painted plywood strips we installed only a few months before would not last long enough and I began the quest again to find the perfect kitchen floor. I had long been deeply in love with handmade cement tiles (also known as encaustic tile, or Cuban tile) but the cost was just far too much for us to justify in our kitchen (I even included a different shot of the top photo in a post from last January). Then I was in Home Depot on 23rd Street in January and I stumbled on the Merola series of tile (above). They had a look just like cement tiles, they were made in Portugal, and they were only $1.97 each! I could definitely hear a few chords chiming away in my heart as I ordered samples of three different designs and put them on the floor in the kitchen to see how we liked them. I also posted the photo below to my Facebook to get votes and feedback. The results? It was a close call, but with more than 40 votes, “B” took the lead and held on to it. All three of these would be a very bold decision.
![We were elated when we discovered <a href="http://www.semihandmadedoors.com/" target="blank">SemiHandmade Cabinet doors</a> for IKEA cabinet frames, but ultimately the limitations of fixed sizes forced my to search for other options. [<i>Source: <a href="http://sarahshermansamuel.com/kitchen-before-after/" target="blank">Sarah Sherman Samuel Blog</a></i>]](https://halfclassicsix.com/wp-content/uploads/2015/12/SemiHandmade-kitchen-by-sarahshermansamuel2-455x500.jpg)
We were elated when we discovered SemiHandmade Cabinet doors for IKEA cabinet frames, but ultimately the limitations of fixed sizes forced my to search for other options. [Source: Sarah Sherman Samuel Blog]
OK, back to the floors…. As we (I) did endless research on what I wanted our now long term kitchen to be, and after finding and buying sample tiles which mimicked the cement tiles I so loved, we finally reached the point where we knew it was going to be tile. But after living with the samples in the kitchen for a few months, we both began to feel that all three styles looked a bit fakey and cheap. The notes in my heart were becoming more off key each day. Since real cement tile was definitely out of the budget, I once again began my quest for the perfect tile. That is how we ended up with two inch white hexagon with black accents by my post on the floors this past summer. My heart was pretty happy with this decision. I knew I had to live within reason and budget, and I felt that I could be completely OK with it in the long term. Yoav was onboard as well. Finally, we had made a decision on a look we both liked, and a material which would stand the test of time (or had we?).
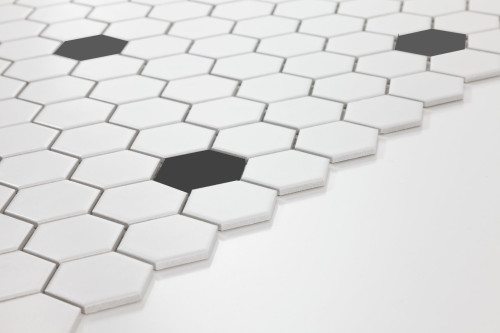
Since real cement tile was definitely out of the budget, we ended up deciding to go with two inch white hexagon with black accents. Classic and timeless.
This is where the unplanned delays in starting our kitchen renovation came into play. Last spring, we planned to start working on it in July, then August. By June it had been delayed until October, then November. Then in October we decided that we needed to hold off until after the holidays. Each of these delays resulted in refinements and shifts in our initial plan. Mostly because I am known to spend countless hours (days?) searching far and wide (mostly on the Internet) for what makes my heart sing.
By September, the hexagon tiles were beginning to not sing so loudly for either of us….. The notes were beginning to be quieter and my commitment was waning…. Looking back at the now dozens of different flooring options, materials and patterns we(I) looked at, we both realized that none of them really make either of our hearts sing…. Except for this one particular pattern of cement tile.
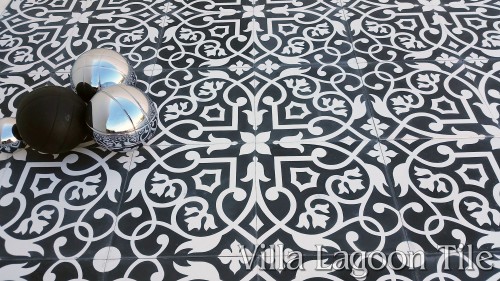
“Gypsy” in Black and White from Villa Lagoon Tile
Over the course of this whole year, I found myself returning to not just cement tile websites, but this cement tile, at this website, over and over…. And every time I would look at the picture, my heart would sing loudly and with joy…. As it turns out, every time I would show this to Yoav, his heart also would sing loudly and with joy. But there is one major obstacle, the cost…. This amazing tile is expensive when compared to the other options we were looking at. But for shits and giggles, I ordered a sample anyway.
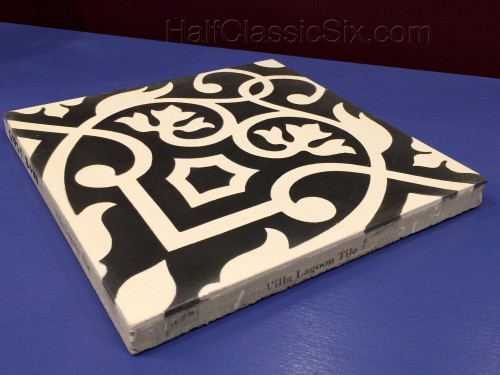
Our sample tile, Black and White “Gypsy” from Villa Lagoon Tile
The sample arrived, and the music got louder for both of us. We knew then that we had to find a way to make it fit into our budget as this was to become the showstopper of the kitchen. I did the calculations and the cost of the tile itself isn’t such a scary thing…. However, it turns out that cement tile is not nearly as simple to install as ceramic or even porcelain tiles. There are several more steps involved and instead of it taking 2-3 days, it will take 5-6 days. As such we braced ourselves when we researched and put out requests for quotes to do the job. Upon receiving quotes for installation back from three different installers this past week, hour hearts sank and our dreams seemed to sink as well.
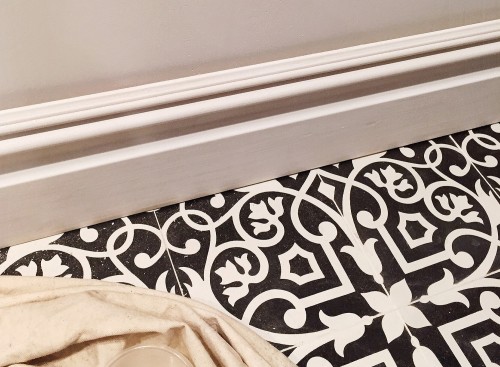
This example of our dream floor recently discovered on Curated House blog. She used it in her laundry room and it is stunning!
All told, our 170 square foot room will end up costing a bit under $50 per square foot installed. Yep, that’s right, an astronomical sum (to us) to have the one tile which makes our hearts sing the loudest…. The floor would end up being more expensive than the cabinets and marble countertops combined. The floor would ultimately be the one BIG splurge we do in this renovation, and in the end, after crunching numbers, it would account for about a quarter of our total renovation budget.

What we love most about this pattern is how there are really two patterns embedded within each other. And, since there is only one source… We aren’t likely to see it everywhere we go.
This left us with much to ponder, but after an evening of careful thought and consideration, we came to the conclusion that knowing we will have a floor we love and brings us the most joy will be worth it in the long run. We are installing this floor with the intent that we will be in this apartment for a very long time and sometimes you need to just take the leap and get what you want… And I can say that after a lifetime of making compromises due to budgetary constraints, it feels good to actually get what you really want.
Footnote: Blog posts have been somewhat sparse this past few months as projects have been somewhat sparse. However now that we are ramping up the kitchen renovation…. You can expect to see more posts! Yay!
Another footnote: This post was briefly posted earlier today, however there was a code issue requiring me to delete and re-post. Sorry for any confusion.





0 Comments