The countertops are in! And they are AMAZING!….. But you will have to wait a little bit more for the full reveal… Later this week, I will be posting a full marble countertop and backsplash reveal…. And it will be FABULOUS! In the meantime, let me catch you up on our now still unfinished, but finally functional kitchen! This is huge! After 130 days (a third of a year!) without running water in our kitchen, we got hooked up this past week. And after sealing our countertops on Saturday, we began to move things into our kitchen on Sunday, including the unpacking of some of my daily dinnerware which has been boxed up since January of 2014 when I packed up my Hell’s Kitchen apartment.
In my last post (almost a whole month ago), I did a list of To-Do’s and Ta-Done’s. I am happy to report that many of the To-Do’s have now been moved over to the Ta-Done list. So, for this progress report, I am going to go over all the Ta-Done’s I have accomplished this past month, and then what’s left for phase I of our three phase project.
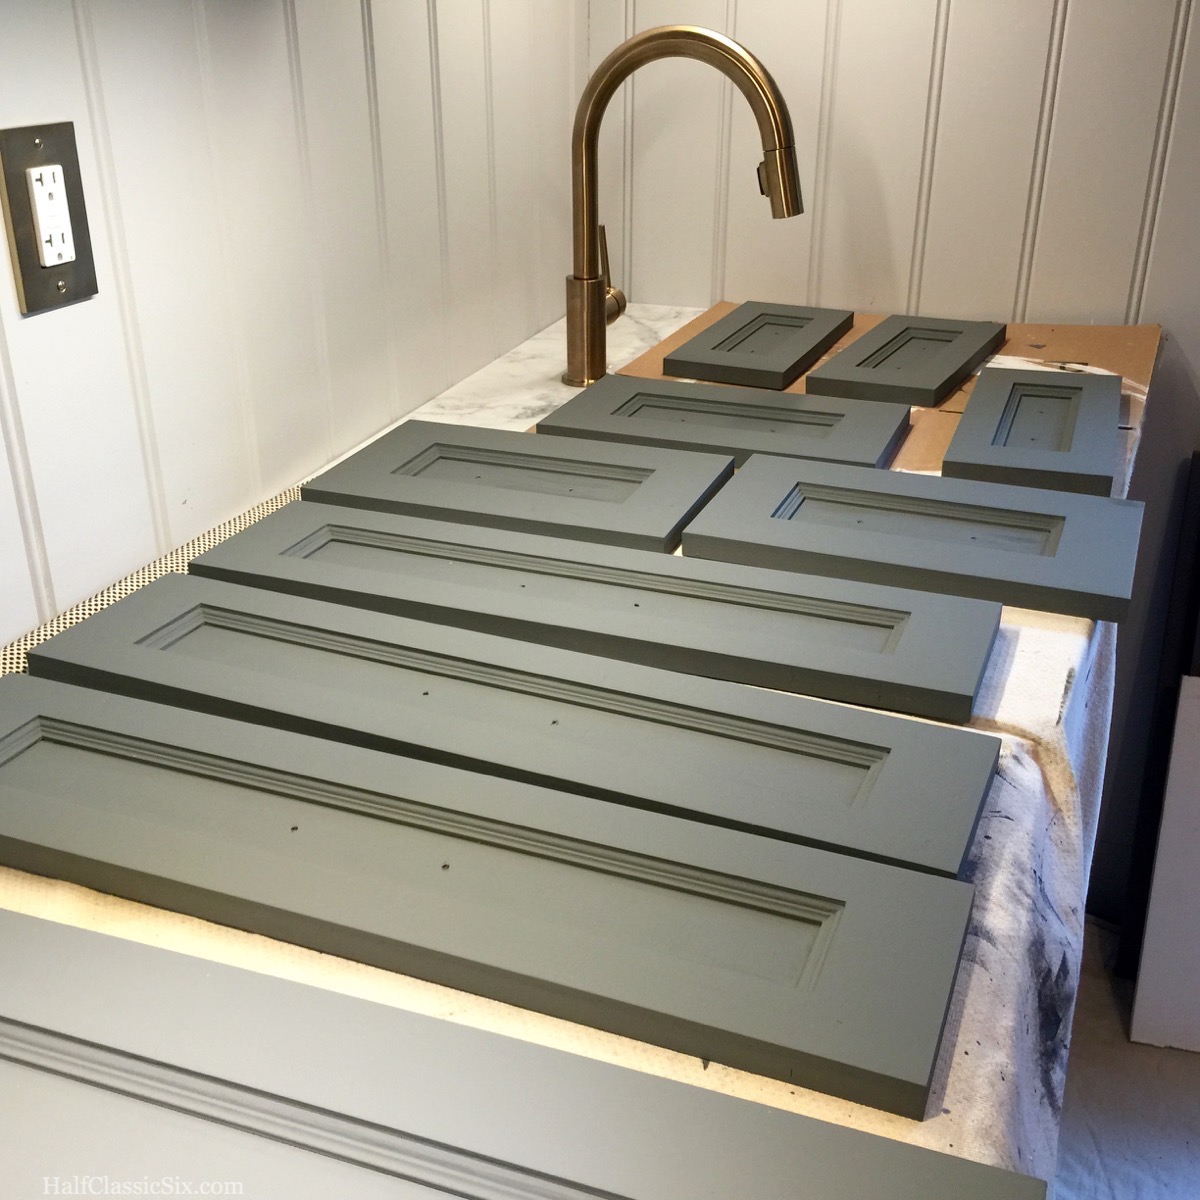
Second coat of Farrow & Ball Dark Tones Undercoat and Primer is done and awaiting the first coat of finish paint.
Priming and painting the cabinet drawer fronts and doors – I am thrilled to say that the base cabinet drawer fronts and door are done! And installed! I also primed and painted our integrated dishwasher panel. Priming and painting all of the cabinet parts has been a huge task, and I will say it is not for most people. I started out gung-ho and got a lot done right away… And then I began to grow weary of all the work, especially the door fronts and drawer fronts which need to be primed and painted on both sides as well as the edges. So much priming and paint, oh my….. So where are we now?

Second coat of Farrow and Ball, Stiffkey Blue (No 281) applied and drying. My paint job is imperfect which is okay because I am about the same level of imperfect!
Well, about six weeks ago, after having already painted nearly 90 individual pieces, some on all sides, I needed to take a brief break from painting cabinets. I was just over the tediousness of it all. Then, about two weeks ago, when the first sections of marble were about to be installed, I got a second wind and began to make some real progress.
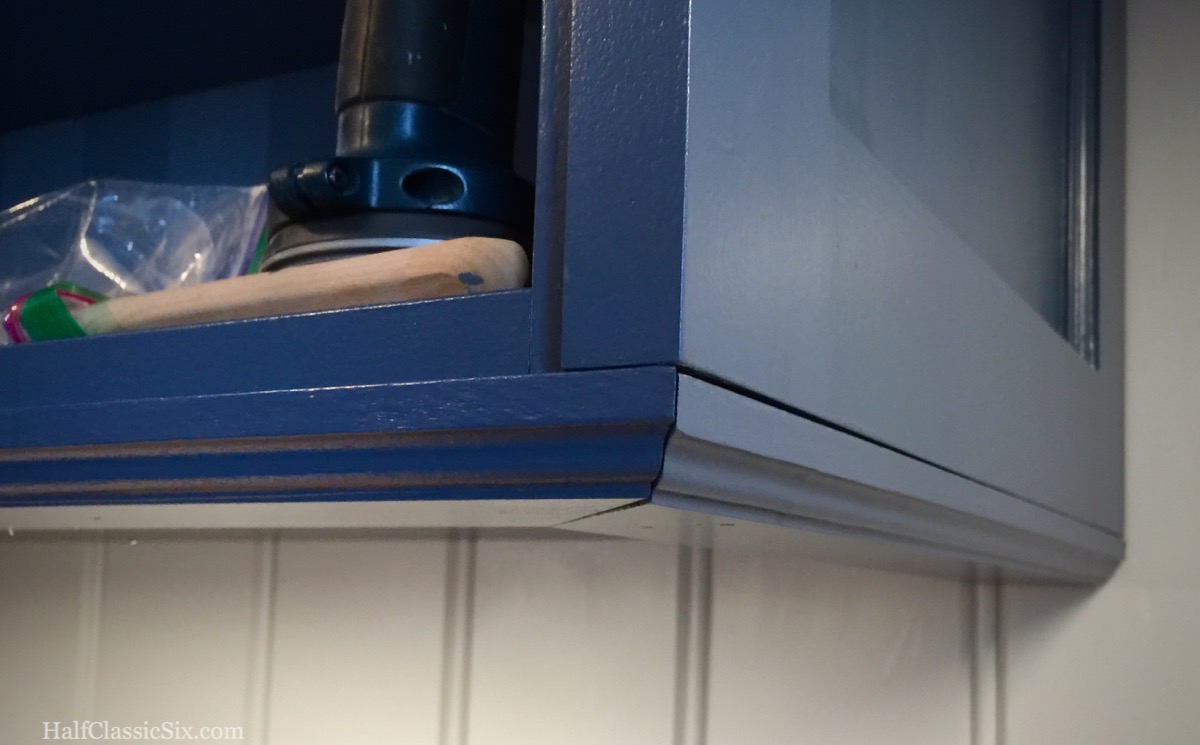
I created this millwork from stock poplar for the underside of the upper cabinets with my router. It does a fantastic job of hiding the under-cabinet lighting.
Upper Cabinet Moldings – In my last post, I had started the work on our crown molding for the upper cabinets as well as the under cabinet trim (to hide the under cabinet lighting). I left off with my pieces of molding in a state of having been primed and awaiting two coats of Farrow & Ball – Stiffkey Blue (no 281). Within a few days I had both the under cabinet molding as well as the crown imperfectly installed.

The crown molding for our cabinets was chosen for its simplicity. It is very appropriate to the period of our 1910 home.
After months of searching for just the right look, I am very happy we chose to stick with a simple vertical crown and not go over the top on the style. Looking back on period kitchens, they didn’t have any where near the over the top moldings usually found in today’s “period style” kitchens. I managed to find this pine molding online from Home Depot for a good price and free shipping!
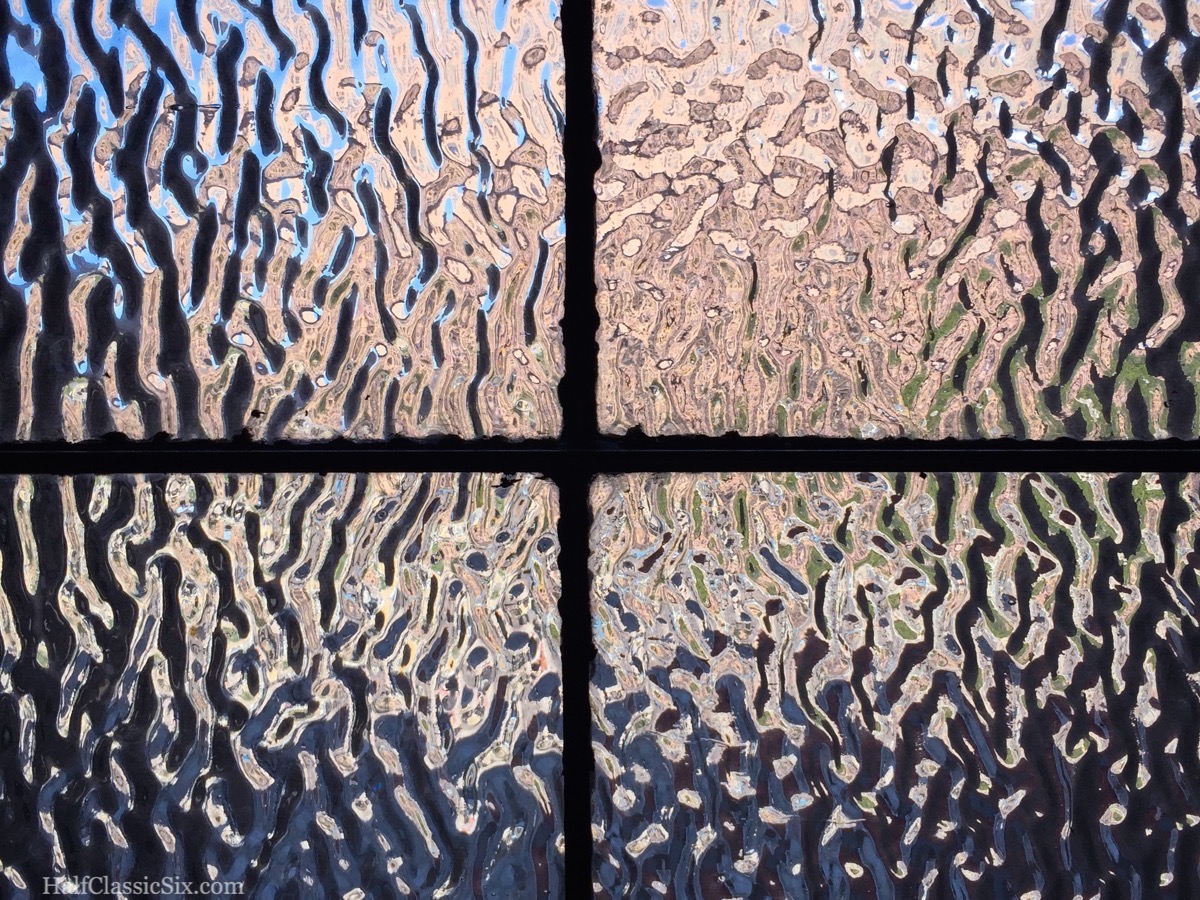
This is some of the textured glass in our stairway landings and this look was inspiration for our choice of cabinet glass.
Order glass – Oh my…. What a frigg’n nightmare ordering glass has been. I will go into the details in a few weeks when I do the glass door reveal post, but let me tell you getting textured glass has been much more challenging than one would think. Fortunately, we are expecting delivery by next week.
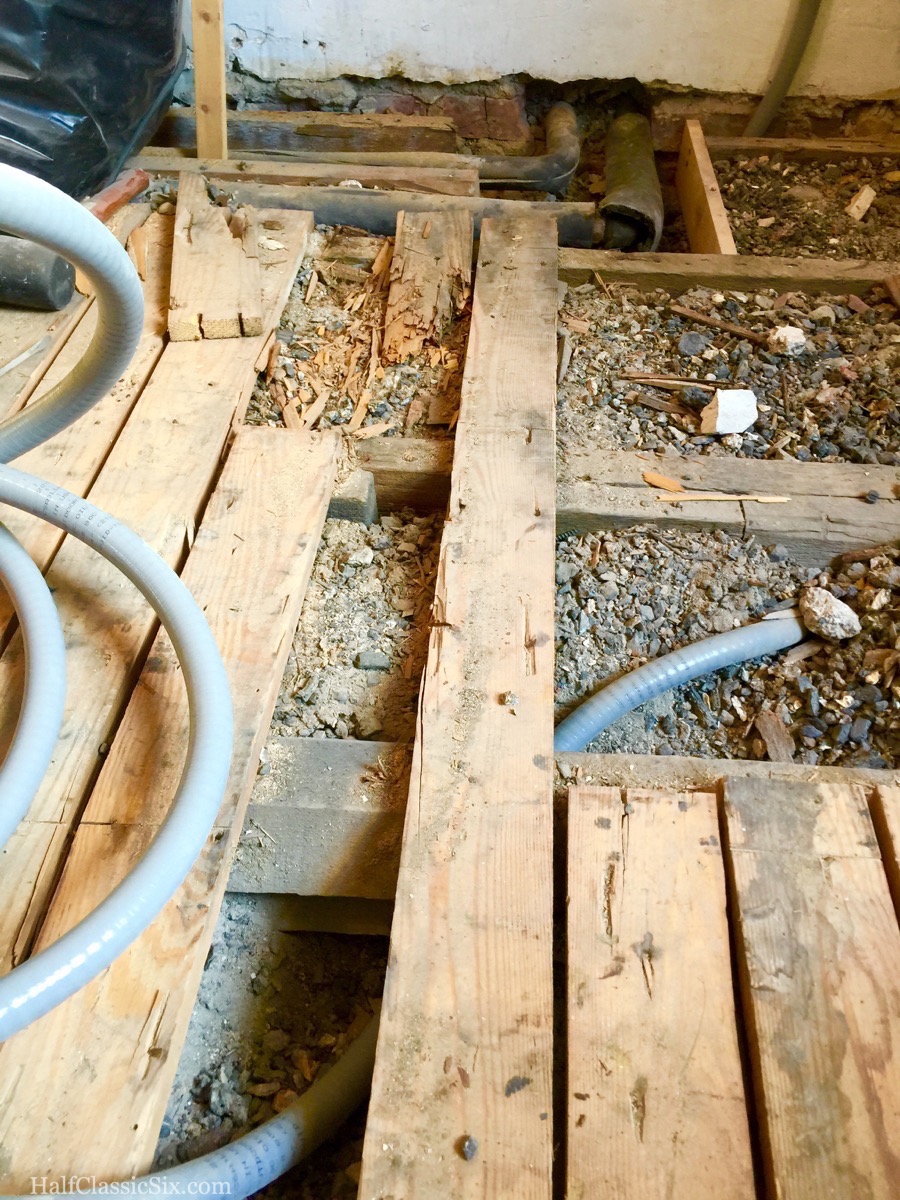
This shot from the end of February shows how I ran the plastic conduit under the floor joists to run the water line from the sink to the refrigerator across the room.
Wire and water Line Runs – When we pulled up the old floor, we ran a piece of flexible conduit under the floor joists from one side of the room to the other which will allow us to run wiring and the water line for the ice-maker across the room seamlessly. Now was the time to finally put my good idea into use and it turned out to be only a partial success, and a difficult one at that. The conduit we ran, was a heavy duty flexible plastic, and I was sure it would be super simple to run a fish-tape through it and pull the low voltage cabinet lighting wires along with the water line for our icemaker through the tube, eliminating any surface mounting.
Unfortunately, it wasn’t so simple after all. It turns out that when I was running the tubing under the floor joists back in February, we had to navigate between blocking which supported the joists resulting in an “S” pattern in the middle of the room.
I didn’t think it would be a big deal, and I was so wrong. My first attempt to feed my fish-tape through resulted in going about half way and then a dead stop. So, my next attempt involved using our shop-vac to suck a string through so I could attach the fish-tape to the string. The process of sucking the string through actually went fairly well…. But once the string was in there, we couldn’t pull it through without the vacuum. My brute attempt to pull the high-strength string resulted in frustration and a semi-painful snap when the line broke as I was pulling with all of my weight. Ugh…. What to do.
A bit of online research turned up wire pulling lube (which my father later told me is often referred to in the field as wire snot). It is super slippery and slimy…. We squeezed the wire lube in both ends, I used my air blower (attached to my pancake compressor) to attempt to blow the lube further into the tube…. And the string was again not moving, and again snapped in two.
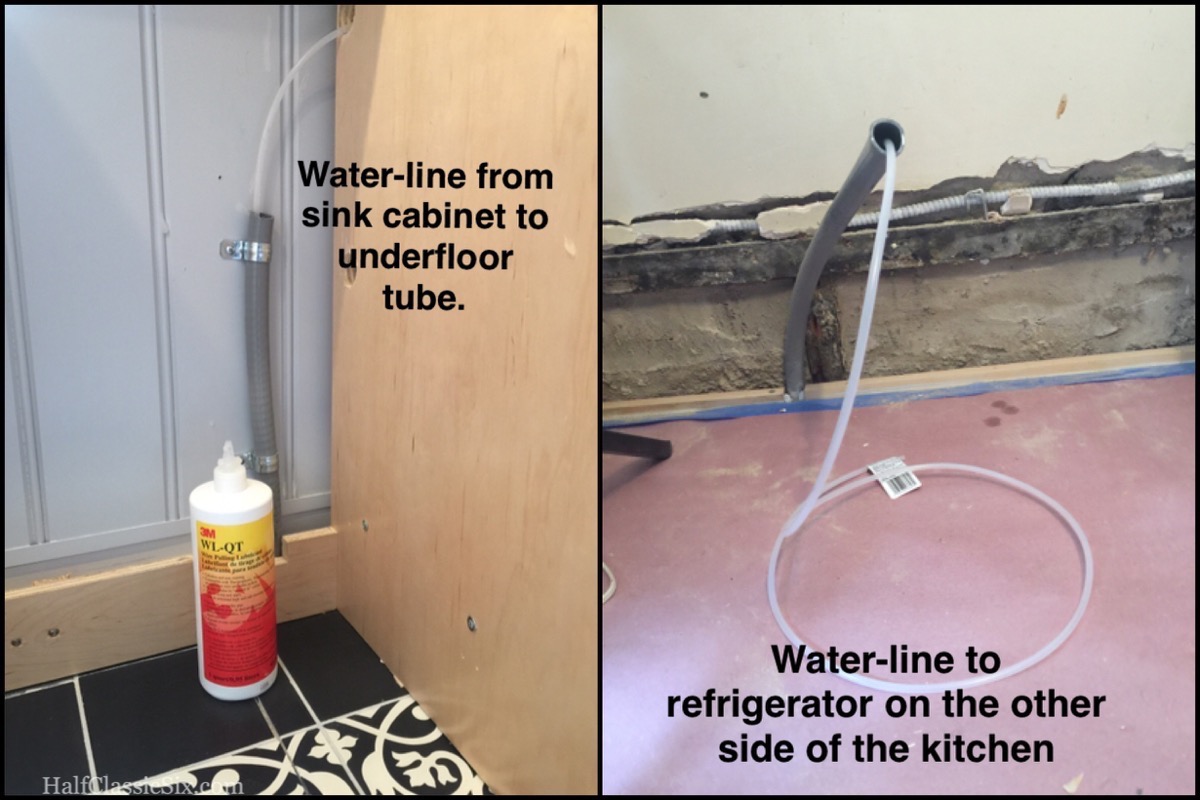
In order to get water for our ice-maker across the room, I installed this gray conduit under the floor back in February. Now that it was finally time to run the waterline, it turned out that getting the water-line under the floor to the other side of the room was a much more difficult task than we expected.
At that point, it was starting to become clear to Yoav and I that we were not going to be able to use the underfloor tube as planned. While I was thinking that if I could just get the water line through, I could figure out the wiring somehow, Yoav came up with the brilliant idea that we could run the wire across top of the picture rail on the window wall and it would be almost invisible. This idea never crossed my mind because I was so hell bent on routing the wire under the floor.
So, with a ton of lube squeezed into the tube, I slowly fed the PEX water-line into the opening behind where the dishwasher will be. The lube must have helped, because after what seemed like forever, the end of the water-line magically appeared on the other side of the room. And when the two of us pulled it back and forth, it slid through very easily. Woo Hoo! Partial Success! We will have chilled water and ice cubes galore coming soon (ish)!
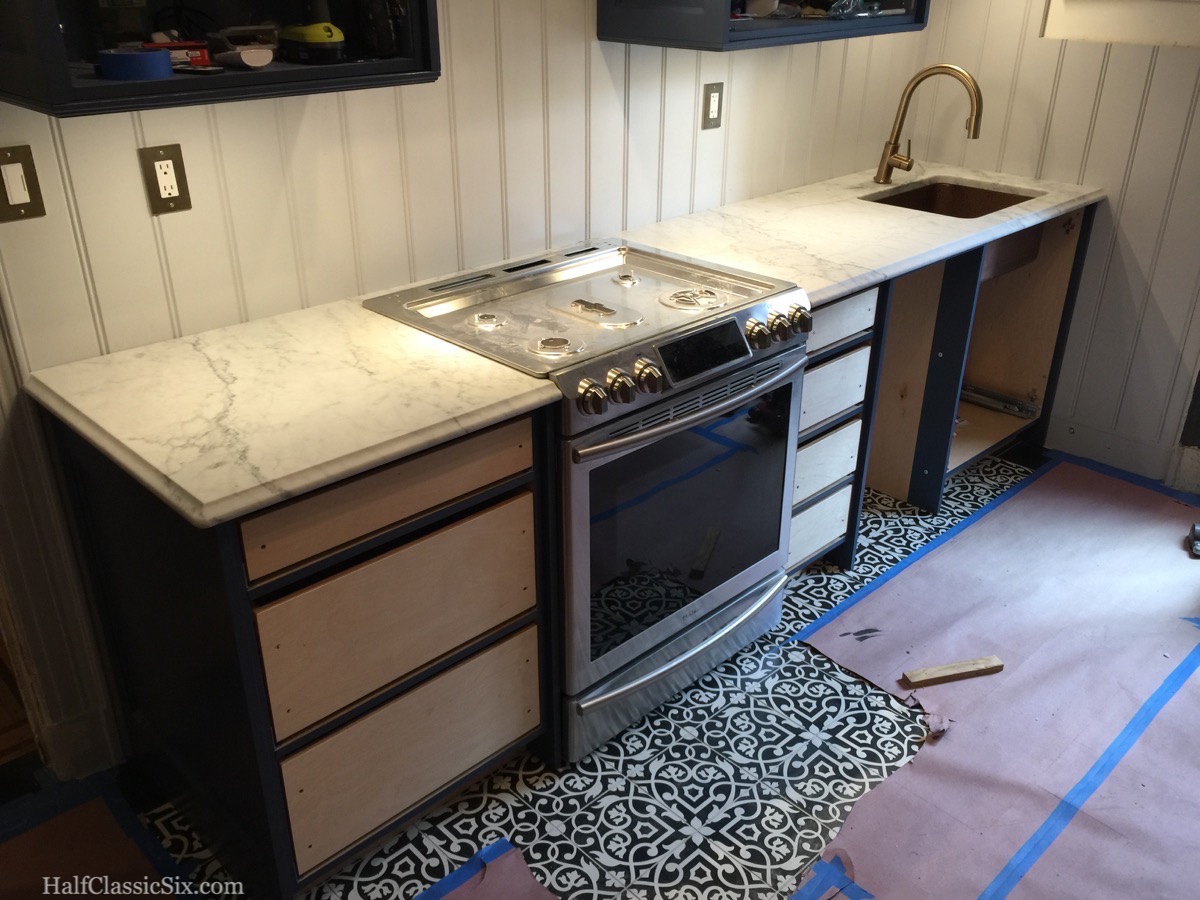
The first of a two part install on our marble countertops completed. As soon as the installers left, I temporarily stuck the faucet in the hole to get an idea of what was to come.
Countertop Installation – Two months after we paid for our countertops followed by two separate trips out to two different towns in New Jersey on two different Saturdays, the countertop installers arrived and completed the first of two installation jobs. They installed the countertops on both sides of the stove, as well as a small sliver behind the stove. They also installed our copper under-mount sink.
I was able to work from home that day, and Yoav and I watched as three men hauled the three pieces of beautiful marble up to our apartment (fortunately, the biggest piece fit in our elevator). It took them about ninety minutes to transform our kitchen. Once they left, we both felt we reached a huge turning point in our renovation project. When they arrived, we had a collection of boxes lined up against the wall, and when they left, we had what looked like a kitchen. Yoav and I had giant grins on our faces as we stood there and repeatedly said, Wow…. Wow…..
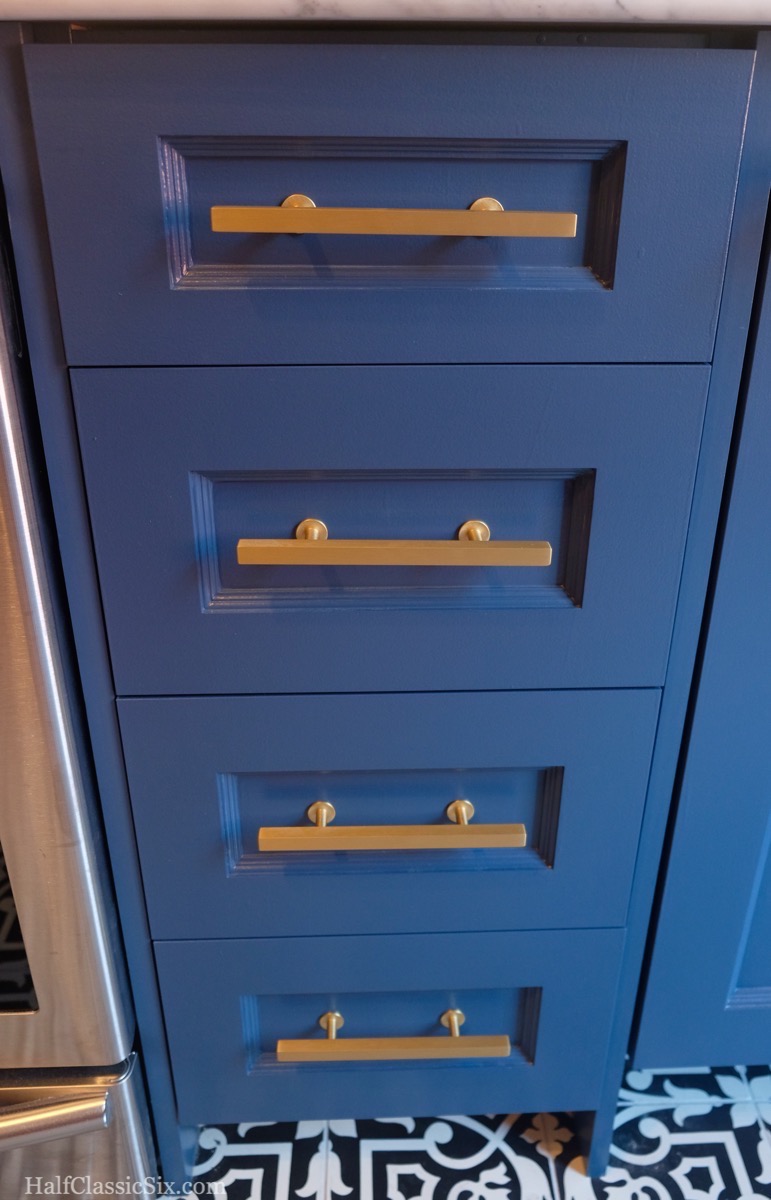
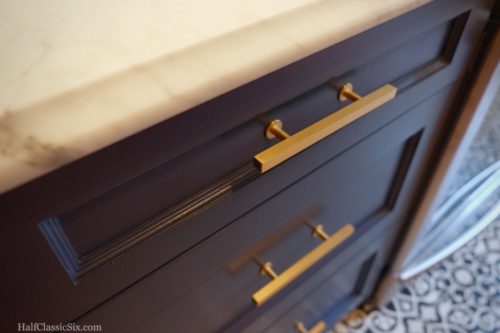
Drawer fronts installed…. Farrow & Ball – Stiffkey Blue with Lewis Dolin Hardware in brushed brass on our Barker Cabinets. One of the things I love the most about Barker Cabinets, is that I was able to order our drawers in 1/4″ increments. This allowed me to order a 13.75″ wide drawer cabinet, maximizing our storage without compromise.
Install base cabinet drawer fronts and door fronts – With the countertops in place, I quickly finished up the painting of all the drawer fronts, the dishwasher panel, and under sink doors. Yoav had just left for the week for work, and once I had the first drawer front installed, it was probably less than an hour later that I had them all installed.
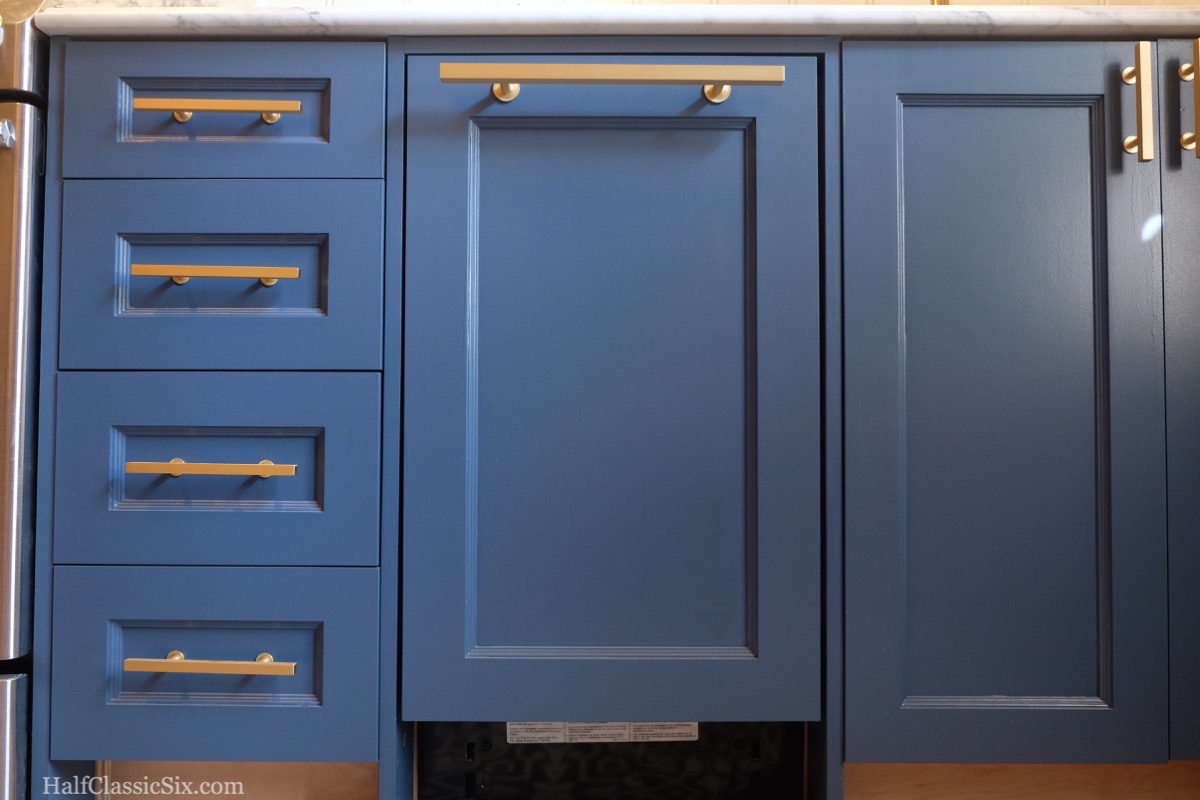
At the last minute, we decided to switch from a stainless steel front to an integrated panel dishwasher and we are so very happy we did.
The last item on my To-Do list from my last post….
Installing the dishwasher – I hadn’t expected to be able to install it so soon (for some reason which I cannot explain), but everything lined up just right. Our replacement panel arrived shortly after my last post, and once the countertop was in place, I realized I had no reason not to attach the door panel, and then install the unit into the cabinet base, threading the water supply and drain hose through the cabinet under the sink in time for our building Super to hook up the next day.
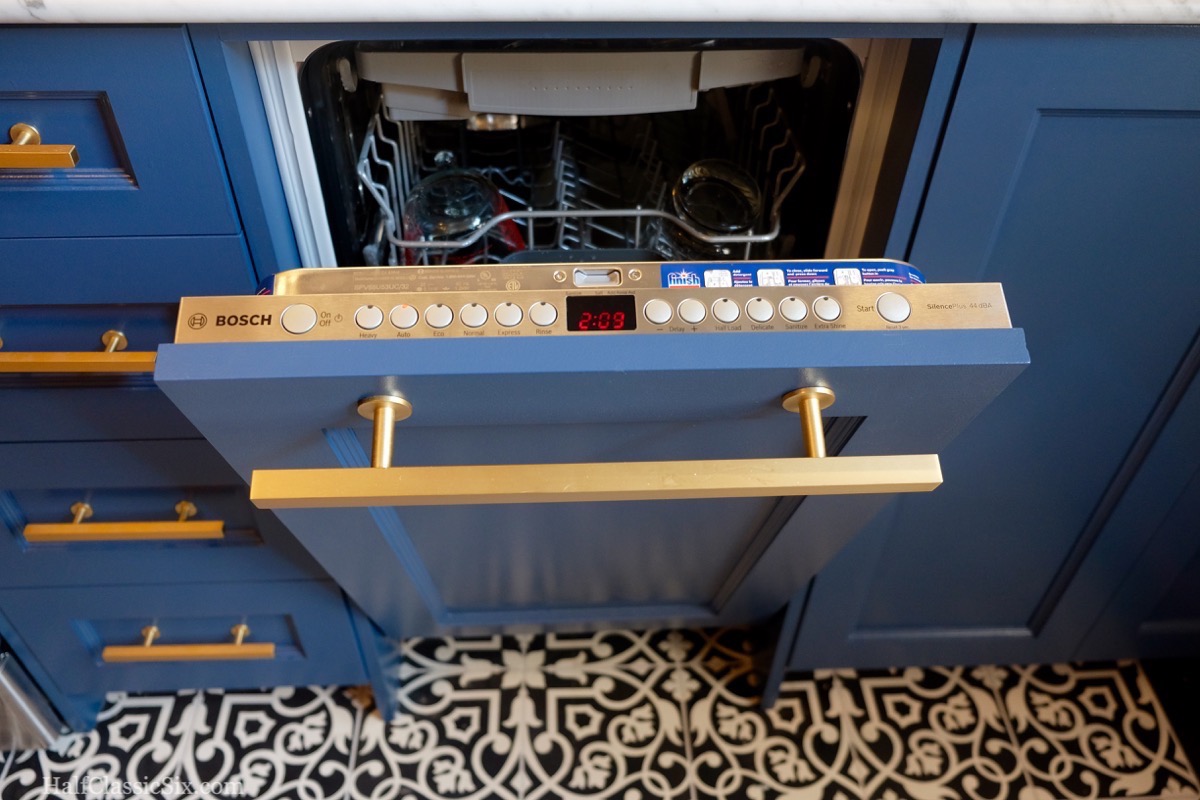
First load of dishes in our Bosch SPV68U53UC … And so quiet. At 44 decibels, I had a hard time hearing it running. The pull bar matches all of the rest of our Lewis Dolin Hardware
Our original plans were to go with a an 18″ model from Bosch with a stainless steel front, but when I looked at the plan for our base cabinets, all lined up with the stove and dishwasher, I realized that going with a stainless front on the dishwasher would break up the entire line of base cabinets too much between the stainless and painted finishes. Literally, at the last minute, just when we were in the middle of placing our order for our dishwasher, we switched to an integrated front panel model by Bosch. It worked out perfectly because they were on a rare sale for $200 off list, and between the custom door front and ordering the matching door pull to coordinate with the rest of our cabinets, we ended up spending only about $60 more than we originally planned. No regrets! For the first time in Yoav’s adult life, and only the second time in mine, we have a dishwasher! And wow is it beautiful!

Our building Super prides himself on neat and orderly plumbing hook-ups. Given the amount of things he needed to hook up, I think he did a great job.
Plumbing Hookup – With the sink being installed when the countertops installers were here, and the dishwasher installed into the cabinet base, it was time for water hook-up. I had quickly prepared to arrange for our sink and plumbing hook-ups with our building Super shortly after the countertops were in place. I don’t mention our building Superintendent very often, but as with every co-op in New York City, having a good relationship with your building Super can make or break your project. We are very fortunate to have a great Super who has been with the building for more than 20 years. He knows this 106 year old building better than anybody else, and he has been a huge resource in my planning for our renovations.
![Running water for the first time in 130 days! Such a good feeling. [<i>Source: Faucet - <a href=“http://www.homedepot.com/p/Delta-Trinsic-Single-Handle-Pull-Down-Sprayer-Kitchen-Faucet-in-Champagne-Bronze-Featuring-MagnaTite-Docking-9159-CZ-DST/203155724” target=“blank”>Delta Trinsic Series</a>, Sink from <a href="http://www.sinkology.com/kitchen-sink/renoir-undermount-copper-kitchen-sink/" target="blank">Sinkology</a> </i>]](https://halfclassicsix.com/wp-content/uploads/2016/06/HC6-Prog-Rpt-10-17.jpg)
Running water for the first time in 130 days! Such a good feeling. [Source: Faucet – Delta Trinsic Series, Sink from Sinkology ]
In all, I can say we have made a huge amount of progress this past few weeks. I have moved a lot of my To-Do’s to my Ta-Done list and with only the completion of the upper cabinet doors, and a few other minor items, we are sitting at about 85% complete on phase I.
This really is our kitchen! It really really is!
Next post…. The marble backsplash is in! Get ready for a full marble installation reveal! It is Amazing!!!! Also, a look forward to what is left for Phase I and our plans for phase II (the other side of the room).


0 Comments