[Photo: While waiting for our train back to New York City after approving our slab of marble, we took in the beautiful scenery of Edison, New Jersey.]
Holy crap! I just realized I haven’t done a post since May 3rd! That would be three weeks in which I am confident you have been doing nothing but checking the internets on the hour for an update on our kitchen… Or maybe you have a life and cannot be bothered checking for updates but you still want to know about new stuff. There is a solution, plug, plug…. In the left column you should (if you haven’t done so already) sign up for email notifications of new posts. (I promise you will never receive unsolicited spam from me, nor will I ever share your email address, ever.) End of plug. OK, so it has been three weeks, and I can say that things did happen! Actually a lot happened, just not all related to our kitchen. Progress has felt like it is moving at a snails pace, but it is still progress nonetheless.
For this progress report, I thought it made sense to go over just where we are with our sink wall (phase 1). I will start with what I am calling the Ta-Done list. A list of what was accomplished this past three weeks. Then there is the To-Do list, a list of things we still need to do before we can have such luxuries as running water and the ability to boil water.
The Ta-Done list:
Two days after my last post, I got a phone call from the stone supplier that a single slab of honed Carrara had mysteriously appeared and was available for inspection, so, three Saturdays ago, Yoav and I schlepped out to Edison, New Jersey to take a look. We got up early and made our way down to Penn Station to catch a NJ Transit train to Edison, about 36 miles away. Once we arrived, we took a $6 cab ride the mile and a half to the stone supplier.

This was the slab that mysteriously appeared from nowhere in Edison. It worked out that we both fell in love with it, especially the veiny area just right of center bottom.
This place is quite the operation. It is HUGE! They got us started, and we were lead by a very nice woman into the warehouse to view our slab. Upon seeing the slab, my first thought was one of concern about the fact that it is small. The slab is 42 square feet, and we have 33 square feet of countertops to cut out of it. That my friend makes for a challenging task of figuring out how to lay all the parts out as there is not a lot of room to fit all the pieces in and there are blemishes and scratches to work around.

Detail of the veiny area we hope to cut out for our slab on the wall behind the stove.
My second thought was….. Wow, what a beautiful piece! The majority of the slab looks like any other Carrara slab, but in the lower middle was this really lovely section of veins which I immediately thought would look fantastic on the 30″ tall slab we are putting on the wall behind the stove. Since this was the only slab of honed they had available and it could be weeks before another one came in, we had little choice other than to say yes to this one. Once approved, we headed back to the city… Our little round trip to Edison wound up costing more than $60 in train and taxi fare, just to go there and tell them yes. Fortunately, we were there and back in only five hours (for 20 minutes of actual time at the stone supplier). As for the rest of the weekend, not much happened in the kitchen beyond a coat of paint on the 17 shelves for the upper cabinets. We had other obligations during the weekend, and I was admittedly mentally and emotionally exhausted from all the time spent working on the kitchen nearly every weekend since January with only one or two days of rest in the interim. Time for a vacation….

Seattle skyline in the background, we took the water taxi from downtown to West Seattle for dinner with a view at Salty’s.
Vacation is exactly what the doctor ordered and exactly what we did! To celebrate our second wedding anniversary, we spent several days in Seattle. Why Seattle? Well, I spent about a quarter of my life there beginning in the late 80s until I moved to Chicago in 1999. I have a lot of ties to the city, and although I always had ambitions of living in New York City, Seattle will always have a place in my heart. This being Yoav’s first visit to the city, he got to better understand my history and I am sure he was able to put a few pieces of puzzle together about me now that he has experienced the city through my eyes (albeit briefly). We arrived home from Seattle Sunday morning on the red-eye and crashed. The only thing I managed to get done was the second coat of paint on the shelves for the upper cabs.

Only 18 miles from where we picked up the car to Passaic… But it may as well be another universe.
That brings us to this past weekend. While we were galavanting about in Seattle, our stone fabricator picked up the slab in Edison and hauled it to their facility in Passaic, NJ. So this past Saturday, we were able to borrow a friend’s car and drive out to Passaic. This being only my second time driving in New Jersey, we gave ourselves 90 minutes to go about 18 miles. Why?… When we went to a wedding in Jersey last summer, it felt like all we were doing was driving inc circles. Getting anywhere in New Jersey is simply not possible without GPS unless you live there. Apparently New Jersey didn’t get the memo about laying streets out in a grid, or at least in some form of logical manner. The streets go all different directions and are frequently short, meaning you keep making turn after turn after turn…. To add to it, we would miss a street, and the Google GPS lady would recalculate and tell us to turn on X street moments after we passed it. We ended up arriving almost an hour early, despite the GPS throwing us off, so to kill time, we just sat in the car in a strip mall parking lot and played on our phones.
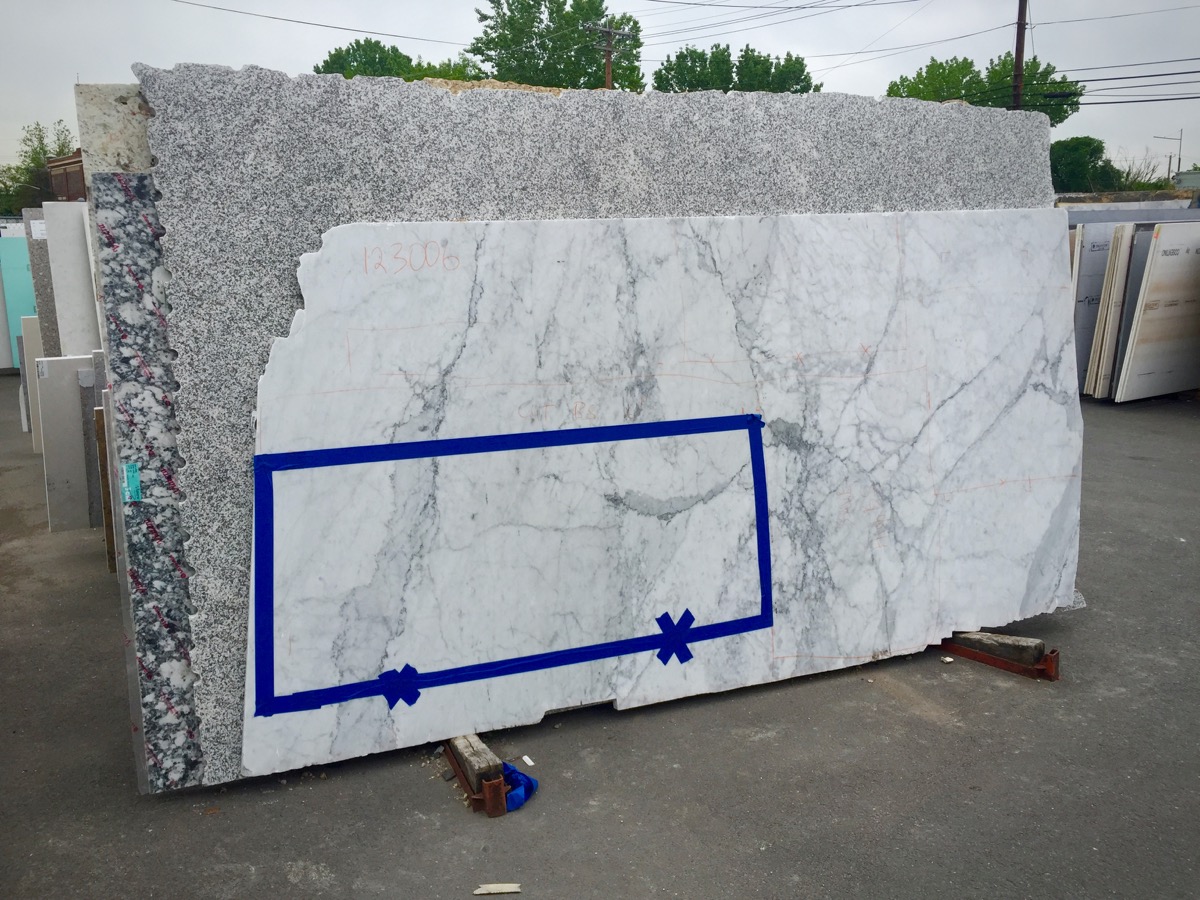
This is our slab in Passaic, two weeks after we approved it in Edison. The large blue square is marking out the section where our sink will be located. The area immediately to the right of that blue box is where I want to have the slab for behind the stove cut.
When we arrived at the stone fabricators, the nice guy helped us with laying out the slab. It wasn’t easy. It was very important to us to cut that one veiny section out for the slab behind the stove, and then make the rest fit around it. Ultimately when it was looking like we didn’t have enough stone to get all of the pieces, I found a solution and figured out how we could rearrange the sections to ensure all of our countertops come from this one piece (there was a moment when we were considering looking for an off-cut for one of the pieces).
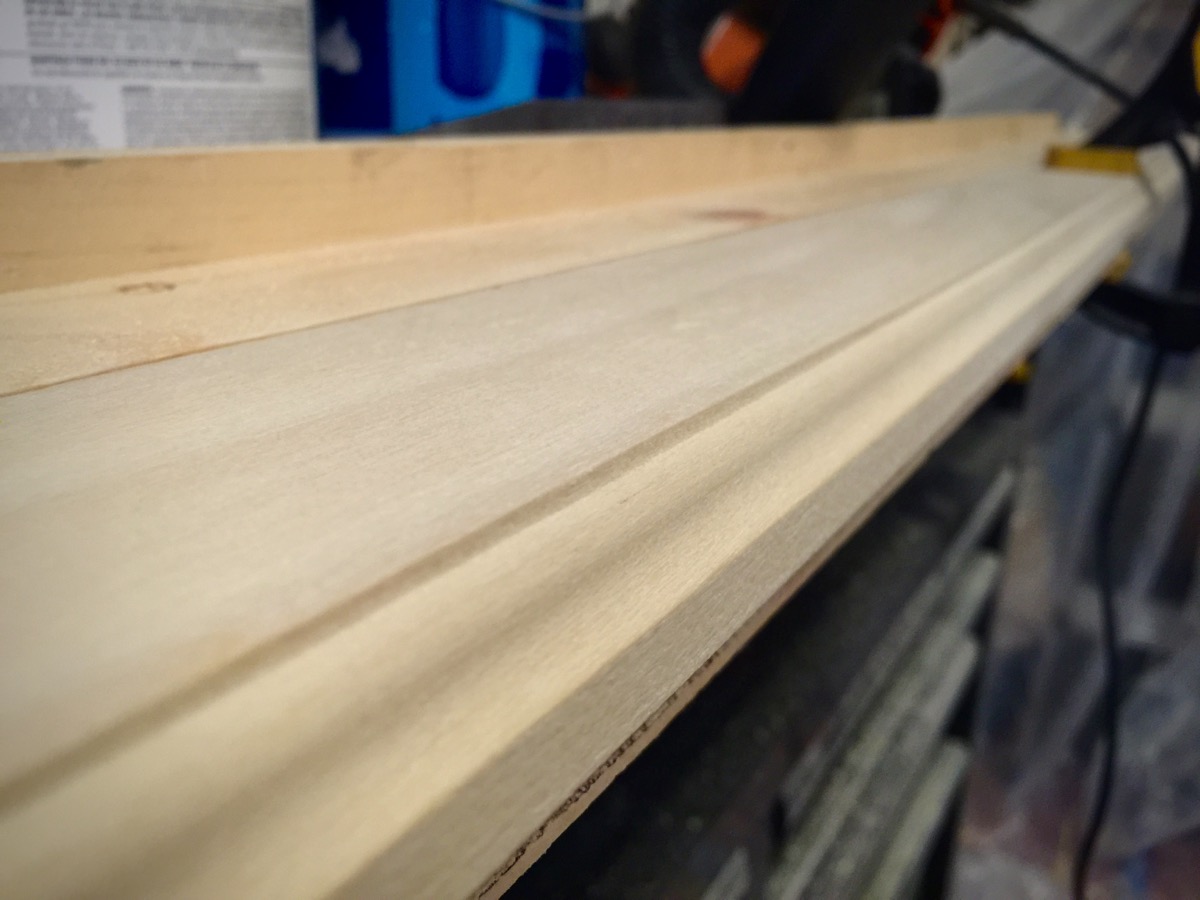
I couldn’t find what I had in my head as far as molding goes, so I pulled out my handy router and ogee bit and made my own trim using 1×3 poplar.
Sunday, I got an early start and started working on some millwork for the trim on the bottom of the upper cabinets. In order to hide the under-cabinet lighting and to enhance the overall appearance of the kitchen, I wanted to add a piece of trim molding on the bottoms of the upper cabinets. Trouble was, I spent countless hours searching for exactly what I had envisioned in my head and found nothing… What to do? Get the router out and make my own molding.
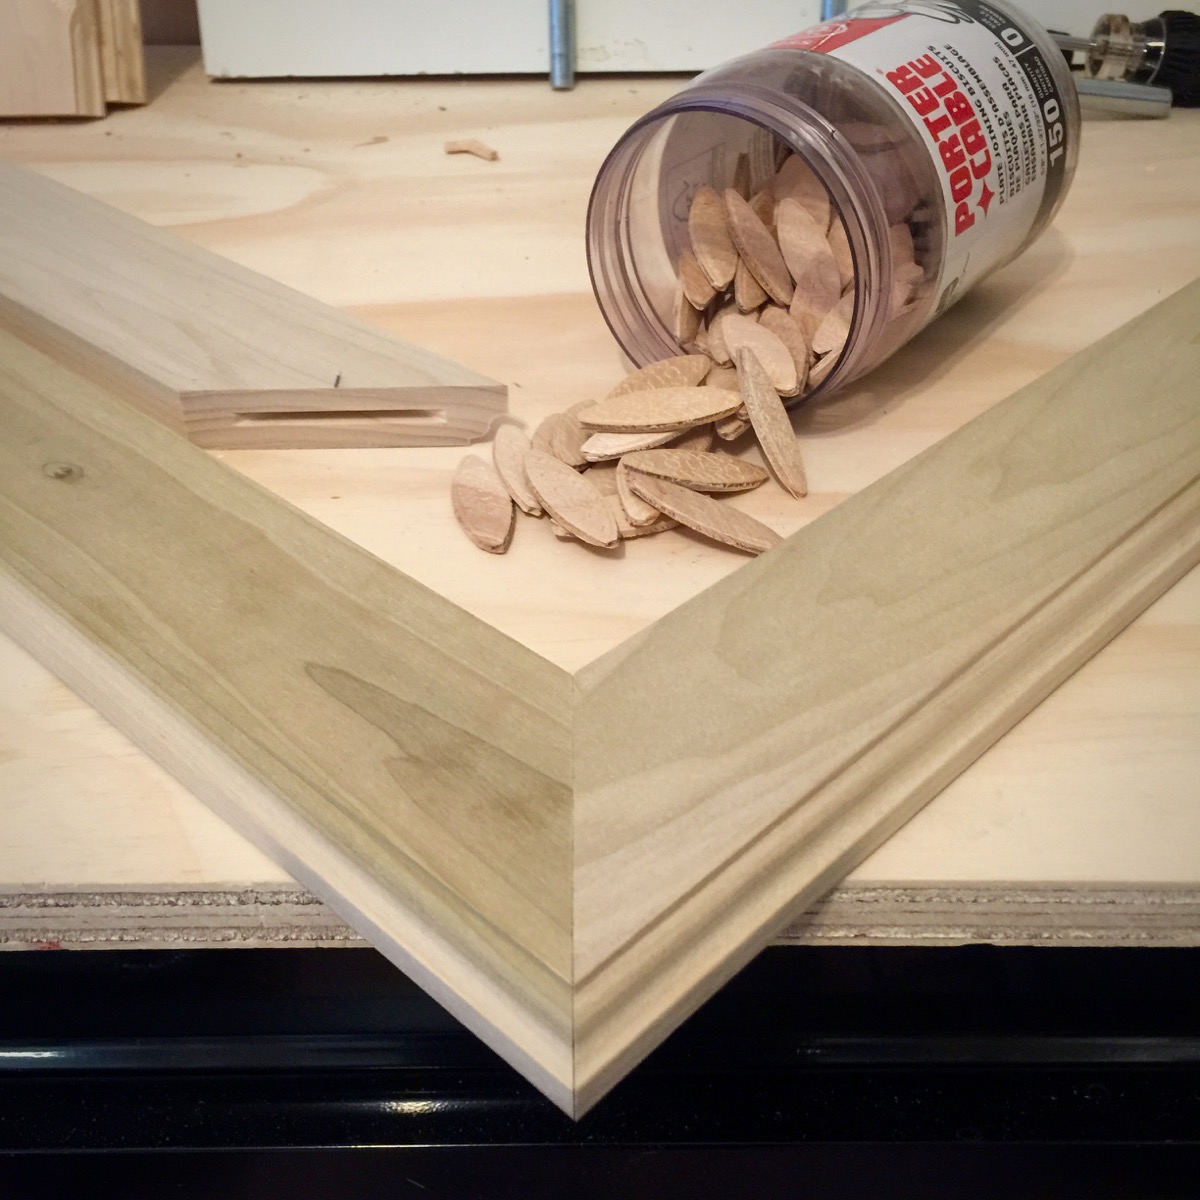
After “milling” my own trim, I made the miter cuts, bored the slots for biscuits with my biscuit joiner. Next up, priming!
Once I routed an ogee edge to four 6′ lengths of 1×3 poplar I went to work on cutting the pieces needed to trim out the cabinet bottoms. Then I dug out my biscuit joiner, a power tool I haven’t really used for several years and cut slots into the ends to join them together with wood glue and little wooden biscuits. Woodworking is actually a fun activity for me. I love creating something from raw material and making it look fantastic. One of the primary elements in our kitchen is that I wanted the cabinets and trim-work to reflect the fact that we live in a 100+ year old apartment, but I didn’t want it to be over the top with super fancy trim pieces and crown molding. Over and over I see kitchens described as French Country, or Victorian, or some other vernacular traditional theme and they are so over the top with fancy trim-work, they end up looking nothing like the theme they are trying to evoke and everything like something I don’t want. Kitchens 100 years ago were not fancy, they were utilitarian. And while I will admit to having some luxury materials, none of my kitchen is far from what could have or would have been created style-wise in 1910, the year our apartment was built.

First coat of primer on custom milled (by me) poplar for trim-work on underside of upper cabinets.
Back to the custom trim-work. After cutting all of the pieces, I primed them yesterday. Before the weekend, I will paint them Stiffkey Blue to match the cabinets and once installed the bottoms of the cabinets will be finished off. I plan to prime them, install them, and then paint them to finish off the bottoms of the upper cabinets. I also did some work on my crown molding, it also is not over the top, but I will post more about it in a future post.
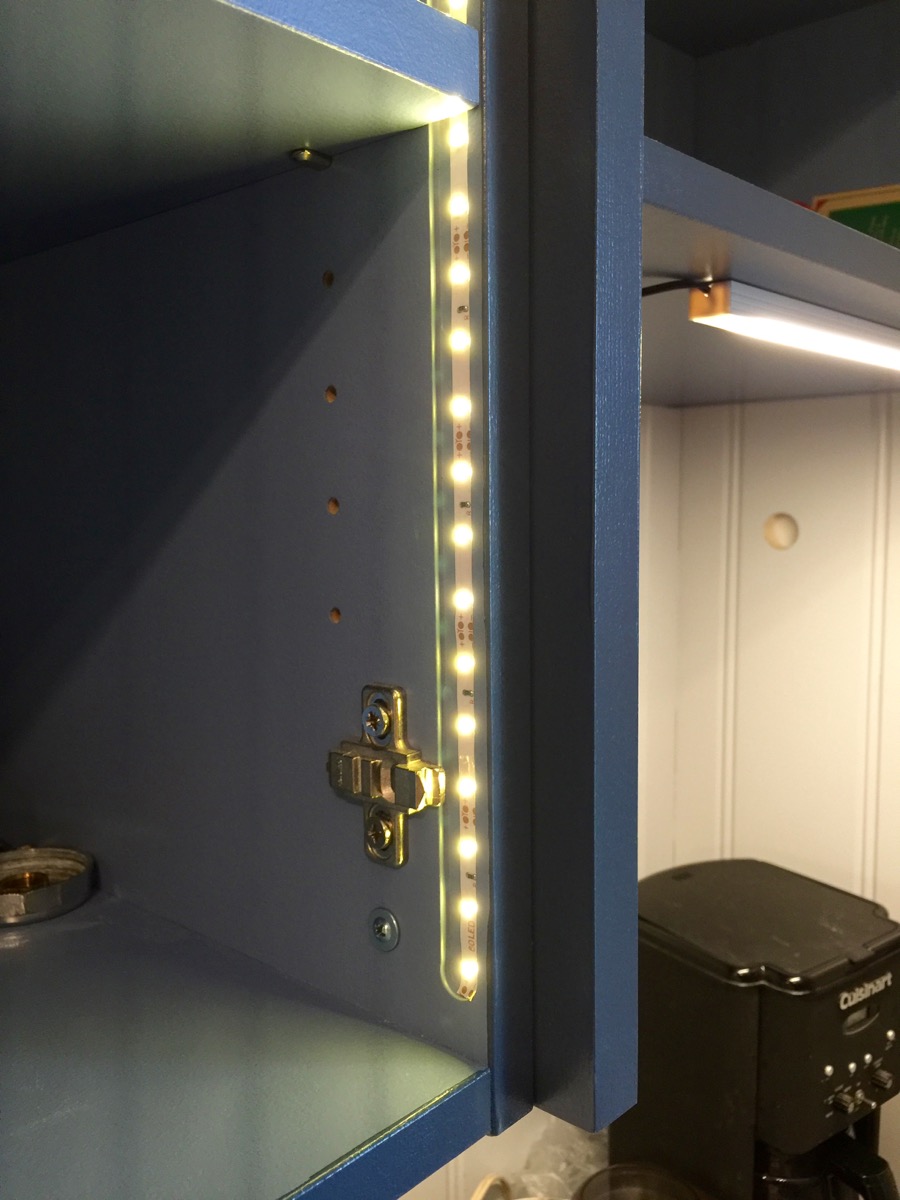
Close up of LED lighting installed inside the upper cabinets. By installing them just inside the door frame, they will light the front of the cabinet and won’t be seen directly.
Once I had the trim-work pieces cut, I decided to move onto the upper cabinet interior lighting system. All of our upper cabinets will feature textured glass doors, and I wanted to have an interior lighting system, not so much to light up the interiors for the purposes of displaying the contents, but to add another dimension to the finished space. With the contents being behind textured glass, our hopes are that you will see shapes and colors, but not whether we use Brand A cooking oil versus Brand B cooking oil.
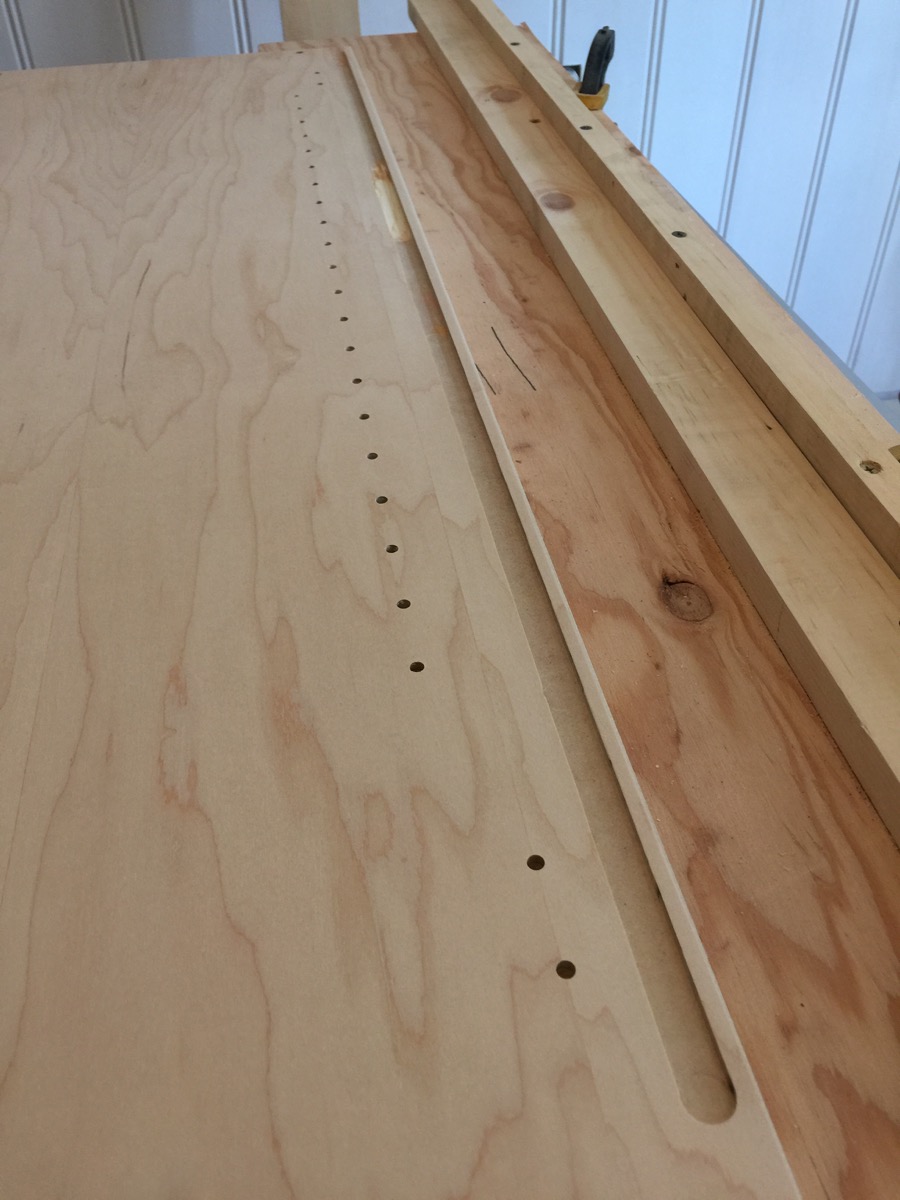
Before even the first coat of primer on our cabinets, I took the time to use my router to carve a dado slot into each side panel of the upper cabinets in preparation for interior lighting.
I planned for this from the beginning and before we began priming and painting the upper cabinets, Yoav assisted me with holding things in place while I used the router to cut a dado slot into the sides of each upper unit. This allowed for me to install warm white LED tape lights on an RF controller to add that dimension to the kitchen when it is finished. The white LED tape lights weren’t all that expensive (about $24), but when you add a power supply, an RF controller, and a multitude of connector wires, it worked out to about $110. Not quite inexpensive, but not breaking the bank either. With the interior cabinet lighting completed, I could finally install the shelves… Progress!
The To-Do List:
We are coming down to the final weeks (months :p) before the sink wall cabinet installation will be complete. Woo Hoo!. If all goes well with the fabricator, we will have an unfinished, but functional kitchen by early June. And, only two months after I had originally hoped it would be to this point. But aside from the countertop installation, there are most definitely things which still need to be done.
So here is my list of to-do’s… More or less in order:
- Priming and painting the cabinet drawer fronts and doors – I am embarrassed to admit that I haven’t even started this yet. After having already painted nearly 90 individual pieces, some on all sides, I needed to take a brief break from painting cabinets.
- Order glass – We have held off on ordering our glass for the upper cabinets because I didn’t want to add to the monumental amount of construction crap in our apartment and I didn’t want to risk breakage.
- Wire and water Line Runs – When we pulled up the old floor, we ran a piece of flexible conduit under the floor joists from one side of the room to the other which will allow us to run wiring and the water line for the ice-maker across the room seamlessly. Now is the time to finally put my good idea into use and I am excited about doing it.
- Countertop installation – We aren’t doing the install of course, but we expect the timing to be around beginning of June. They will need to come out in two trips. The first one to install the counter tops, and the second one for the back-splash. This will enable them to make any final adjustments needed for the back-splash once the countertop has been installed. They will also install our under mount copper sink (Woo Hoo!).
- Once the sink has been installed, we can work with building staff on getting our faucet and waste pipes hooked up as well as the installation of the stove.
- Lower drawer front and cabinet door install – Finally once the countertops have been completed, and the sink and stove installed, I will be able to install the drawer fronts and cabinet doors followed by the installation of brushed brass hardware.
- Install glass in upper doors, then install upper doors.
- Dishwasher Installation – Maybe? If all the planets align, and we are far enough along, we can install the dishwasher. Long after our cabinets arrived, we decided to switch to a panel dishwasher instead of our original stainless steel design. I ordered a custom panel from Barker Door, and unfortunately, it came damaged. We are as of this writing, waiting on a replacement door. Hopefully it arrives soon. (EDIT 5/28/16: The replacement door from Barker has arrived and is great!)
So there you have it, I really and truly think we can be completely finished with phase one by the end of June, if not sooner! In the meantime, I will do another update soon, and I have a special non-kitchen focused post coming up soon as well. And please consider subscribing so you can be notified of new posts!
One last thing…. Here is our kitchen as of Monday morning. Interior lighting on low, shelves installed, ignore the mess otherwise. We are still very happy with our Barker Cabinets and would gladly recommend them to any DIY’er out there looking to get a quality kitchen for a fair price.
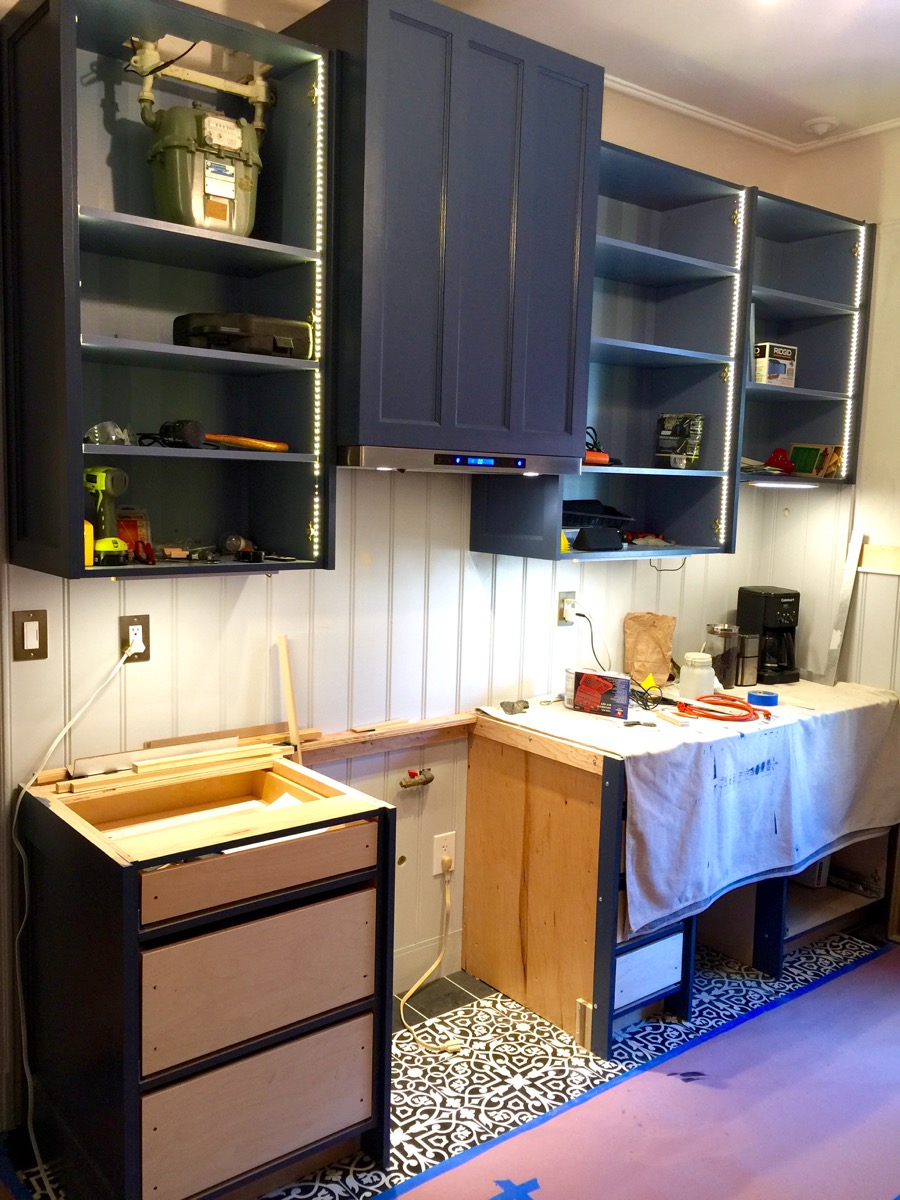
This is the kitchen as of Monday morning. Interior lighting installed, shelves installed. Random mess here and about.


June 10, 2016
Hi Devyn- I stumbled across your blog while researching for my own impending kitchen remodel. I’m sold on barker cabinets from your recommendation and another friend’s but (I hope I didn’t just miss this info in previous posts) do they have an inset style? I know that is what you were originally looking for but not certain if you actually found it.
June 10, 2016
Hi Laura,
They do not (unfortunately) have an inset style, but I decided that to get the look, I would simply frame the doors/drawers with a 3/4 inch piece of trim. So, in my situation, it worked out that I had for the uppers, a panel between all of the uppers, and I inserted a piece of 3/4 poplar between some of the lowers. It’s not quite what I had hoped for, but dollar for dollar, I cannot say enough about our choosing Barker Cabinets.
I expect to have the sink wall completed within a few weeks, and at that time, I expect to post images of how I achieved the illusion of inset cabinets without the expense. I hope you will stay tuned!