
I know you have been waiting on the edge of your seat in anticipation for the next progress report on my kitchen (probably not), but suffice to say that real progress has occurred. Like OMG! This dream is beginning to really actually look like a real kitchen, and a really amazing one at that. For those who cannot wait to see where we are, at the end of this post you will find a photo of the kitchen as of this morning. For those who are like me and enjoy the journey, here is an update on the progress and some of the fun along the way.
On my last progress report, it was all about priming and painting the dozens of individual cabinet pieces and finally assembling them into cabinets. I also went over how we decided to break the entire project up into three phases to keep things in focus. Phase 1 is all about getting the sink wall completed to the point that we can have our sink and stove installed and begin to actually use the kitchen in an unfinished, but minimally functional state. Phase 2 was the completion of the cabinets on the opposite wall where the refrigerator will be along with finishing out the beadboard, baseboards, and wood trim. Phase 3 will be the final phase and it will be all about building out my long awaited workspace. But lets get back to the here and now progress report.

In the midst of priming, painting, and then installing the cabinets, I couldn’t resist taking the time to install the ceiling medallion.
I spent the second half of my time off focused on priming and painting all those cabinet pieces. Two days before returning to work, I was getting ready to assemble the upper cabinets, when I had moment of hesitation…. We had already decided to paint the cabinet interiors a lighter shade of blue (Benjamin Moore – Old Blue Jeans #834) to complement the Stiffkey Blue (Farrow & Ball – no. 281) we are using on the outsides of our cabinets, but I still felt something was lacking. There must be something I can do to elevate our upper cabinets even further from the ordinary. So, I took a few minutes and poked about the internets (mostly Pinterest) looking for inspiration about what I can do to the upper cabinets to make them seem more interesting. And then I came across this shot.
![This pattern on the inside back of the cabinet is fabulous! But getting fabric at the 11th hour is not realistic. [Source: A Lo and Behold Life]](https://halfclassicsix.com/wp-content/uploads/2016/04/projects_kitchen8.jpg)
This pattern on the inside back of the cabinet is fabulous! But getting fabric at the 11th hour is not realistic. [Source: A Lo and Behold Life]
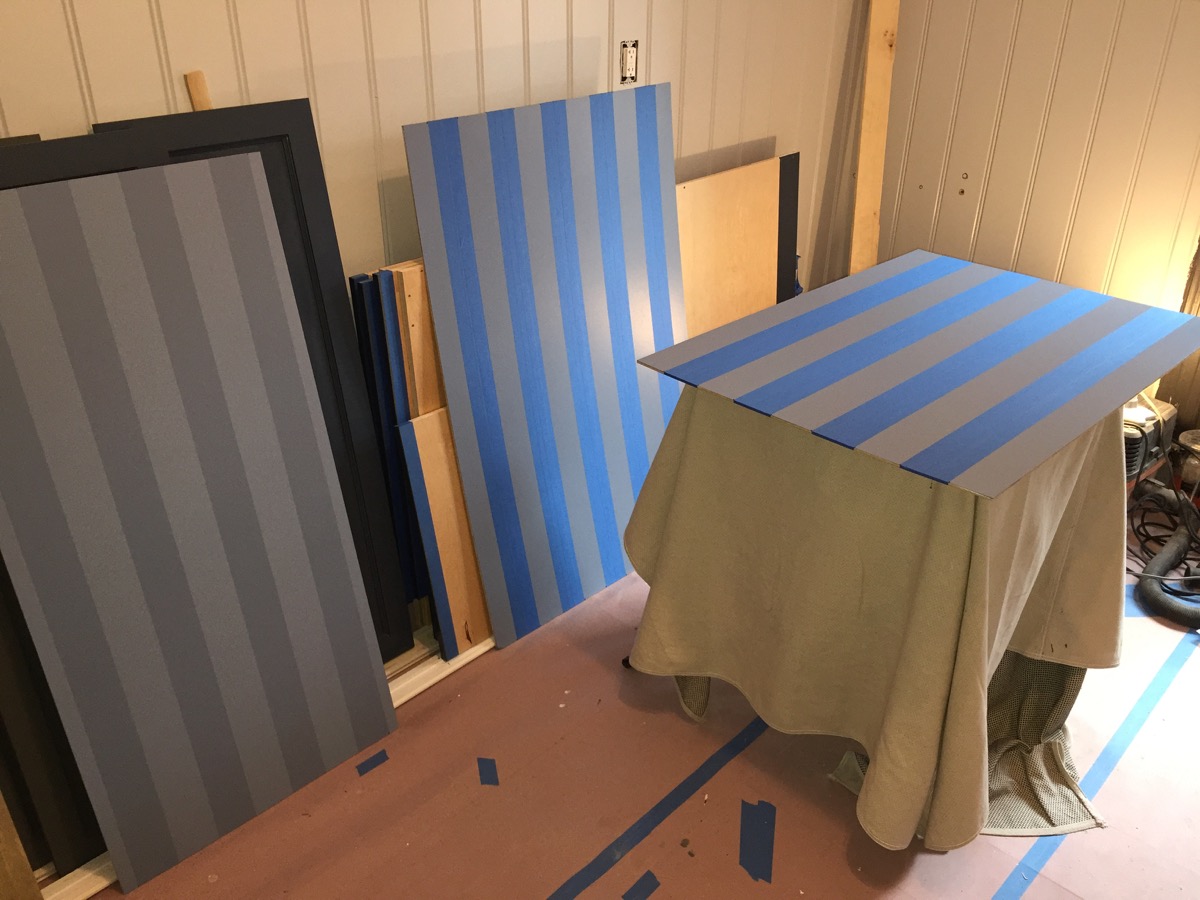
Adding the stripes was actually fairly simple. After doing one cabinet as a test, I did the other two within an hour.
Stripes! I can do stripes! (This was the surprise I mentioned in my last post.) And I can do them easily too! All I need is some painters tape and paint. Hmmm, what color? Well, at first I thought go bold, but then I realized that subtle can make a much bigger statement. So, I took the paint I was already using on the interior and added just a tiny bit of white to lighten it up. Then I taped off three inch stripes and painted the back of just one unit. I had to get Yoav to agree to this, so I didn’t want to go too far because if it failed, I could easily paint it back. Here is how it turned out…
We both love them! I am not yet sure if you will see them through the textured glass doors, but you will see them when you open the cabinet up and that little bit of extra detail is exactly what I wanted to elevate this kitchen design to a more unique level. One of a kind, like no other. That is how I want my kitchen to be.
I finished assembling the frames for all of the sink wall cabinets the day before returning to work after two weeks off…. Then as mentioned in the last update, I returned to a tidal wave of a workload, and suddenly I felt like I had hit a wall. I was exhausted. Up to this point, while working full time, I had devoted the previous ten weekends as well as sixteen PTO days since early February without a single day of rest. It’s been a long time since I was in my 20s, and after all this activity, I am just plain sore and tired. Being middle-aged has its perks, but the ability to put in a 12+ hour day no longer exists, and that sucks! I tire much more easily than I used to, and I cannot work as many hours without taking a break which leads to frustration. Those who know me well know I tend to be a very driven person when I am pursuing a passion. Whether it’s home renovation, a good book, or some kind of research project…. I tend to just go, go, go…. And then I am wiped. Suffice to say that by the time Saturday the 9th rolled around, I was in no mood to work on the kitchen. But I could not just sit. What to do? Shop for Marble.
Cararra Marble may be at the lower end of the marble spectrum, but it is still very beautiful and will be perfect for our kitchen.
Realizing that we are mere weeks away from having the cabinets installed to the point of measuring for countertops, it hit me that we had yet to truly begin shopping for marble. Now before I get too far into our hunt for marble, it is important to note that living in Manhattan offers many conveniences in life. We have within three blocks of us, four banks, two diners, three hardware stores, four drugstores, three grocery stores, four bodegas, three Thai restaurants, three dry cleaners, countless other conveniences including the subway, and surprisingly, only one Starbucks (although there are more than a dozen within a mile radius). That’s the upside to living here… Then there are businesses you need, but are nowhere near to you, and even if they are, they are not convenient at all. There is a Costco and Target just over two miles away, in Manhattan. They may not be very far away distance wise, but getting there and back is a serious schlep (at least 45 minutes each way) and not worth the effort except for a few times a year.
Oh yeah, back to the hunt for marble. So, on Saturday morning, after my usual coffee and oatmeal, we rode three different subways, and in just over an hour, we were in Greenpoint, Brooklyn. Greenpoint is a lovely Brooklyn neighborhood with a still very solid Polish community. It is the northernmost neighborhood in Brooklyn, and just across the East River from Manhattan, but there is no direct way to get there without taking one of several subways lines to a G Train. The G train is the only subway which does not connect directly with Manhattan, but it did drop us within a mile of our destination. Fortunately, the weather was nice enough that the near mile long walk was relaxing. We arrived at the stone supplier and met with a very nice man who was helpful and offered to take us out to the stone-yard (which is actually indoors, this is the North East, and winter) to see a couple of slabs of white Cararra.
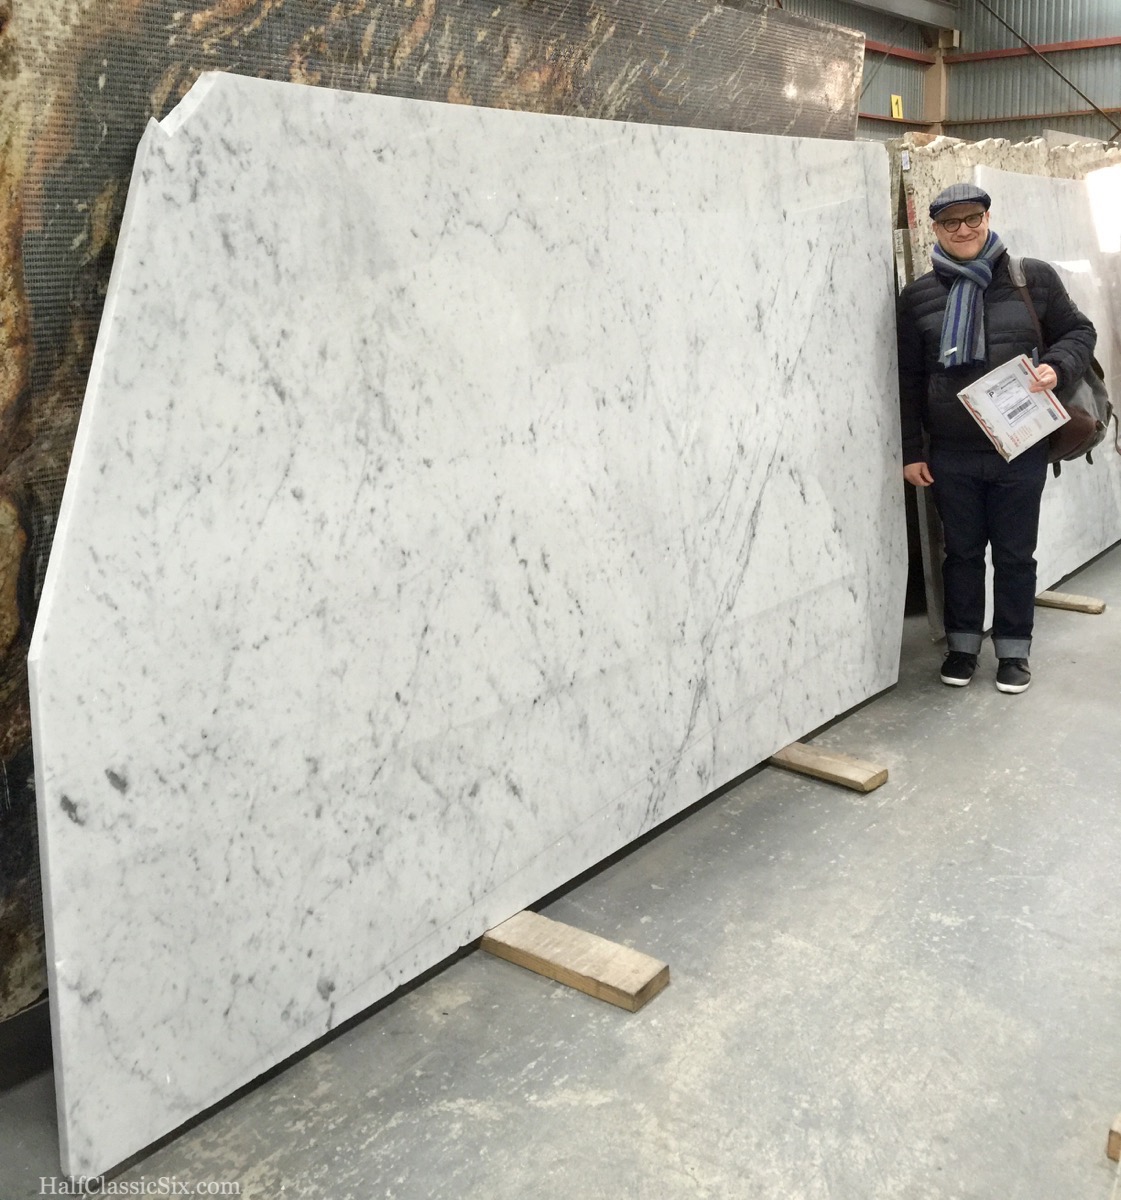
Yoav and I schlepped out to Greenpoint, Brooklyn to check out giant slabs of Cararra marble.
We looked at the slabs, as well as some much higher end slabs of statuary marble (which Yoav hates) and then went back to the showroom for him to work up a quote. Now, I know from my previous research that white Cararra marble is not considered high end in the world of stone countertops. It is generally the lowest priced marble, and usually around the same cost as the now ubiquitous and somewhat recently reviled granite. Somewhere in the vicinity of $100 per square foot. We need about 30 square feet of it, and with the addition of sink cutouts and a fancy edge detail, I expected it to come in somewhere in the $3,000-3,500* range. With tax, our quote came in at nearly $4,500. Ouch! For a brief moment, I was ready to pull out the checkbook and make a deposit, Yoav was on board…. But something told me to hold off… This was our after all, first stone supplier.
We said “Thank you”, took the quote, and left. After getting outside, I did a search for another place which was open on Saturdays in Brooklyn…. Nothing came up that was even close to being easy to get to, so we decided to head back into the city and check out a showroom in the Flatiron District.
![This Home Depot on 23rd Street is probably the most elegant HD in the land. [Source: Matt Green - flickr]](https://halfclassicsix.com/wp-content/uploads/2016/04/HomeDepot23rdSt.jpg)
This Home Depot on 23rd Street is probably the most elegant HD in the land. [Source: Matt Green – flickr]
Here is how the conversation went.
Me: “Hi, we are interested in honed Cararra counters.”
HD Guy: “No you’re not.”
Me: “Yes, we are actually.”
HD Guy: “You don’t want honed, it is porous and stains easily”
Me: “Well, I’ve done my homework and I really want porous and easily stained honed Cararra countertops, do you have it?”
HD Guy: “Follow me…”
With that, we found out that they do have porous and easily stained honed Cararra. And as luck would be, it was 10% off that weekend. So, after pricing out our square footage, sink cut out, and fancy edge, it came out to about $3,300* and there is no sales tax (because we are buying through a third party). Wow! This is very much within the realm of what we were expecting. The process is that they come and measure for the countertops, and then Yoav and I have to find a way to get to the massive stone-yard in Edison, NJ (about 40 miles away).
Why did we go with Home Depot? In the end, aside from a fair price, it came down to the fact that we are not doing a complicated marble installation. We are having humble white honed Cararra countertops installed in a fairly straight forward manner and it doesn’t take a rocket scientist, or the skills of a highly paid designer and fabricator, to do the job right. And another thing, if there are issues, we felt we have more recourse with HD than we would with an independent. (I would like to say it has been smooth sailing so far with our HD purchase, but there has already been a glitch with getting the appointment set to measure… More on that in a future post.)
One more thing…. Brushed Bronze.
One of the details I had not worked out with the kitchen design was the light switch and outlet covers. Through out the rest of the apartment, I have been installing Lutron dimmers to control our LED lighting, and along with that we have installed the very simple, but elegant Lutron Claro wall plates. This is what I planned for the kitchen as well, but after giving it some thought, I decided to do what I always do… Search the Internet for options. I was imagining something to go along with the brushed brass hardware we are doing for the cabinets. It seemed that everything that was listed under brass was either shiny polished brass (too much like Trump Tower) or antique brass, which is dark and not very antique looking. Then I found this.
![Finally, a wallplate that isn't shiny brass or dark fake antique looking. [Source: wallplatesonline]](https://halfclassicsix.com/wp-content/uploads/2016/04/wallplatesonline_century.jpg)
Finally, a wallplate that isn’t shiny brass or dark fake antique looking. [Source: wallplatesonline]
![Ding, Ding, Ding, Ding! This is the perfect wall switch/outlet cover for our kitchen. Simple, elegant, timeless. [Source: Wallplatesonline]](https://halfclassicsix.com/wp-content/uploads/2016/04/wallplatesonline_elan.jpg)
Ding, Ding, Ding, Ding! This is the perfect wall switch/outlet cover for our kitchen. Simple, elegant, timeless. [Source: Wallplatesonline]
![The new brushed bronze switch and outlet plates are so lovely on the beadboard wall. [Source: Wallplatesonline]](https://halfclassicsix.com/wp-content/uploads/2016/04/ProgressReport7-05.jpg)
The new brushed bronze switch and outlet plates are so lovely on the beadboard wall. [Source: Wallplatesonline]
![This is the kitchen late in the day on Sunday. All of the upper cabinet shells have been installed along with the range hood enclosure. The base cabinets are in the correct order, but not in the correct location and obviously not attached to anything yet. [<I>Cabinet Source: <A HREF=“http://www.barkercabinets.com” TARGET=“BLANK”>Barker Cabinets</A></I>]](https://halfclassicsix.com/wp-content/uploads/2016/04/IMG_2375.jpg)
This is the kitchen late in the day on Sunday. All of the upper cabinet shells have been installed along with the range hood enclosure. The base cabinets are in the correct order, but not in the correct location and obviously not attached to anything yet. [Cabinet Source: Barker Cabinets]
* My original budget for marble was $2,500. But I changed my plan slightly, and didn’t account for the fancy edge detail, the six-inch backsplash, or the extra cost of polishing required for an undermount sink cut out.


June 21, 2016
Hah! We too are looking for honed Carrara marble and everyone in NYC keeps saying we don’t want that. lol Yes, I actually want honed marble that stains easily. …and that won’t look silly if we use pumice to buff out a stain to show spots of buffed marble next to polished marble.