I can finally say that Phase One of our kitchen renovation is done(ish)! Woo Hoo!!!!! And wow is it beautiful! This past holiday weekend, I met my goal of completing the majority of work on phase one of our kitchen renovation. OK, so we are two months behind our original timeline, but still….. We have a functioning kitchen folks. The last major hurdle being the completion and installation of our glass doors for the upper cabinets. Once we got through the fiasco of ordering our glass, it all went fairly smoothly and now I can move on.
Before I get to the pretty pictures, you get to read a bit about the glass. We knew early on that we wanted all glass uppers, and when we were originally planning on going with an Ikea kitchen, it was going to be a bit of a challenge to work with their limited options, and I wasn’t sure I wanted clear glass. But then in June of last year, I discovered a brilliant alternative, Ikea cabinet frames with cabinet doors and drawer fronts made by Semihandmade. This gave us the freedom to easily incorporate textured glass in the uppers (this was also when we decided on Farrow & Ball Stiffkey Blue for the cabinet color). It was the closest I could come to capturing the look of those British kitchens (like these) I am so fond of.
Then late last October, after experiencing frustration with trying to make the fixed sized Ikea frames fit within our space, I searched for alternatives for the Ikea frames. That’s when I discovered Barker Cabinets and everything changed. Out with Ikea and (Semihandmade), in with Barker Cabinets, and our textured glass doors became even more prominent because we shifted from two rows of uppers to a single row of very tall uppers.
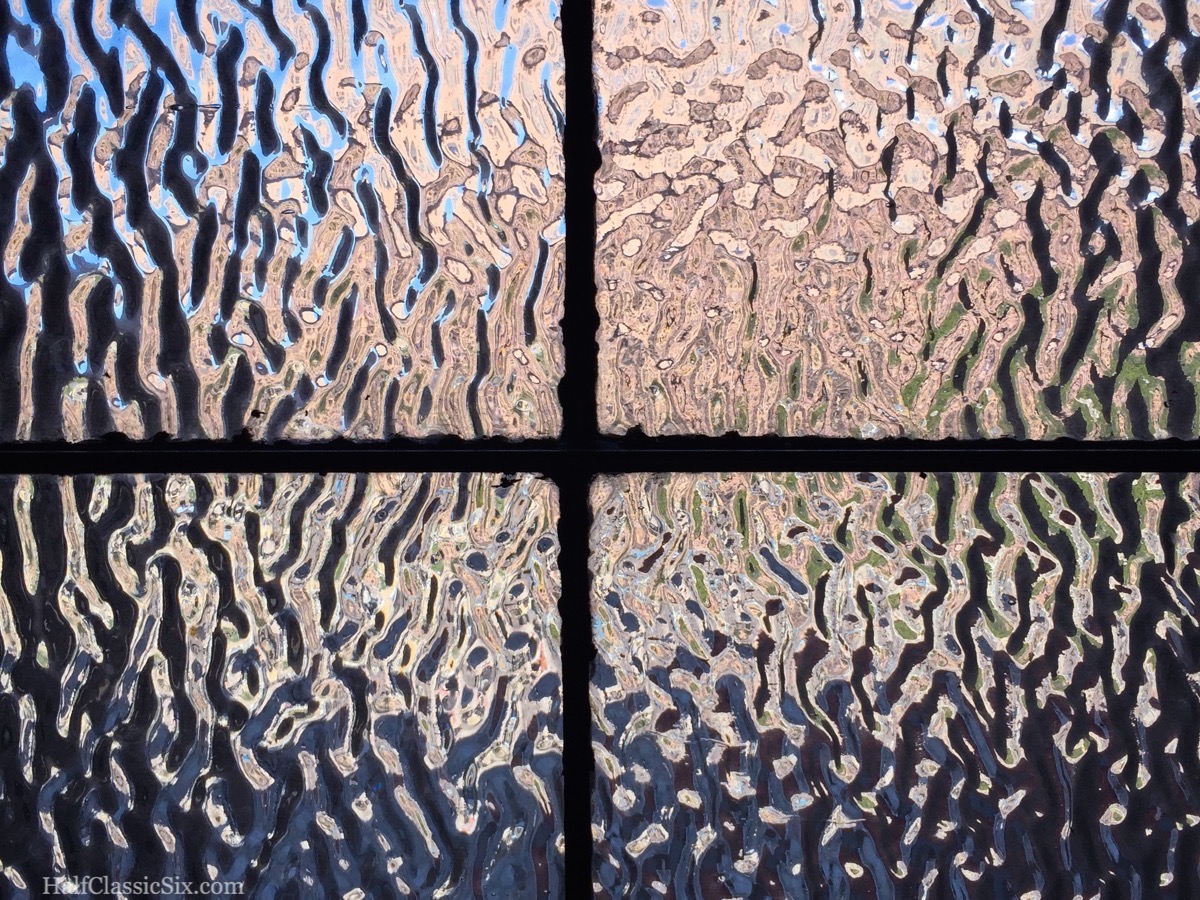
This is some of the textured glass in our stairway landings and while out of production for decades, this look was inspiration for our choice of cabinet glass.
With a budget of $400 for approximately 23 square feet of glass, we had stopped by our neighborhood glass shop to see what they had last winter. They had several types of textured glass, but none of them spoke to us. But they quoted us $16 per square foot, which is on target and then offered us a 10% discount which put us below budget. We took a few samples and initially considered the Crystal Ice pattern, but ultimately, weren’t very thrilled with any of them. They all seemed to lack clarity and or quality.
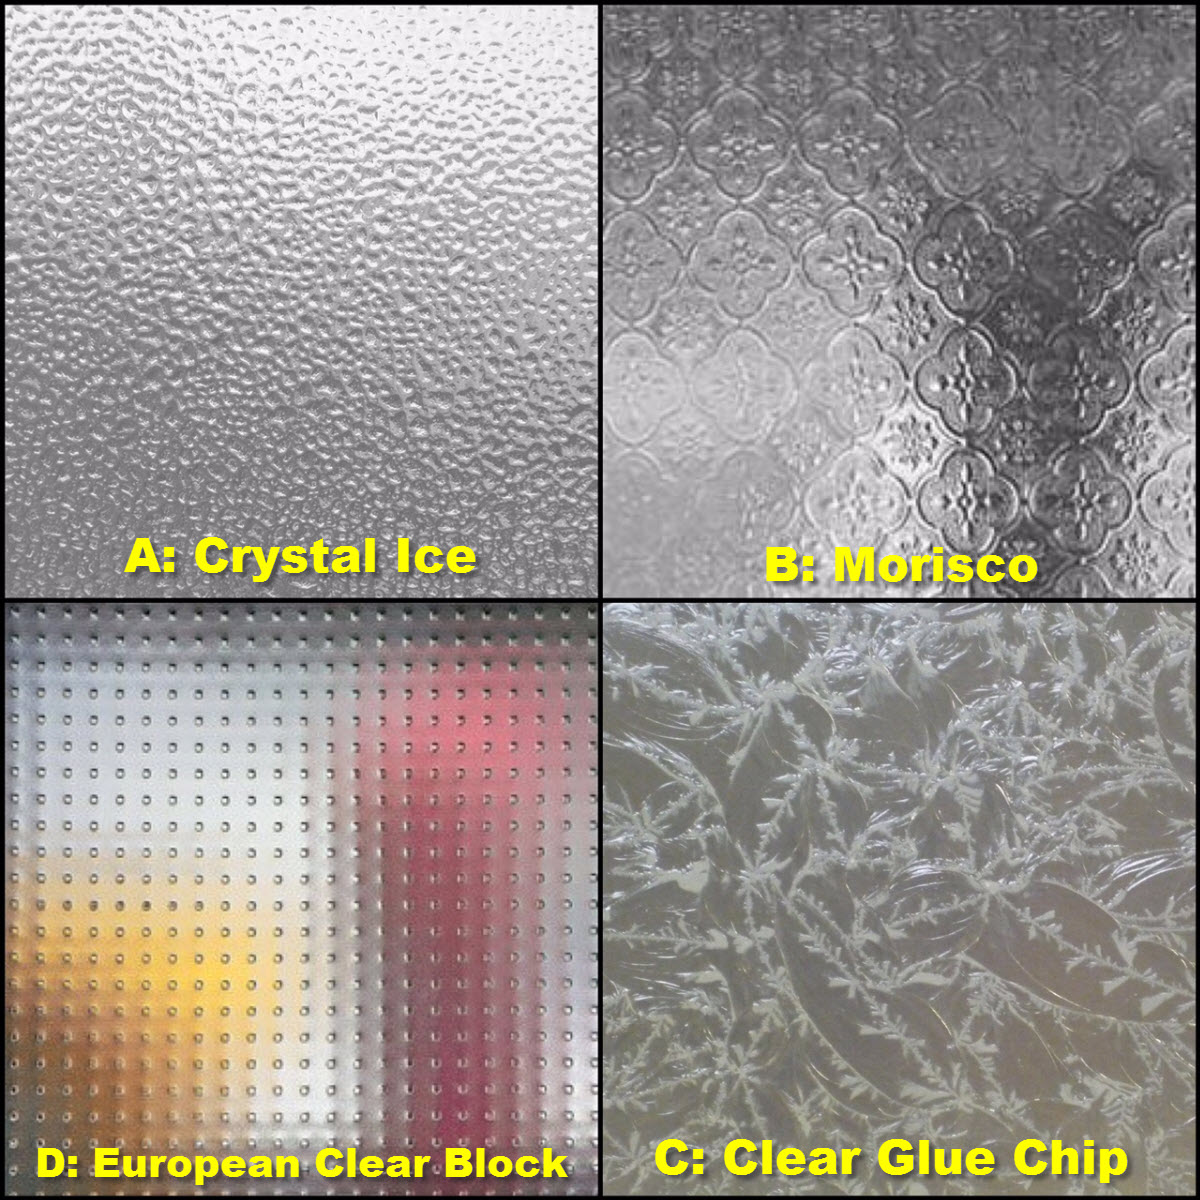
These were the best options available locally, and none of them were our favorites.
A: Crystal Ice was not very clear, B: Morisco was too Victorian, C: Clear Glue Chip was too clear, D: European Clear Block was too 1980s.
Fast forward to this spring when we had a monumental amount of construction crap in our apartment and to avoid the risk of breakage, we held off on ordering our glass inserts. We had already determined that we did not want frosted glass, and inspired by the beautiful but long out of production vintage 1910 textured glass of the stained glass windows in our stairwells I had a solid vision of what I wanted in my head.
Then in May it was time to get serious about finding and ordering our glass. After being dissapointed by our local shop, I turned to my favorite source for virtually everything…. The Internet! My Google searches revealed much of the same mostly banal styles available from my local glass shop, but I also found several designs where were more in line with what I was thinking. As much as I wanted to support our local glass shop, they just didn’t have enough selection. So as usual, the options on the Internets were greater and the prices seemed to be about 30% less. Yay! What could possibly go wrong?
![After lots of searching for the right glass, we like this hammered texture the best. [Image Source: Armstrong Glass]](https://halfclassicsix.com/wp-content/uploads/2016/06/Clear-Hammered.jpg)
After lots of searching for the right glass, we like this hammered texture the best. [Image Source: Armstrong Glass
Well….. It turns out, a lot….. I wish I could say our online experience was a simple one. Our glass order amounts to about 23 square feet cut into 9 pieces. It took nearly three weeks of back and forth with quotes to finally get our order placed. First I placed an order online with a glass supplier in New Jersey only to find out the next day that the glass was no longer available as the manufacturer was going out of business. Ugh…. Next I went to three other online retailers to get quotes on various glass styles close to the one that we couldn’t get. The first one based in California, came back with a quote of $399 for a glass that was similar to the one we liked. The next one in Texas, came back with a quote of nearly $700 for another similar glass, and the final one based in Georgia came back with a quote for about $500 on a different glass than we requested the quote for because it was no longer available (turns out it was the same glass as we wanted from the place in Jersey). Ultimately, we decided on a different style and placed the order online with the place in New Jersey for about $245 plus shipping figuring shipping would not be too bad as they were only about 20 miles away from us.
The next day, they came back with a quote adding on the packing and shipping. In addition to the $245 for the glass, they wanted $80 to box it up, there was sales tax of $65, and the shipping charge was a whopping $402. Yep, they wanted $402 to put it on a truck and drive it 21 miles. You can well imagine my response. These folks either don’t want my business or they are batshit crazy. My guess is that my business wasn’t important to them. After calming the f*ck down, I politely (or as politely as one can when they have been handed a quote more than double what was expected) emailed back and said NO.
So much for wanting to keep it local…. I then promptly placed our order with Wholesale Glass and Supplies in California (the place with the $399 estimate).
![This was the glass we finally ended up getting. It looked very much like the one we wanted originally, and it turned out to be almost exactly the same. [<i>Source: <a href="http://www.wgsonline.com/glass/WG133.html" target="blank">Wholesale Glass and Supplies</a></i>]](https://halfclassicsix.com/wp-content/uploads/2016/07/HC6-ProgressRpt-12-01.jpg)
This was the glass we finally ended up getting. It looked very much like the one we wanted originally, and it turned out to be almost exactly the same. [Source: Wholesale Glass and Supplies]
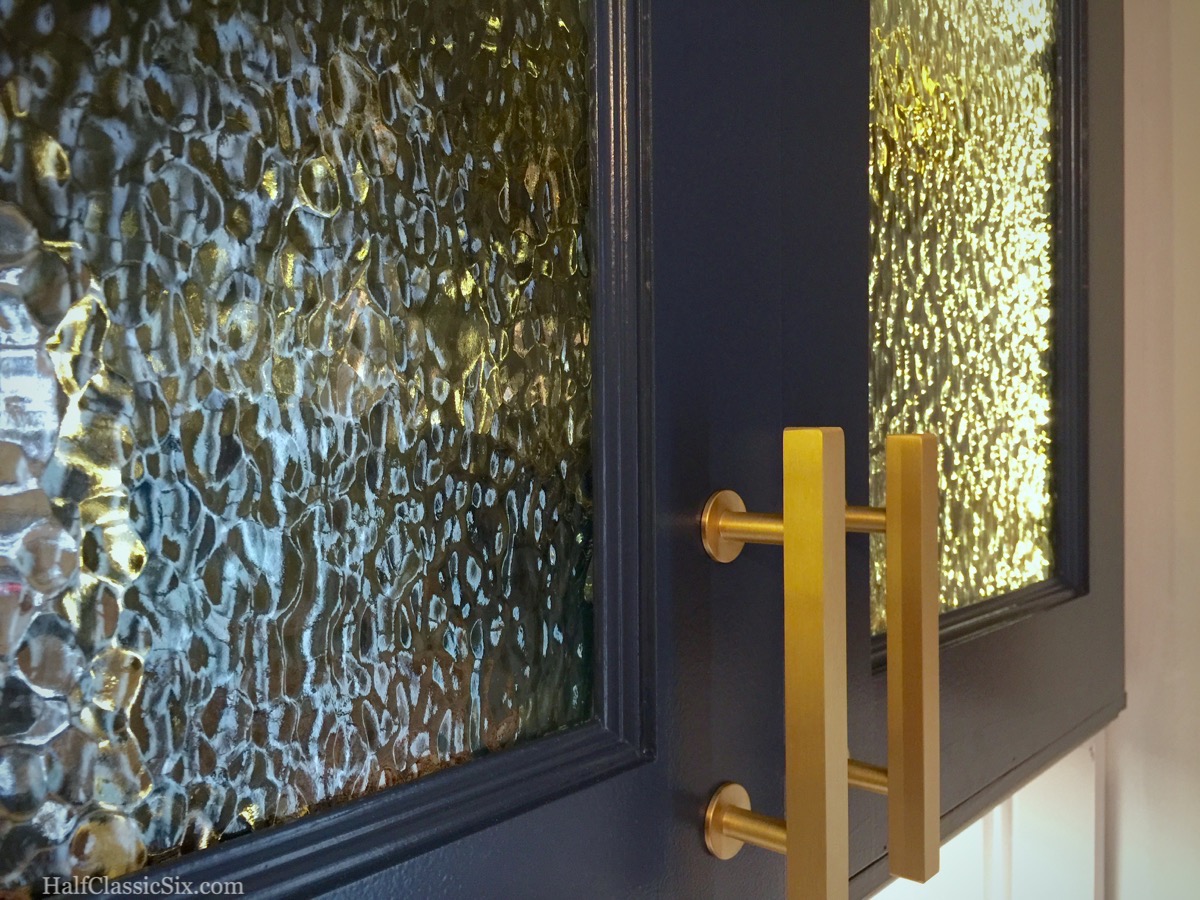
The last week of June (the day before my last post) a big box weighing 48 lbs arrived from California marked “Fragile!”. I spent 30 minutes unpacking our 9 pieces of glass. It was bundled with styrofoam, and pallet wrap, and bubble wrap, and wood planks to stiffen it all, and then that bundle was inside a large box with more filler. After carefully unpacking the entire box, it is everything we had hoped for, I was relieved to see that it was cut as ordered and nothing was broken. It has a wonderful pebbled look and great clarity. We were both super psyched to see it in our kitchen.
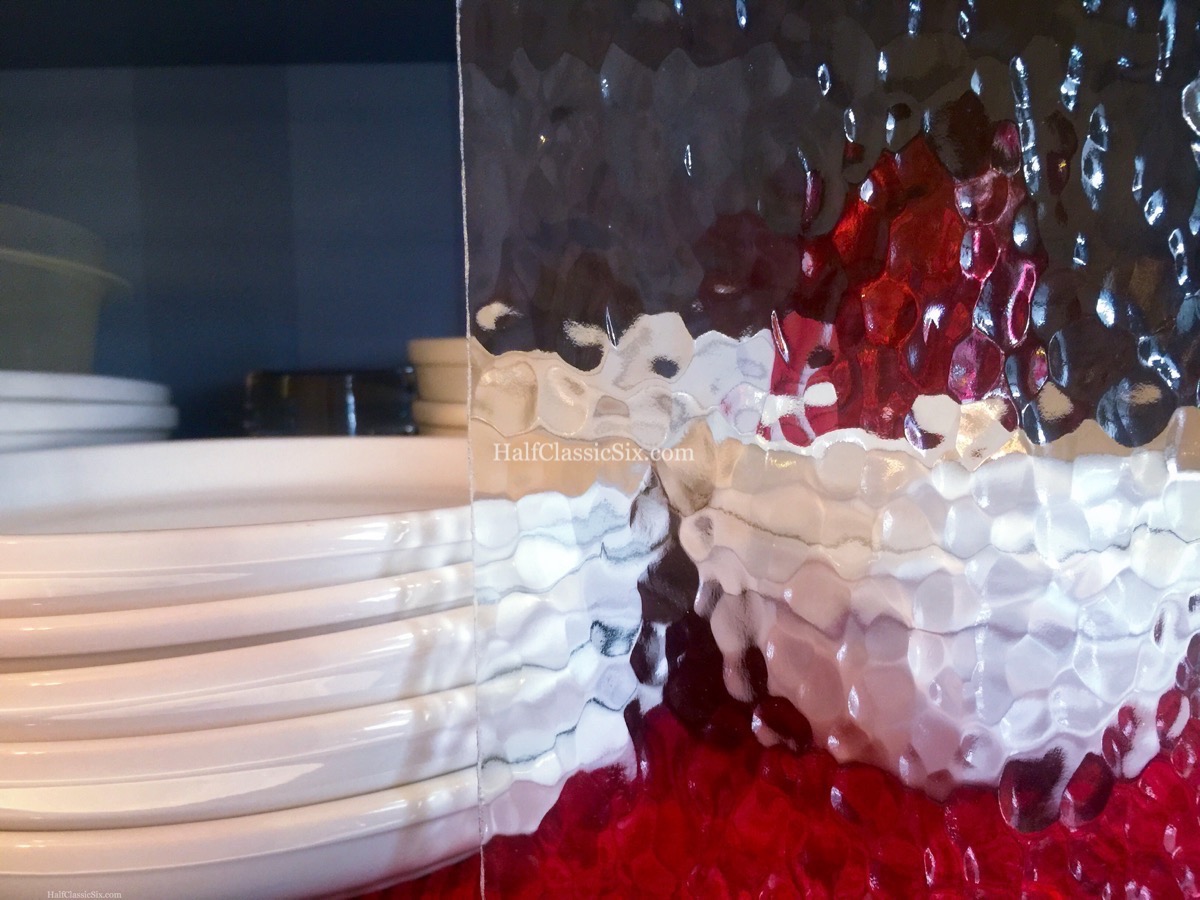
The textured glass arrived! Large Hammered finish!
The next day as I was carrying the shipping box down the hall, I pulled the packing slip and got a lovely surprise. The final cost was not $399 as originally quoted, but only $313, more than 20% below our original $400 budget. In the end, the Internets won again….. Woo Hoo!
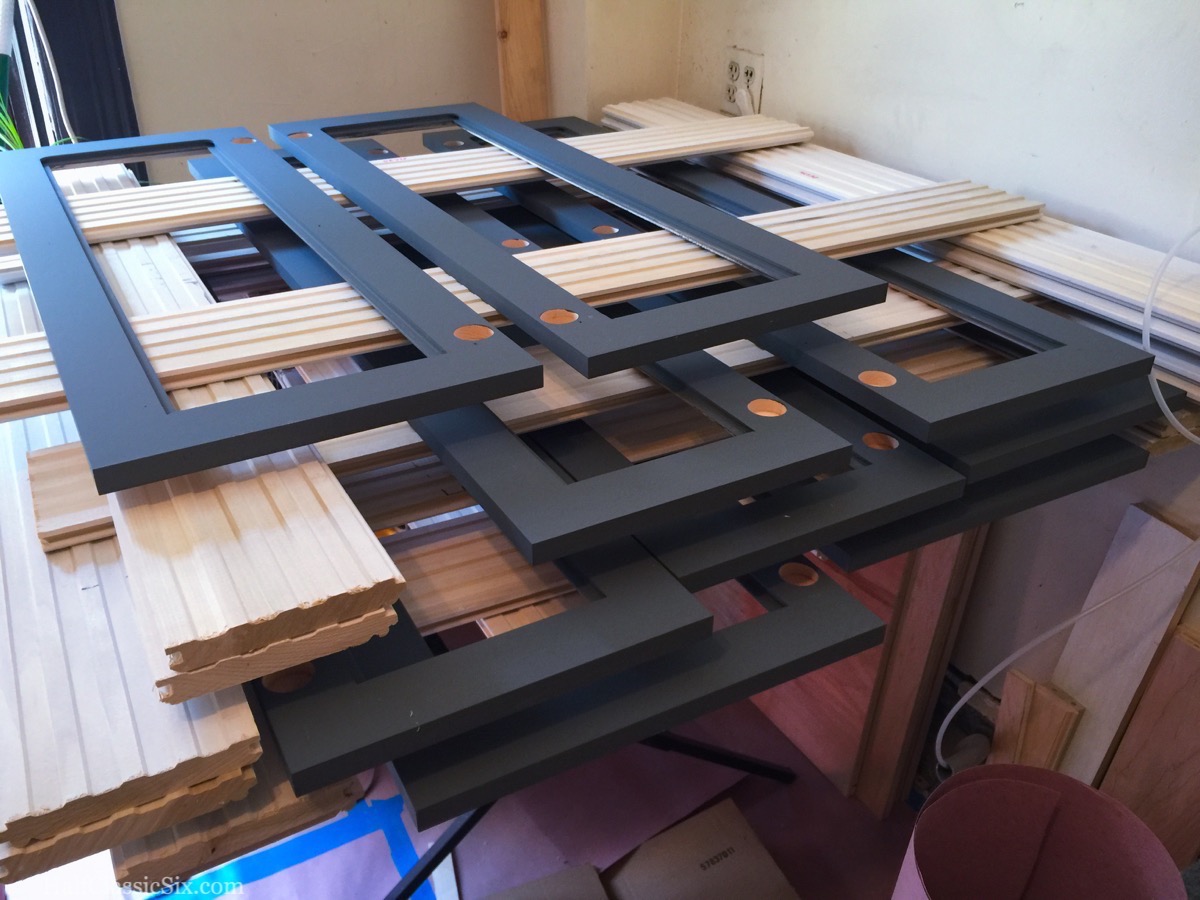
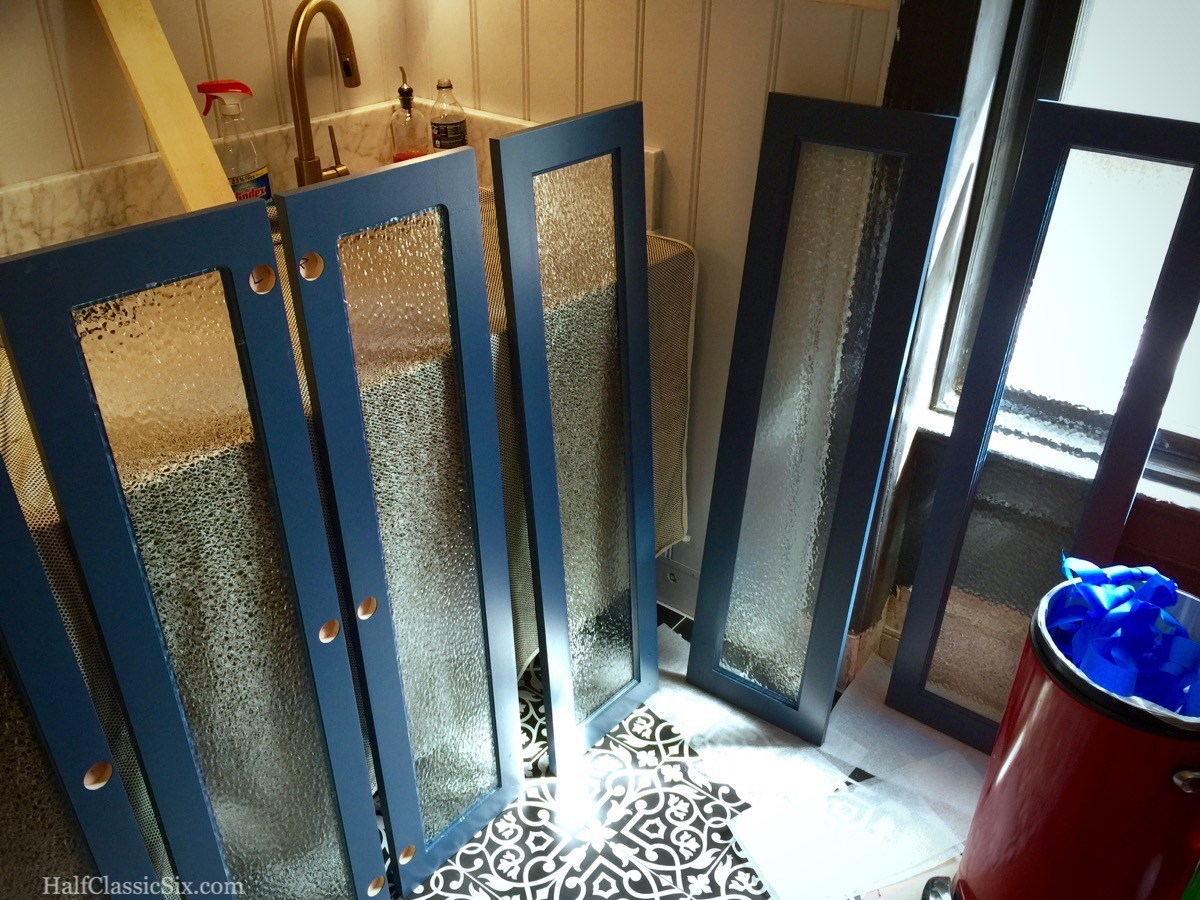
The drying rack after the second coat of primer. I used yet to be installed beadboard stacked criss-cross to build this simple but effective drying rack.
Of course, as noted in my last post, I still had to finish priming and painting the door frames front and back. I had managed to get the priming started a couple of weeks ago, and once completed I applied the paint, first to the insides over the last weekend in June, and then towards the end of last week, I got the fronts painted. By painting the insides first, the paint had more than a week to cure before being installed to prevent them from sticking and damaging the finish. Finally, on Saturday, I dove into the installation of the glass. I had initially planned to use the traditional method of window installation using glaziers putty, but after much online research, I decided not to. Mostly because I am not very patient and didn’t want to wait days or even a week for the glaziers putty to harden so I could prime and paint the puttied area to match. Instead, I went with the more modern and much faster silicone caulk.
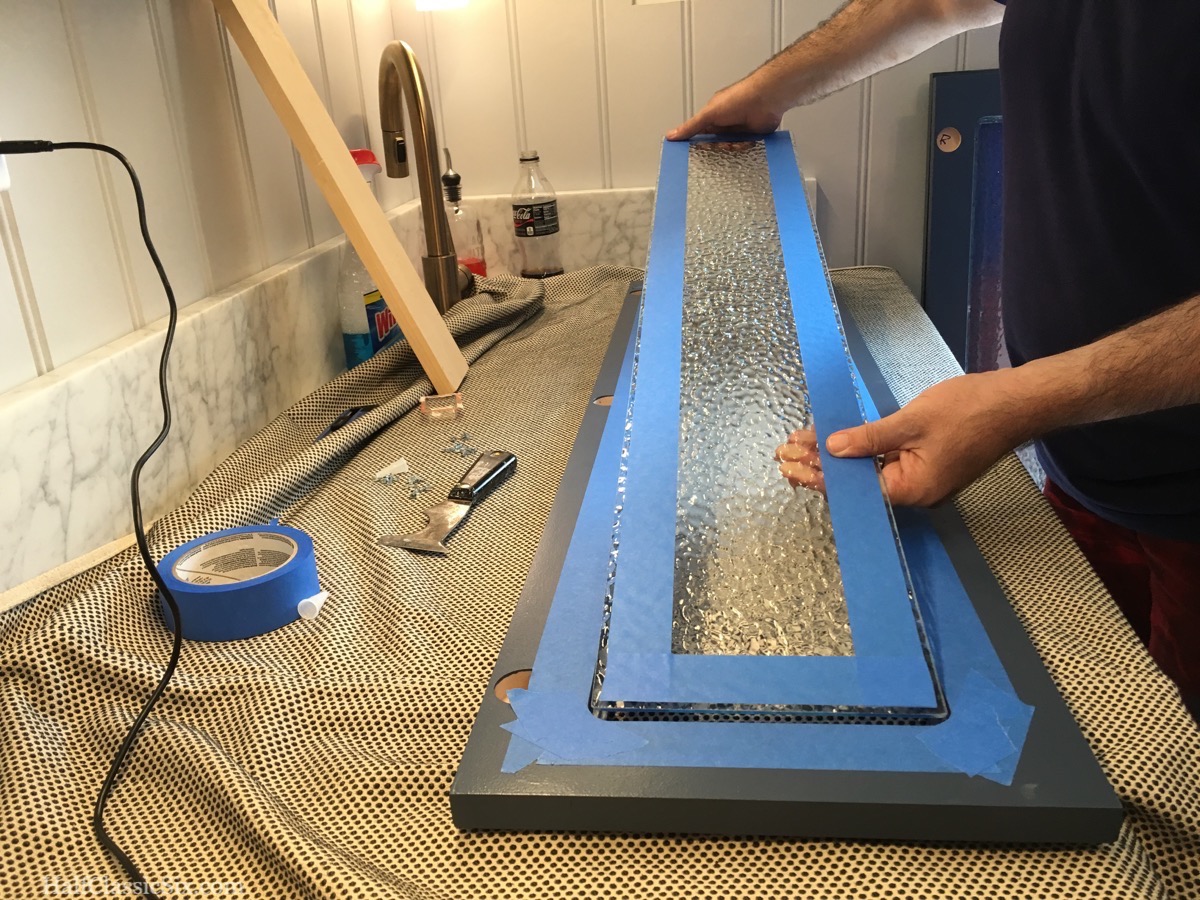
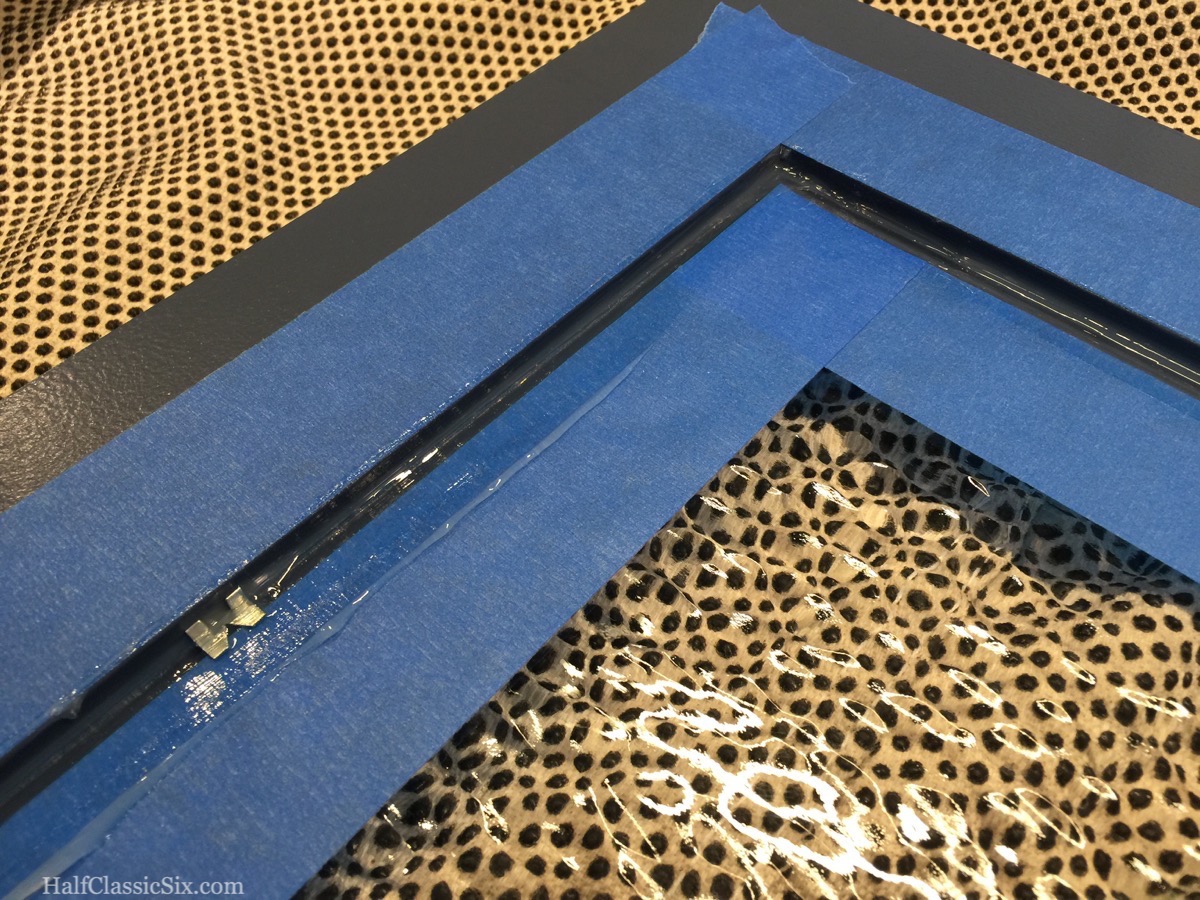
To get started, I needed to first clean the glass, and then tape it off with painters tape, leaving about an 1/8″ exposed along the edge. Then I had to tape off the door frame itself as well to prevent the silicone from making a mess.
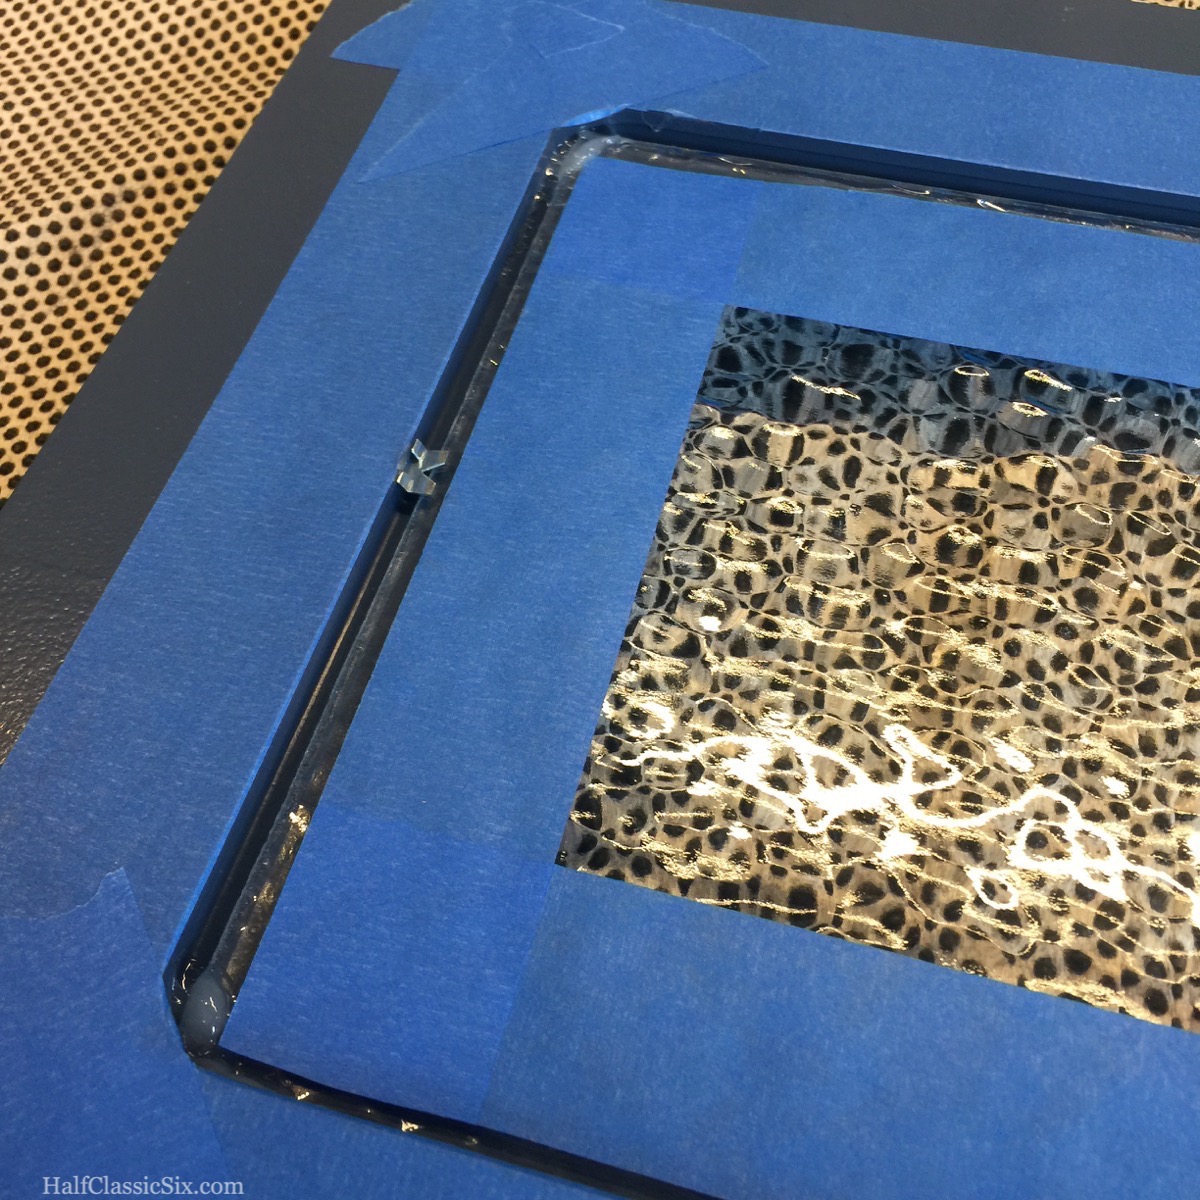
Setting the glass pane in place.
Once I had the taping done, I put a few small dabs of silicone into the corners, and then laid the glass in place. Then I inserted glaziers pins around the perimeter to hold the panes in place once the silicone was applied.
Just before adding the silicone caulking around the perimeter.
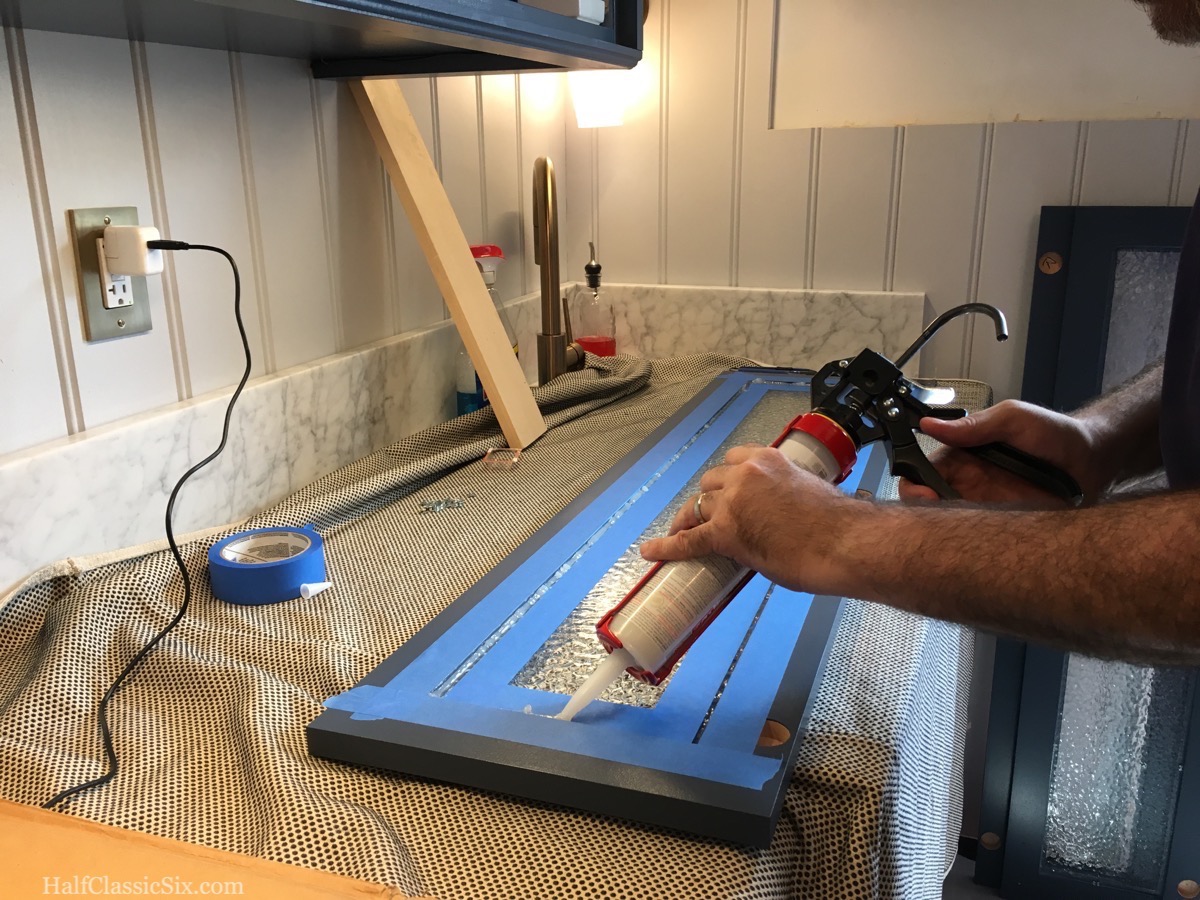
Adding the bead of silicone to the perimeter of the glass.

I am using my index finger to evenly spread the silicone along the border of the glass pane.
After applying a bead of silicone around the perimeter of the pane, I used my finger to push it into the groove around the entire piece of glass, and then once I was satisfied with how it looked, I carefully pulled the tape up before it set.
Close up just before pulling off the tape. The glaziers points are holding the panes in place while the silicone will form the bond.
Then came the really hard part….. Waiting for the silicone to set up before adding the hinges and installing the doors.
Wrapping up the glass installation, the silicone caulk is still wet, making me wait to install the hinges and then the doors themselves.
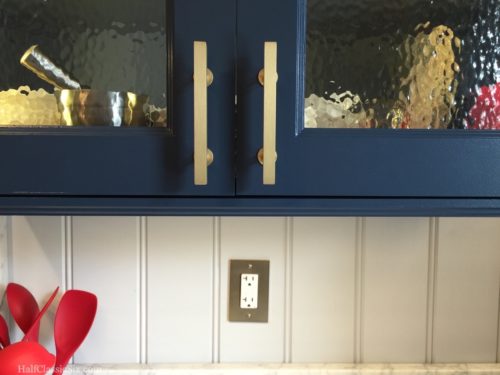
Once the silicone had set for a couple of hours, I got busy installing. If you have read this far, here is the reward for getting through all of the details.
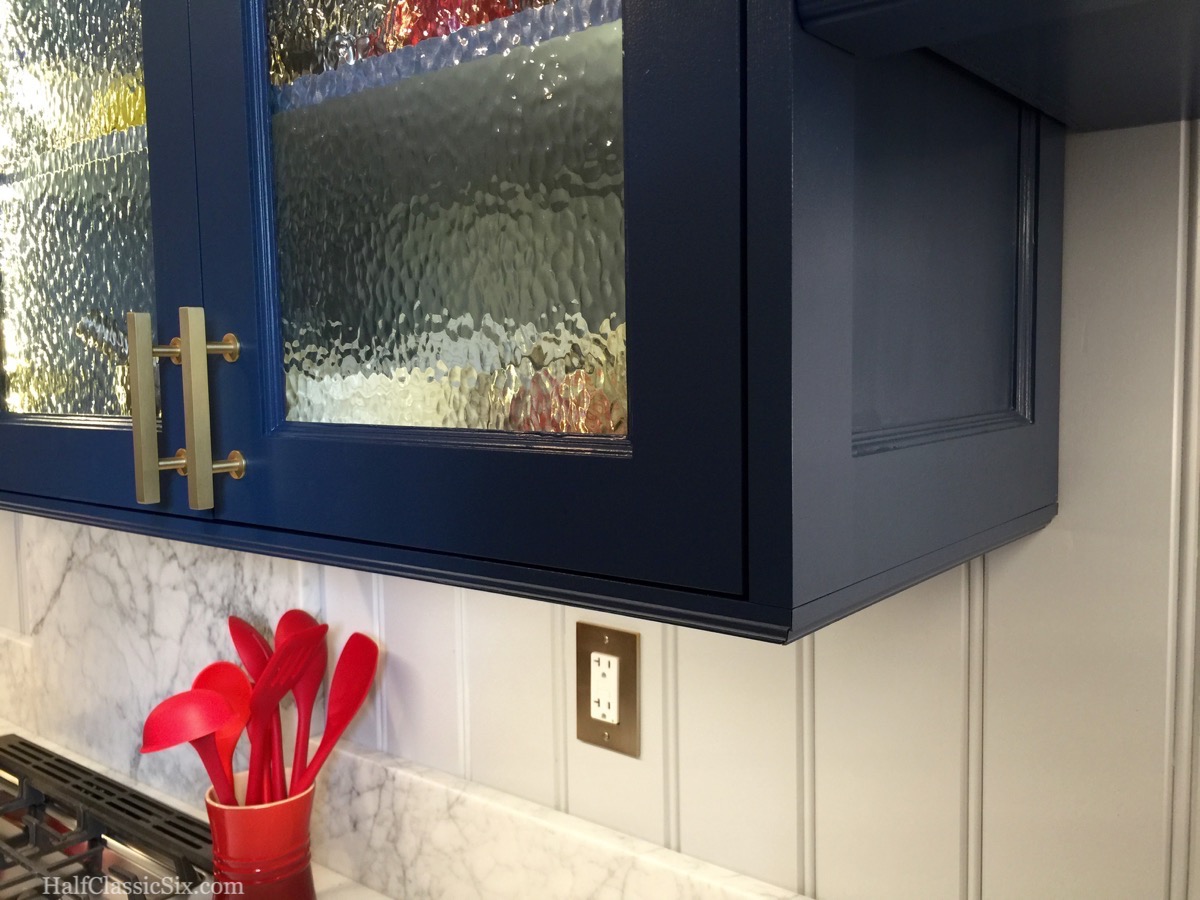
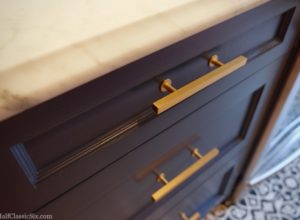
The combination of the custom side panel with the bottom trim crafted from a 1×3 piece of poplar really frames the doors beautifully.
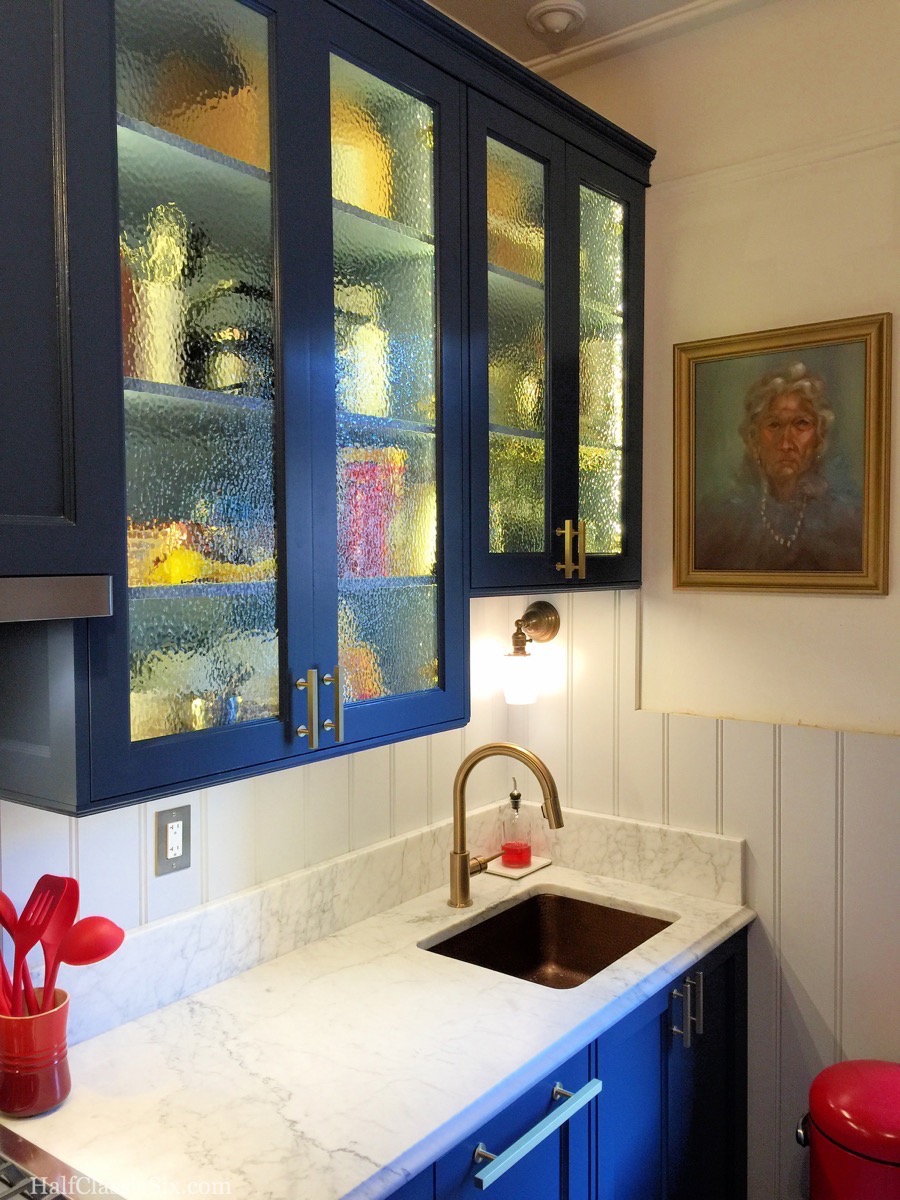
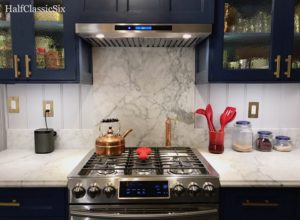
The magazine worthy shot. The outside light on the Stiffkey Blue cabinets is so pretty and changes tone throughout the day.
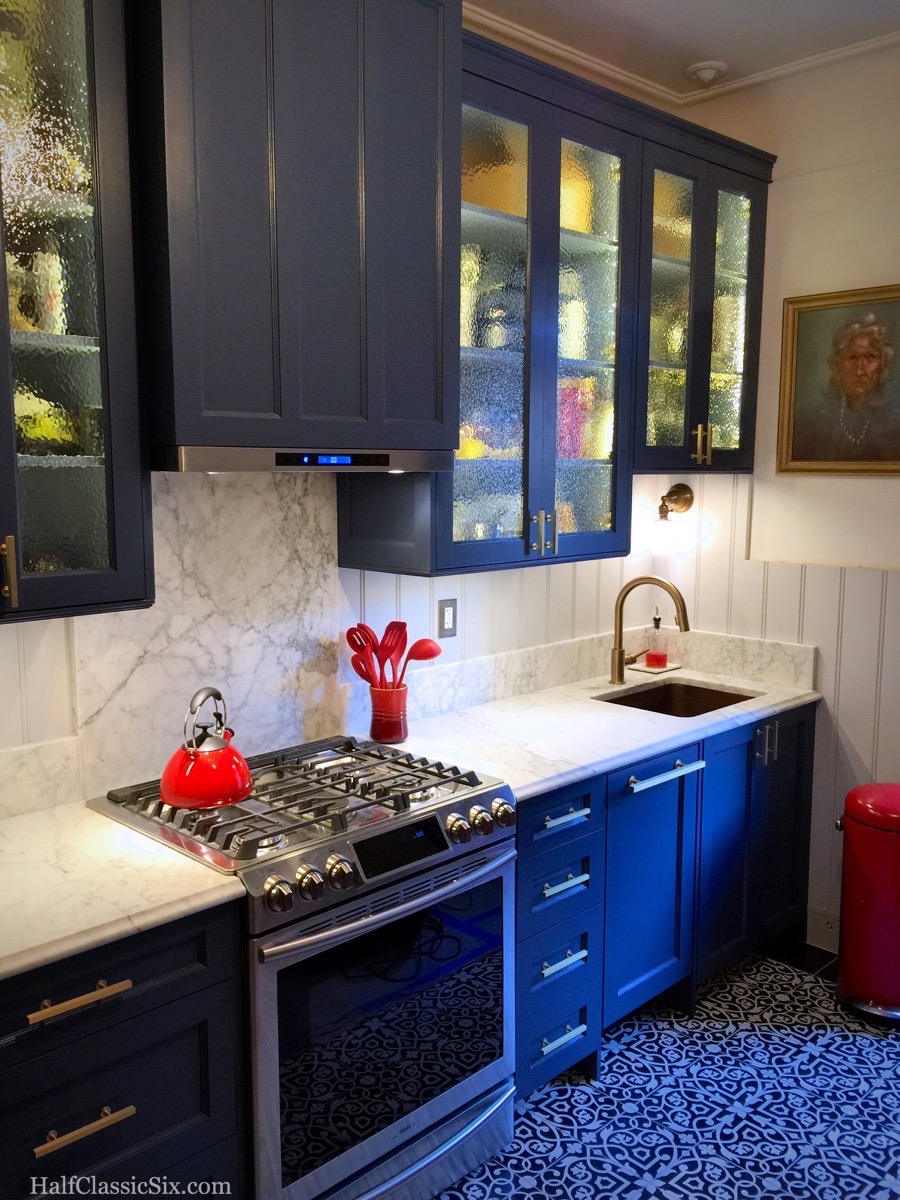
Another magazine worthy shot, yes? (Ignore the unfinished beadboard trim on the wall under Nanna Zelda).
The interior cabinet lighting is just inside the door frame and wonderfully obscured by the texture in the glass.
So, finally…. Phase one is done(ish). I still need to come back later and finish the toe-kicks and some other trim-work on the beadboard wainscoting, but beyond that, it is done! Now we are preparing to head out for our annual week in Provincetown, MA, a very overdue week away from New York and our kitchen reno. Phase two will start later this month when I am back in town. I’ll be putting together a post about what’s to come soon, and I will also be working on a resources post as a few folks have asked where we got all this great stuff.


July 6, 2016
Gorgeous, gorgeous, gorgeous! I love the glass. We also keep trying to keep our business local, but sometimes the local businesses just don’t make it easy. It’s always a tough call.
July 6, 2016
Thanks Stacy! I see on IG your kitchen is coming along as well! It will surely be done well before mine. 🙂