The reveal!
Ok, so last week I posted about what we started with and the process, and left you with a few images to get you thinking…. Now your patience will be rewarded….
This is our entry gallery as it is today…..
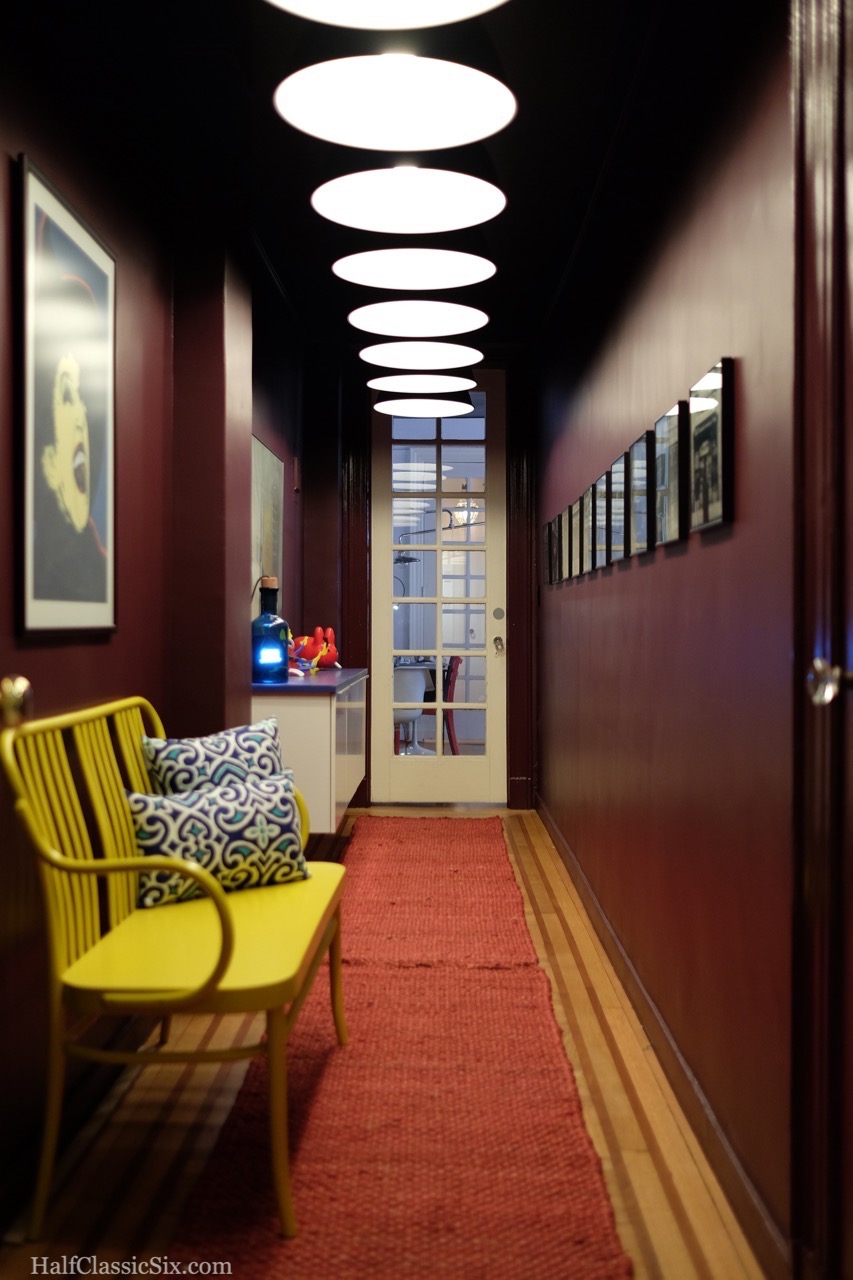
The hallway as viewed from the living room… Makes my heart go thump thump thump every time I walk through it.
WOW! WOW! WOW!
I know! Right?
It’s amazing!
Our 22 foot long entry gallery was very uninspiring before, but with a coat of deep dark luscious Raspberry Truffle from the Marquee Collection at Home Depot [MQ1-49] the transformation is complete. It makes a bold statement as one transitions from our front door to the living room. There is a sense of importance and grandeur as you make your way into our home, without being stuffy (I hope). We are so completely thrilled with how it looks, and every time I come and go, I can’t help but have a moment of pride for thinking this up myself.
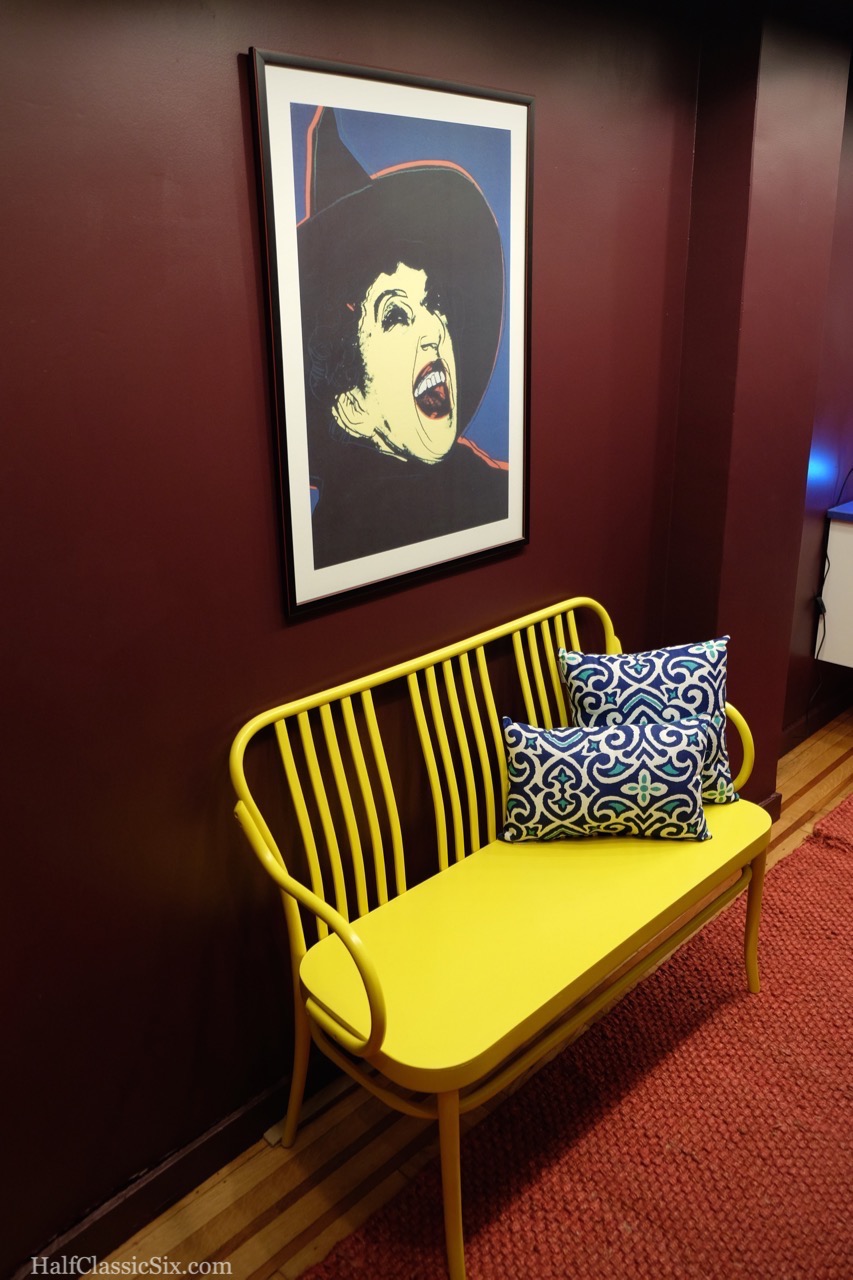
Andy Warhol’s Wicked Witch has taken up company over our yellow bench which we purchased before we closed on the property.
The concept:
Our plans for the hallway began in July of last year, before we had even had our board interview and set a closing date. If you have been reading HC6 for a while, or read backwards, I did a post about a certain yellow bench and our plans for the hallway in July of last year. Looking back at what I wrote almost 14 months ago, we basically did exactly what we planned with the only exception being that we changed the color and went bold with the lighting.
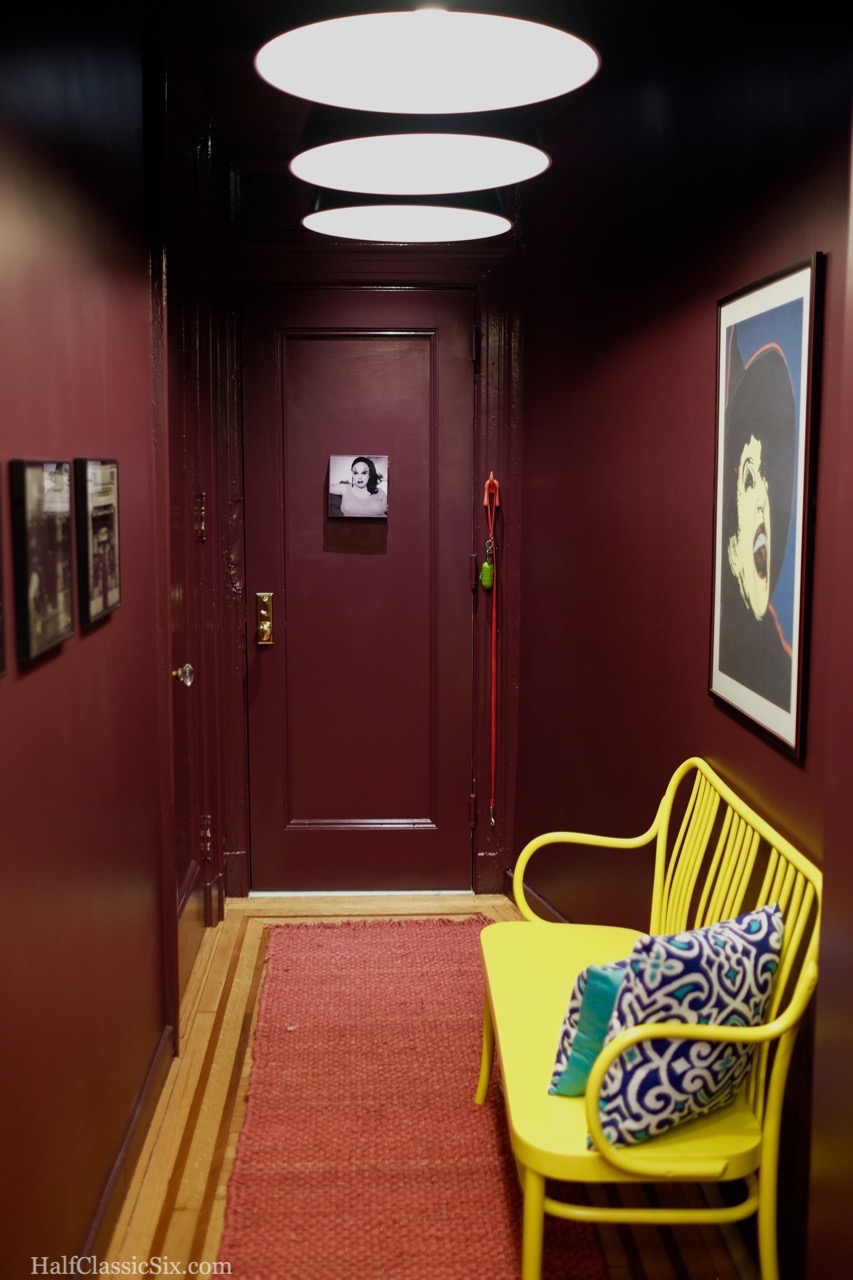
Looking back at our front door from about the halfway point in the hall.
To go along with that yellow bench, we decided to hang Yoav’s print of Andy Warhol’s Wicked Witch above. This print has a lot of sentimental associations for Yoav and was a gift from a very dear friend. It was expertly framed, and the colors worked absolutely perfectly in that spot. This was a no brainer.
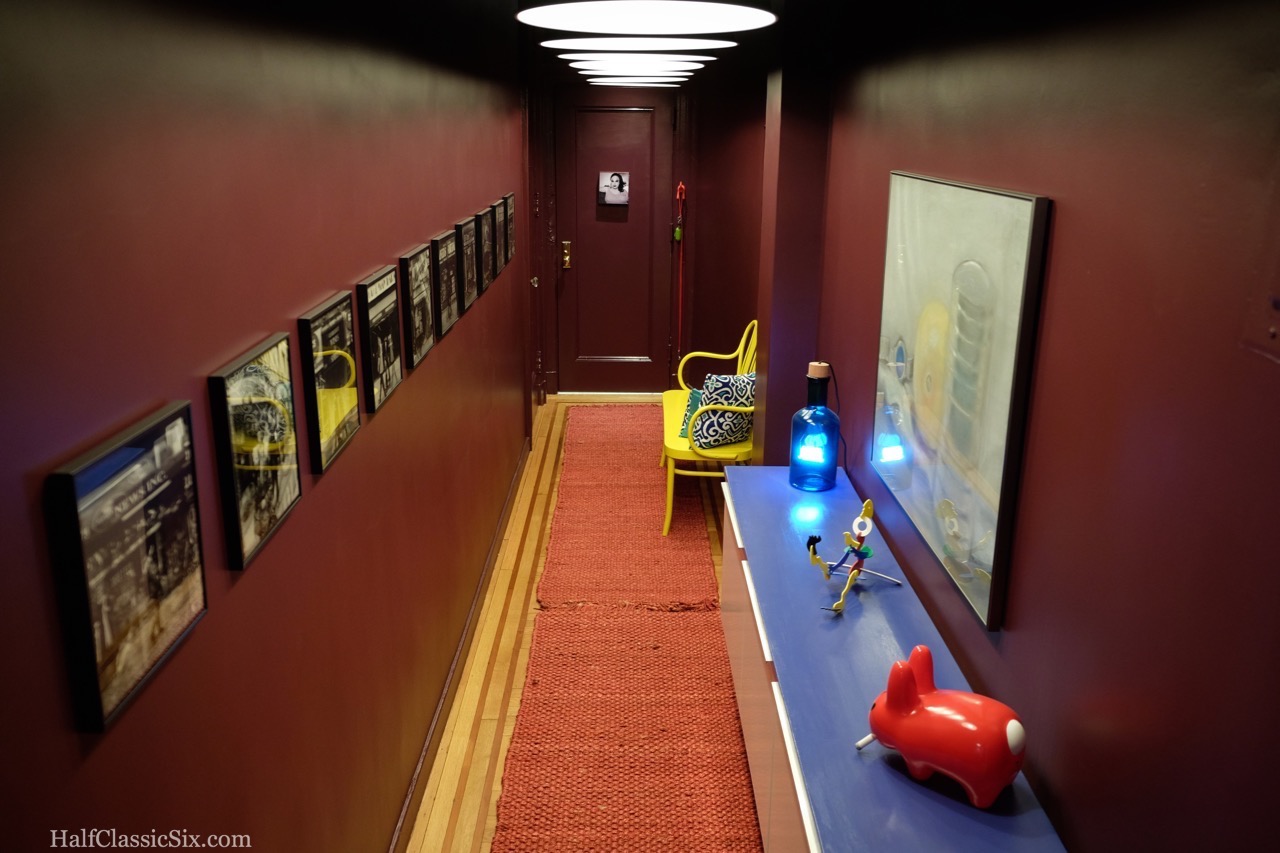
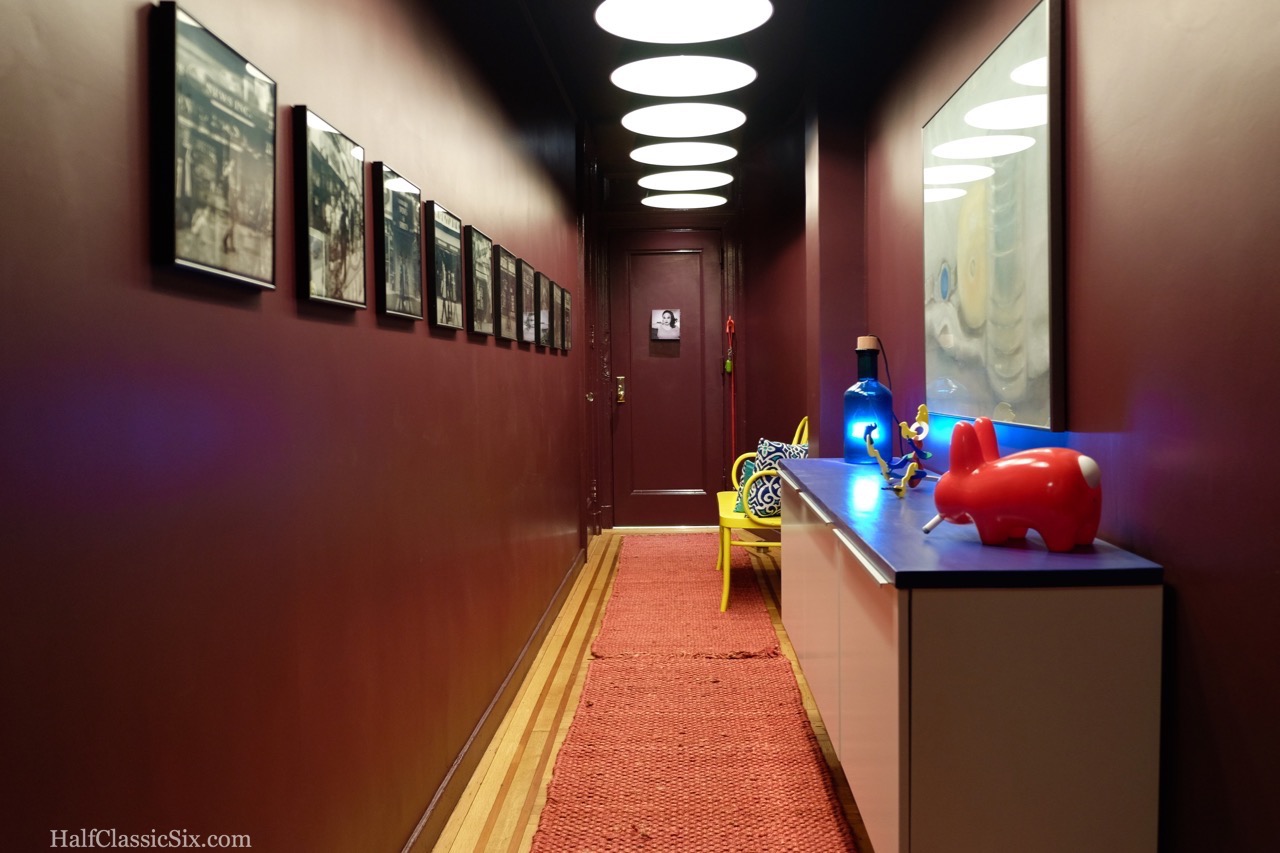
An overview of the gallery hall.
Along the same wall as our bench, we hung a “fauxdenza” using IKEA SEKTION upper kitchen cabinets hung low with a butcher block top stained medium blue (to pull in the color from the Wicked Witch). Above the fauxdenza is a chalk work done by artist David Hathaway, a close friend of Yoav’s, also with a lot of sentimental value.
The opposite wall is designated strictly for photography, my photography to be specific. I hope to change it out twice a year to keep it interesting for guests. For the moment, I have a series I shot with my iPhone this past March of mom and pop store fronts along Broadway from 77th to 107th Streets. You can view the actual shots here on my flickr page (if you are curious). The blue light is the Bouche Neon Table Light from Beam in Williamsburg, something we both fell in love with last year and used wedding money to buy. The rag rugs are from Overstock.
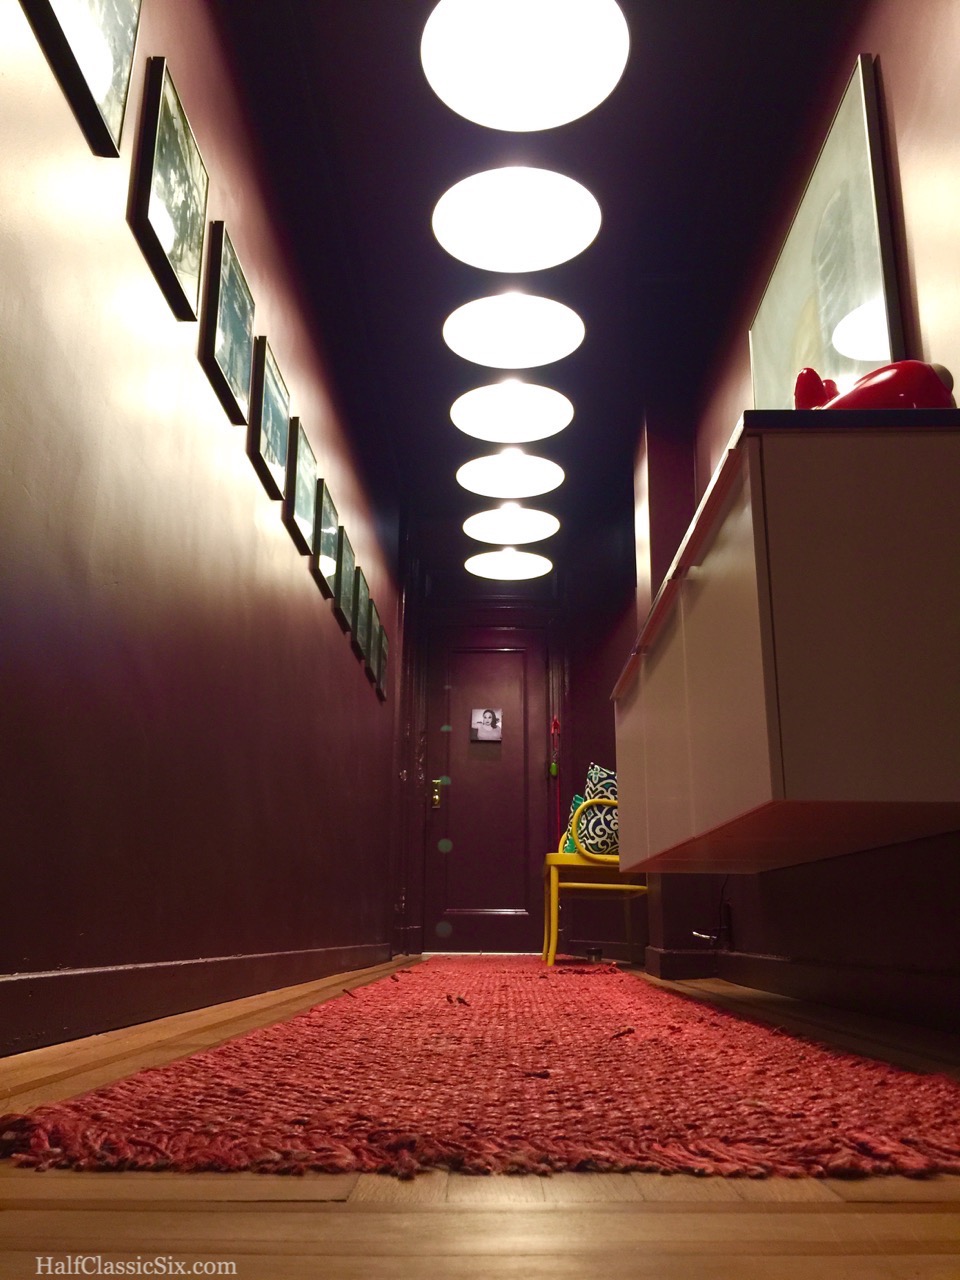
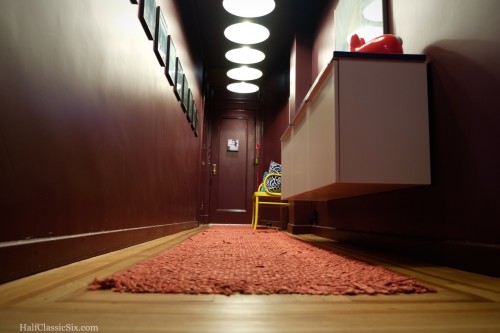
The view from the living room door at floor level. The lighting is so wonderful.
The lighting:
Last year when we were working out the plan for the hallway, I decided that we should keep it simple. Because we were going dark, I wanted to just run a single black track down the length of the hall and use LED spot lights on a dimmer to highlight the art, leaving the rest of the space dark. So dark, you wouldn’t be able to see the actual light fixtures, only the spots of light shining down.
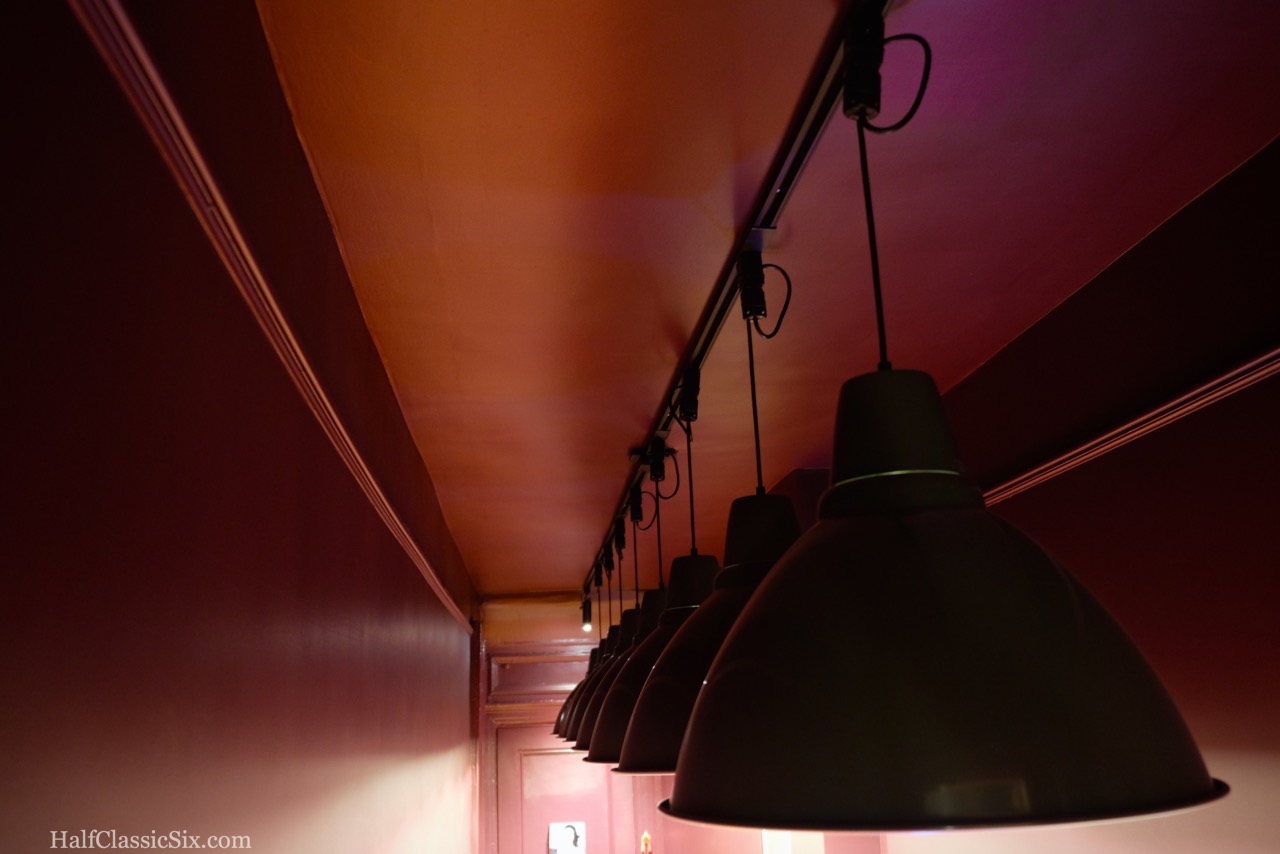
The view from above the lights…. You can’t see any of this when you are standing below them, it is as though the ceiling was black.
Then, after thinking about it more and more I just really didn’t want track lighting. But what? Then it dawned on me….. An idea I have had rolling around my head for many years, but no space in which to make it a reality until now. Inspired by a photo I took of the lighting at the coffee place in the Chelsea Market, I suddenly realized that I had the right space to make a serious impact with some amazing lighting. But how to do that and not spend a fortune? Ikea FOTO, of course! At $30 each, we could get maximum impact and not break the bank. As for getting them up on the ceiling, I already had the track light track from my Hell’s Kitchen apartment, so all I needed to do was install the track the full length of the hallway, and hook each one up with an adaptor. This worked out to about $15 more for each one (adapter, plug, and LED bulb), making them not that many dollars more than the $39 LED track heads we were planning to use originally, and obviously much more impactful. The LED bulbs being only 10 watts each at full brightness, we are talking about only 80 total watts of power for more than enough light.
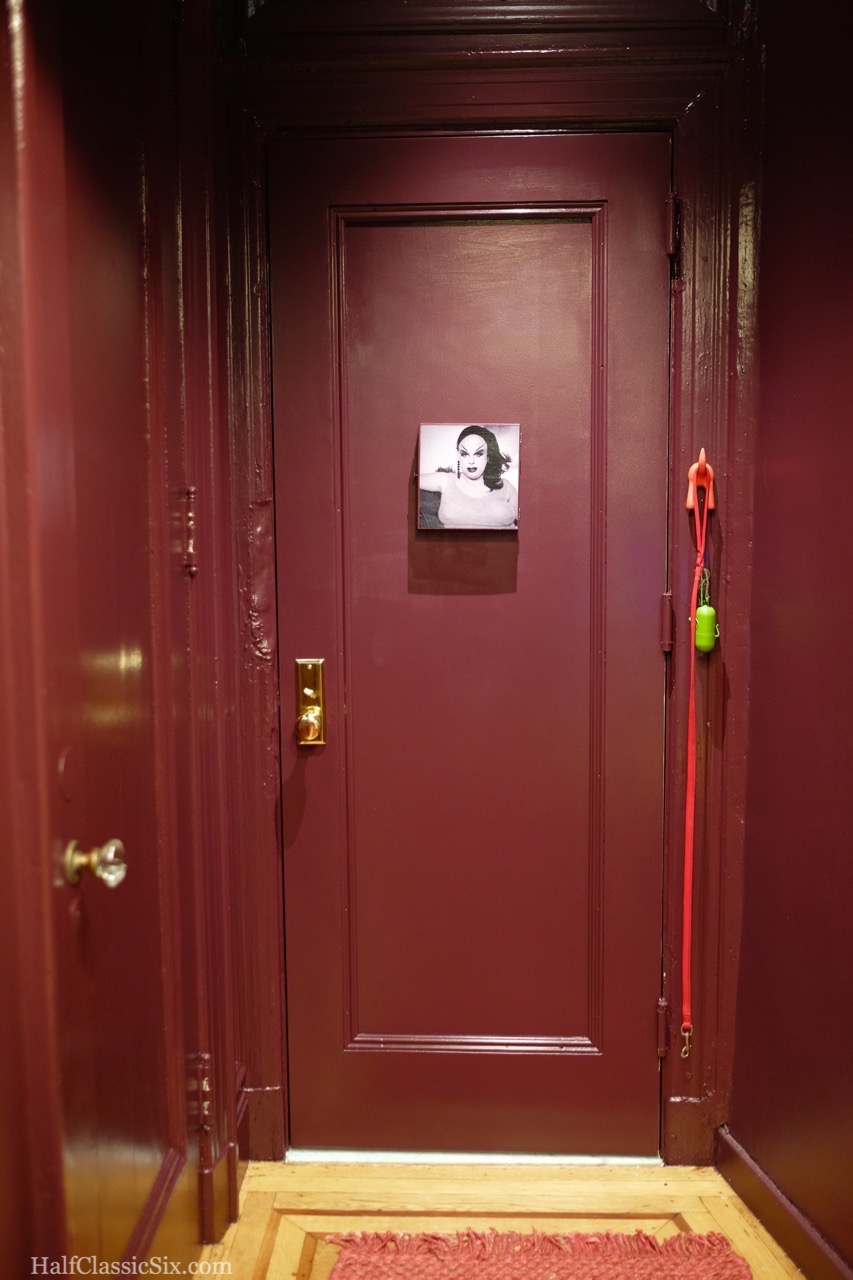
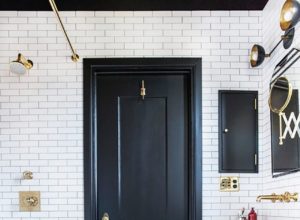
The inside of our front door, cedar closet on the left, the dog leash on the right, and of course, Divine in the middle of it all.
And then there is Divine…..
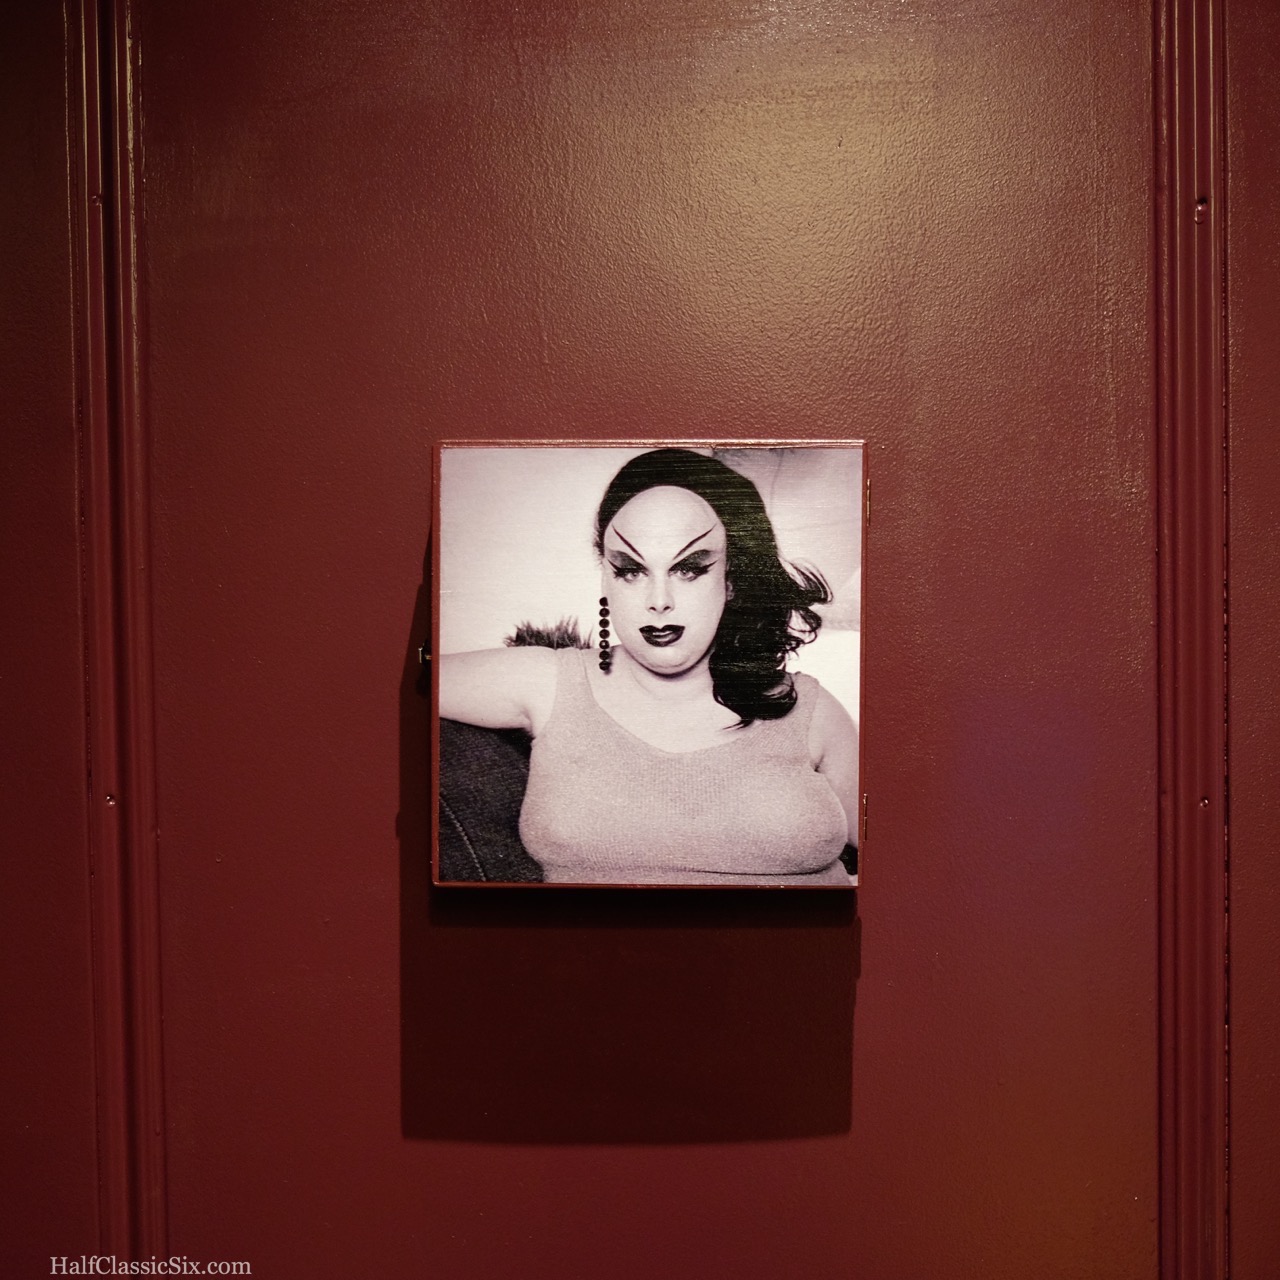
Divine makes for the perfect last impression when leaving our apartment.
So, just before we began working on the hall, we had an issue with our 1930s front door locking correctly, and it was decided that a new one needed to be custom made (to sorta match the other apartment doors in the building). The new door was installed last month, and it was raw, unfinished steel over a wood frame (fire code), set in a steel frame screwed into our original frame. The painting of the door was left to us (which was fine with me) so this allowed me to prime and paint both the inside of the door, as well as the inside of the door jamb to match (the outside was painted by the building staff). Unfortunately, when they installed the door, they also installed a mechanical door bell on the inside of the door housed in a hideous white plastic enclosure with a sliding thing to open and look through the giant peephole. Since, we would never hear that mechanical doorbell inside the apartment, I decided to remove the doorbell button on the outside, and the enclosure in the inside and do my own thing (saving it for the possible day far off into the future when the apartment may need to be sold.)
I attached the button for the electronic doorbell to the outside over the hole where the button was, and on the inside, I came up with the solution of attaching a box with a door on it to cover the peephole. But of course, I couldn’t just put a plain box up, it needed to be another place for creativity. Having recently stumbled across an image of Divine I hadn’t seen, I knew that was the perfect thing for our peephole box.
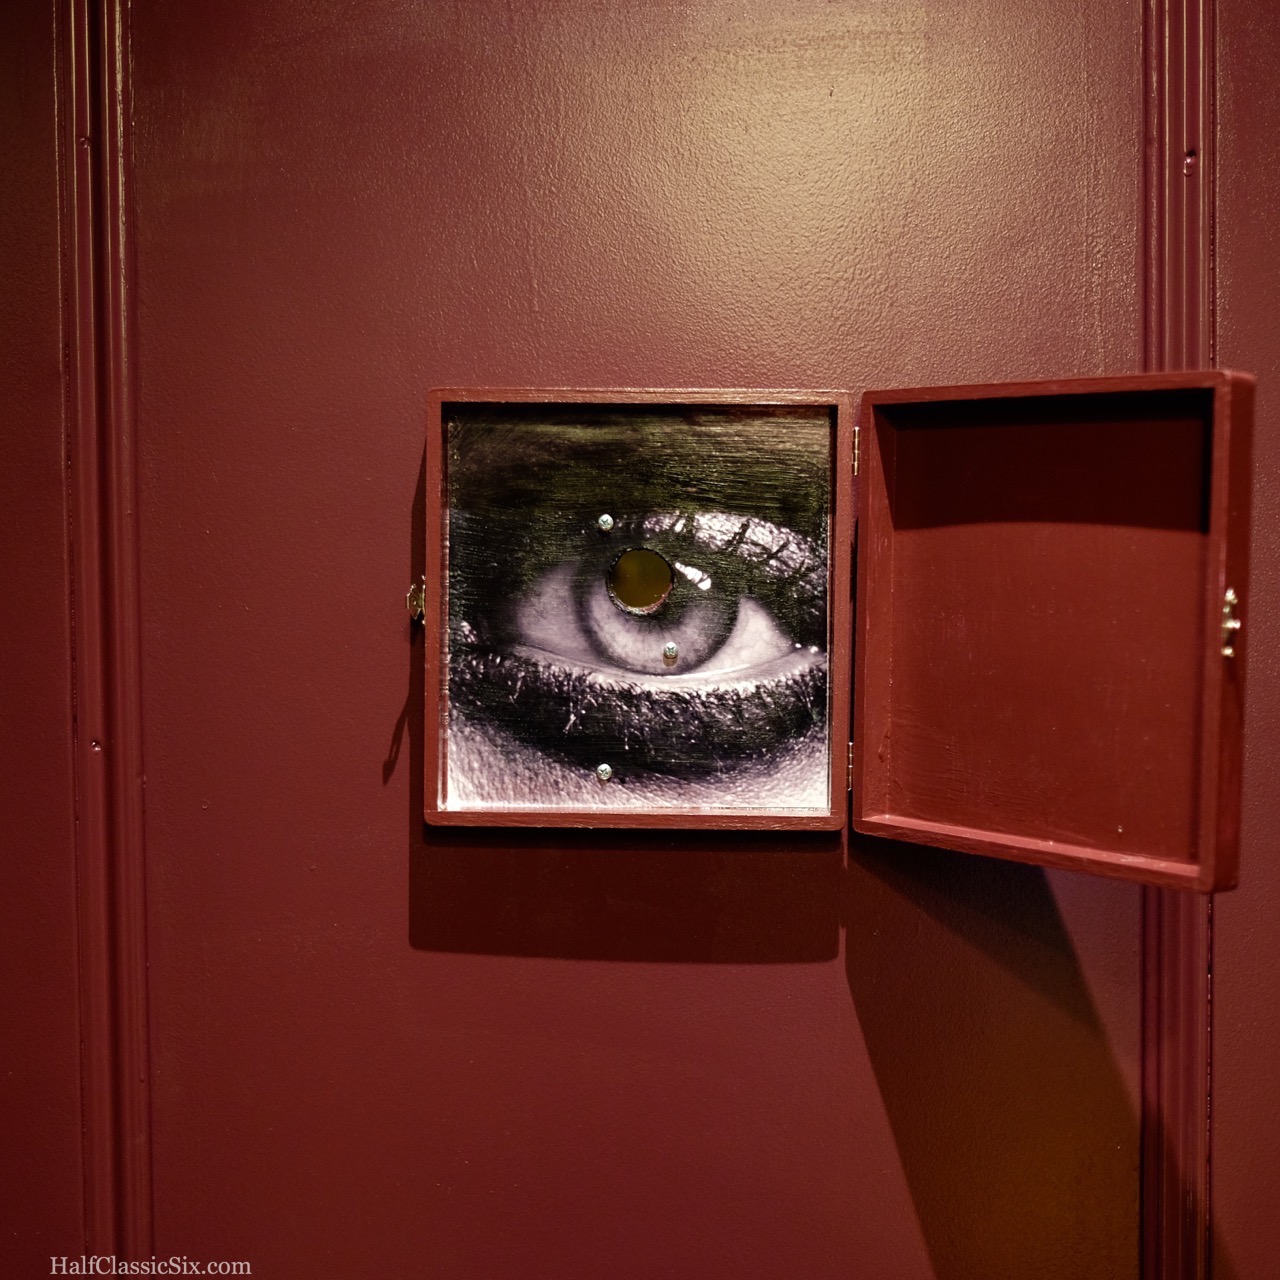
Inside the peephole cover, peeping back at you.
And on the inside, it needed to be something else, an enlarged version of your guest peering through your peephole back at you seemed perfect. The choice to go with black and white images looks absolutely wonderful against the Raspberry Truffle paint color.
The view as you walk into our apartment. Eventually, the French door will be stripped of all the white paint and the underlying mahogany restored.
So I must end with this tidbit…. Last month, just after they replaced our front door with a new one, I had the door propped open and was painting the door jamb when a neighbor stopped by. He stood there and looked down the hall with pleasure, and said: “You’re really into this!”. To which I responded without a beat, “I don’t f*ck around”.


0 Comments