Yesterday was The Big Black Reveal (Part I) where I described how I was enthralled with the idea of a black ceiling, yet terrified of doing it. And then after letting go of my fear and getting the approval of my husband, moved forward and painted our living room ceiling black.
As much as I would like to say that having a black ceiling in my living room only serves to reinforce my status as quirky and unconventional, the primary driving force for painting the ceiling black was more about the fact that it provides a back-drop for our crowning jewel of a chandelier.
But, before we could have a chandelier, we needed a medallion. In the past, I have always thought ceiling medallions were basically tacky, unless they were original to the room. They just seem so out of place in a modern home and even more so when it is obvious that they were added later. Our apartment when completed in 1910 had simple, but very beautiful over-sized plaster crown moldings, but it didn’t have ceiling medallions. Well, our crown moldings were unfortunately removed in a subsequent renovation and although it did not have a medallion, they were none the less still very in vogue in 1910.
The painted medallion ready to be installed.
So, my goal was to find and install a stylistically appropriate ceiling medallion that related to the Beaux Arts architecture of our building (I found one on Amazon) and make it look as though it has been there the entire time. How did I do that? I used a trick I learned from Daniel on Manhattan Nest. I used Plaster of Paris with a one to one ratio of water to create a slurry. After a very quick and intentionally sloppy slathering of the slurry (say that three times fast) the medallion took on the appearance of having been on the ceiling for the past 105 years with requisite dozens of coats of paint.
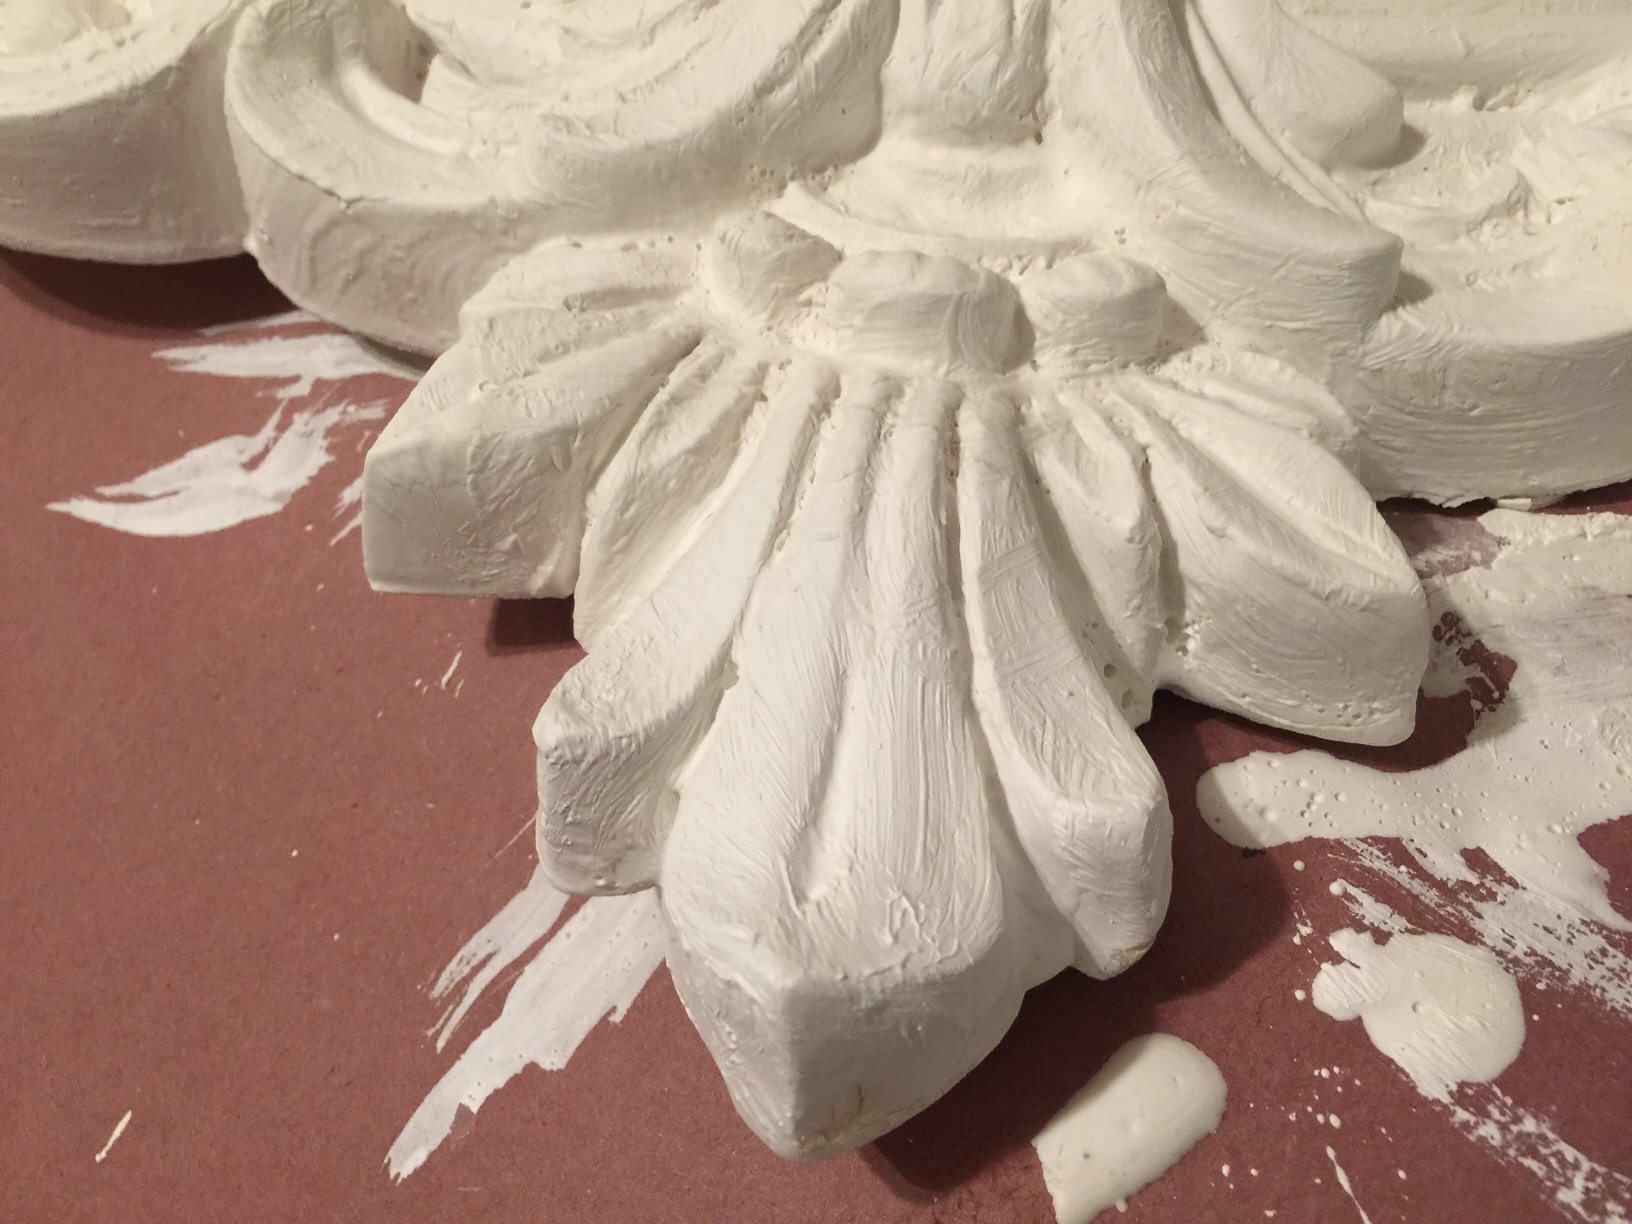
Plaster of Paris mixed one to one with water into a slurry and quickly painted on to simulate years of paint build up.
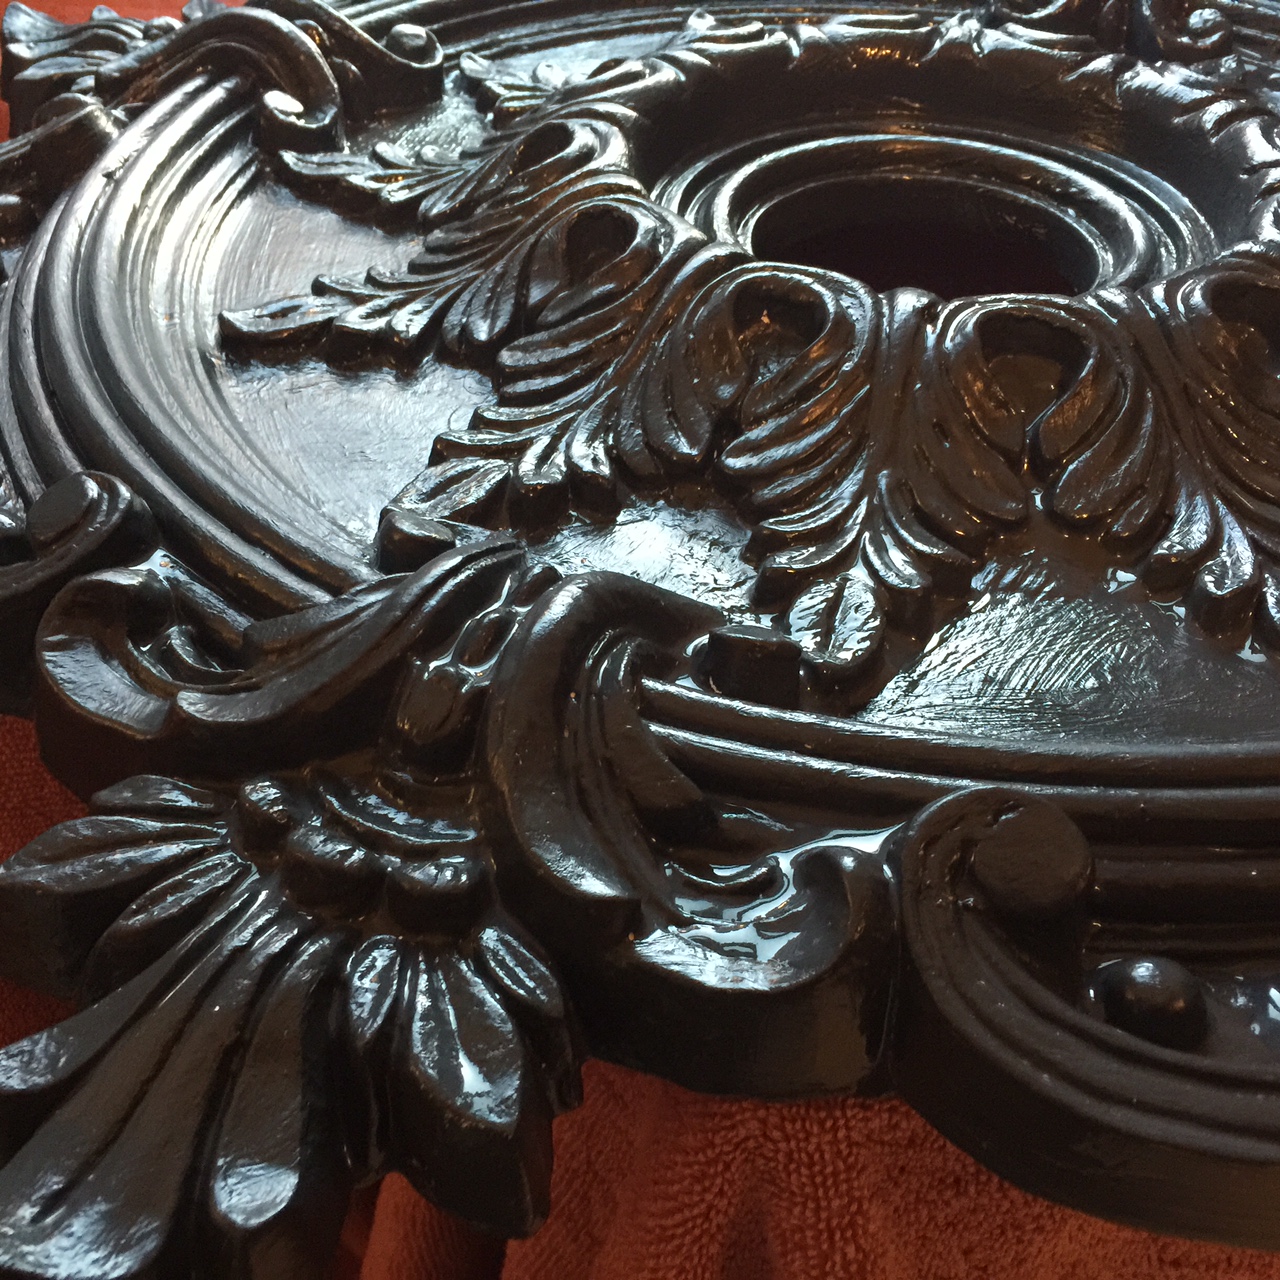
Once the medallion was dry, I gave it a couple of coats of the Onyx. With all of the details, nooks, and crevices in it, I found it much easier to paint it while laying down than had I installed and then decided to paint it from below. I am sure that when and if I ever need to paint this thing in the future, it will take longer to paint the medallion than the remainder of the ceiling.
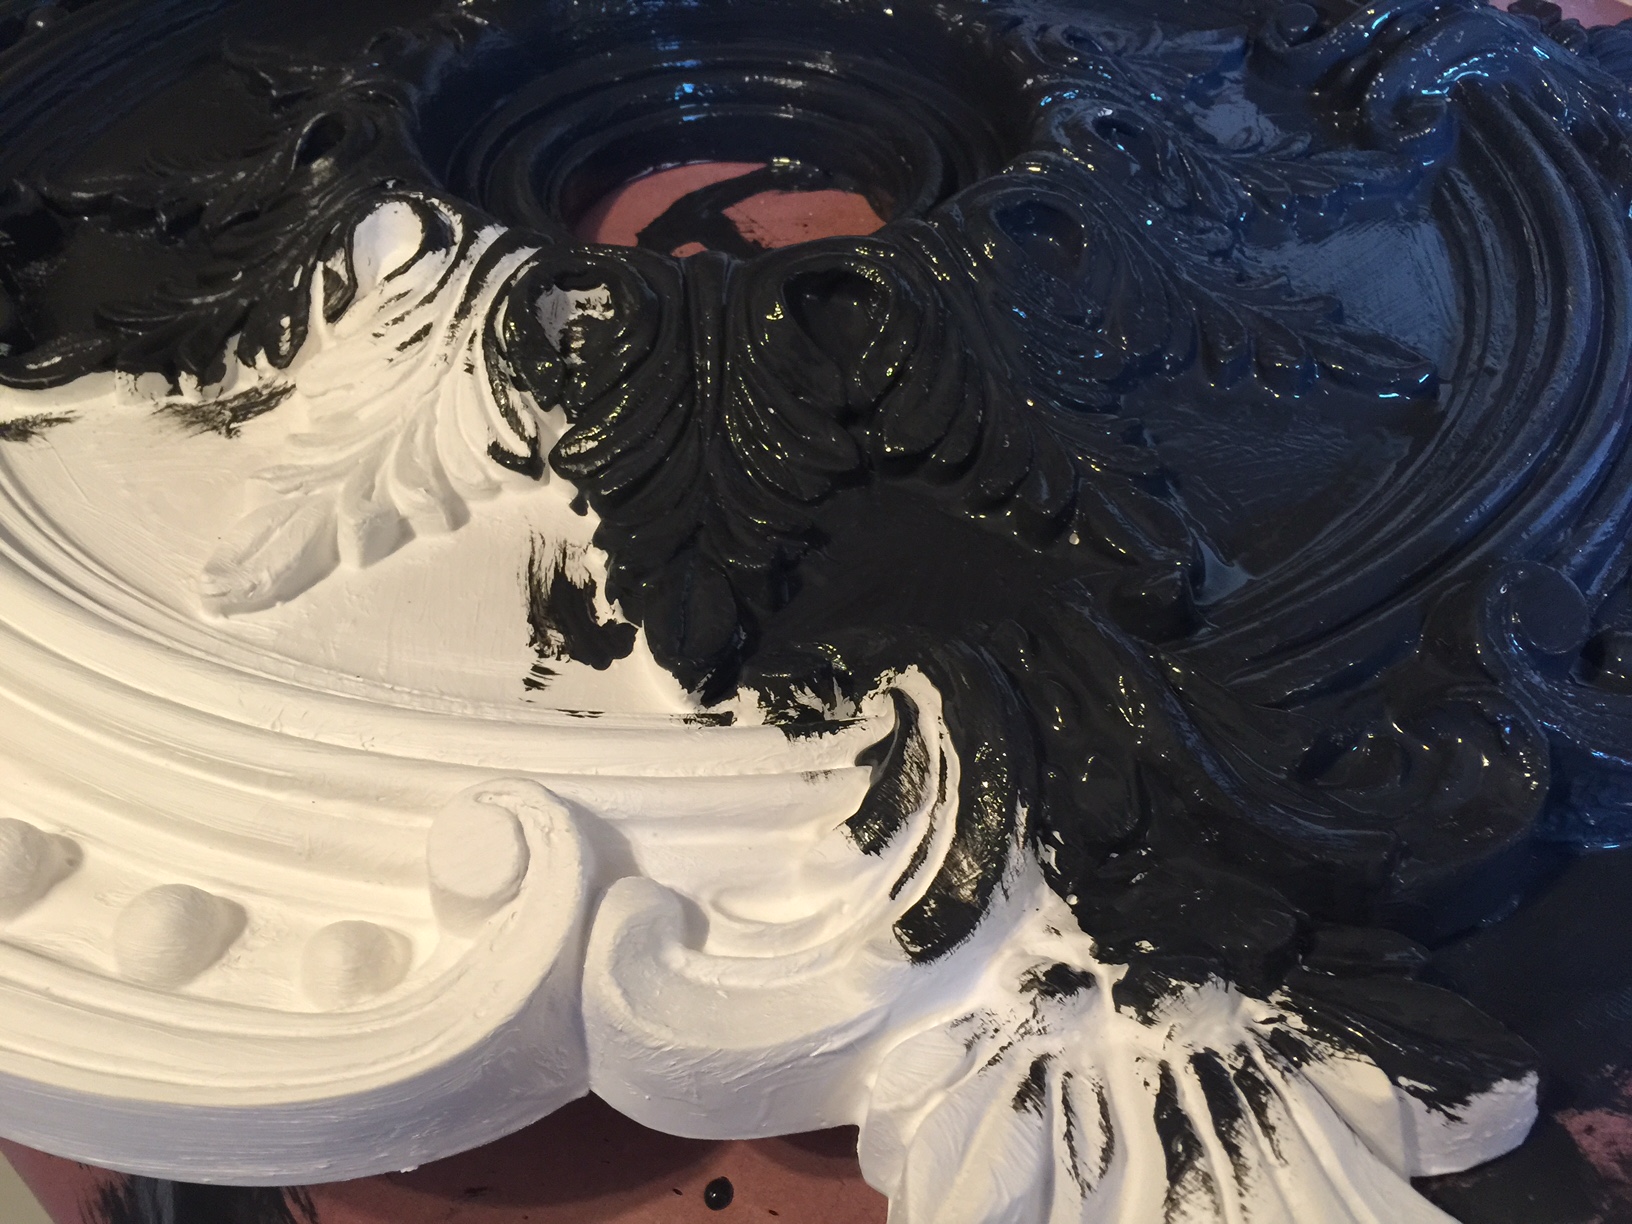
First coat of Onyx was soaked up like a sponge
I love how the Plaster of Paris gave it the look of having 40 coats of paint like the rest of our woodwork (image at top). Once the two coats were dry it was time to break out the liquid nails, apply liberally and stick it up there. Then I used my new favorite tool, my pneumatic nail gun, to shoot some 1.25″ brads through the medallion into the plaster ceiling just to hold it in place till the liquid nails set up…. Then some painters caulk around the perimeter and some touch up paint… This thing isn’t coming down… Ever.
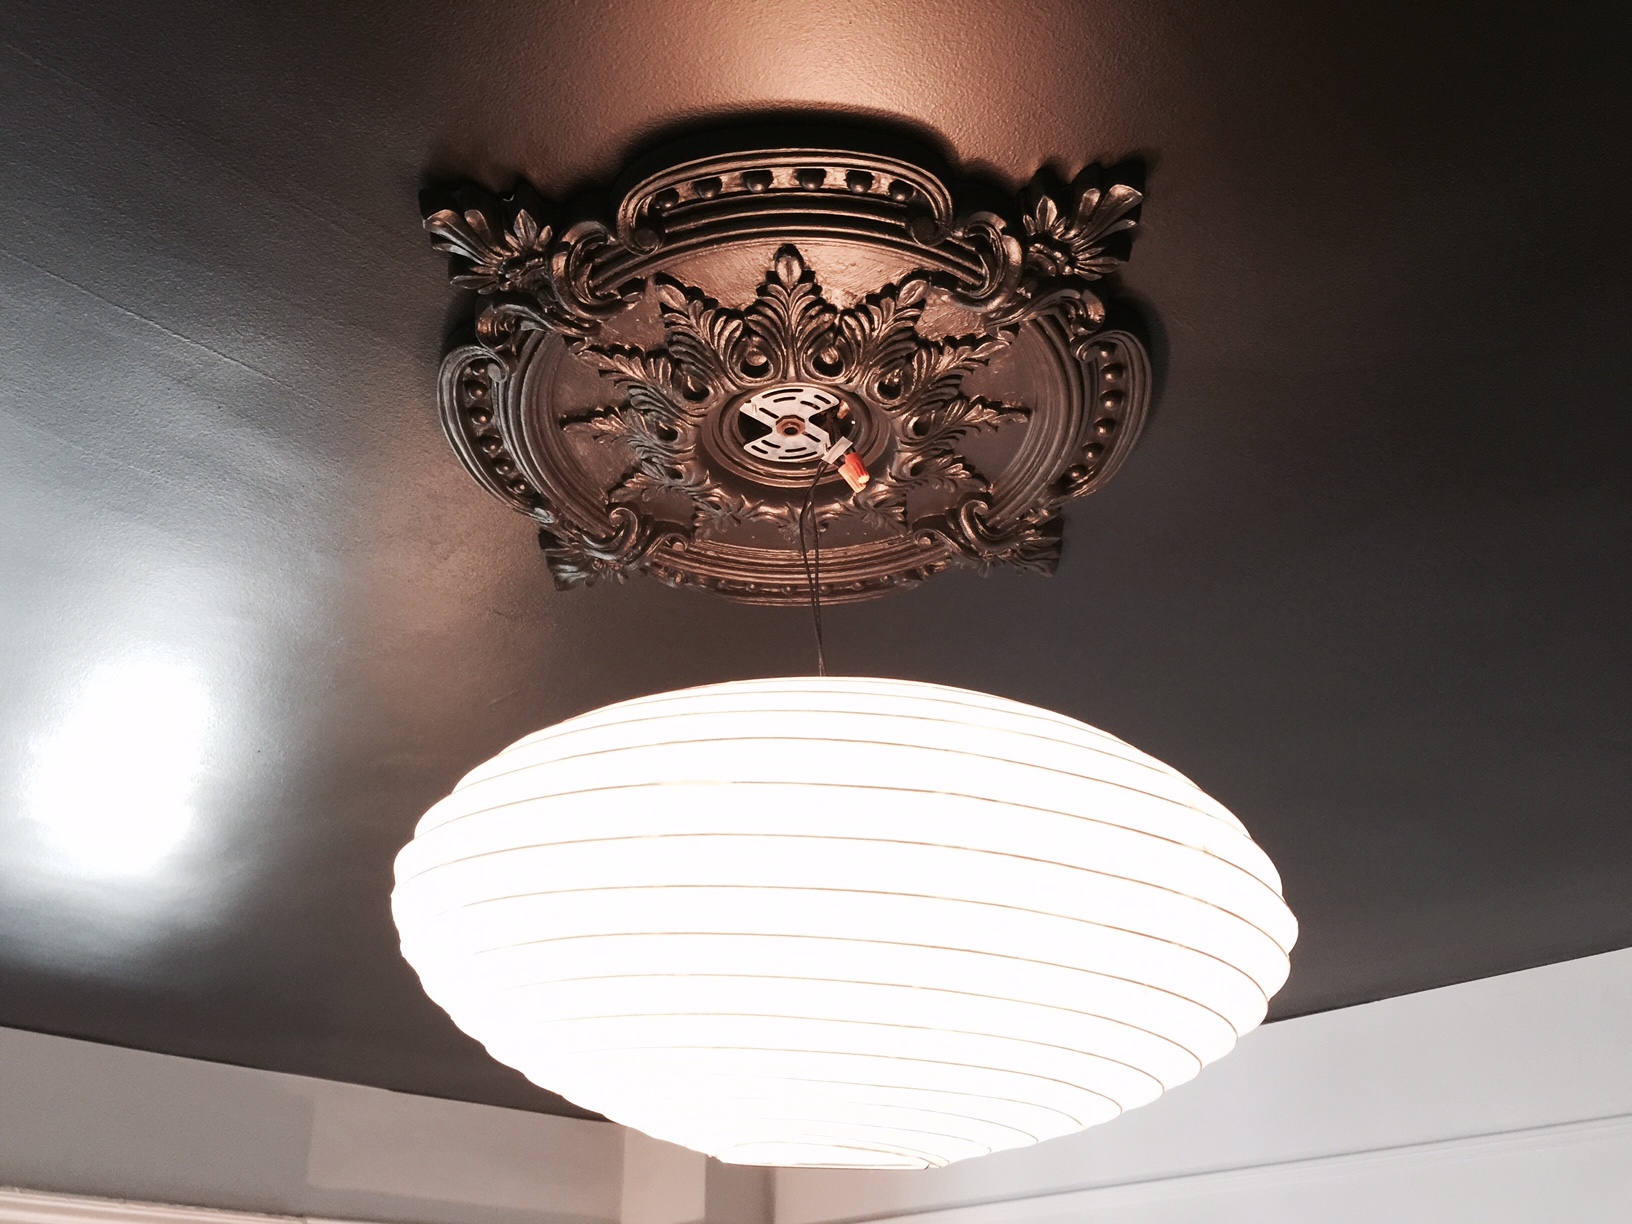
Medallion is up and with a few weeks till we could put the chandelier up, I put up a temporary paper lantern (cause I just can’t look at bare bulbs).
OK….. Now for the exciting part!
Finally on Saturday, March 14th, we were ready to install our crown jewel of a chandelier. I had already re-wired the fixture with new sockets, so it was a relatively easy matter of connecting it to our vintage 1910 wiring (which is in remarkably good condition). The fixture has six sockets, we found dimmable 40 watt equivalent LED bulbs which should last us for the next ten years (theoretically at least) The best part is at full power, it will fill the room with light allowing Yoav to work and only consume 30 watts of power. And they dim wonderfully!
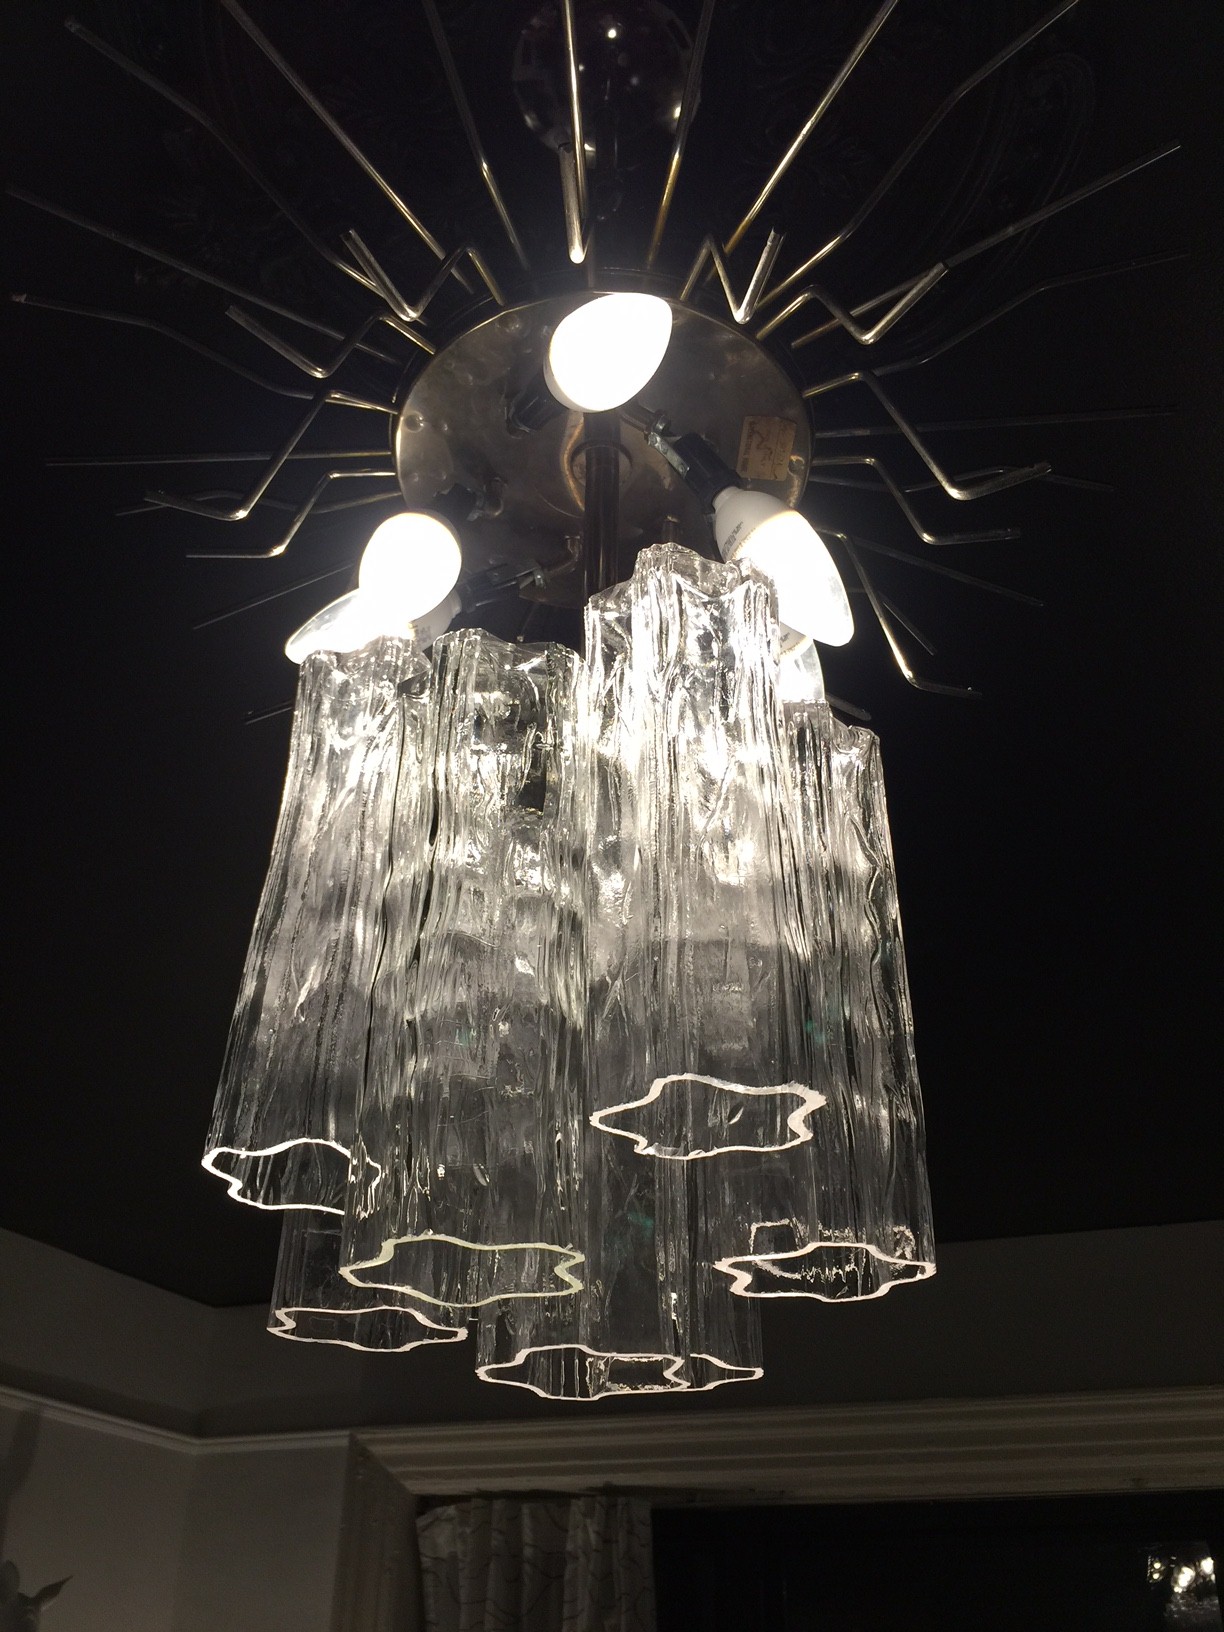
The first of three tiers of Tronchi glass attached.
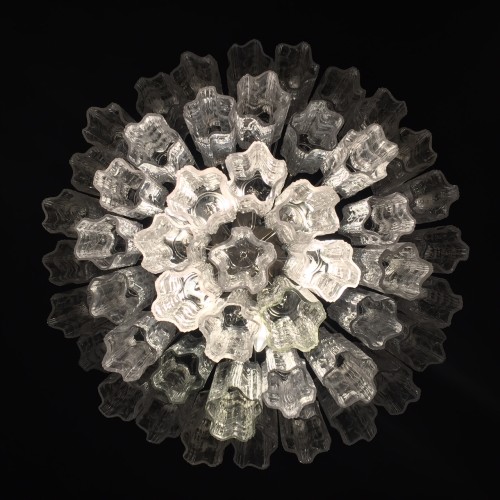
Then we began to hang the Tronchi glass pieces. To keep it from lilting too far to one side, you hang each piece opposite the previous one. It was a tedious and nerve racking process, but as the gaps started to fill in, the excitement grew for both of us. We were starting to see just how stunningly beautiful it is. By the time we had finished hanging all 49 pieces, we were completely giddy with excitement and joy. The photos cannot come close to how beautiful this is, and suddenly the fact that we spent more than we had planned became completely irrelevant. (Hint: click on the images and click through the slide show to see them bigger.)
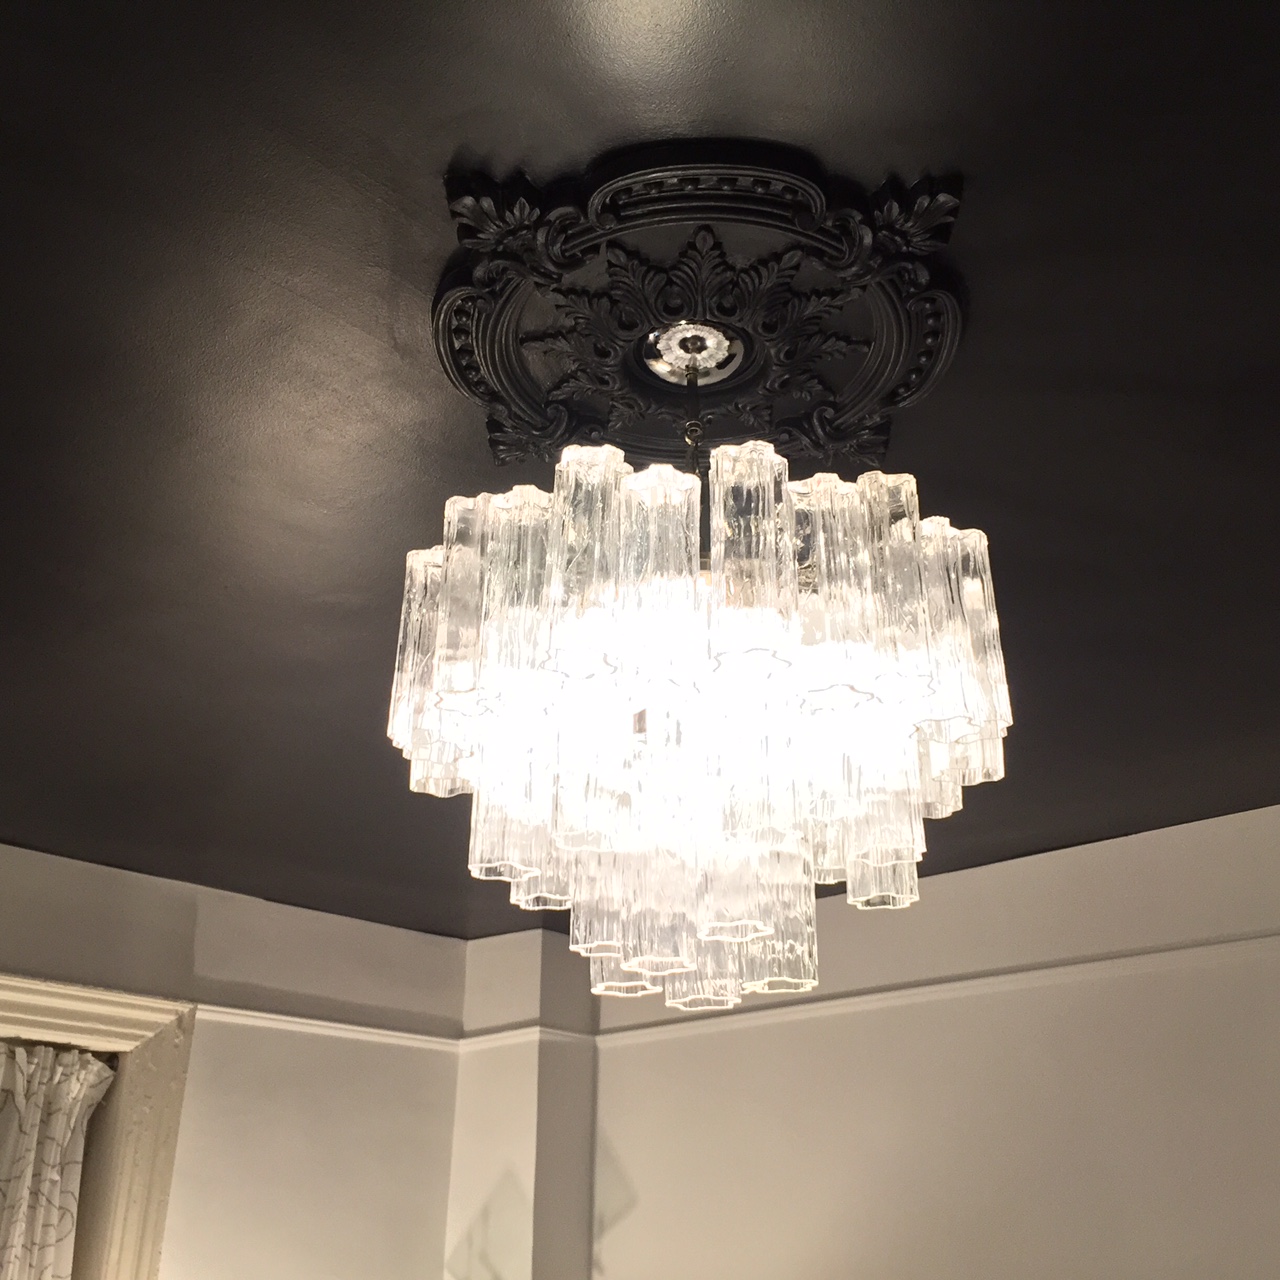
All 49 tubes hung and it is friggin gorgeous! The ceiling medallion takes a back seat, but I think it is perfect.
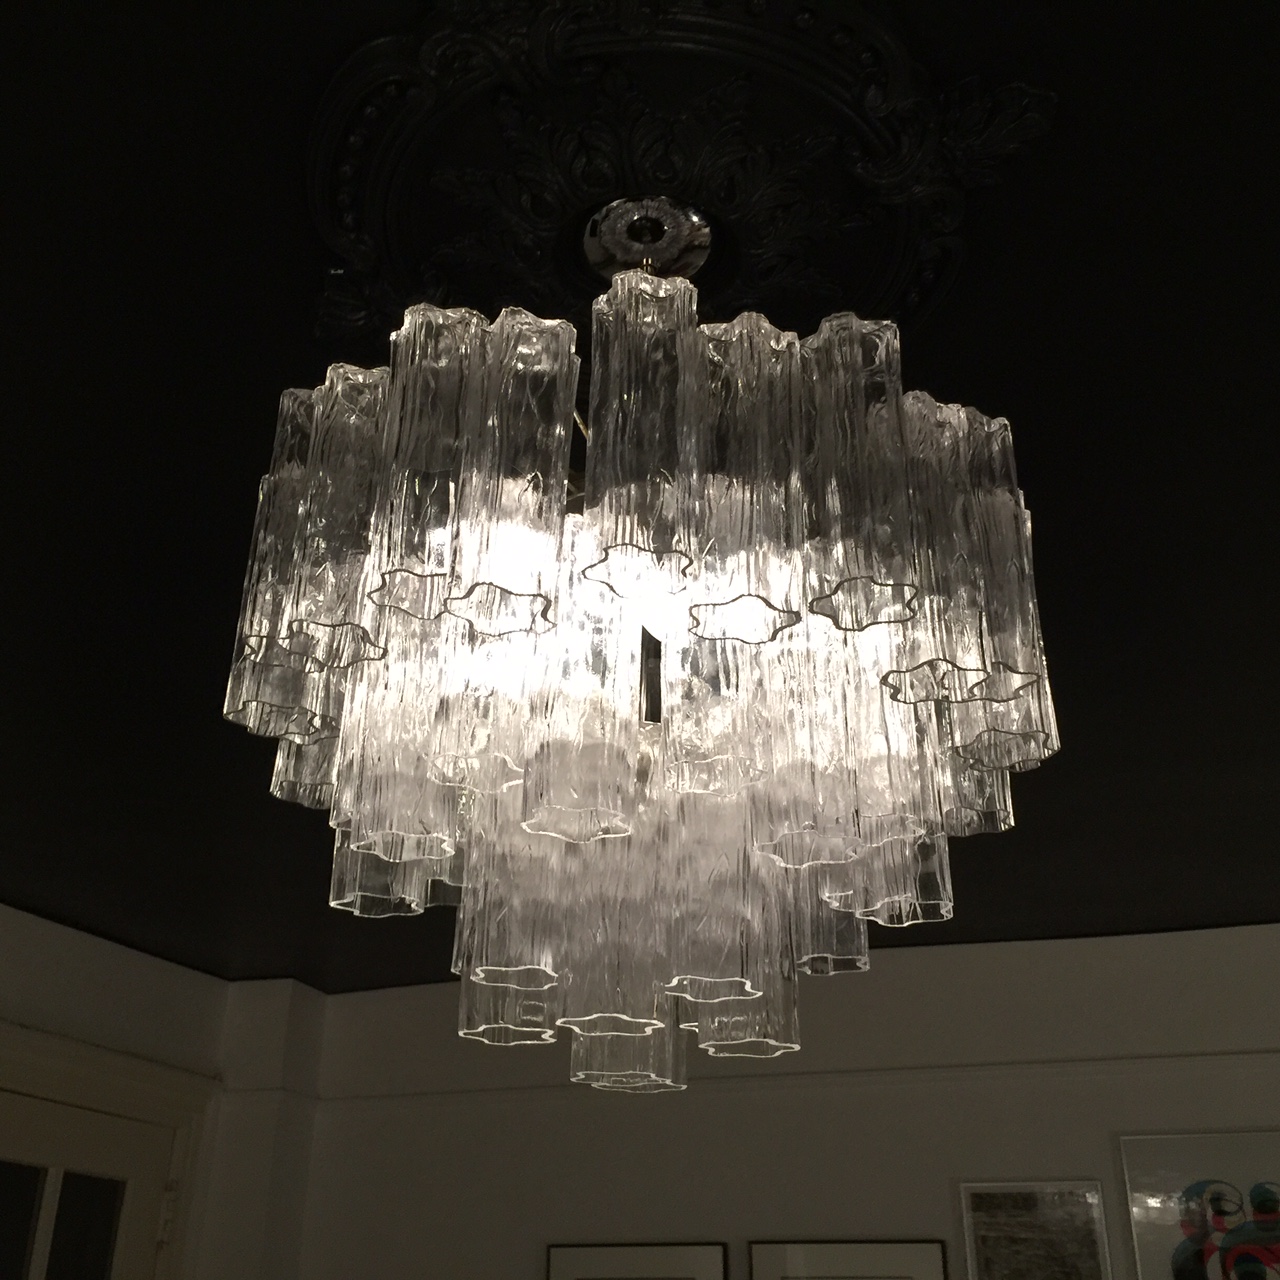
Another view with the lights dimmed a bit…. Looks like ice.
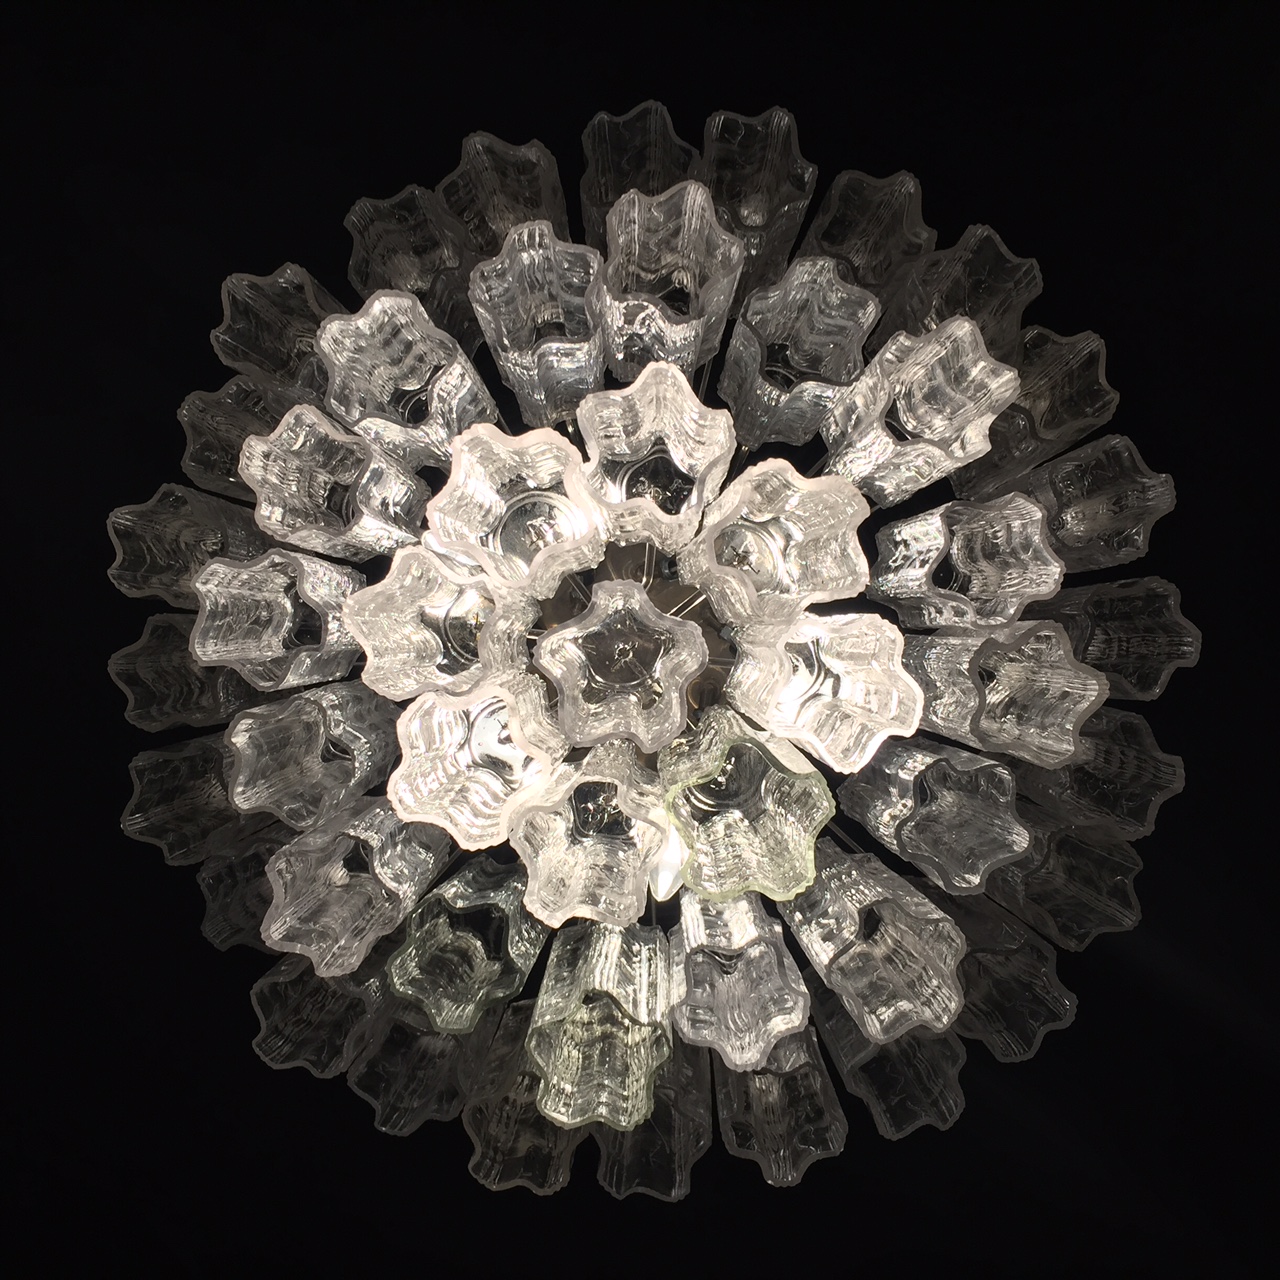
Standing under the chandelier looking up. This is truly amazing.
Finally after months of spending weekends painting walls and ceilings, assembling furniture, hanging art, and unpacking books and chotchke, our living room is beginning to feel like a place we want to come home to. A warm, comfortable, inviting space to relax.
In the coming weeks…. The full reveal.


0 Comments