Part of the joy (or is that sorrow?) of owning an old home is that things inevitably wear out. Sometimes it is a slow process where it occurs over years and other times it is an unexpected emergency where you are forced to address it immediately. This (above image) is what it came down to in our bathroom. A bit embarrassing as this was cleaned less than a week ago. Fortunately for us, there was no emergency requiring expensive immediate attention. But that doesn’t mean that there is no sense of urgency. Drip, drip, drip…
To put that last paragraph into context, we have had a cold water drip from our shower-head since the day we moved in last year. I do not know when it officially started, but I remember the tub not being dry the first time we toured the apartment, and it has not been dry ever since. This dripping shower-head did not dissuade us from moving forward with the purpose, we didn’t even make it a requirement that it be fixed. At the time we made our offer, we envisioned having our entire bathroom gutted and redone before moving in…. Well that didn’t happen. While we still plan to eventually gut (and rearrange all of the fixtures) the bathroom, it is now a long term plan, not likely to happen for at least the next five years.
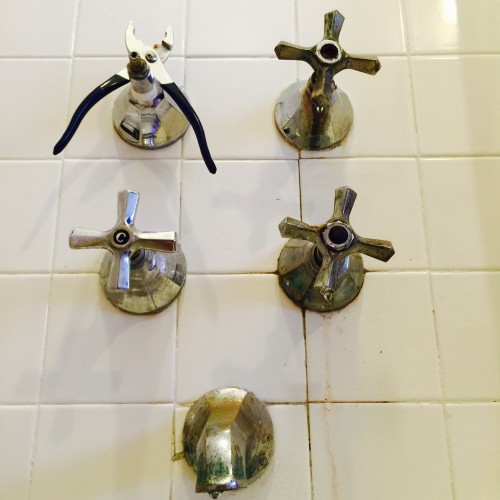
![It seems that having four valves in your tub is quite common in New York City. [Left] My 1934 bathroom from my West Village apartment [Right] my 1929 bathroom in Hell's Kitchen.](https://halfclassicsix.com/wp-content/uploads/2015/08/Bathtub-Horatio-W57.jpg)
It seems that having four valves in your tub is quite common in New York City.
[Left] My 1934 bathroom from my West Village apartment [Right] my 1929 bathroom in Hell’s Kitchen.
Oh yeah, the drip drip…. Until recently we weren’t sure if it was the hot or cold that dripped as both valves were well beyond their useful life. The drip was something we just came to live it. Whenever we would get up in the middle of the night to go to the bathroom, there was that sound…. drip, drip, drip, drip… Eventually, you don’t really notice it, but it is always there.
At the same time we have been having problems with the cold water not shutting off, the knob on the hot side has also been a problem since we moved in. It has been “repaired” twice in this past years, both of which were basically band-aids to a bigger problem. Drip, drip, drip…
Then summer began to settle in. The very large south facing bathroom window allowed the sun to filter in, and the temperature in the air-condition-less bathroom began to rise. Warm moist air made for ideal conditions to allow the mold to thrive and spread…. and then well…. Moldy shower curtains, slippery stuff in the tub, and more… Ewwww, you can figure it out. We had begun the discussion with our building super Patrick, about our plight in early June. He said in his Irish brogue, if I buy a new valve set and trim kit, he would arrange for a good plumber to do the work. After an hour of research, I had ordered an new valve and trim kit via Amazon, we are all set to go, right? Then the random delays set in…. Busy weekends, guests, parties, etc… The mold got worse, and I began to feel more and more guilt and embarrassment when our house cleaner has had to scrub and clean the moldy shower walls and tub every other week.
Then, a few weeks ago the situation got worse, the hot water knob wouldn’t stay on, and the pliers became our only option to controlling the hot water in the shower. Not ideal. We had reached the point where we had to get this done. Drip, drip, drip…..
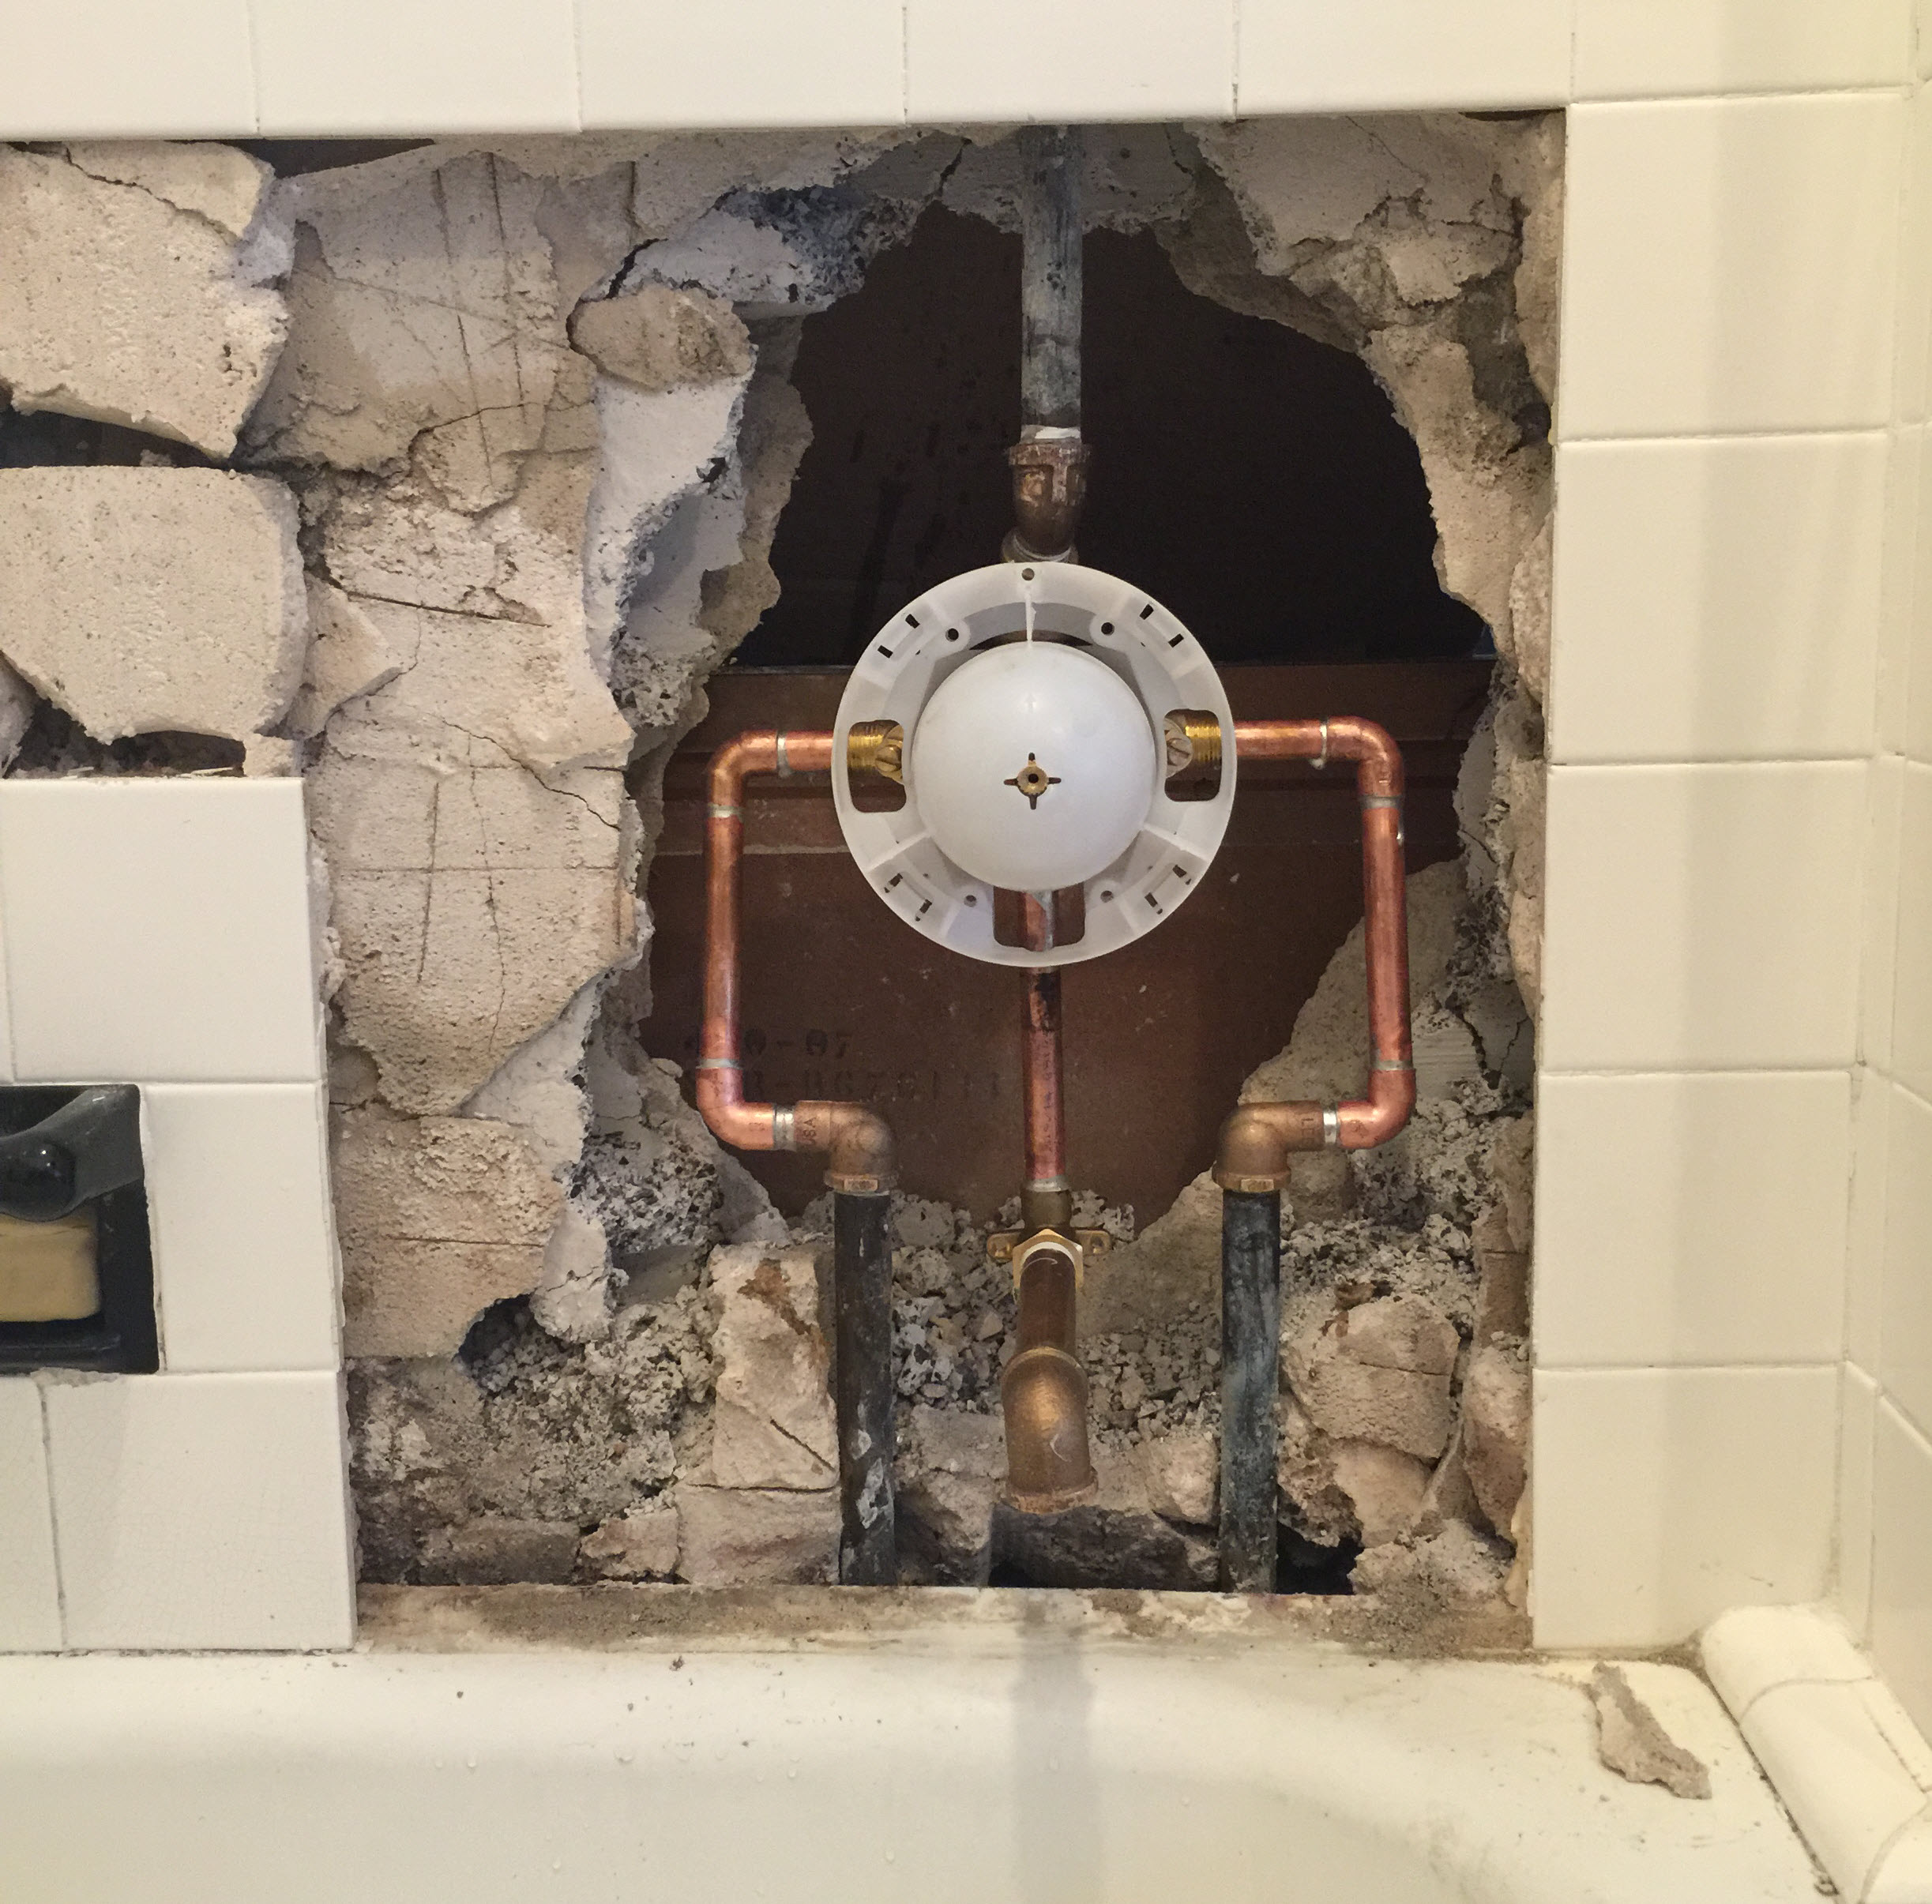
New valve to be buried inside the wall again. (That is the back of our dresser in the bedroom behind the new valves.)
It was with great relief that on this past Monday, we were able to confirm that the plumber would be there on Wednesday. Our super came in and did the initial demo to access and remove the old valves. I thought this would be a relatively easy thing, but of course not. Our walls are made of soft, hollow, cinder-block bricks with plaster. This makes for a very solid wall, and at the time of construction was touted as “absolutely fireproof”. Well, it is likely fire resistant, but they couldn’t make that claim today. Another advantage of masonry walls is that we almost never hear anything from our neighbors. It turns out those advantages are great but they come with a sizable disadvantage. The plumbing is buried within the masonry wall and the only way to get to it is to chip away at the cinder blocks, which unfortunately resulted in busting through to the bedroom. The hole started out small, but the more he had to chip away to get to the pipes, the bigger the hole got.
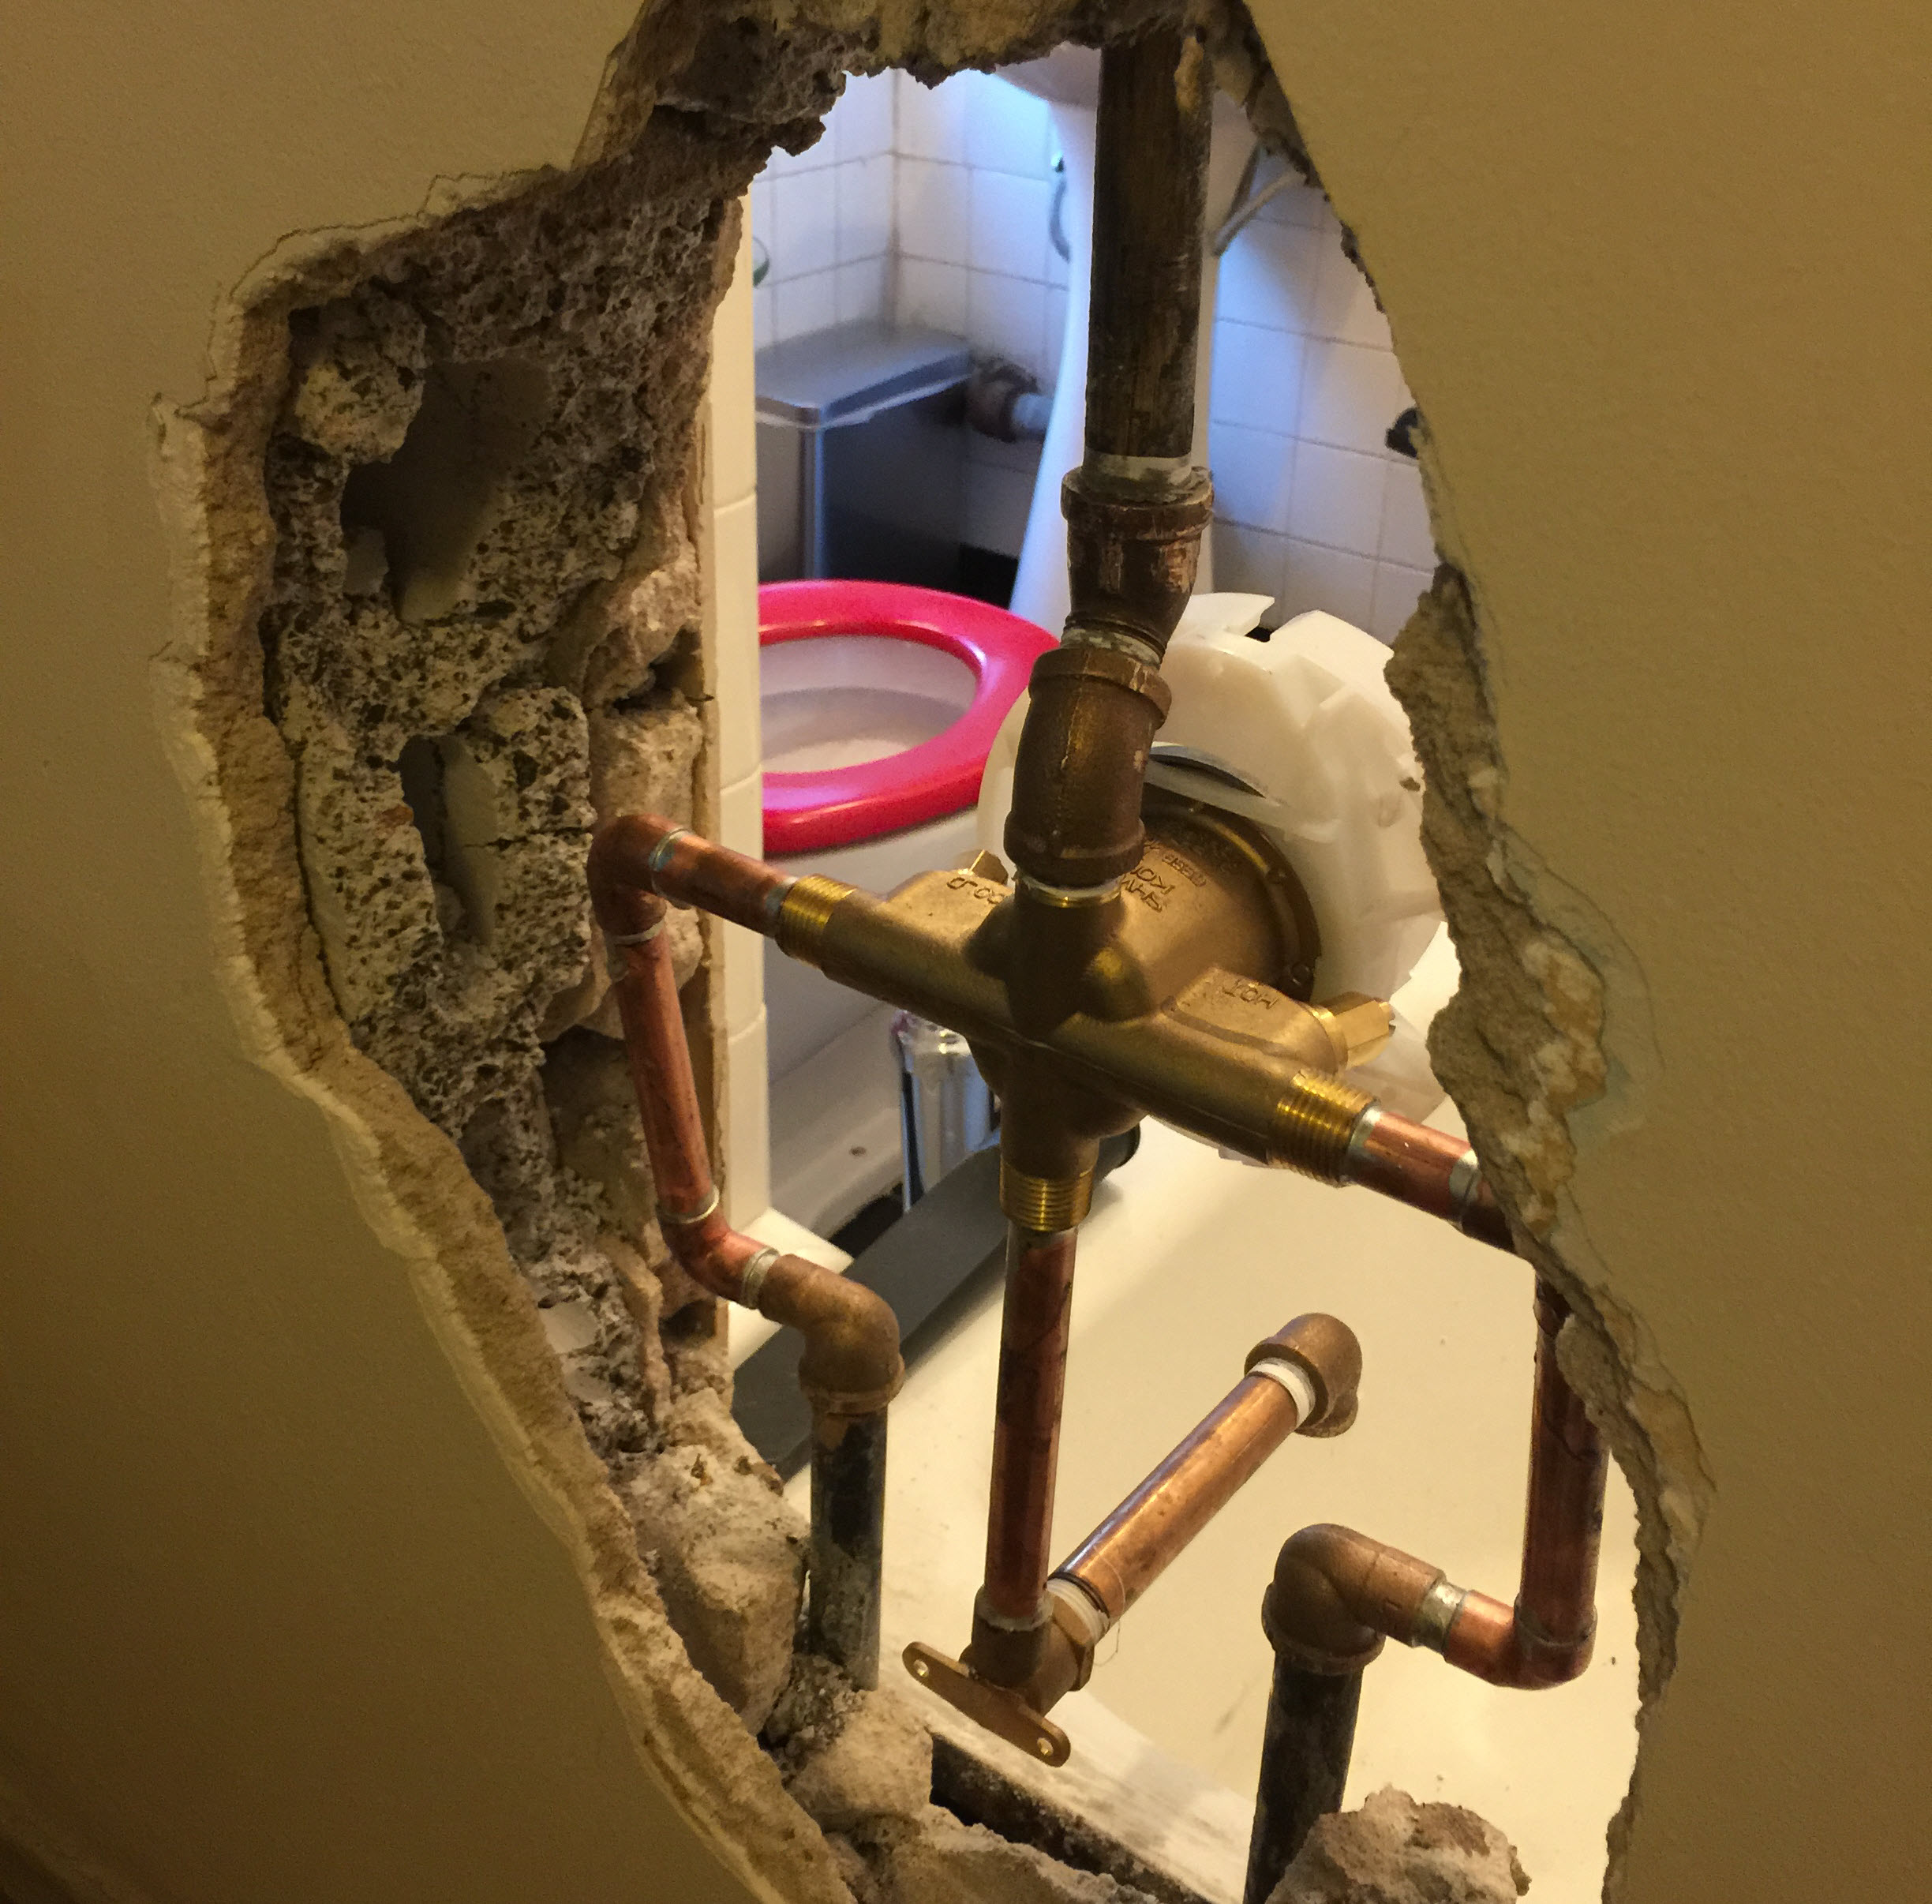
The unexpected view of the bathroom as seen from the bedroom.
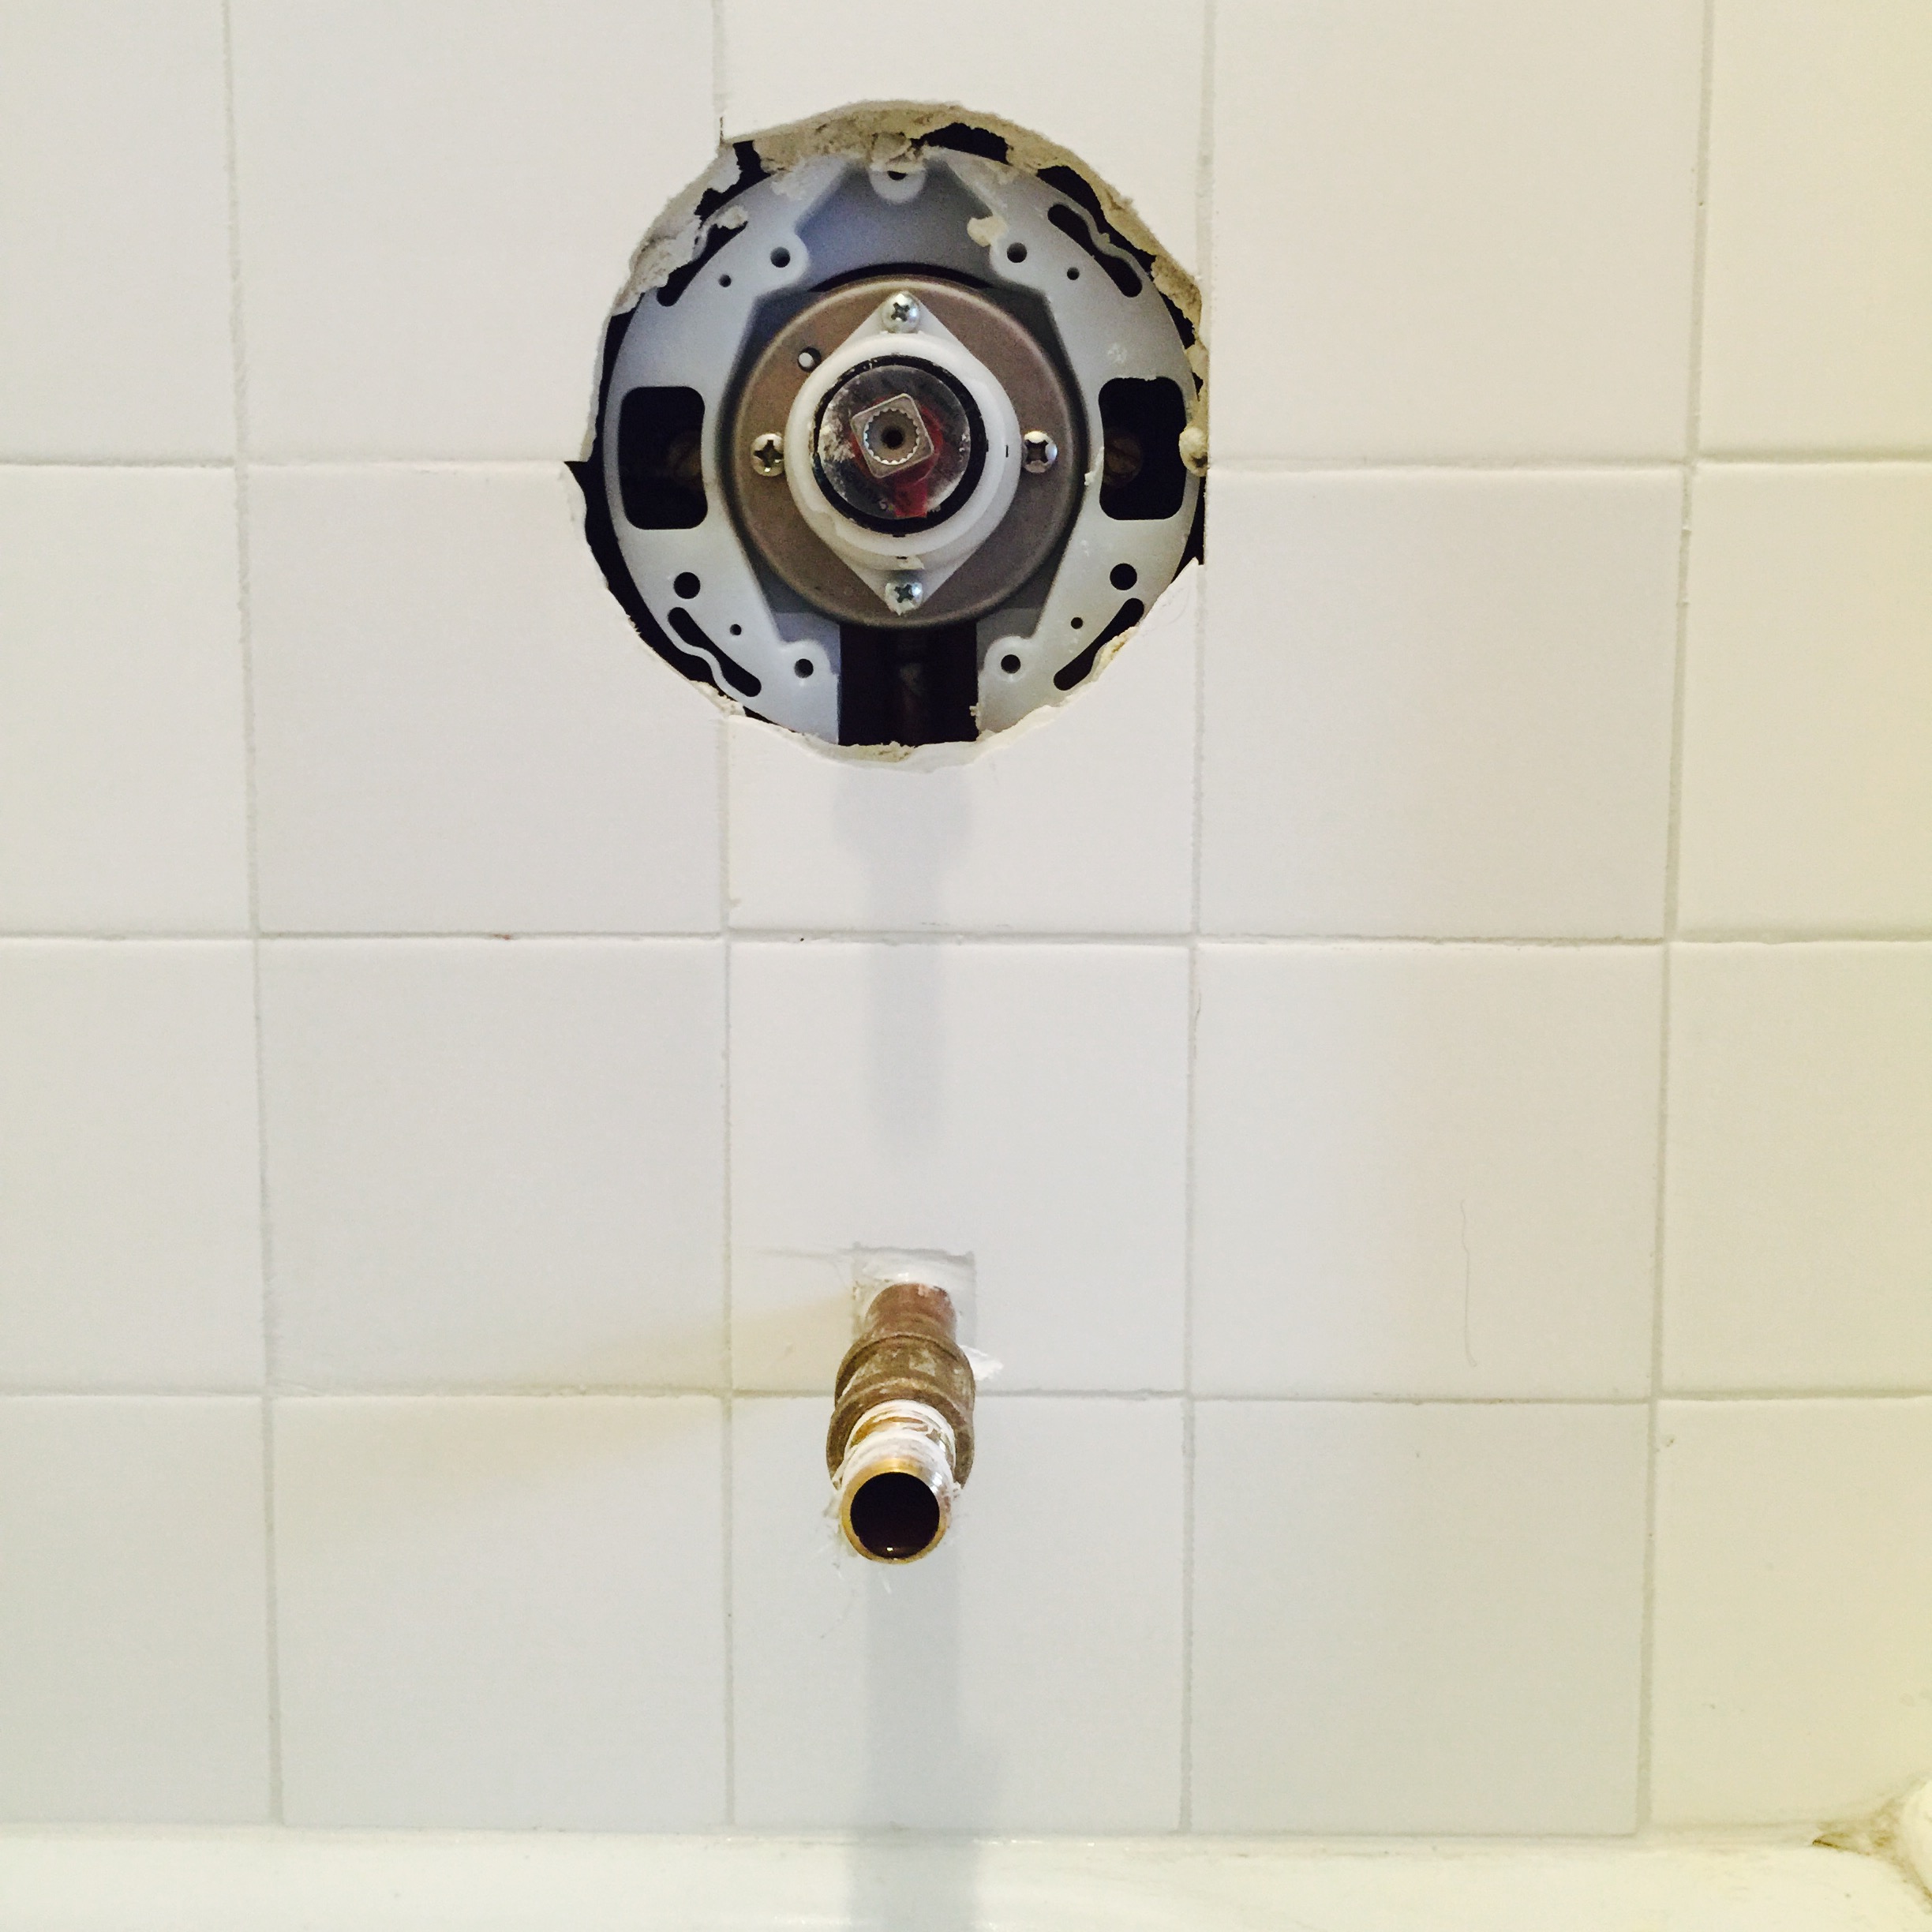
Once the old valves were out, the plumber arrived and very diligently installed the new single handle “Rite-Temp Pressure Balancing Valve”. I must say the plumber was very good. I watched as he took the time to do it right (measure twice, cut once) and when it came to soldering, he very deftly managed the torch to heat the joints while not setting the cardboard shoved up against the hole on the bedroom side on fire…. Which is amazing as the cardboard was perhaps two inches from where he was using the torch to solder the joints.
Newly grouted, almost done. You can barely tell the new tiles from the old ones.
Then it came to patching things up. Our daytime porter has been with the building for quite a few years, and we were told is well versed in doing the necessary work to repair the walls. The 4.25×4.25 tiles on our walls date back to the 1950s, but fortunately they are still made and can be easily had at your local big box store for about $0.13 each. I spent a total of $3.40 for replacement tiles. The new white tiles match the old white tiles pretty well. Our porter did a great job with repairing the hole and resetting the tile.
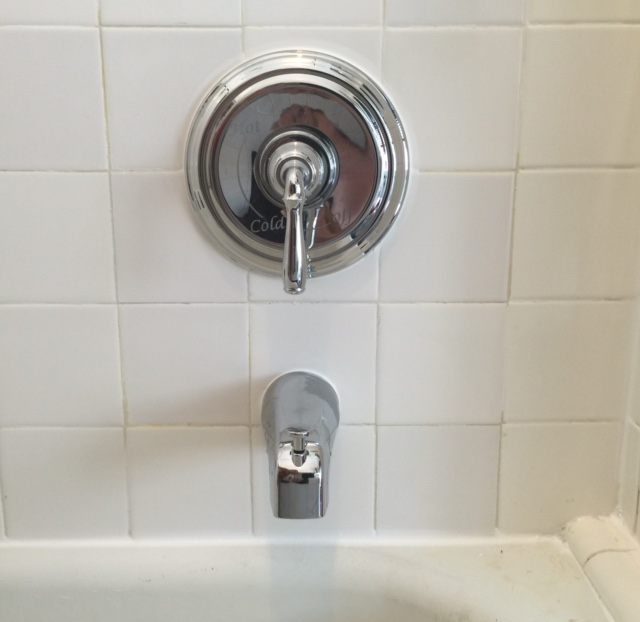
The new Kohler Mixer…. About as fancy a tub/shower faucet as I have ever had.
How much was all this you ask? This being New York City, nothing can be simple or cheap, but this wasn’t so bad.
| Parts: | Kohler valve and trim kit, $188; replacement tiles, $3.40 |
| Labor: | Plumber, $400; Tips to building staff for old valve removal, resetting of new tile and repairs to hole in the wall, $400 |
| Total Cost: | $991.40 |
Not bad in the end.
So after a year of drip, drip, drip…. We now have a dry tub for the very first time.


Social