OK, so we are now a full week into my two weeks off to work on the kitchen renovation and in some ways I am very happy with the progress, and in others, not so much. The focus of this week was installing the beadboard wall behind the main bank of cabinets. This turned out to be much more of a challenging week than I expected, but in the end, I am proud of our accomplishments… Even if they are not very visible.
Rundown of the week:
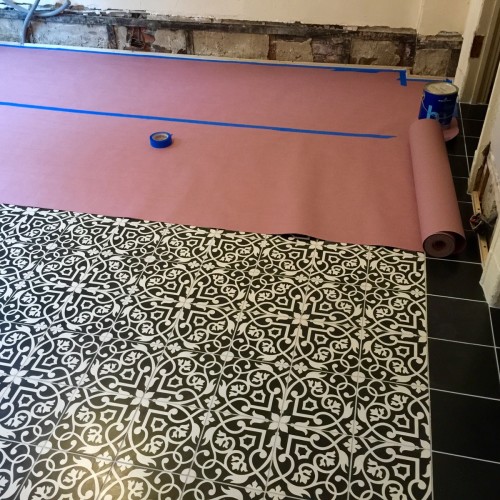
Saturday and Sunday (before last) was all about preparation. The first task…. Protect the amazing floor. With a bit of sadness, we rolled out the rosin paper on Saturday to protect the floor during the construction period. Before I started rolling out the paper, we took a moment to take it all in as we would never see the floor in its entirety again. Cabinets and appliances will cover about one third of it, which means this is the last time the room will ever be empty again.

It was heartbreaking to cover the floor with rosin paper knowing we would never see it as an empty room again. Soon the cabinets will obscure sections forever-ish.
Once the floor was covered, I started to prepare for the beadboard installation on the sink wall. However, before I could get started, I realized that if I am going to butt new wood next to the door frame which has 100+ years of paint accumulation, I should probably strip the paint from the door frame before adding a single piece of beadboard. And so it began…. The detours and delays to the project.
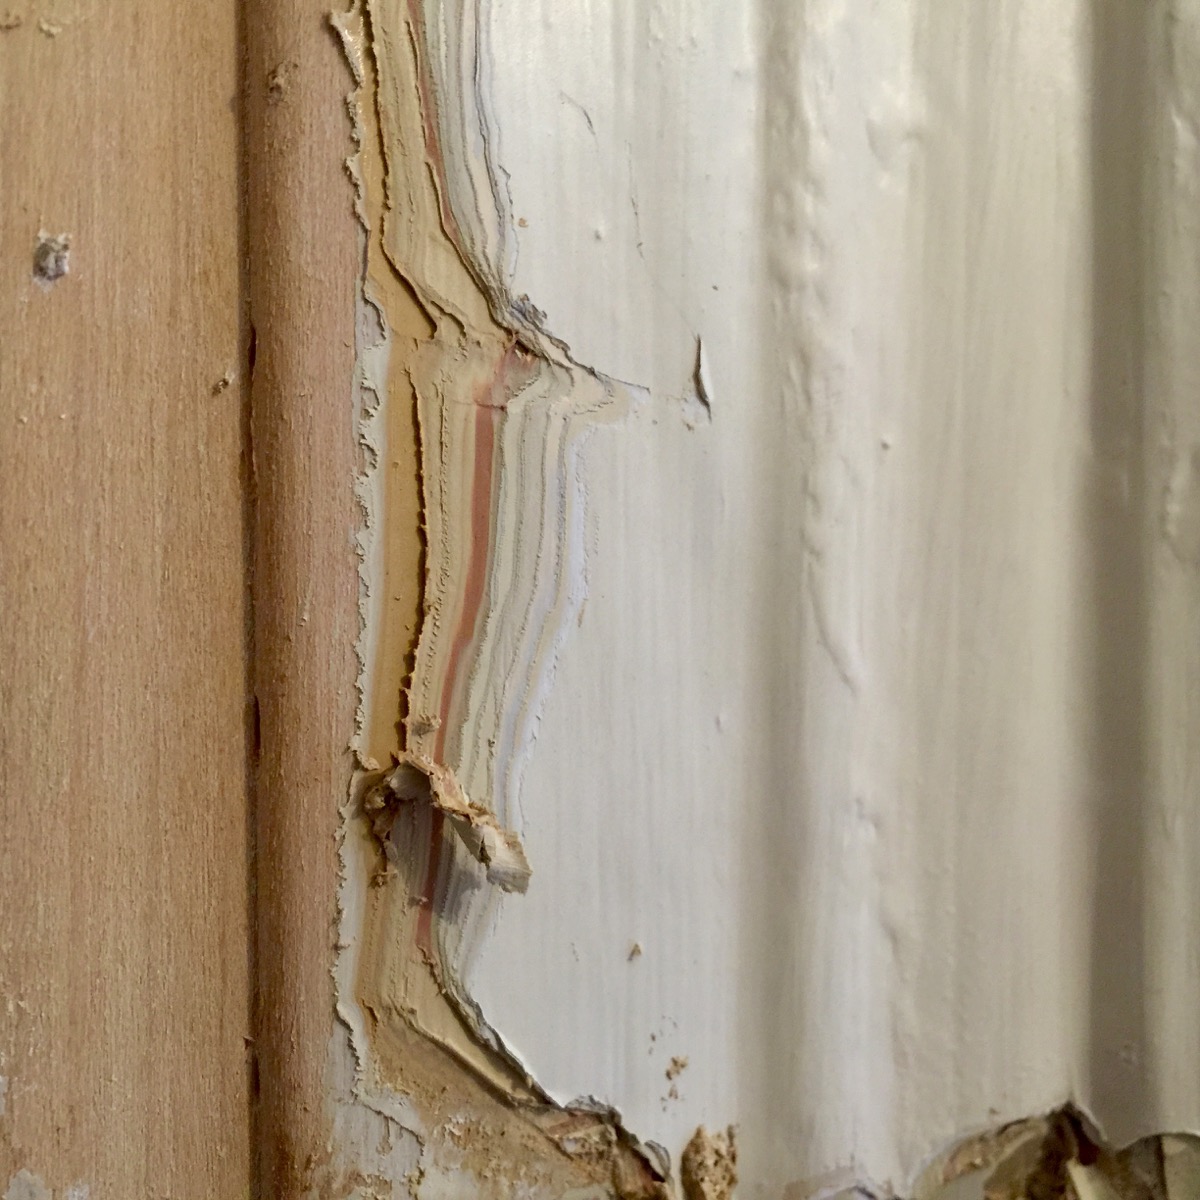
Fifty shades of beige…. Looking at the color history of the woodwork in the kitchen shows that there has never been much variation of color. As temping as it is to stain and finish the wood, this has always been painted from the time of construction.
Unplanned paint stripping with the heat gun on the door frame adjacent to the soon to be installed beadboard wall.
I spent much of Saturday afternoon with a heat gun stripping the paint off of the right side of the door frame adjacent to where we are installing the bead board. Because of my time line, it made sense to only strip the side adjacent to the new wood and I will come back later and finish the rest of the door frame (and hopefully the transom). Of course stripping paint is not a fast process, and I ended up spending much of Sunday wrapping up just the one side of the door frame.
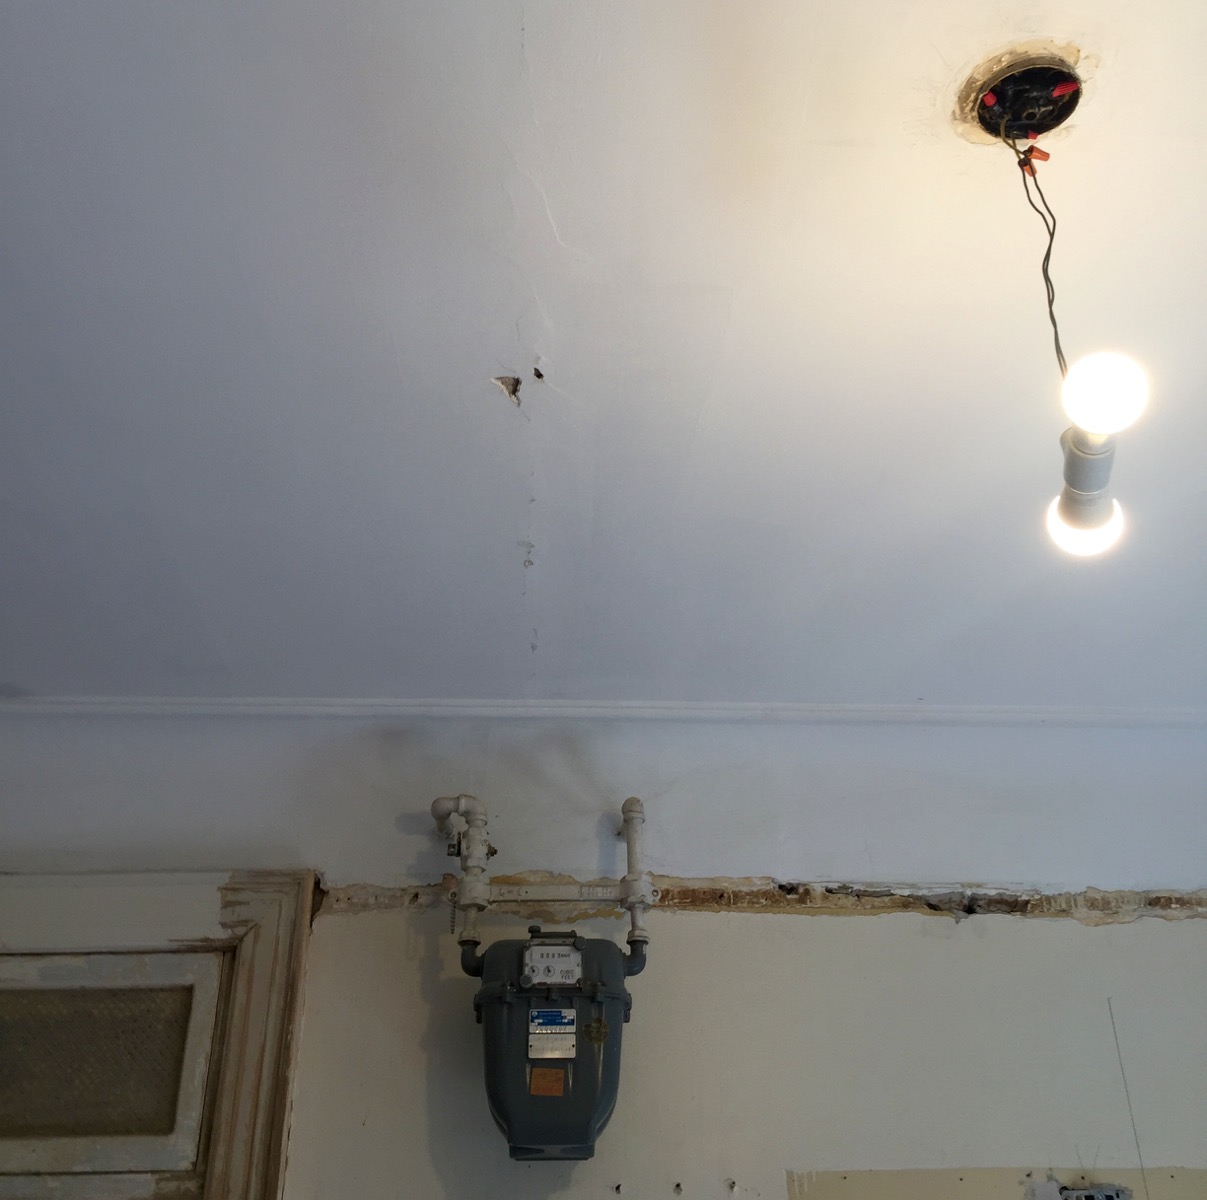
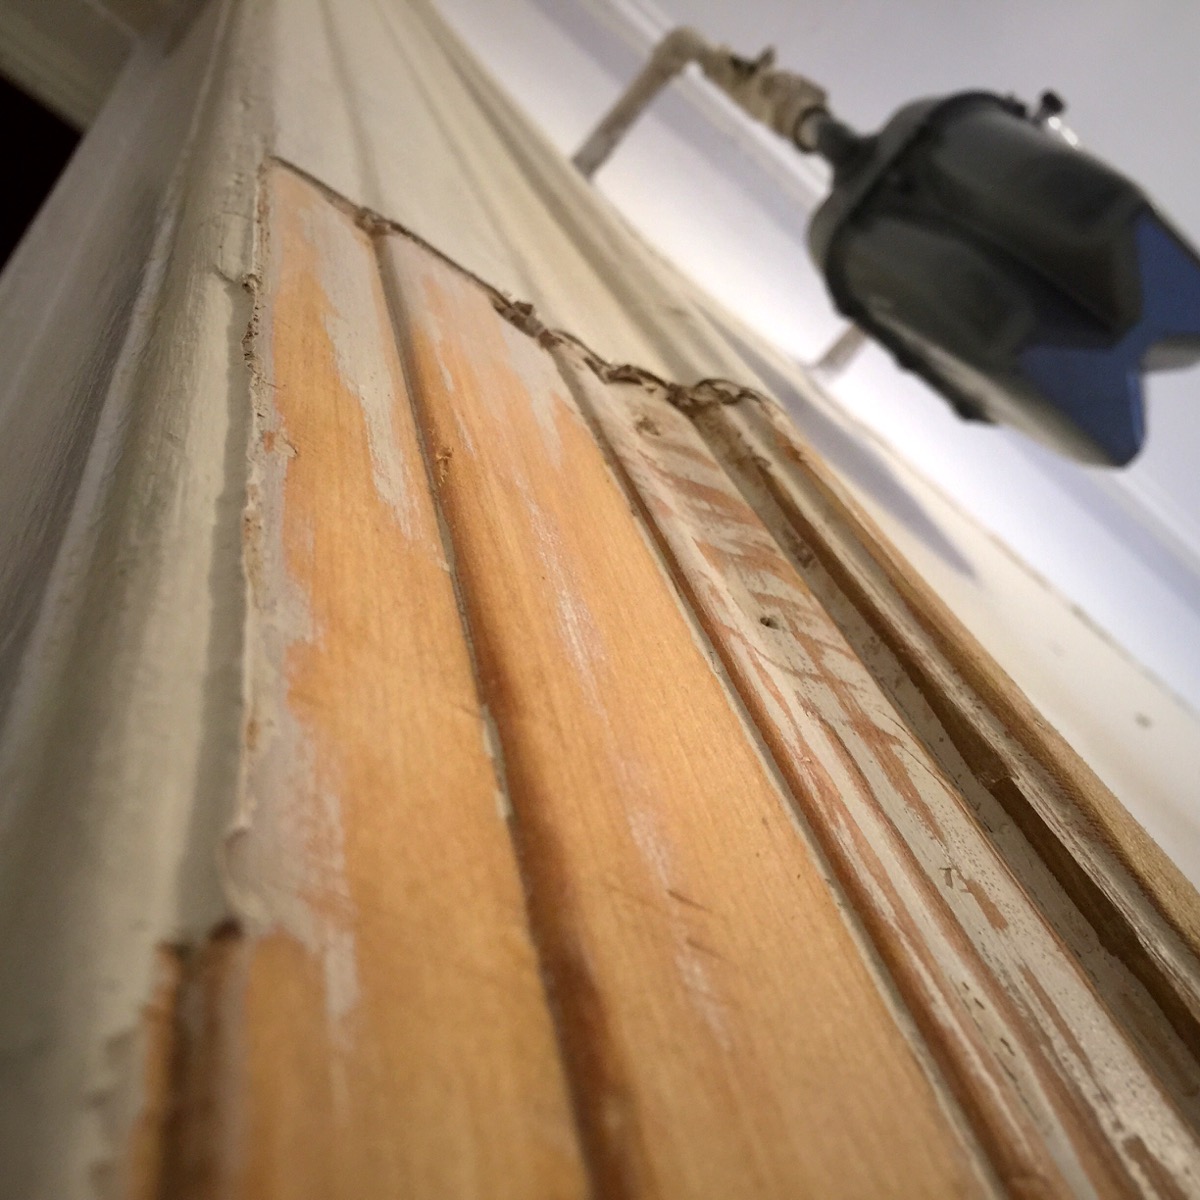
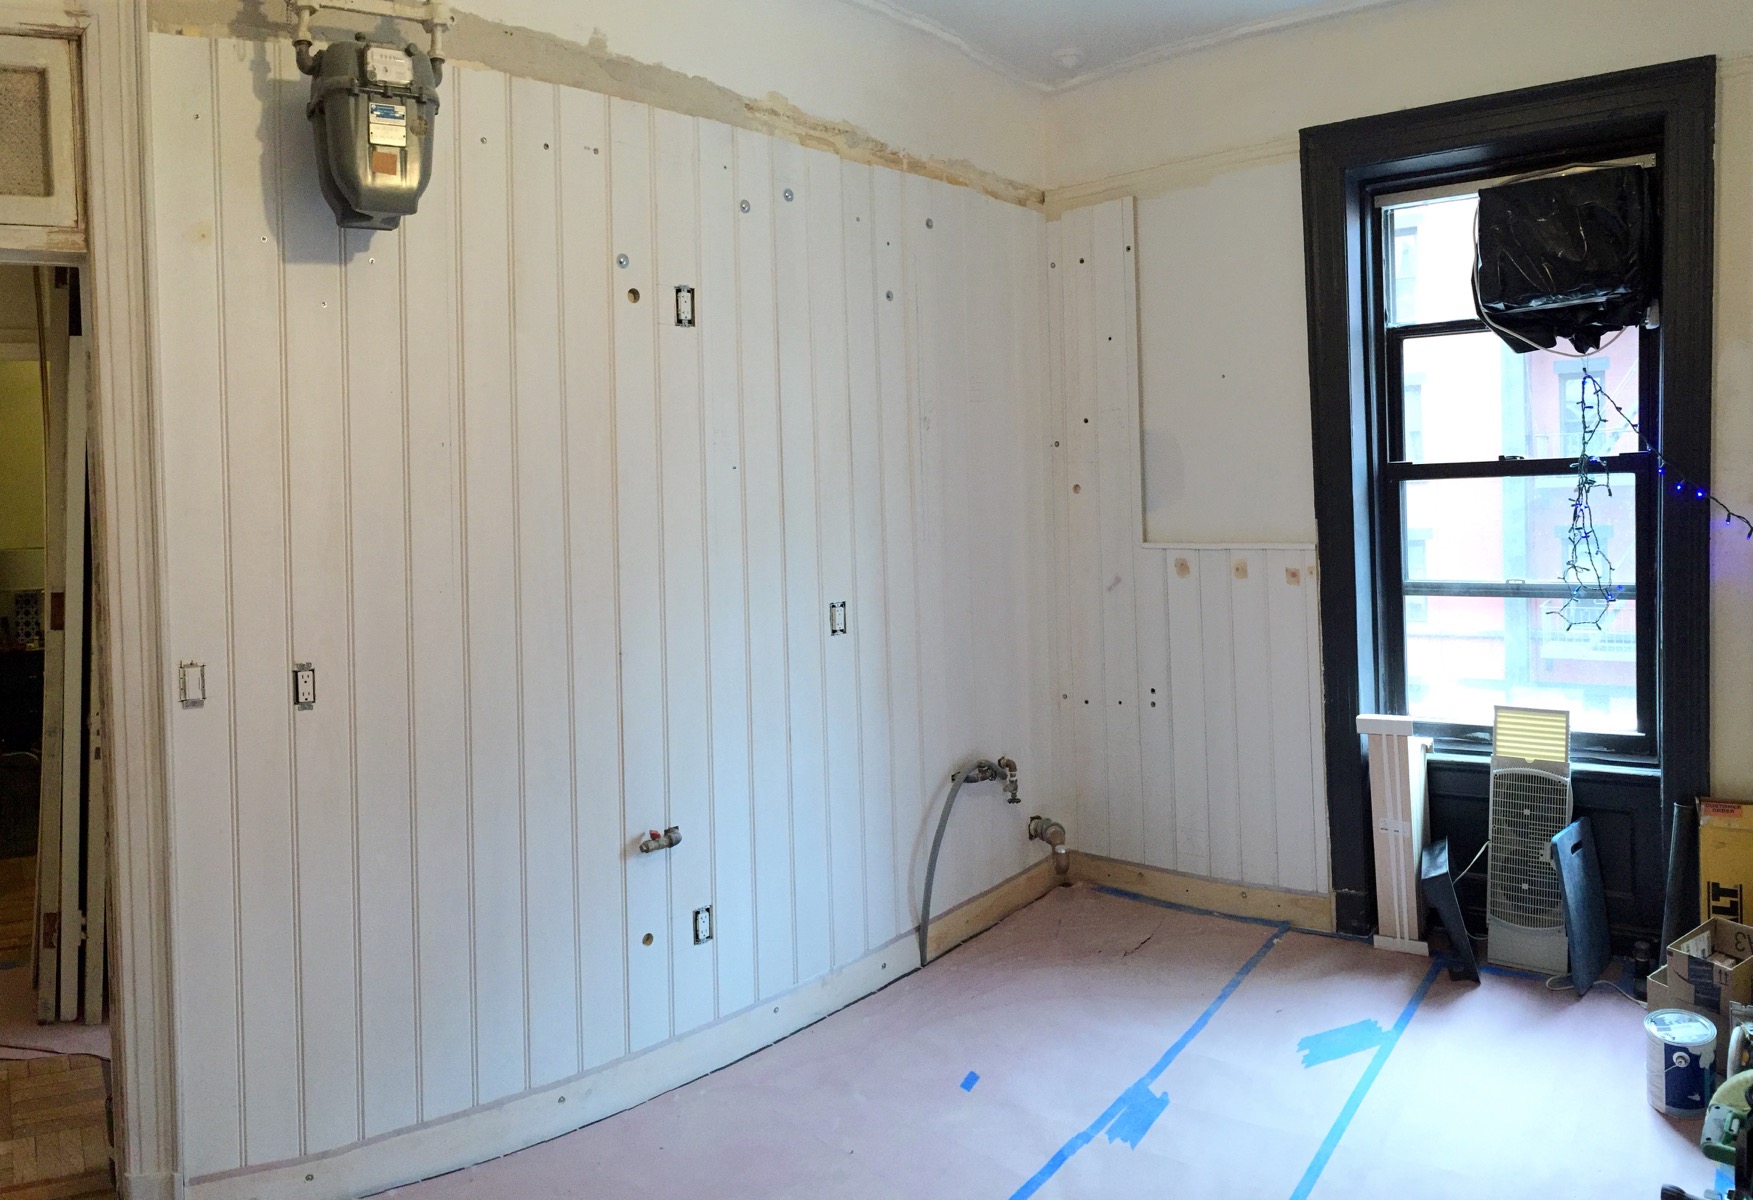
Hideous ceiling fan is now gone (YAY!!!), the crack in the ceiling is bigger than originally thought, but the plasterer will fix it this week. You can see where i stopped stripping the door frame adjacent to where the beadboard will be installed.
Other accomplishments on Sunday were taking down the hideous ceiling fan which has long been a source of displeasure and putting up a temporary double socket for light. I also installed the “ledger” board along the base of the sink wall which will have an aluminum track for all of the beadboard to fit into. I also did two coats of paint on the ceiling, skipping the large crack which ran across the width of the room (more on that later).
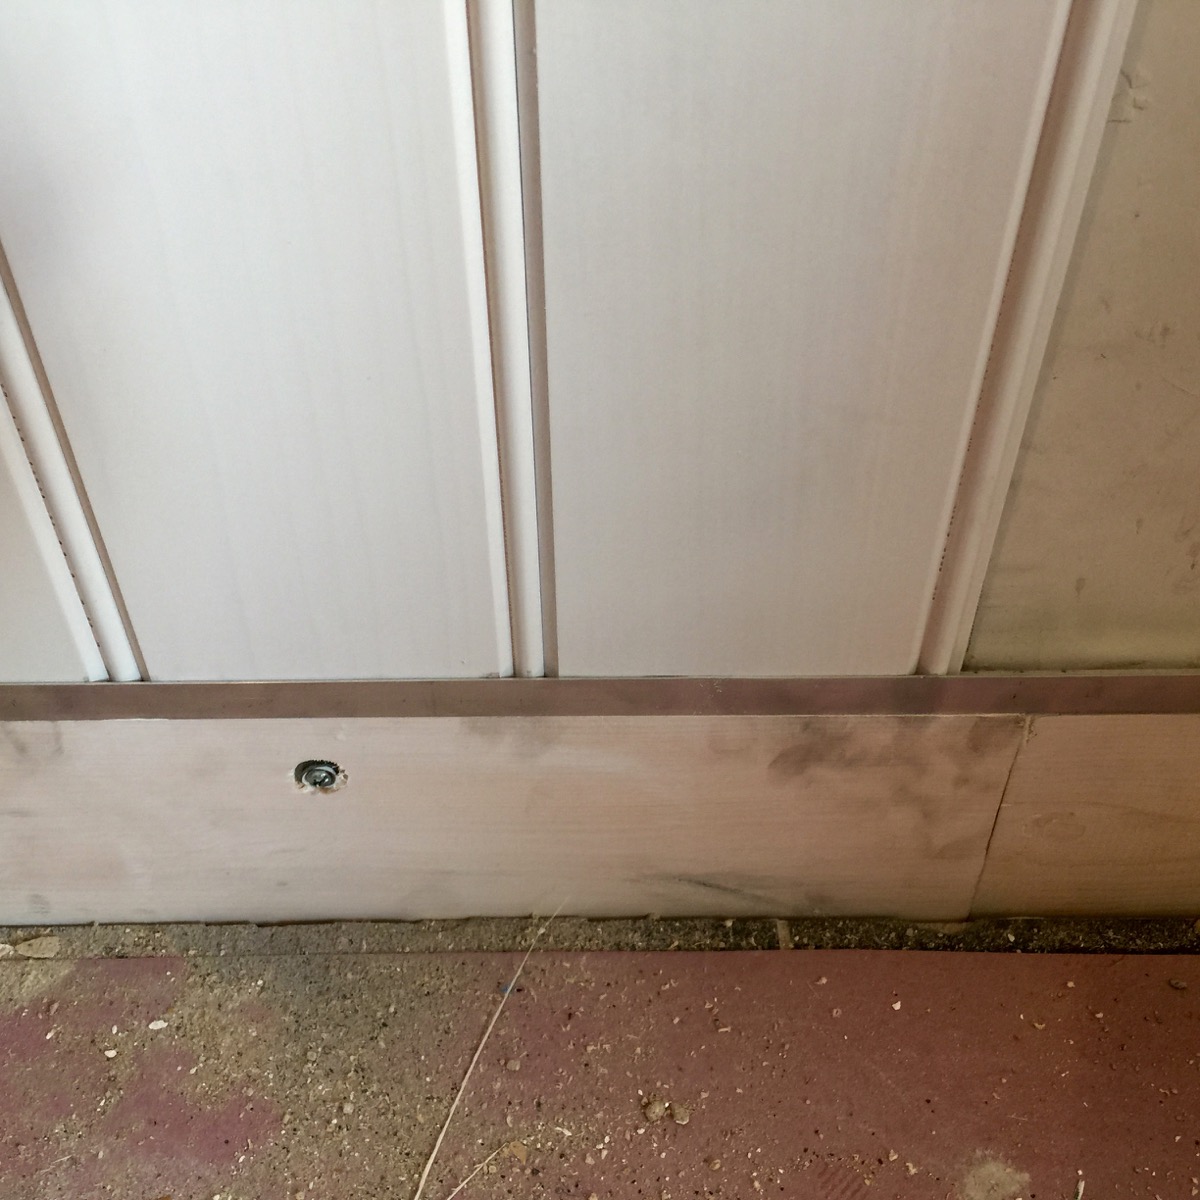
The aluminum angle screwed into the horizontal board along the bottom of the wall ensured each piece of beadboard was positioned correctly at the base…. Too bad it wasn’t positioned correctly as it rose up the wall.
Finally on Monday, we started installing the beadboard. It started out great! I thought we could finish the entire wall in two days. This should be a no brainer! Only 22 boards to install along the ten foot wall, and 8 more between the sink wall and the window. We should be good to go! I was so wrong! Installing the beadboard took the entire week. Why you ask? Well… It’s complicated.
![This example of a gypsum partition tile from the Certain-teed catalog of 1936 is a good example of what our walls are constructed from. The imprinted texture helped the plaster to stick. [Source: Building Technology Heritage Library]](https://halfclassicsix.com/wp-content/uploads/2016/03/Certain-teedPartition-Tile.jpg)
This example of a gypsum partition tile from the Certain-teed catalog of 1936 is a good example of what our walls are constructed from. The imprinted texture helped the plaster to stick. [Source: Building Technology Heritage Library]
Gypsum is a soft sulfate mineral composed of calcium sulfate dihydrate, when combined with a few ingredients including water and a binder (which was wood fibers back in the old days), it is molded into blocks, resulting in a lightweight, soft building block for non load bearing interior walls. This type of fireproof construction was pretty standard for large buildings from the late 19th century up until the 1960s in the US, and is still the standard for much of the rest of the world, not just for big buildings, but also for single family homes. As a whole and when covered in plaster, gypsum tile blocks make a very solid wall which is basically fireproof and quite soundproof as well. But the individual blocks themselves are actually rather soft and fragile. They crumble when you try to drill into them, and they have little strength on their own. This makes mounting cabinets (or anything) to them virtually impossible. This was made all the more obvious when we went to remove the previous cabinets which were haphazardly screwed to the walls with drywall screws. We didn’t have to loosen the screws hardly at all, just a good tug and they came off the wall. [History lesson over.]
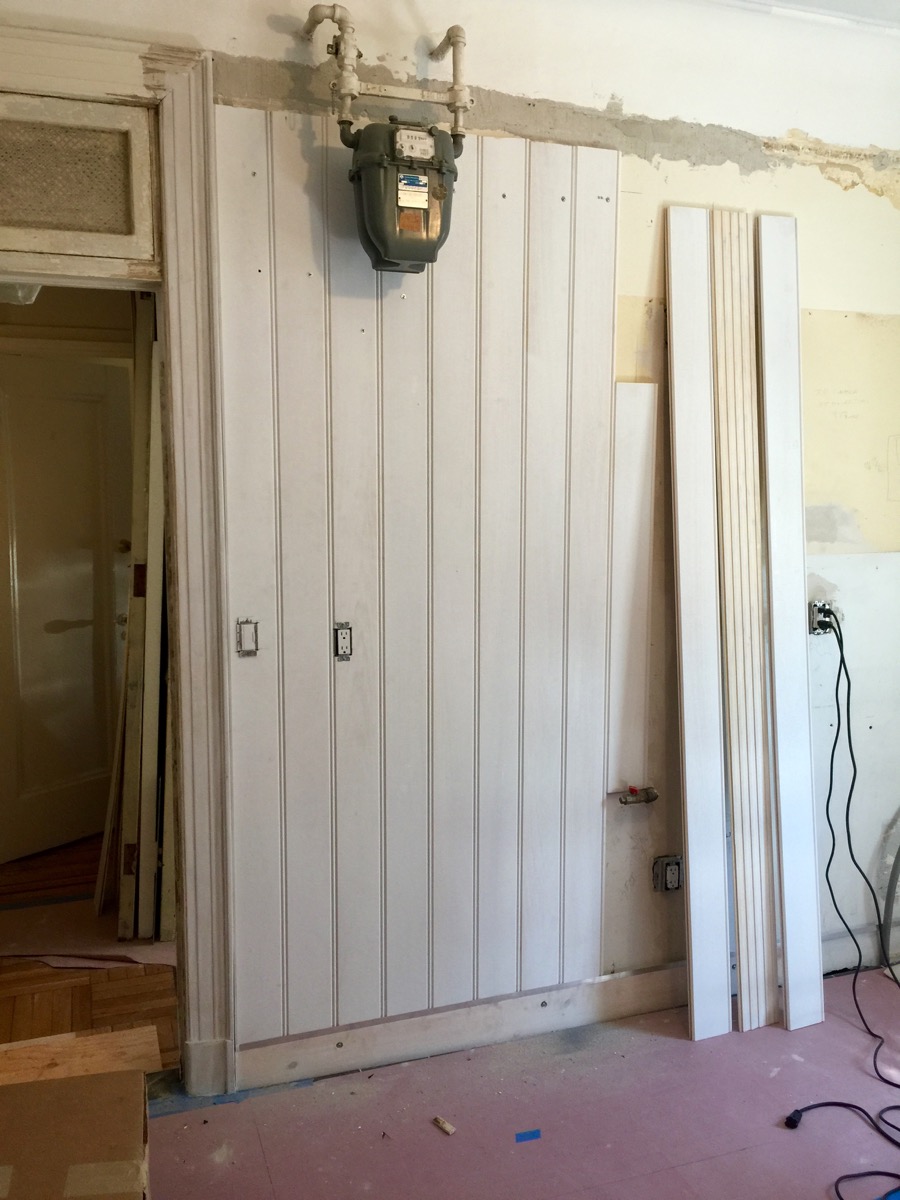
First day of beadboard went well, until it didn’t. After the eighth board was installed, the wall took a dramatic shift in direction forcing us to begin to rethink things.
This was the primary reason I decided to go with 3/4 inch beadboard for the walls. I figured that if I could anchor the boards at the top and bottom and use construction adhesive, I would have a solid enough wall to mount the cabinets to. Well, this almost worked. We got off to a good start and the boards were very solidly installed with construction adhesive and anchors, but we ran into problems after installing the eighth board. I devised a method of keeping the bottom aligned by installing a 1×6 along the bottom of the wall, topped by an aluminum angle which created a level track to slot the boards into, insuring the boards were all level, lined up, and firmly attached at the bottom. Installing the board/track along the bottom of the wall was relatively straight forward, and as noted, the first eight boards went in fairly well. But suddenly the wall was no longer vertically true and the upper half of the boards were getting further and further away from the wall. That was when my top anchor pulled out of the wall and a chunk of the wall came with it. Ugh! This was the moment where my plans fell apart, delays set in, and I was forced to come up with an engineering solution. Which I did of course.
It occurred to me that we could just drill through the wall into the bathroom and insert a long bolt with large washer and literally bolt the beadboard to the wall using the wall itself as the anchor. My first thought was how to deal with the aesthetics of bolts on a wall in the bathroom. I immediately went to the internets and began looking for ways to resolve this. Should I install a long bar with holes for the bolts? Should we just have the bolts exposed and paint them to match, hoping they would just blend in? Should I obtain some sort of decorative washer to make them look better? None of these ideas sat well with me, but we were none the less off to Home Depot anyway.
It was now Wednesday afternoon, and I expected to be done with this wall, but no. After some morning errands, I had an epiphany and my solution was clear. We could drill through the wall, and then from the bathroom side, we could chip away at the plaster exposing the gypsum block. This would then allow us to sink the bolts into the wall and plaster over them (one day). This it turns out was the perfect solution. Once the holes in the bathroom wall are repaired and painted, nobody will ever know that there are bolts through the wall.
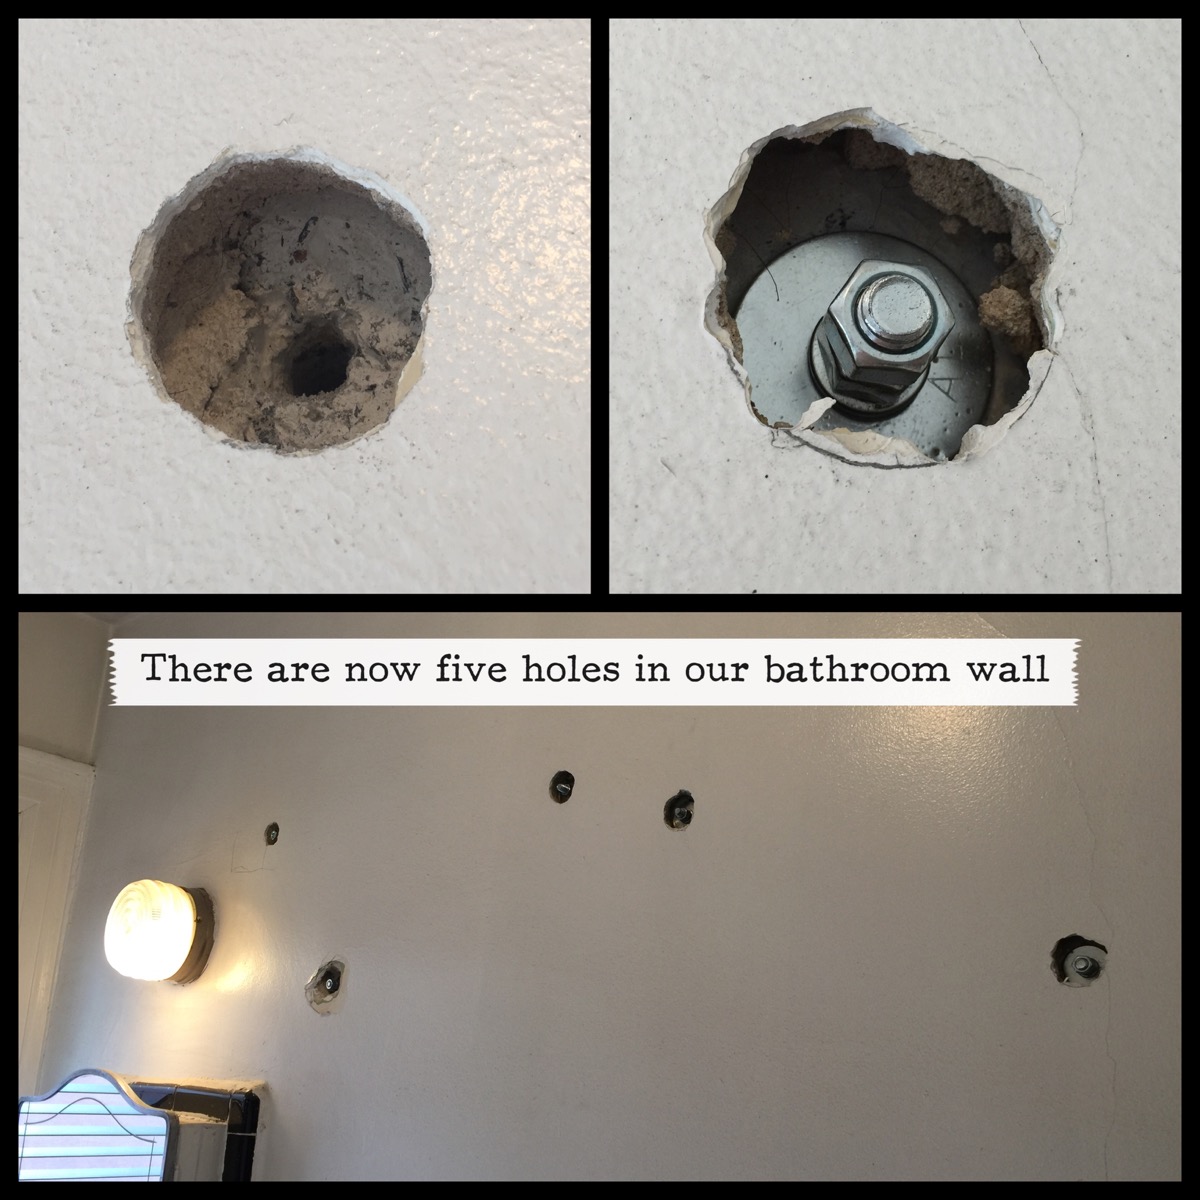
So, this is how the bolts through the wall turned out on the bathroom side…. You can see the gypsum block behind the plaster on the top left before we installed the bolt. On the top right, the bolt has two nuts and a lock washer (it aint coming loose) and is recessed into the wall. Once they are plastered over, you will never know they are there.
I would like to say that I finished the wall on Wednesday, but alas, there were other obstacles to deal with which slowed things down. It turns out there is a surprising amount of existing metal within the wall and adding my five bolts was a lot more complicated than expected as I had to do some some serious navigation with the big drill. How did we know about all the metal in the wall? Of course we would have had no way to know this were it not for a handy device I ordered on a whim last month. I was looking at tools which I needed for the project, when I came across the Zircon Handheld Electronic Metal Detector. I thought it would be fun to have and may come in handy, so I bought it. This device is designed to find both ferrous and non-ferrous metals up to four inches deep in concrete, masonry, plaster, etc… It turned out to be among the best $40 spent on our project. This handy little device found all sorts of metal embedded within the wall. I found the pathways of the original 1910 BX wiring, including abandoned wiring from before it was a kitchen, I also determined where the 1980s electrical upgrades, the gas pipe for the stove, water lines, and the much larger than expected cast iron waste stack were. If it were not for this device, I could have done some serious damage. This also explains why the bolts into the bathroom appear to be in random locations. I had to work around all of the metal things already in the wall.
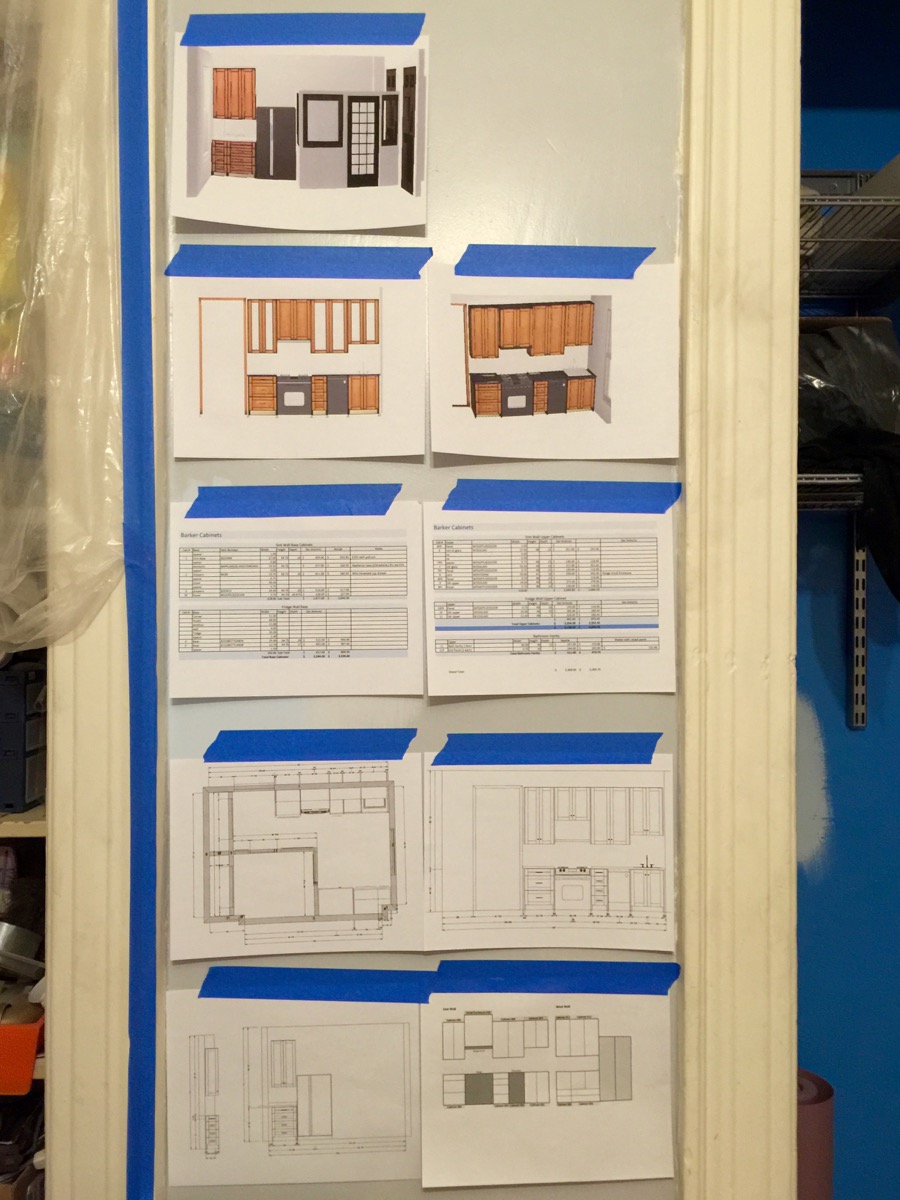
Plans, Plans, Plans….. This is the high level plan of the kitchen. The colors are wrong, but the cabinet placement is correct-ish. Also my list of the cabinets with corresponding parts and measurements.
Finally, by the end of the week, I managed to get the beadboard completed on the sink wall, and started on the small section towards the window. This feels like not very much, but if you add in the two coats of paint to the ceiling followed by the hiring of a local plasterer to do some plaster repair, the stripping of the paint on the door frame, the removal of the ceiling fan, the painting of the ceiling medallion, I did get a fair amount completed. Adding to the excitement of all of this, were the multiple trips to multiple Home Depots including a trip to The Bronx to procure lumber. Yoav was an amazing help all week. Standing by to hand me tools as I needed them, holding things, and running errands. He made at least a half dozen trips to local hardware stores hunting down extremely overpriced parts.
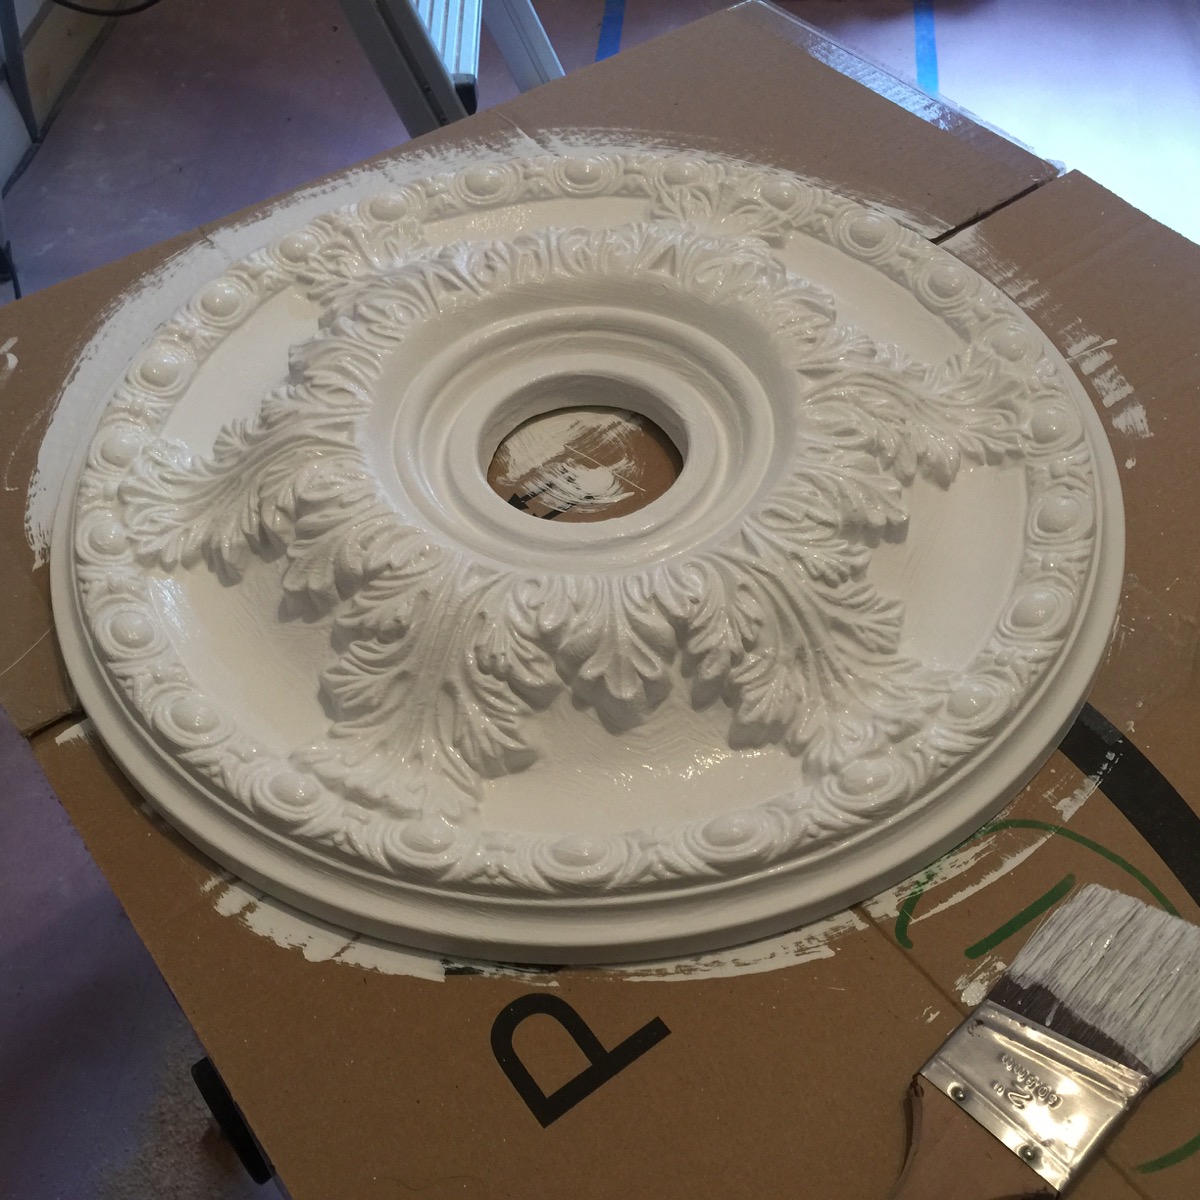
Adding age to the ceiling medallion involved several coats of thick paint. This should go up soon.
By the end of this past weekend, I was letting go of the feelings of not getting anything accomplished, but it was at this point when I realized that I needed to rethink my priorities in how this kitchen is going to get done. I’ll go into the details in my next post, but in a nutshell, I decided that the sink wall being the most important element to the entire project was the top priority. This wall contains the largest portion of cabinets, the sink, and of course the stove. If we can complete this section first, we can return to the status of having a functioning if not completed kitchen. The rest will follow…
The completed first phase of the beadboard installation. This is our sink wall and will be the foundation upon which the primary elements of our kitchen will be built.
Where does that leave me for this week? Well, Yoav is back to work, I am still off this week, but the reality of my original goal of having the base cabinets installed and ready to measure for countertops is clearly not going to happen. Having now completed the final section (for now) of beadboard on the wall between the sink and the window, this week will be all about priming and painting. I need to prime and paint the insides of the upper cabinet frames (because they will have glass doors) before I can assemble them. I also need to prime and paint the front edges of all of the cabinets, as well as paint the beadboard wall. It is my hope that by the end of this week, I can be ready to go back to work on Monday, and then spend the following weekend assembling and installing cabinets.
One more thing…. We picked up our Farrow & Ball Stiffkey Blue (No 281) paint along with some F&B primer for the cabinets. For those who don’t know the story… We fell in love with this paint and this color last summer and are very excited to finally have it.
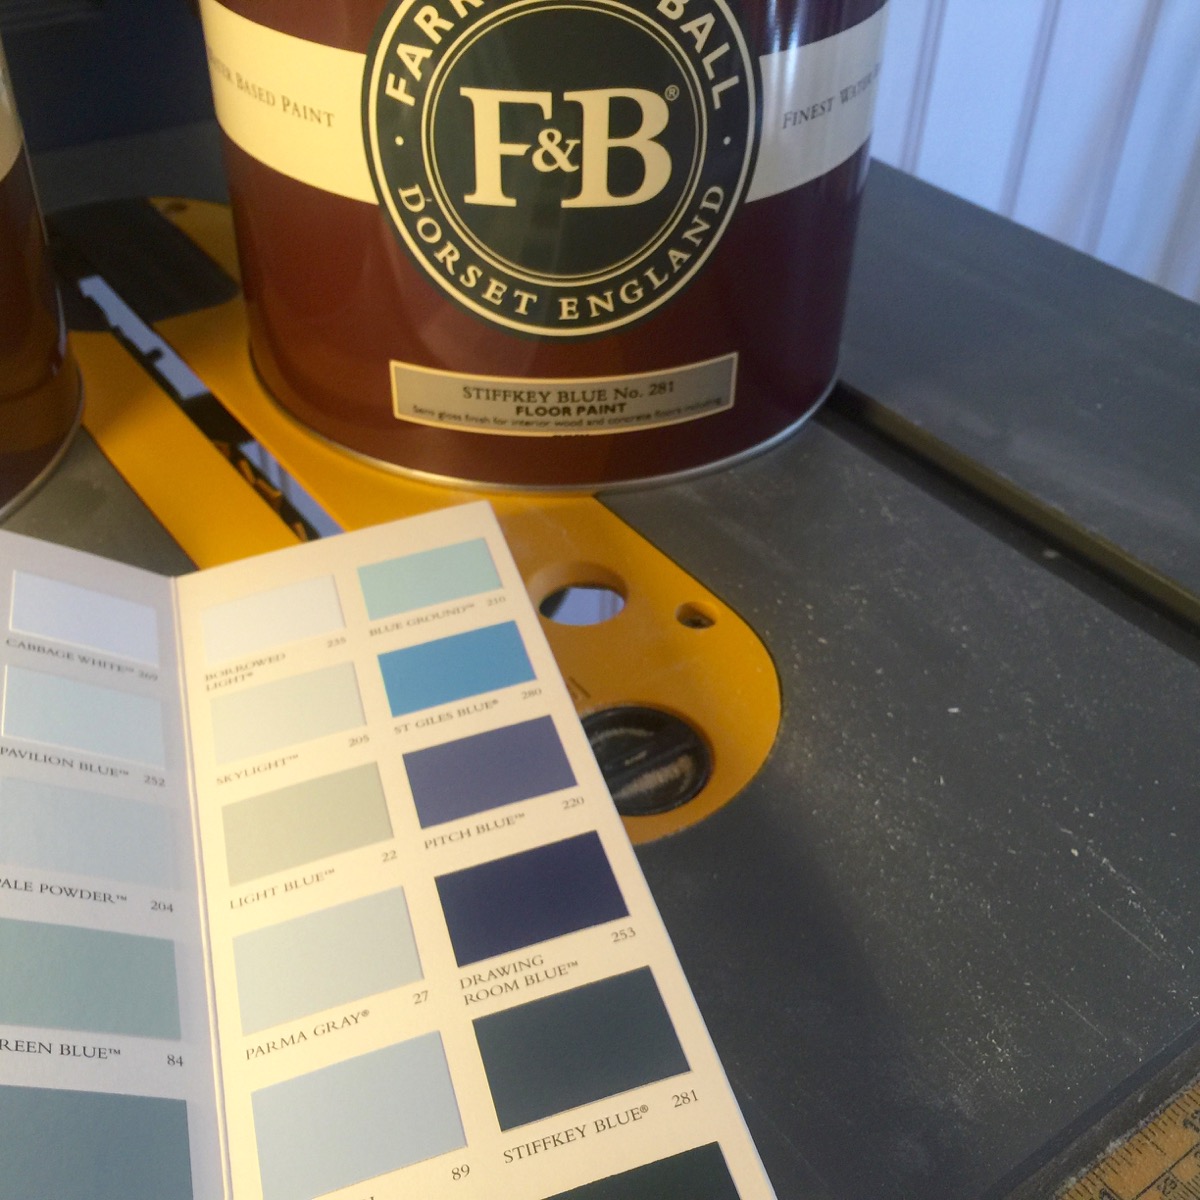
Our beloved Stiffkey Blue paint (No 281) from Farrow & Ball has been procured, along with tinted primer.


March 30, 2016
Great blog, love all the details about your decision making process and how your plans have evolved over time. That cabinet color is gorgeous and the cement tiles look great! Wondering how you plan to create the cubicle walls, if they would be easy to remove if you guys ever decide to sell? Anyway, love your blog!
March 30, 2016
Thanks for stopping by! It has most definitely been an evolution and I am ultimately grateful that we didn’t just jump in and do what we wanted from the beginning as our final plans are so much improved from my first thoughts.
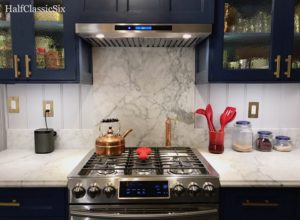
The cabinet color is turning out to be more beautiful than we expected. We finally got started on priming and painting yesterday, and I can tell you that although we have not completed any cabinets yet, the parts which have received the Stiffkey Blue are almost breathtaking. Hopefully, I can photograph them well when it’s time to post about them.
The workspace walls will be constructed with a poplar frame painted to match the door trim, with a vintage sliding door. I plan to do wood inset panels on the lower half, and textured glass on the upper half. I envision them being like an early 20th century office divider. They will be bolted to the floor for stability using as few attachments as possible, but I am designing it so that it can be removed should we ever need to sell (although unless we win the lottery, we plan to retire here). Removing it will open up a huge area which will make for a great eat in kitchen. We would have loved to kept that concept, but one of the determining factors in buying this apartment is that I could utilize this space as workspace, and still have a nice sized kitchen (we had hoped to find a two bedroom, but they were just too far out of reach for us). This is all part of a future blog post of course, but you and anyone else who is reading this response gets the details early 😉
April 30, 2016
Hi there…. stumbled across your blog over at Houzz. Love what you are undertaking here!! I envy those that have the patience and know how to tackle a project such as this. I am having someone do my kitchen reno but am trying to plan it myself which is making me crazy! 😉 Just wonder if you could share the software or app that you are using plan out your kitchen – I see printed plans in this post and saw screen shots in the next post. Maybe this could help actually make a decision instead of going ’round and ’round. Thanks so much for any help!
April 30, 2016
I’m glad you found my site.
Ahhh the software… I had originally designed my kitchen using the Ikea kitchen designer, so I knew a lot about sizing and spacing. Once we decided to go with Barker Cabinets (of which I am VERY satisfied with), I discovered that they have a 30 day trial version their own software which I downloaded and worked with. There is definitely a learning curve, but I managed to figure it out enough to come up with a design and a plan that would work in our space. The software is designed around Barker Cabinets own product. The design of the cabinet layout was fairly straightforward. Other than figuring out sizing, the two walls are both straight runs which simplifies things quite a bit.
Once my kitchen is finished, I plan to write a fairly glowing review of Barker Cabinets on Houzz. I am not sure if you saw my post from last November about our changing course, but I cannot express how thrilled I am that we found this option. I especially love that the sizing can be so highly customized, this allowed us to have a much more functional kitchen than we would have had we gone with Ikea. In the end, it was a bit more expensive than Ikea, but that is really only because the ability to customize so much gave us a much better design, with a lot more storage in the end.
The cabinets themselves assemble quite easily, and I am super happy with them. However, I will be the first to say that priming and painting all of the individual pieces has been a long arduous task. One that I am not sure I was quite prepared for (and one that is still only about 60% done). That said, I am known to be quite driven when I set my mind to it, and we wanted kitchen cabinets which did not look off the shelf or like what most people envision as their dream kitchen. This will be my dream kitchen, and I believe will stand the test of time as far as how it holds up over the next few decades we intend to stay in our apartment.
I hope there was a nugget of help in all this, and I wish you the best with your kitchen. Check back as I have progress reports planned for most weeks. I also post progress images on my Instagram: @halfclassicsix
May 2, 2016
Thank you so much for taking the time to write up such a detailed response!! So appreciate that. I will definitely go over and see if I can figure out the 30 day trial software and maybe even get something drawn up! Thank you again and I can’t wait to see how your kitchen finishes up! 🙂
May 2, 2016
Darn….not mac compatible. I shall keep looking! 🙂
May 3, 2016
:p Yep… It isn’t Mac compatible. As an IT person in my professional life, I understand why…. But at a Mac person at home, it was a pain in the arse. I happened to have an unused windows computer available to me, and used it to do the design work.