
[Photo: My self portrait for today]
OMG! OMG! OMG! WOW!
The floor that we have been planning for this past year… The floor that went through dozens of changes and iterations…. The floor that we finally decided was the right floor, regardless of cost…. The floor that makes our hearts sing… Has been installed and it is AMAZING.
When I posted my progress report last week, Jim from Merolle Brothers Marble and Tile was already well underway with the installation of our Gypsy Black and White cement tile from Villa Lagoon, but as with anything of quality, this was not a one or two day process. In fact, it is still not officially done. When I left off last week, the nine days of grueling back breaking work tearing up the old floor, fixing the underlying issues, and installing the new plywood subfloor was just finished in the nick of time for the tile install to begin on Monday morning.
So, to pick up from where I left off last week….
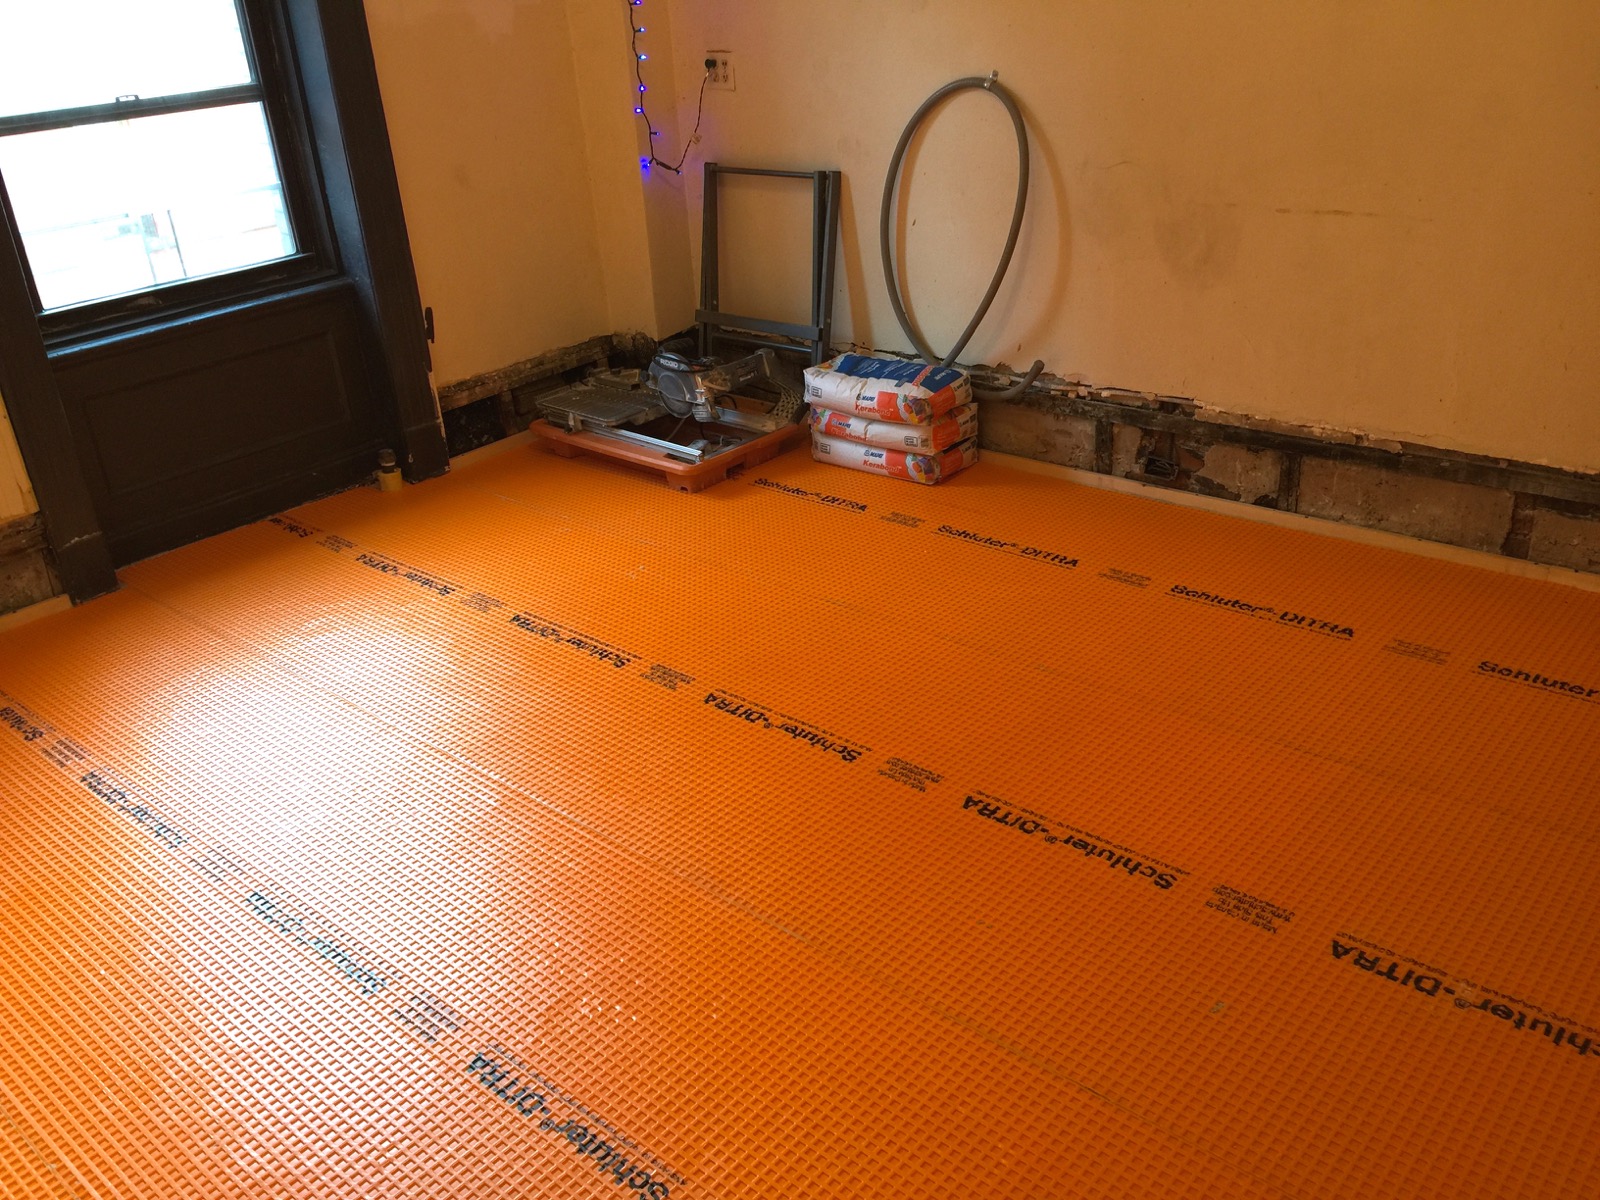
End of workday on Monday, the tilers had installed a layer of Ditra in preparation for tile.
Monday: The Jim and his helper from Merolle Bros arrived on time on Monday morning and after hauling a lot of materials up to the apartment, they got to work right away with putting down the underlayment. Rather than opt for the now traditional method of installing cement backer-board onto the plywood and then laying the tile on that, we went with some much more recent technology known as an uncoupling membrane. It is thinner, lighter, easier to work with, and it results in a better tile installation with less risk of cracks and loose grout. Our tile pros installed Ditra, by Schluter. Ditra was introduced to the market in 2008, and it is made up of two parts. A fabric like membrane on the bottom attached to a waffle like plastic top. The fabric part is attached with thin-set directly to the plywood, and then the tile is set on the top. The waffle texture gets filled with thin-set during the tile install and when it dries, it bonds the tile to the floor.
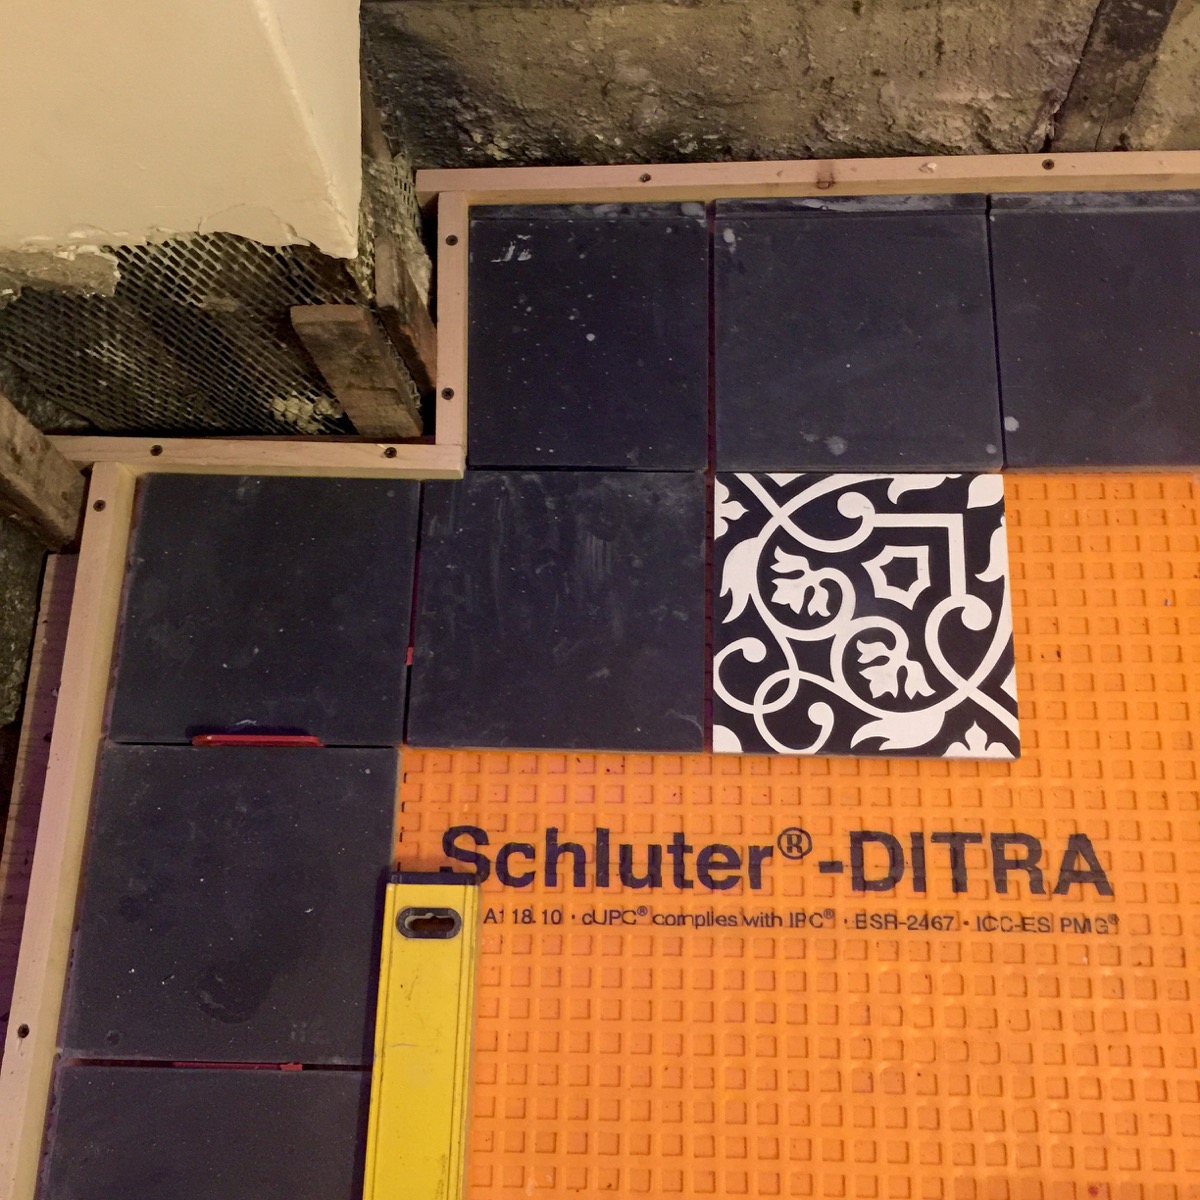
First day of fitting the tile. The walls are far from straight resulting in several small slivers of tile along the back wall. Nobody will notice when it’s done.
When installed correctly, the plywood subfloor can expand and contract (as they always do), but the shifting of the plywood does not impact the tile on top. Ditra is more expensive than backer board, but the installation is faster and much easier, so it works out well. By early afternoon on Monday, the Ditra had been installed and they moved onto another job.
First day of fitting the tile. The entire day was all about cutting and fitting the border (along with a few field tiles for reference).
Tuesday: This day was all about the border…. Traditional cement tile design usually features the design set into a border which frames the design and helps to keep the pattern from overwhelming the room. We chose to install a single row of black tile around the room to create a border; we also decided to go with solid black tiles in the two closets and under window where it forms a niche for the radiator. The border also helps to create the idea that the tile could have been there all along. Even though you will not see the black border under the cabinets, your brain will automatically connect that it is there, much like your brain knows to add that signage for “23” on the subway reads as “23rd Street” in your head. No need for the “rd” or “Street” after 23, your brain automatically puts it there.
The border also allows for future owners to make major changes to the space while leaving the floor in place. Jim, our tile expert from Merolle Bros, has been laying tile since he was a kid, helping out during the summers as well as after school. He is truly a pro and it showed. He and his helper spent the entire day on Tuesday cutting and fitting the black border tile around the room and into the closets. He encountered crooked walls, and several complicated cuts to make everything fit. His skills became very apparent by the level of detail in his work.

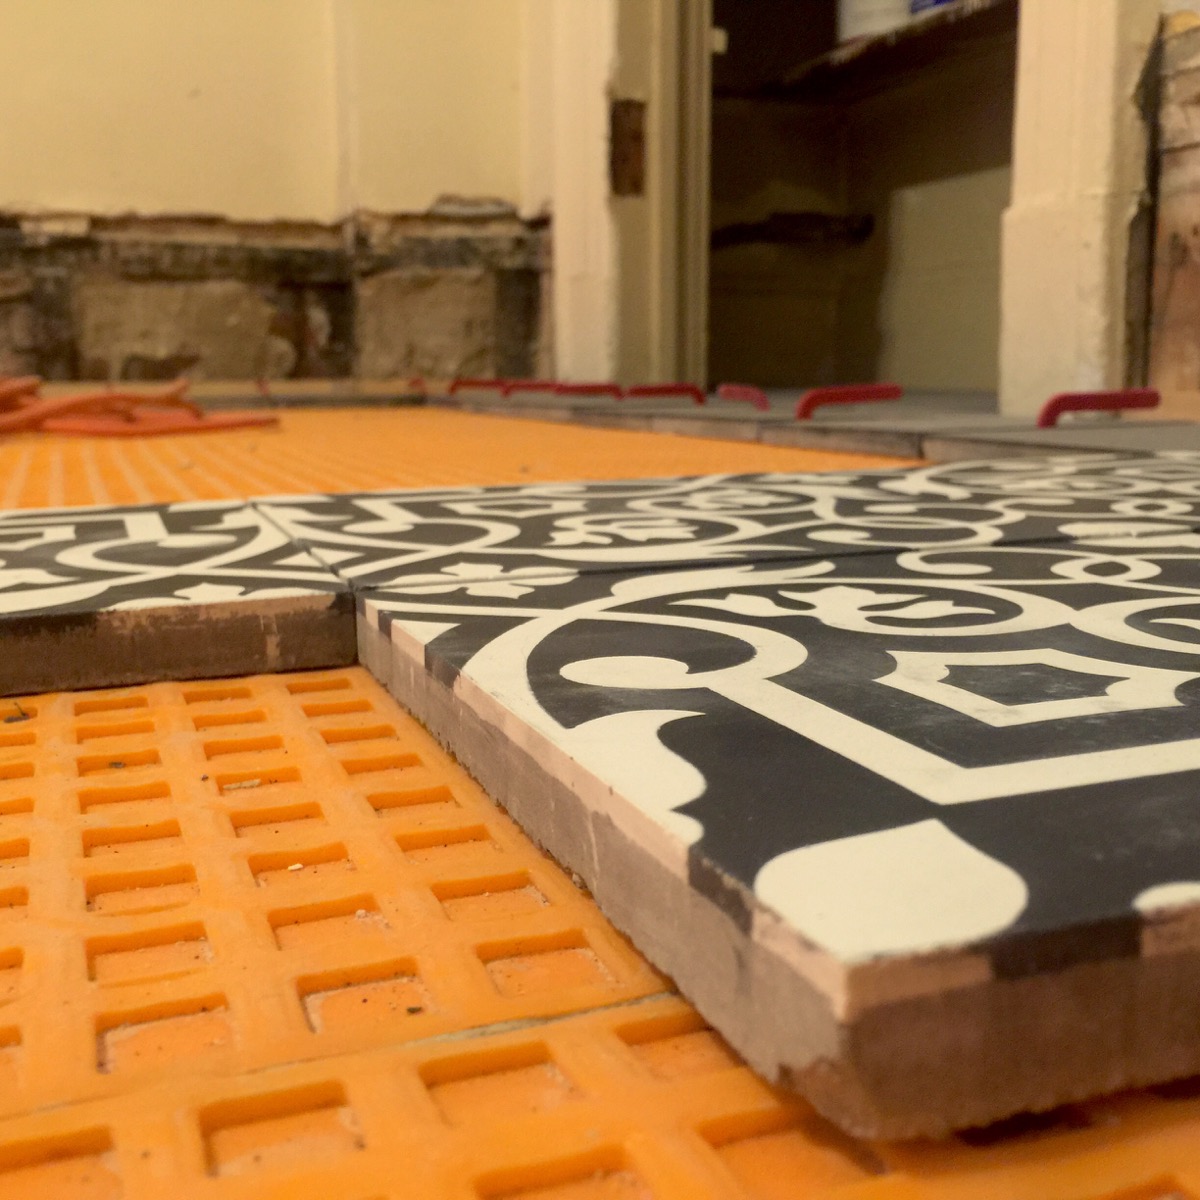
This was day two of installing the tile. The border was set, and the field tiles were started.
Wednesday: The guys started to set the border tiles on Wednesday, and by the end of the day, they completed the border tiles and a few rows of the field tile. I was at the office, but because Yoav works from home, I sent him text requests every hour asking for status updates and photos. By the end of the day we could finally see the foundation of our future kitchen. The excitement when I got home from the office was nothing short of true state of giddiness.
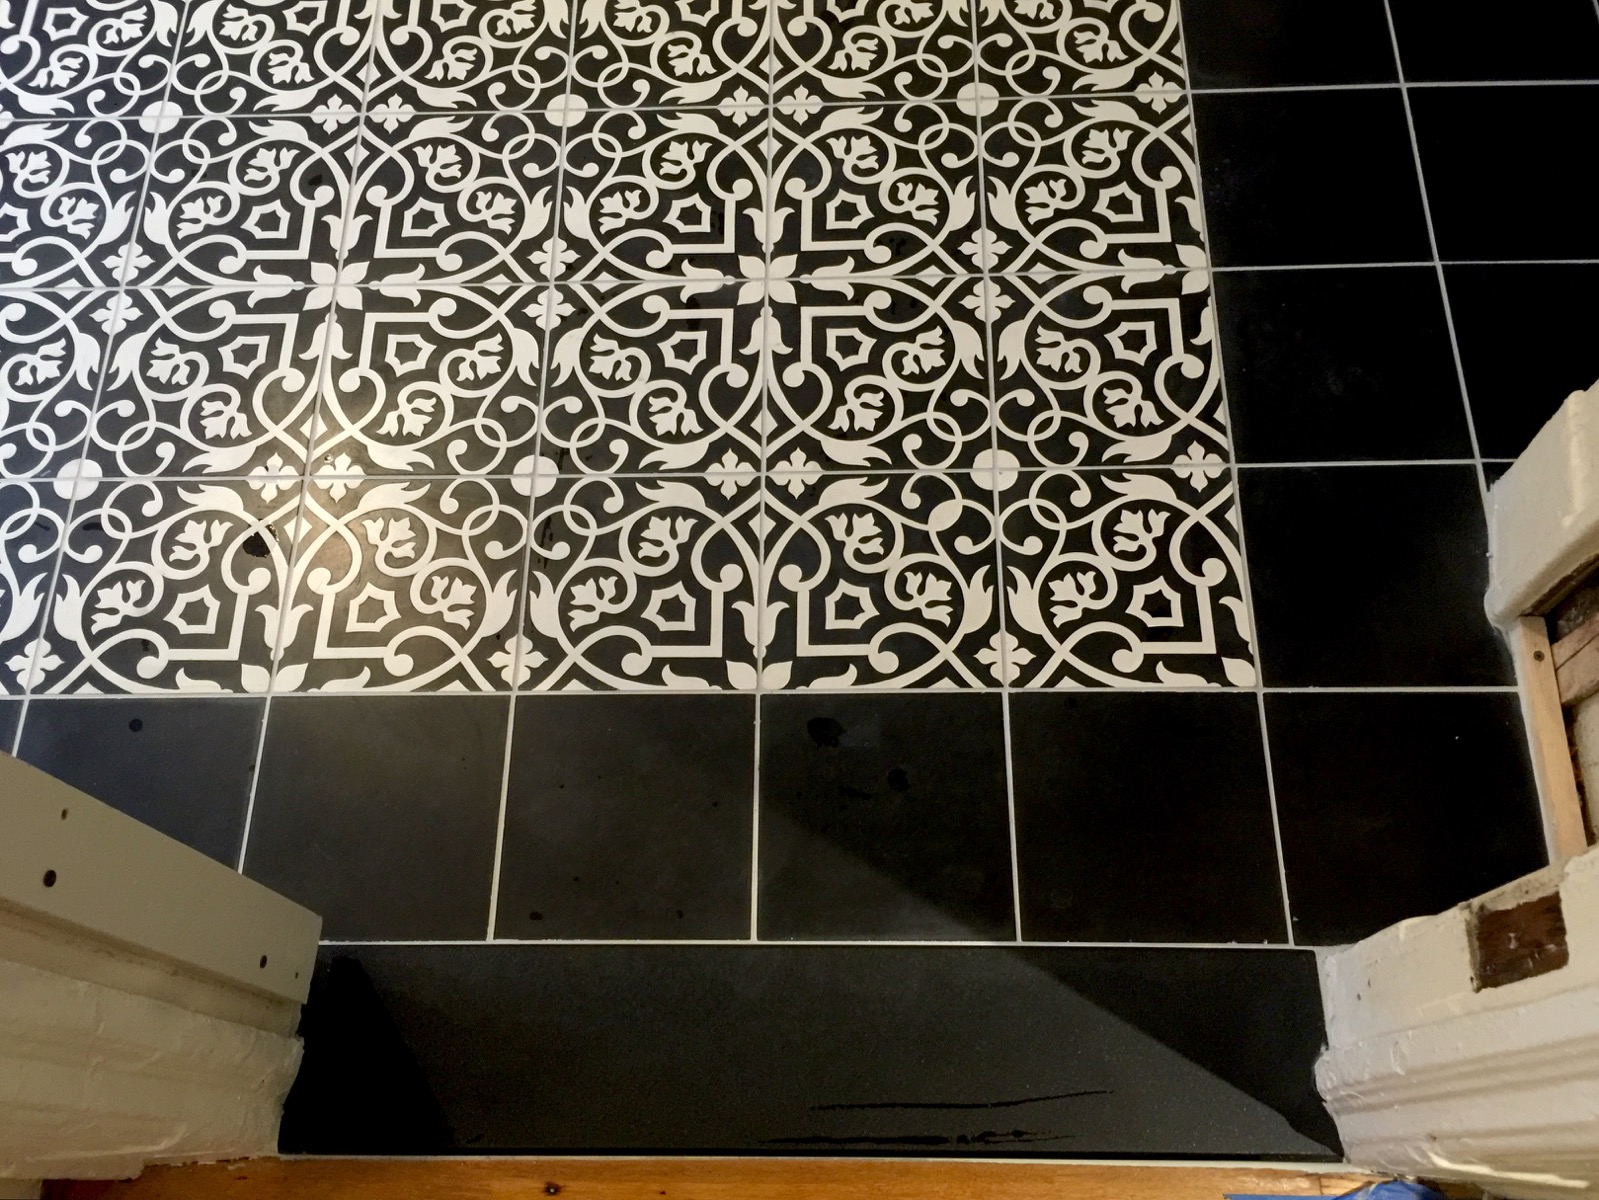
![We cannot get over how beautiful it is. This is the view from the door right after the first coat of sealer was applied. [<i>Source: Cement Tile from <a href="https://www.villalagoontile.com/" target="blank">Villa Lagoon Tile</a></i>]](https://halfclassicsix.com/wp-content/uploads/2016/03/FloorReveal05.jpg)
We cannot get over how beautiful it is. This is the view from the door right after the first coat of sealer was applied. [Source: Cement Tile from Villa Lagoon Tile]
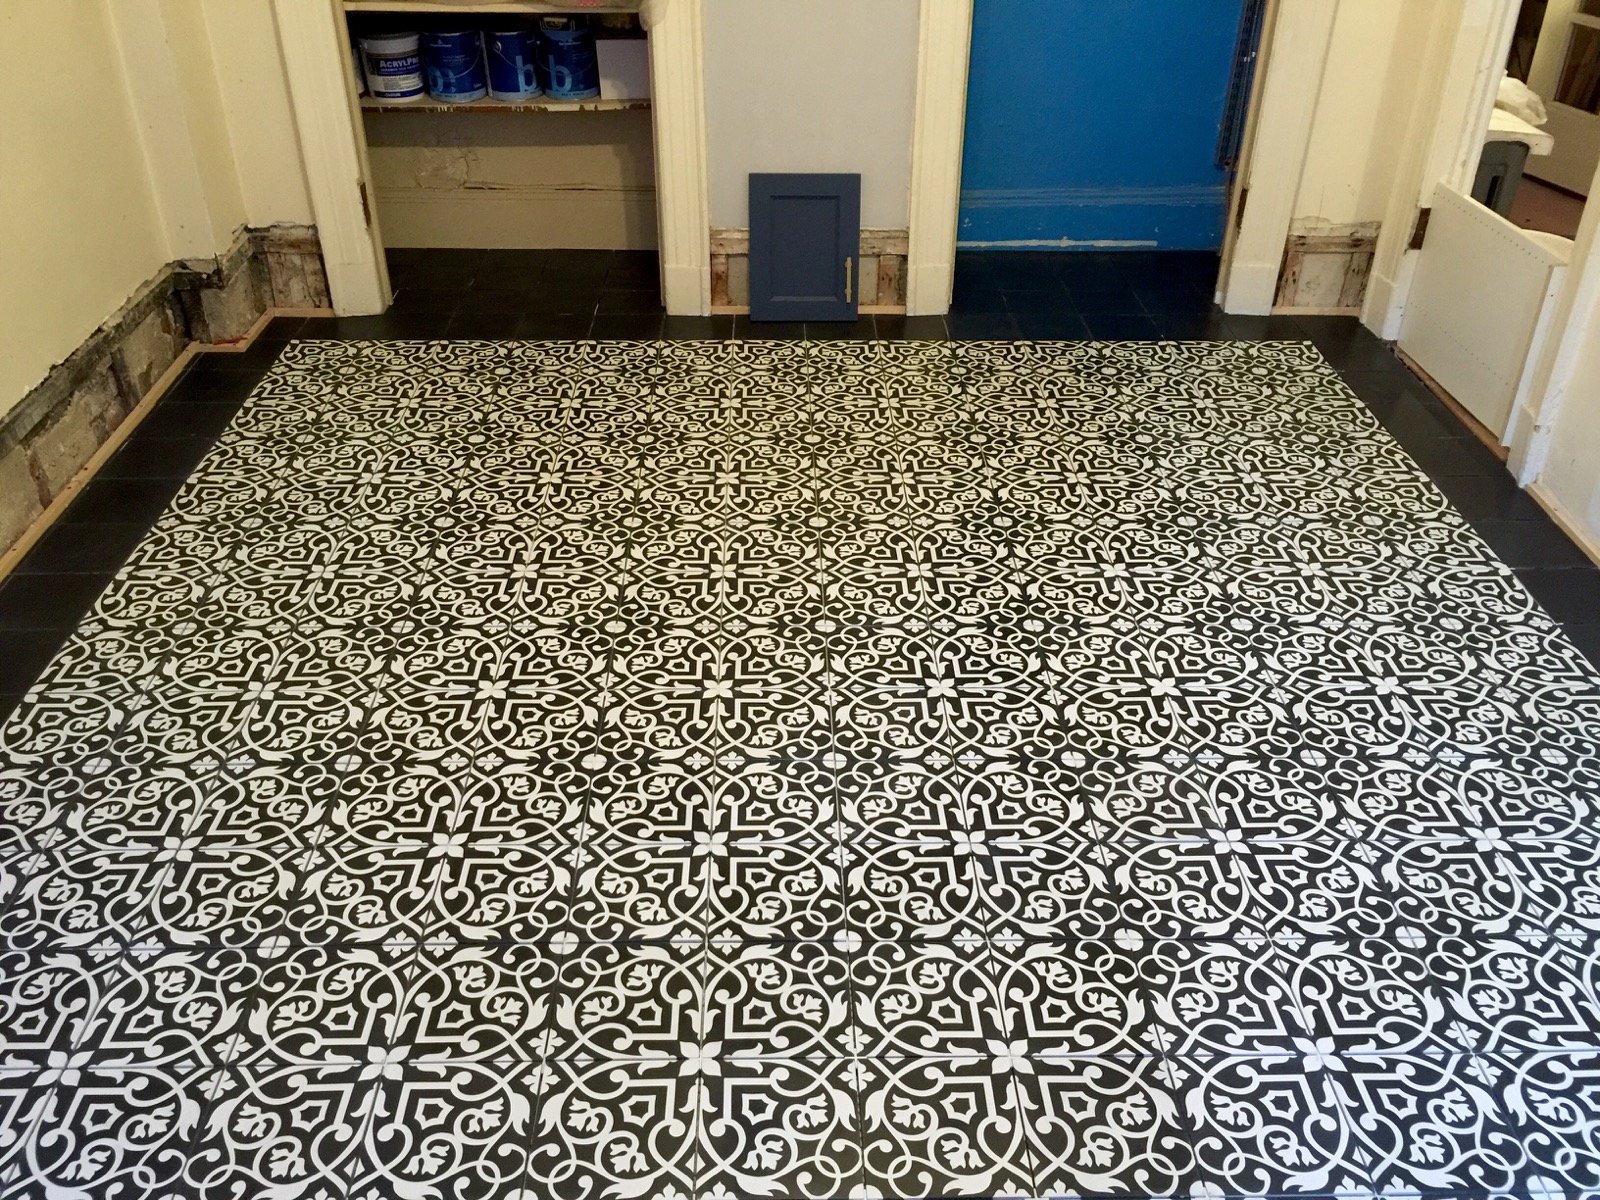
OMG…. It is so beautiful! (Notice the white panel across the door to the hall on far right. This is to keep Fritz out of the kitchen, but it is also to keep mice out of the rest of the apartment as they still have access to the kitchen.
Friday: Day five was a fairly simple one. Mike came in and applied a coat of sealant to act as a grout release. This is an important step because the tiles arrive unsealed (and very susceptible to staining) and until they have been sealed, any kind of grout can permanently alter the appearance (especially dark grout) so to skip this would be a huge mistake. Fortunately, because it is Friday, the floor will have a few days to dry before grouting begins.
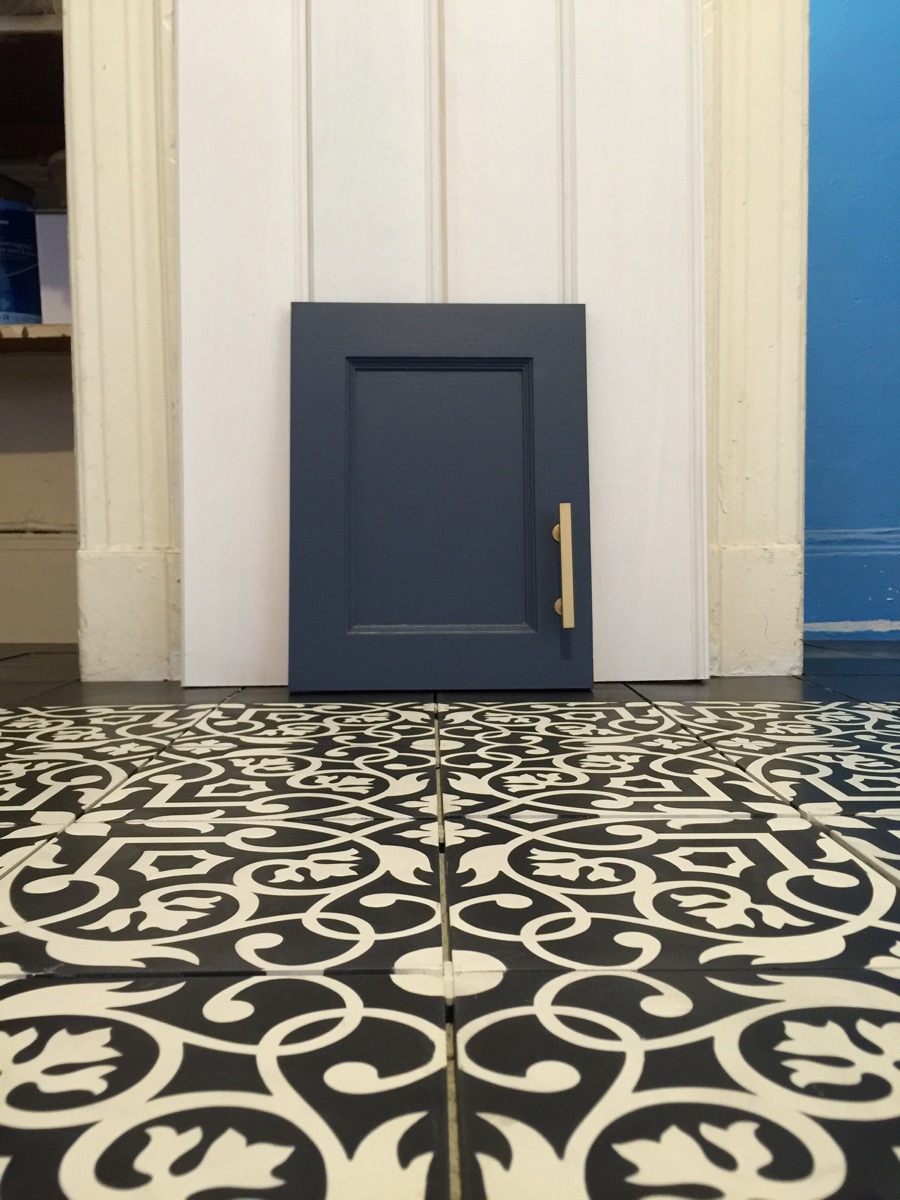
The first day we could walk on it in socks, I couldn’t resist setting a section of beadboard and our sample door in place to see how it looks.
Saturday/Sunday: We were allowed to walk on the floor in socks (no shoes or bare feet) so of course I had to just walk around the completely empty (and hauntingly echo-y) space and take pictures. Since we couldn’t really do anything else, I took the weekend to relax a bit. This is the first time I have taken time to relax since January, and it was much needed. My next time to relax is not likely to happen until a mini-vacation in May.
The door saddle is a custom cut piece of soapstone. It matches the adjacent saddle to the bathroom.
This week: Three things remain to be done on the floor before we can work on our next phase of the new kitchen. The first item is the transition from the wood floors in the center hall to the kitchen. The bathroom door is adjacent to our kitchen door and when it was last updated, they made a custom saddle to go across the threshold from a matte finished stone. I think it is soapstone. So part of the requirements for our floor was to provide a soapstone saddle for the doorway. By going with soapstone, I will have the same basic look as the bathroom doorway, even if it isn’t soapstone. They measured for the custom fabrication of the saddle, but we had to wait until Tuesday for it to be ready to install.
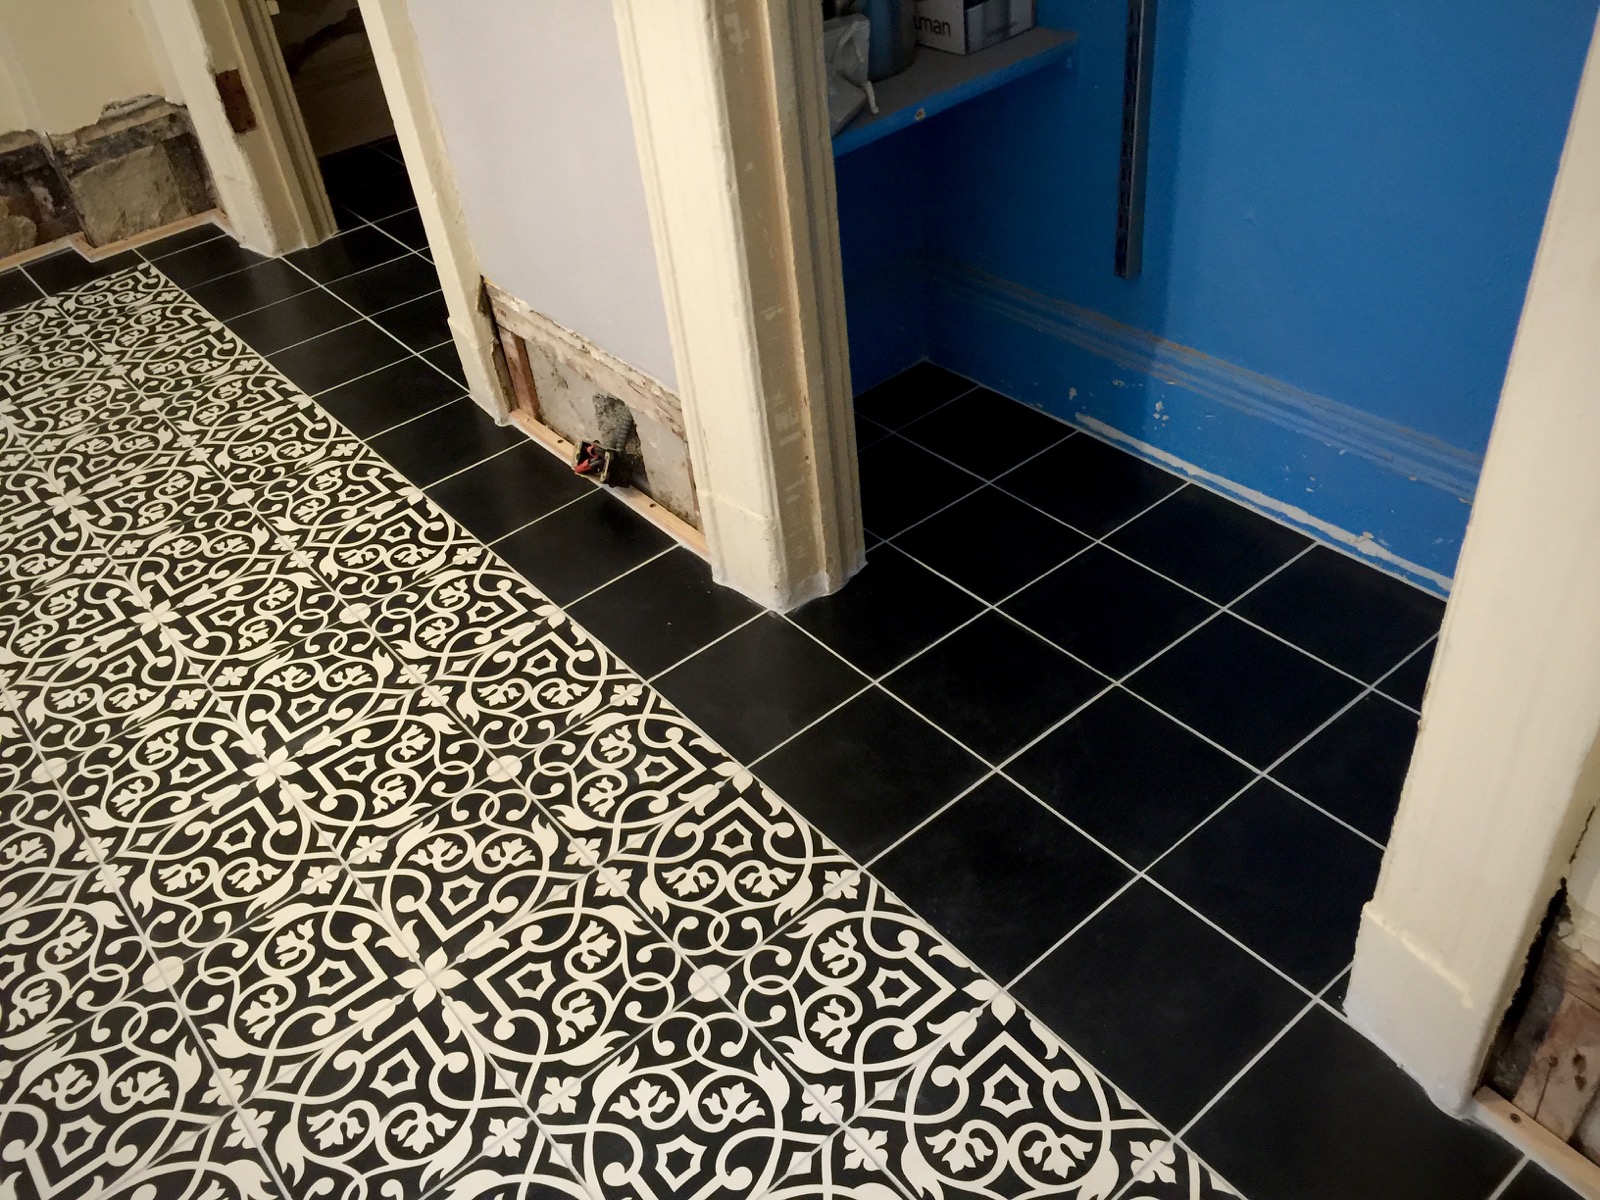
I wasn’t sure how I felt about the light gray grout with the black tiles, but it is growing on me.
Also on Tuesday, they did the grouting. We went with a light gray grout. As previously noted, dark grout has a high risk factor for staining, even with grout release, and white grout is too bright and will not stay white over time. So we elected to go with a medium gray.

Clichéd, I know…. But I couldn’t resist. The grout looks great!
With the grouting completed, we then had to wait two days for it to be completely dry for them to come back for the final coat of sealant. That happened this morning. It needs 24 hours to dry and 48 hours to cure. That means, we can finally start working on it on Saturday morning. The timing couldn’t be better.

With the floor completed, we can now begin to put all the pieces of the puzzle together and create our dream kitchen.
What’s next?
Well, I have the next two weeks off of work. Our original timeline had me installing beadboard and cabinets along the sink wall to be ready for them to measure for countertops by April 1st. Looking at all that remains to be done for them to come in and do that, I am not sure we will make the deadline, but I will spend two weeks straight working my ass off to get as much accomplished as possible.
My ambitious plans for the next two weeks include:
- Taking down the ceiling fan replace with temporary light.
- Painting the ceiling “Sweet Bluette” [Benjamin Moore: #813]
- Painting the coved plaster at top of wall “Chantilly Lace” [Benjamin Moore: #2121-70]
- Strip paint from door frame next to cabinets.
- Install beadboard along sink wall including routing channels for low voltage cabinet lighting wire
- Paint beadboard “Sidewalk Gray” [Benjamin Moore: #2133-60]
- Prepare upper cabinet frames for interior lighting
- Prime cabinet frames and doors
- Paint cabinet frames and doors in Stiffkey Blue [Farrow and Ball #281]
- Assemble cabinet shells for sink wall
- Install upper cabinet shells on sink wall
- Install lower cabinet shells on sink wall
- Measure for countertops
This is really only the high level list of stuff and none of the cabinets on the opposite wall will be done (since there will not be marble countertop cut for that side) nor will any of the millwork planned for the cabinets or the beadboard walls happen as this can happen a bit later.
There are also lots of small projects which also need to happen, but they will only happen if time permits in the next two weeks (and it won’t).
- Strip brass hinges and hardware for the closet doors
- Cut the bottom of the doors to allow for new floor height
- Age ceiling medallion with plaster Paris slurry
- Paint and install ceiling medallion
- Strip paint from wood panel under window and window frame
- Strip paint from closet door frames
- Finish stripping paint from transom window
OMG… So much to do! But I am confident we will totally not get everything done. We will, none the less make major progress.
Clichéd, I know…. But I couldn’t resist. The grout looks great!
That wraps up this week’s progress report. I will post another one next week and hope to have a more realistic outlook on what can and will be done before I return to work.


Social