One of the very first things that drew me to even look at the apartment on that day in May last year was the floor plan indicated a very long entry hall. And when we went to the open house, we were not disappointed. The front door opened to a lovely 22′ long and generous 4′ 5″ wide hallway with beautiful quarter-sawn oak floor bordered in mahogany. Immediately, I was dreaming about how we could use it as gallery space to display photography and art. As we entered the apartment, the Realtor pointed out the coat closet next to the front door. As I opened the door to the coat closet, I immediately knew this was not an ordinary apartment. First, the closet door was very tall and substantial (it turns out that it is 8′ 3″ tall), and then I saw the inside of the closet was lined top to bottom in cedar including cedar veneer on the inside of the door. Wow, just wow…. So cool!
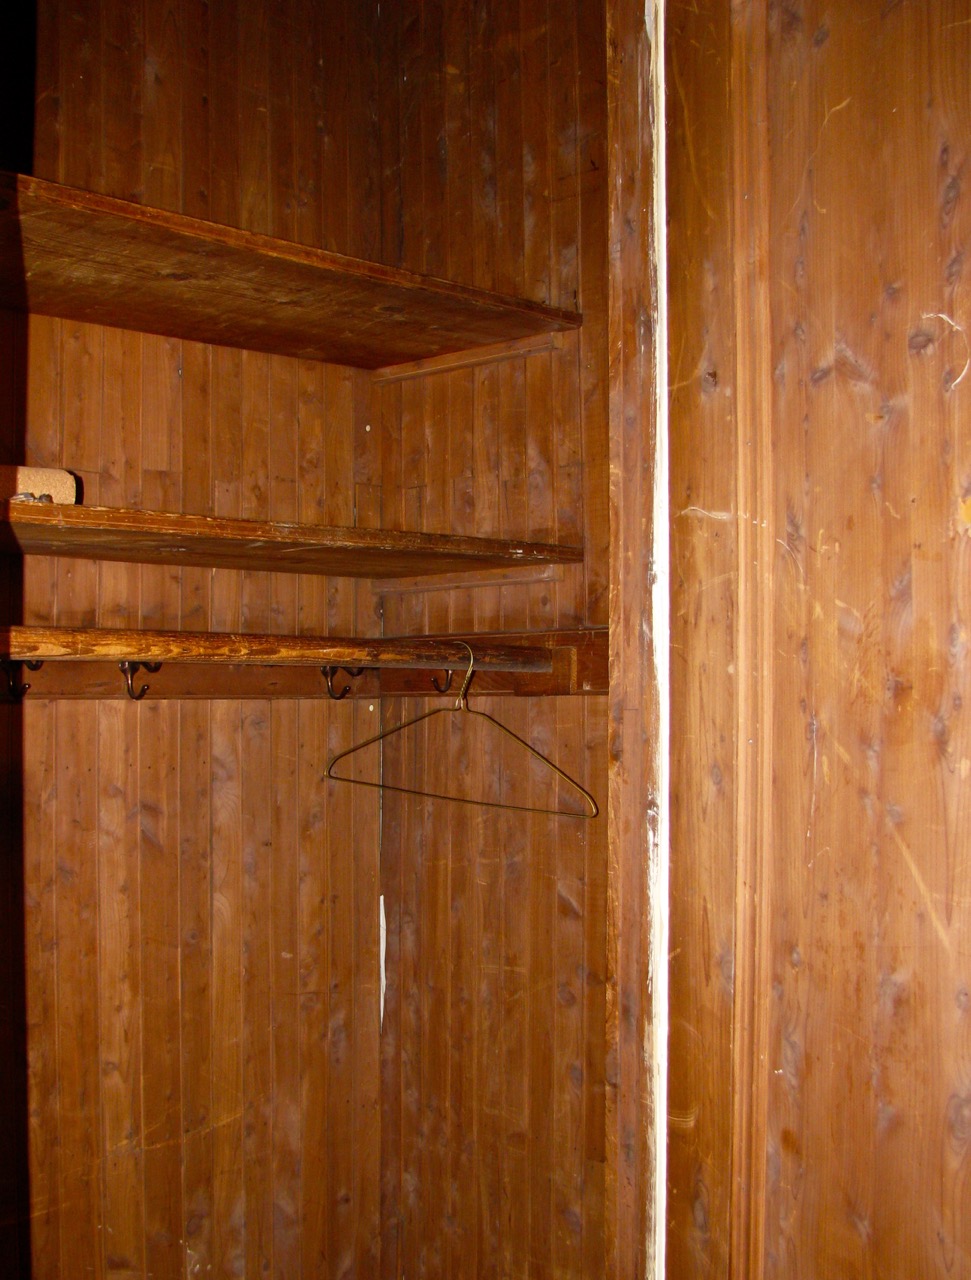
The cedar closet in it’s original unchanged state from 1910 all the way down to the original brass hooks. We don’t plan to change a thing other than perhaps refresh the cedar with some cedar oil.
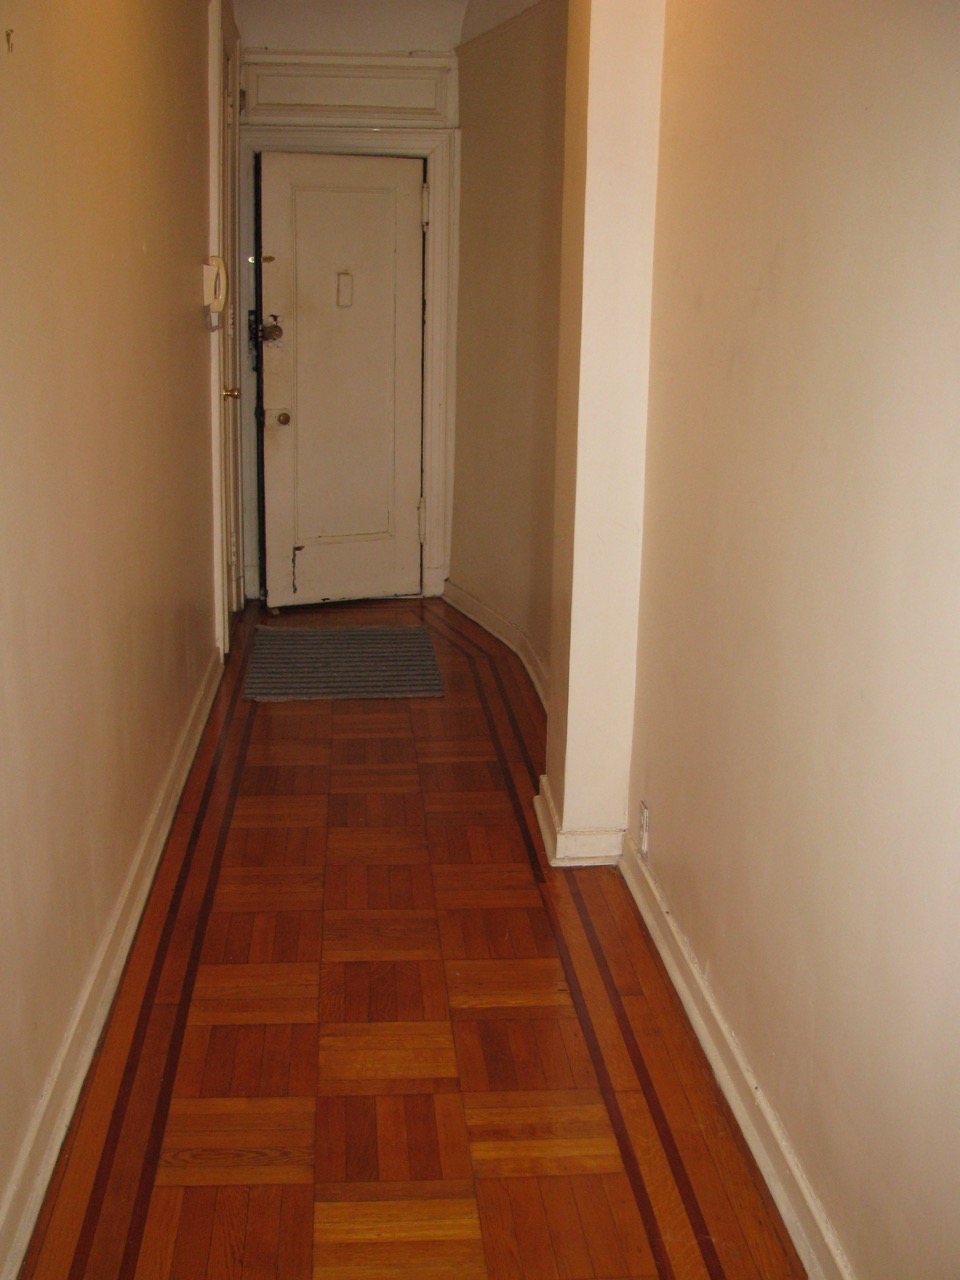
The floor in the entry gallery is wonderful, and the quirky curve near the door is there to provide room for our next door neighbors entry.
But the hallways itself? Ugh, not pretty at all. As happens so frequently, it was relegated to the purpose of just a passageway to get to the apartment from the front door. But the seed had been planted, and as I lay in bed that night, I found myself thinking about the apartment and that hallway. Somewhere about three am, I turned over to see Yoav staring at me with a smile on his face. We both realized at that moment after more than 50 open houses, this was the one. This was to be the apartment we were to build our future in.
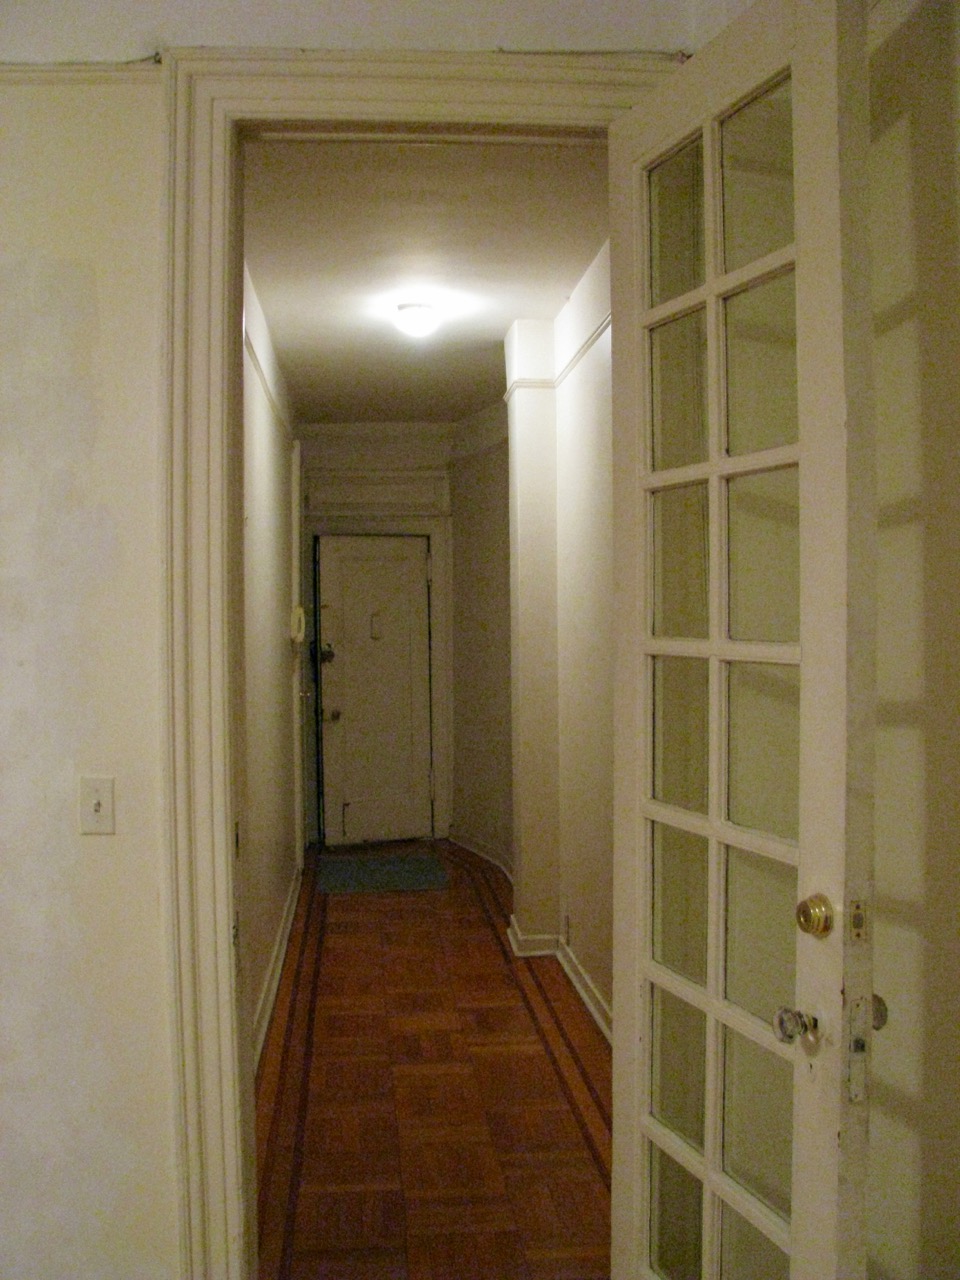
This is the entry hall as seen from the living room before we moved in. The French door is usually closed providing us a lot of privacy from the hallway outside our front door.
OK, back to the hallway…. Yoav and I had encountered long hallways in other apartments and each time we both made note that having a long hallway provided a great opportunity to display art and photography. But most of those hallways were somewhat narrow, some as narrow as 30 inches. This hallway is about four and a half feet wide, and the ceilings are almost ten feet high, and at the opposite end from the front door is one of the two remaining french doors. We love this because we can keep the door closed, and still see the hallway, but we don’t hear anything going on outside of our front door in the hallway.
After we moved in last September, we quickly learned the challenges of having a long hall (first world problems, I know). First challenge, the buzzer. For some reason, the buzzer was located by the front door, so whenever the doorman called to let us know we had guests or a delivery, we had to run all the way to the end of the hall to answer it. That was not going to cut it… It took a few months to have the work done, and it wasn’t cheap, but in the end, it was totally worth it. The buzzer is now conveniently located in the living room next to the french door to the hall and it is much easier to both hear it as well as answer in a timely manner. This worked great for visitors which came up from the lobby, but not all visitors warrant the doorman calling up to notify us. There are times when building maintenance or the Con-Ed meter reader knock on the door or push the doorbell mounted on the door and because we keep the French door closed, we have no idea they are there. The solution turned out to be adding a wireless doorbell button to the outside of our door and placing the bell in the center hall where we can hear it from all the rooms.
We finished most of it in July, just in time for my birthday party, letting about 30 people have been let in on the secret…. But it wasn’t finished until this past week.
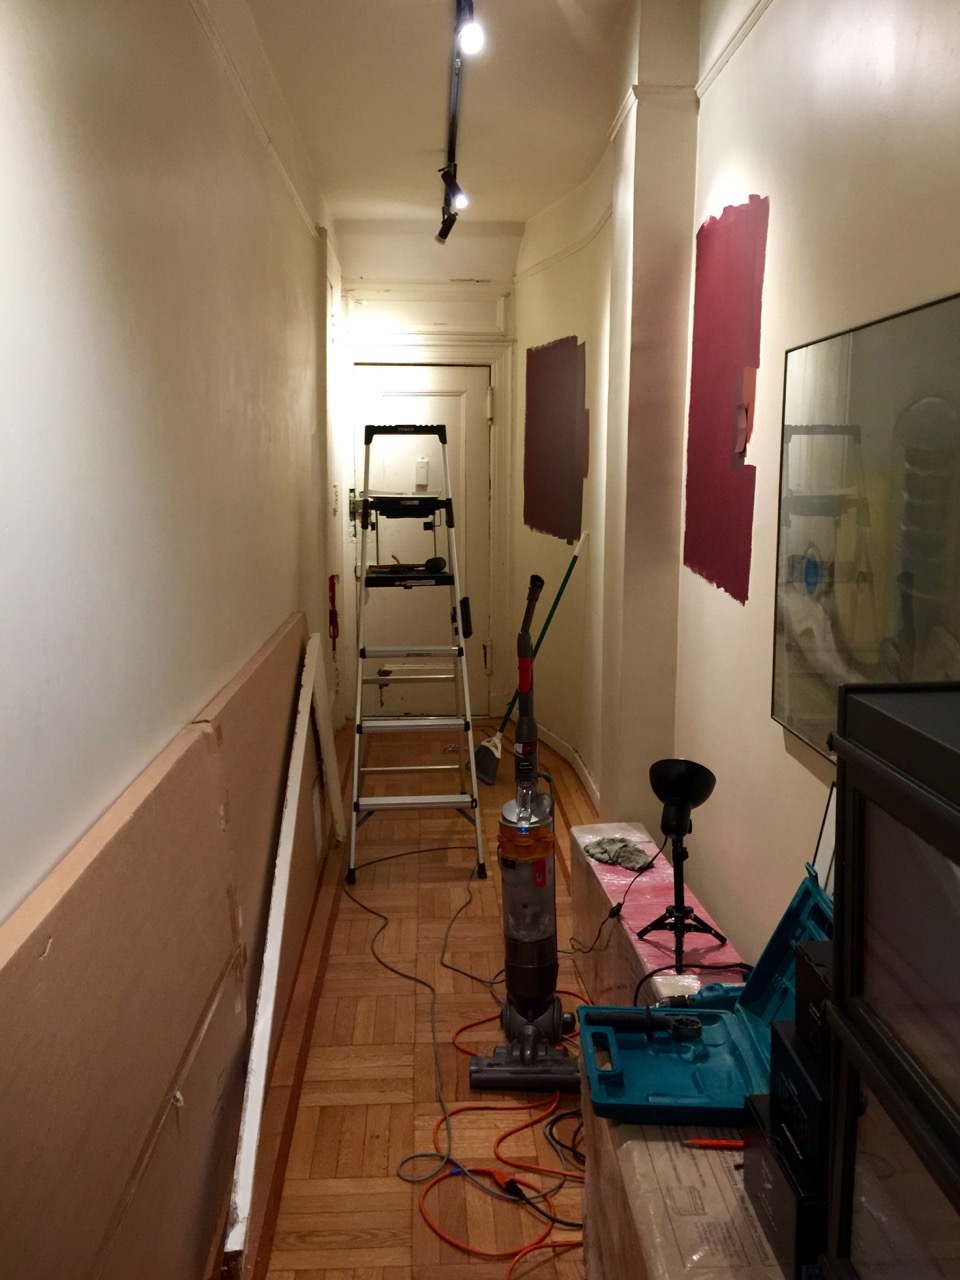
Installing the track for the lighting. I installed and then un-installed the track before painting because it is much easier to install when you can see what you are working with. The paint samples on the right side of the hall are from several attempts at getting the color right.
Before we could start in on the paint, I needed to address the lighting. We initially planned to just keep it simple and make the focus on the art and not the space. Our original plan was to run black track lighting with LED spots down the hall. The idea being that in a dark hallway, you would not see the fixtures, just the light shining on the walls. But by November of last year, I came up with a plan and we bought the fixtures (which then sat in our bedroom for the past 8 months). We did end up running a black track down the hall, but we did a very unexpected lighting plan (which will be revealed in Part II). However I knew that installing black track on a dark ceiling in a dark hallway with no light was going to be a big challenge, so I installed the light track to get all of the holes and mounting done, then proceeded to un-install and attach a bare bulb to the wires in the ceiling box.
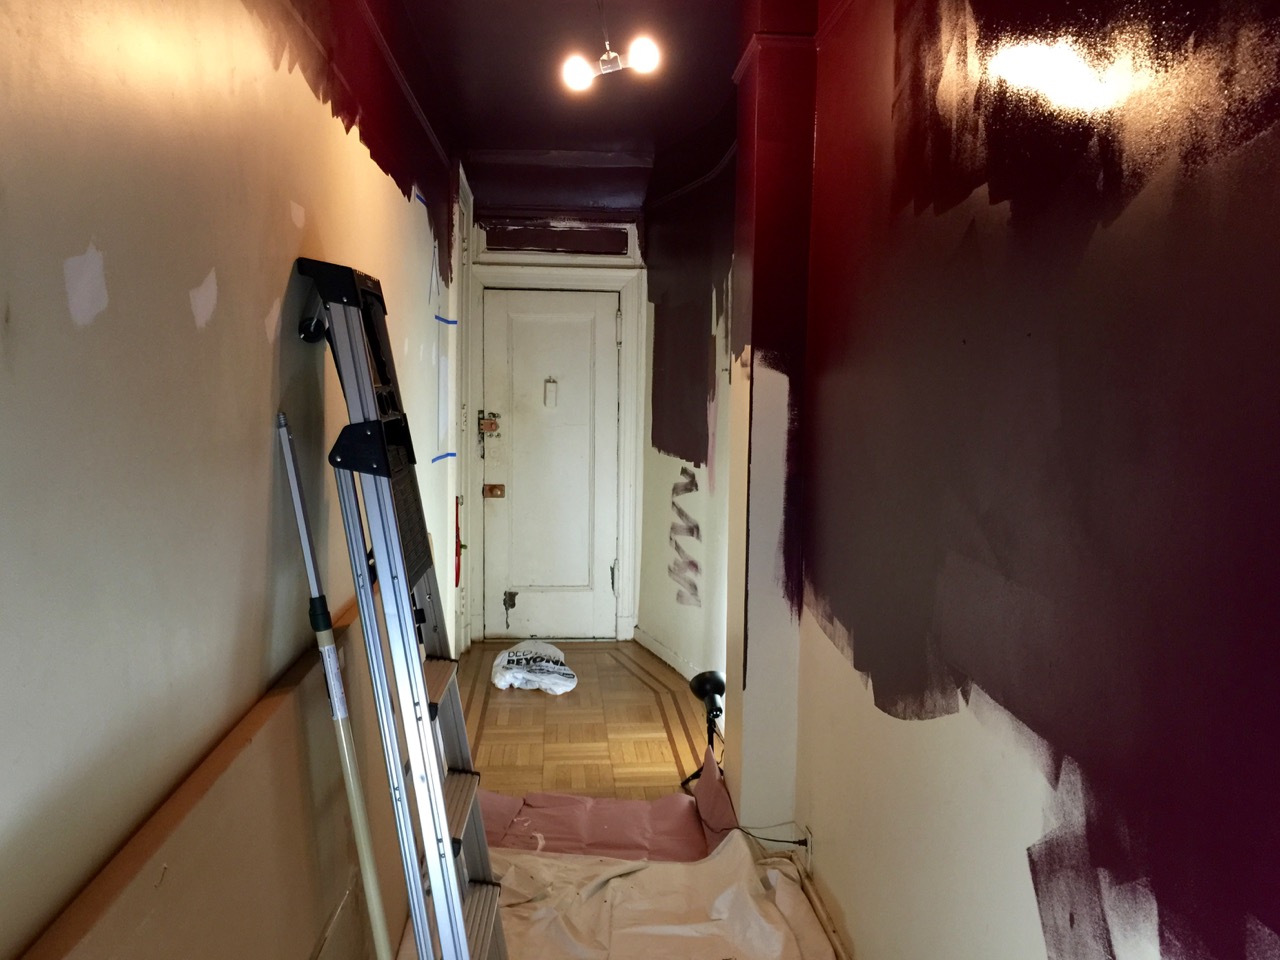
After un-installing the track for lighting, I tackled the ceiling first then one side at a time.
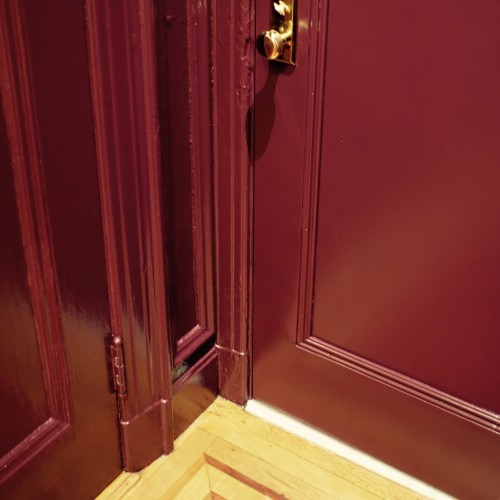
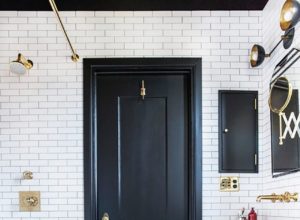
In the midst of working on the hall, our 1930s front door was having issues with locking correctly (at one point we could not lock it from the outside), and it was determined that we needed to have a replacement door made. This was both good news and bad. The good news is that we would have a brand new door and it would be secure. The bad news is that we would have to trade in our beautiful 1930s brass hardware for cheap looking ugly bright shiny brass hardware (à la Donald Trump as seen in the lead photo).
Both sides painted, track re-installed, temporary lighting in place. I held off on painting the front door knowing it was going to be replaced.
It took us months to figure out the right color. We knew early on we wanted dark, very dark. Why? Because I want the focus to be on the art, not the space. My first choice was charcoal gray. But once we were in the space, I felt that charcoal was not the color I wanted to use as a backdrop for the art. So, now that charcoal gray was out, what color?
I am incredibly lucky to be married to a man who lets me do pretty much anything I want (but he does ultimately have veto power) with our apartment, and it is pretty clear that the majority of the apartment reflects my taste and style. Having already decided to incorporate an important piece of Yoav’s art into the entry, it occurred to me that this presented the perfect opportunity to involve Yoav into the color choice. His favorite color being purple, I thought, if not charcoal, then perhaps we could find a tasteful shade of purple for the entry. That way he could feel as though he was represented in our home and it isn’t just all about me. He was quick to say that purple was too much (to which I agreed) and that it needed to have an underlying base of red. Then I thought of oxblood red…. Dark, moody, and dramatic. So the hunt began for the perfect shade of oxblood red.

After searching for the right shade, we finally found Raspberry Truffle [MQ1-49] in the Marquee Collection at Home Depot.
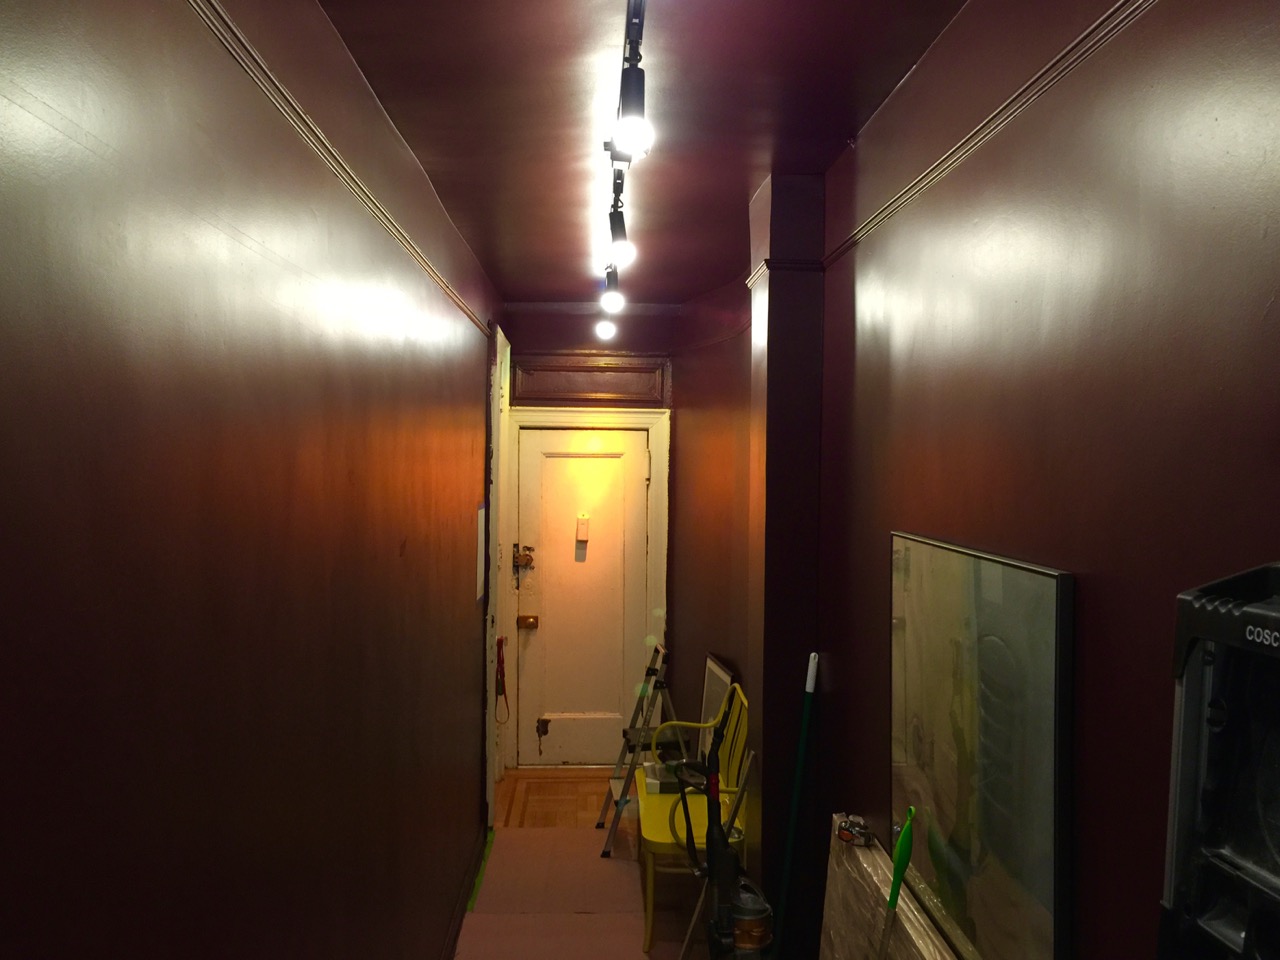
Some people have thought it was purple, and I can see how it can read that way in a certain light, but it is most definitely deep dark red with blue undertones, and we both love it. It makes for quite the statement upon entry.
That about wraps up part one, as I leave you to imagine how amazing the entry gallery looks now, I also leave you with Divine.

There is only one Divine.
Yes, this is the Divine (wasn’t she fabulous!?!?), and she will be a part of the finished hall…. To be revealed next post. [Divine Image Source: I Am Divine]


0 Comments