Wowzers! I just realized it has been four weeks since my last post!!!…. It’s not that nothing has happened (or that I have had a lot of time on my hands)…. In fact, a huge amount of things have happened…. But none of it is really ready for prime time yet as nearly all of my various projects are not quite complete.
So, instead, I am going to give you an update on…. Drumroll please…..
The Radiators! (Super exciting, I know huh?)
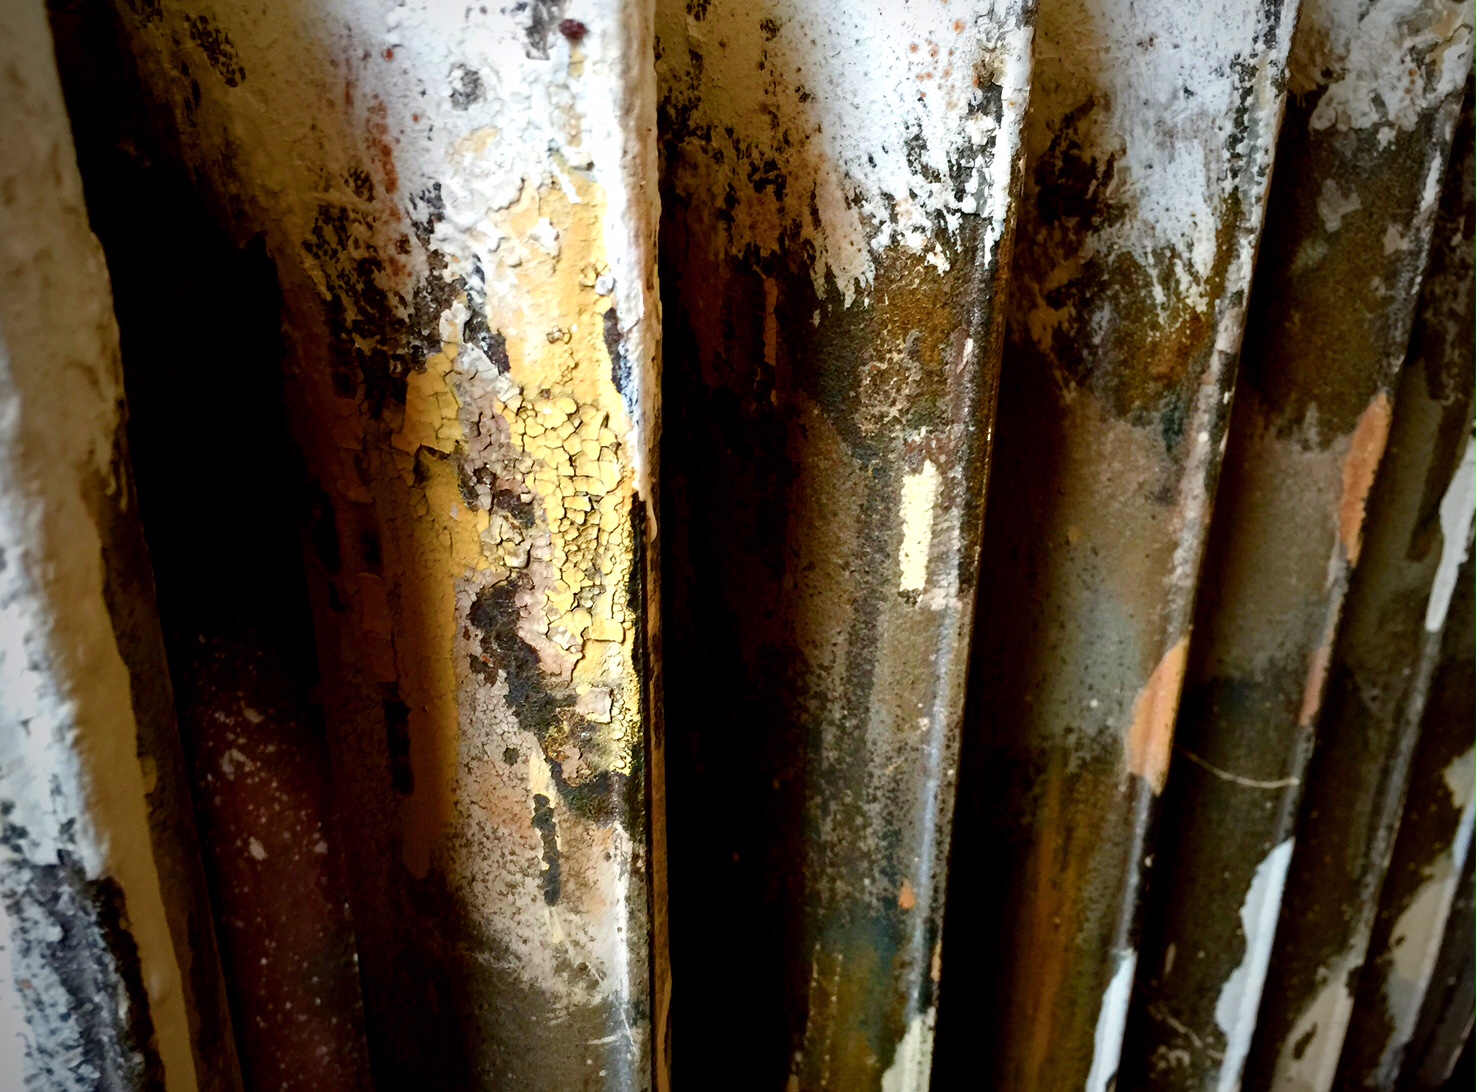
This is the backside of one of our radiators showing the dirt and layers of paint accumulated over decades. This is actually kinda beautiful, huh?
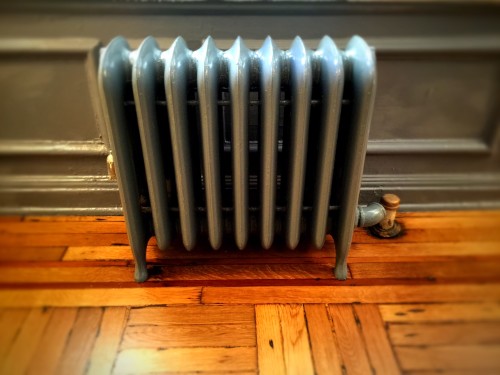
So back in late August, when thoughts of winter were so very far away, we had Patrick (the building super) pull all three cast iron radiators in the apartment in preparation for having the floors refinished. After they were disconnected, I needed to get them out of the way so Yoav and I managed to drag the 250+ pound cast iron rads into the bathroom where they sat. And then continued to sit for the next six weeks.
Fast forward to early October, the floors in the living room and bedroom are done and chill of Fall in the air is forcing us to close the windows at night. I knew that we needed to do something about them, and fast…. Just putting them back was not an option. They were filthy dirty from decades of dust accumulation and in desperate need of a fresh coat of paint. My first thought was that it would be really fabulous to have them sent out, sandblasted and finished with a shiny hard as nails powder-coat finish. But this being early October, and my discovering that it could take as much as ten weeks (or more) for them to be hauled away, stripped, and coated means that we would have no chance of heat until late December at best. Also, at about $300 per radiator, it didn’t make much financial sense either. That meant that we needed to paint them ourselves. But before a drop of paint could touch them, they had to be scrubbed of their decades of accumulated grime and dust. Not something I was actually looking forward to doing, and if not I, than who? Hmm…
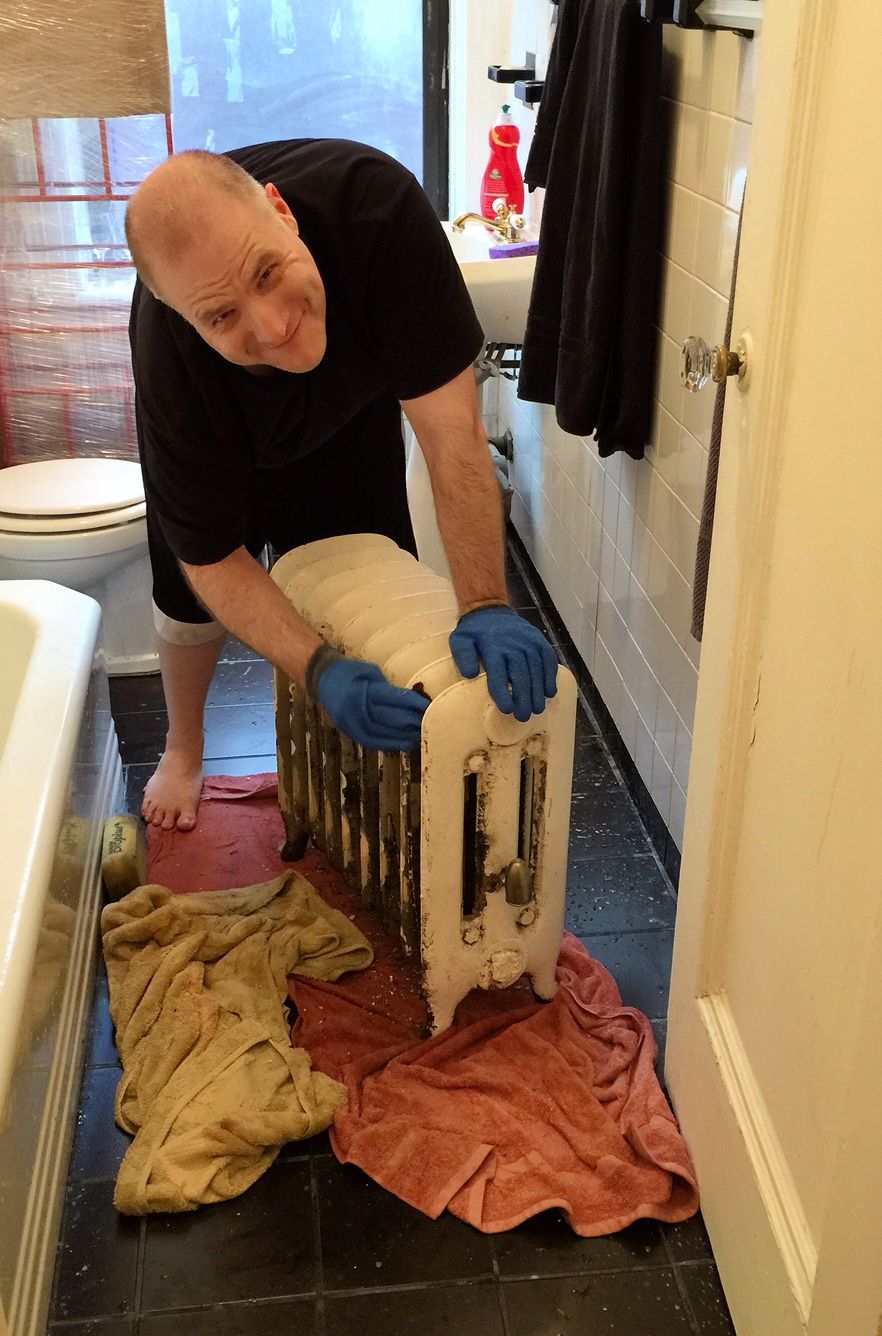
Scrubba Dub Dub – Yoav hard at work scrubbing the sh*t out of the filthy rads. (My gratitude for his hard work.)
As amazing as my husband is with so many things, being handy around the house is not exactly one of his strong skills. So, from the day we moved in, every time I was in the bathroom, staring at the hideous radiators, it became more and more clear to me that I had the perfect task for him. A task which would give him a sense of pride and knowledge that he did contribute to making our house a home beyond his considerable trust and support of my ideas. He willingly accepted the challenge (while acknowledging his inability to see dirt) and after nearly three hours of work, we had clean-ish radiators. I say “clean-ish” because, even though they are hugely improved and cleaner than they have been in perhaps 50+ years, I did not want anything beyond a surface scrub with a wet scrubby sponge. This was to minimize his exposure to the inevitable lead based paint chips any more than necessary. He “gloved up” and scrubbed the living sh*t out of them breaking into quite a sweat. In the end, they looked amazingly cleaner.
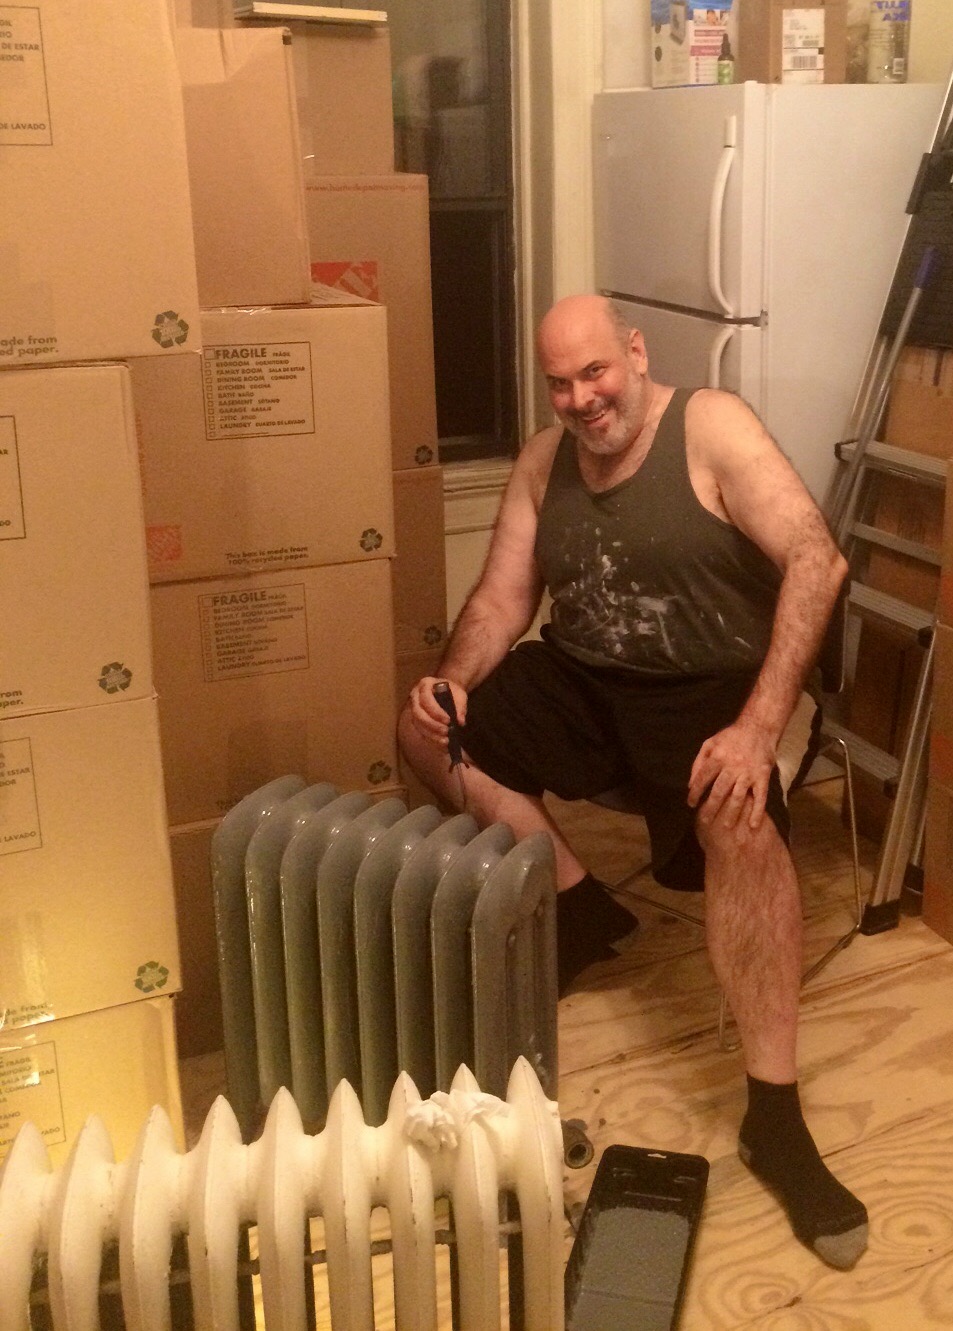
Yours truly (in a less than flattering outfit) painting the hulks of cast iron.
Then it was my turn to give them a fresh coat of paint. I planned on going with a hammered paint finish. I like the look, and the shiny but dimpled finish would surely hide the numerous imperfections which were still evident after all the scrubbing. I picked up two quarts of Rust-o-leum Hammered Paint in glossy black and schlepped them home. Then I began to read up on using it for radiators. People reported great results, but further online research made it clear that short of installing a high powered ventilation system and wearing a respirator and looking like a storm trooper, there was no way we were going to survive the toxic fumes of this stuff (hauling them outside, not an option).
Back to the store…. and I found Rust-o-leum Protective Enamel. My online research informed me that for radiators, it is best to use an oil based paint as water based paints tend to encourage rust. I need to stop the rust, so this was the best paint I could find which was easily obtained. Since there were better options for color, I chose Smoke Gray. It turns out that Smoke Gray is quite close to the Benjamin Moore trim color.
Oil based paint is not so fast at drying, but makes for a much more durable finish.
As a side note, some of you may be wondering why I went with glossy when the experts generally dictate you always use flat paint on radiators. Their explanation is that supposedly flat paint radiates heat better than glossy. If this is true, than any difference there is between flat and glossy is pretty much infinitesimal and of no real concern. Like most Manhattan buildings (not run by slumlords), there is nearly always an excessive amount of heat during winter and the only way to manage it is to crack the window. Most people have the luxury of having a thermostat to maintain the temperature in their home. In Manhattan (and most of NYC), the release of excess heat through an open window is your de facto thermostat in winter (summer is a different story).

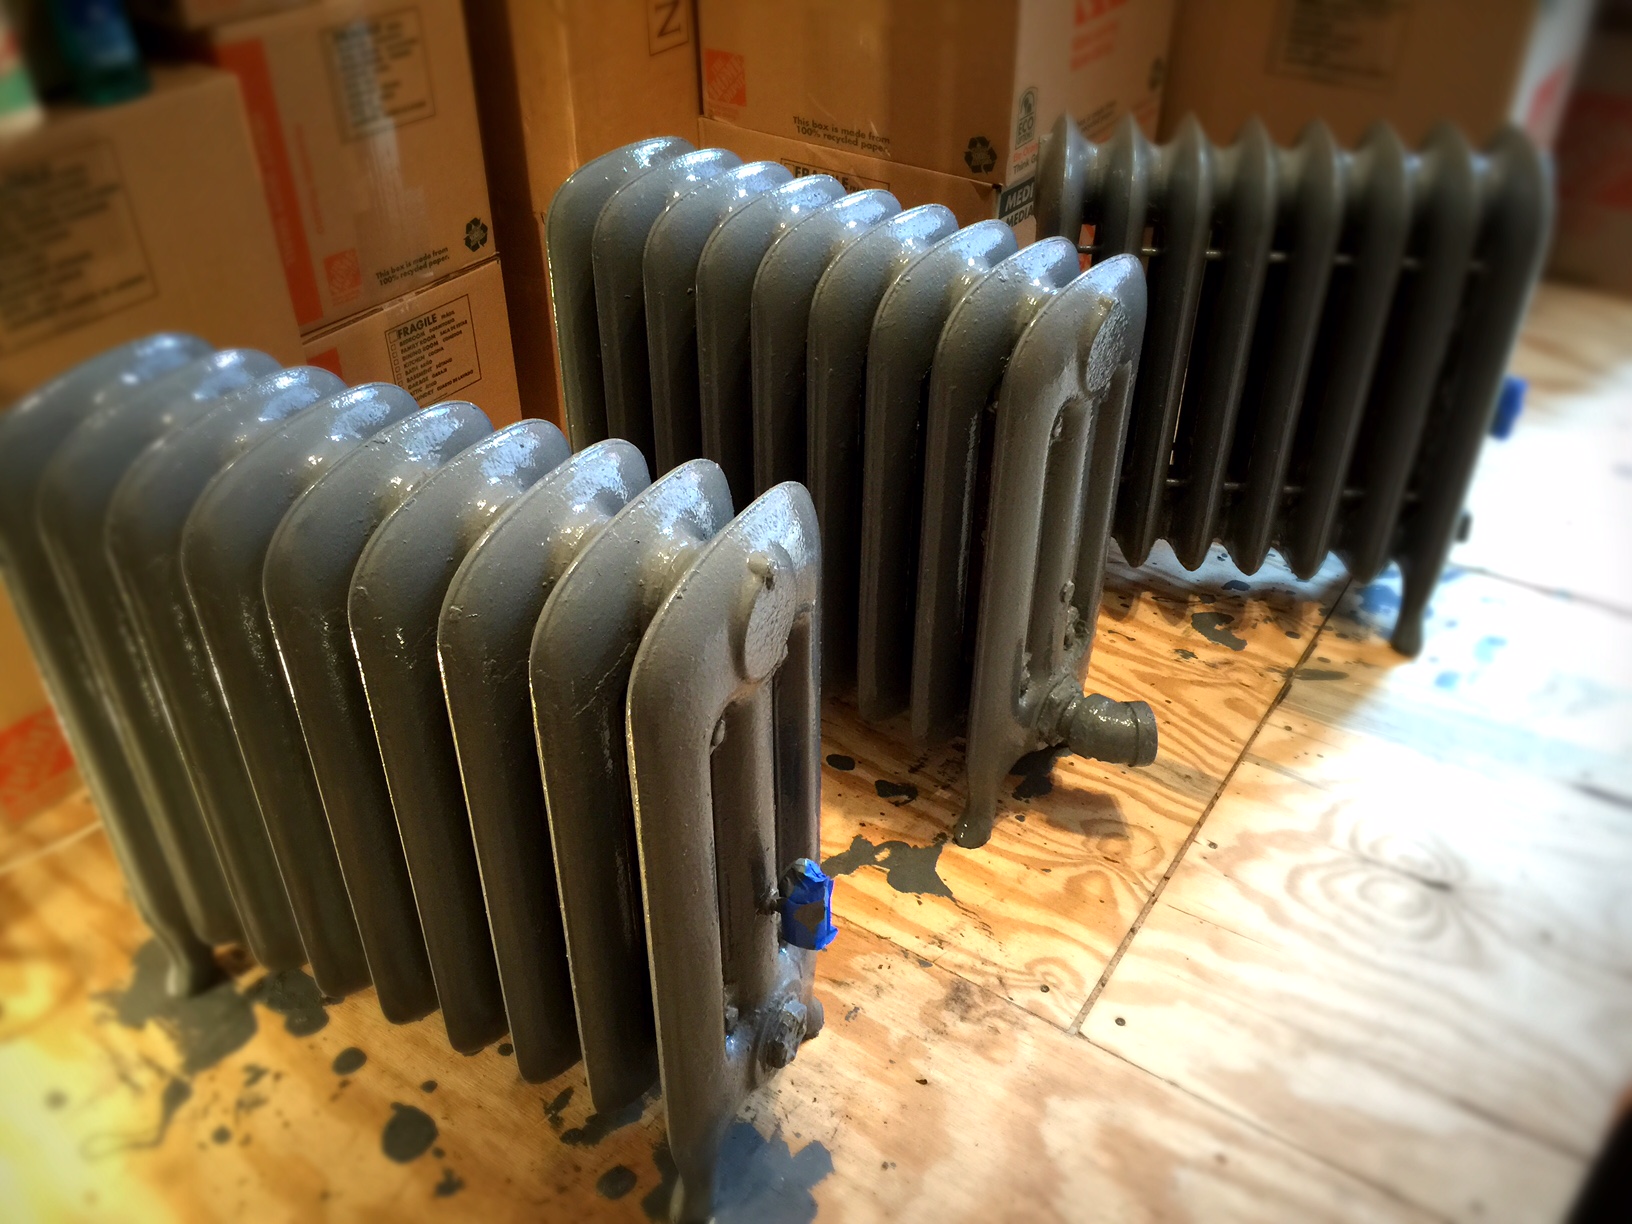
All done…. Waiting for installation.
So, this brings us to the finished product….. If only they were finished! Ha!!! Well, the painting is finished, and the radiators for the living room and bedroom are ready to be installed…. But we are still two, perhaps three weeks away from having working heat. Why? This is because until the third radiator which belongs in the kitchen is ready to install, we need to wait. There are still a couple of hold ups on preparing for the kitchen radiator to be installed. Namely the fact that we still do not have the floor ready for them to install it. Only after I(we) have completed the installation of the new kitchen floor (previously mentioned here, here, and here) will our maintenance team be able to take over. But before they can begin to re-install them, they will need to haul the beautifully painted kitchen radiator down to the basement and out to the back to then grind all four legs of the radiator down by about 5/8″ inch. This is because the new kitchen floor now sits 5/8″ higher than the steam pipe it connects to. The only way to attach is to cut the legs down which will lower the radiator to compensate for the increased height of the floor. Nothing can be simple or easy, can it?
So, there you have it…. Just one of the many many things I am working on which are not quite finished and ready for prime time, but in this case, you get the gist of what the end results will be.
As exciting as our radiators have been, the real activity has been focused around turning Yoav’s old apartment into a rental. Remember the rental? The one I wrote about in July? Well…. several months later we are (finally) deep into renovation and I will be doing a post about it soon! Meanwhile, Yoav and I continue to live amidst the chaos of still mostly packed boxes everywhere with no place to unpack them to… yet…. We also are living with the excitement of what is to come as we finally get to start working on our home.


November 3, 2014
I appreciate the journey: all the details and the way the pieces for together. Not easy! Bless you both for your hard work and vision. You will never forget this experience.
November 3, 2014
Julie, Thanks for the words of encouragement. You are so right, we will never forget this journey. Of course documenting it along the way only helps to reinforce the memories. 🙂